manuals.online logo
Brands
  1. Home
  2. •
  3. Brands
  4. •
  5. Manhattan
  6. •
  7. Media Converter
  8. •
  9. Manhattan 205146 User manual

Manhattan 205146 User manual

Warranty Information
En México: Póliza de Garantía Manhattan — Datos del importador y responsable ante el consumidor IC Intracom México, S.A.P.I. de C.V. •
Av. Interceptor Poniente # 73, Col. Parque Industrial La Joya, Cuautitlán Izcalli, Estado de México, C.P. 54730, México. • Tel. (55)1500-4500
La presente garantía cubre los siguientes productos contra cualquier defecto de fabricación en sus materiales y mano de obra.
A. Garantizamos los productos de limpieza, aire comprimido y consumibles, por 60 dias a partir de la fecha de entrega, o por el tiempo en que se agote totalmente su contenido por su
propia función de uso, lo que suceda primero.
B. Garantizamos los productos con partes móviles por 3 años.
C. Garantizamos los demás productos por 5 años (productos sin partes móviles), bajo las siguientes condiciones:
1. Todos los productos a que se reere esta garantía, ampara su cambio físico, sin ningún cargo para el consumidor.
2. El comercializador no tiene talleres de servicio, debido a que los productos que se garantizan no cuentan con reparaciones, ni refacciones, ya que su garantía es de cambio físico.
3. La garantía cubre exclusivamente aquellas partes, equipos o sub-ensambles que hayan sido instaladas de fábrica y no incluye en ningún caso el equipo adicional o cualesquiera
que hayan sido adicionados al mismo por el usuario o distribuidor.
Para hacer efectiva esta garantía bastará con presentar el producto al distribuidor en el domicilio donde fue adquirido o en el domicilio de IC Intracom México, S.A.P.I. de C.V., junto con
los accesorios contenidos en su empaque, acompañado de su póliza debidamente llenada y sellada por la casa vendedora (indispensable el sello y fecha de compra) donde lo adquirió,
o bien, la factura o ticket de compra original donde se mencione claramente el modelo, número de serie (cuando aplique) y fecha de adquisición. Esta garantía no es válida en los
siguientes casos: Si el producto se hubiese utilizado en condiciones distintas a las normales; si el producto no ha sido operado conforme a los instructivos de uso; o si el producto ha
sido alterado o tratado de ser reparado por el consumidor o terceras personas.
English This symbol on the product or its packaging indicates that this product
shall not be treated as household waste. Instead, it should be taken to an ap-
plicable collection point for the recycling of electrical and electronic equipment.
By ensuring this product is disposed of correctly, you will help prevent potential
negative consequences to the environment and human health, which could oth-
erwise be caused by inappropriate waste handling of this product. If your equipment con-
tains easily removable batteries or accumulators, dispose of these separately according to
your local requirements. The recycling of materials will help to conserve natural resources.
For more detailed information about recycling of this product, contact your local city oce,
your household waste disposal service or the shop where you purchased this product. In
countries outside of the EU: If you wish to discard this product, contact your local authorities
and ask for the correct manner of disposal.
Deutsch Dieses auf dem Produkt oder der Verpackung angebrachte Symbol zeigt an, dass
dieses Produkt nicht mit dem Hausmüll entsorgtwerden darf. In Übereinstimmung mit
der Richtlinie 2012/19/EU des Europäischen Parlaments und des Rates über Elektro- und
Elektronik-Altgeräte (WEEE) darf dieses Elektrogerät nicht im normalen Hausmüll oder
dem Gelben Sack entsorgt werden. Wenn Sie dieses Produkt entsorgen möchten, bringen
Sie es bitte zur Verkaufsstelle zurück oder zum Recycling-Sammelpunkt Ihrer Gemeinde.
Español
Este símbolo en el producto o su embalaje indica que el producto no debe tratarse
como residuo doméstico. De conformidad con la Directiva 2012/19/UE de la UE sobre residuos
de aparatos eléctricos y electrónicos (RAEE), este producto eléctrico no puede desecharse se
con el resto de residuos no clasicados. Deshágase de este producto devolviéndolo a su punto
de venta o a un punto de recolección municipal para su reciclaje.
Français
Ce symbole sur Ie produit ou son emballage signie que ce produit ne doit pas être
traité comme un déchet ménager. Conformément à la Directive 2012/19/UE sur les déchets
d’équipements électriques et électroniques (DEEE), ce produit électrique ne doit en aucun
cas être mis au rebut sous forme de déchet municipal non trié. Veuillez vous débarrasser de
ce produit en Ie renvoyant à son point de vente ou au point de ramassage local dans votre
municipalité, à des ns de recyclage.
Italiano
Questo simbolo sui prodotto o sulla relativa confezione indica che il prodotto non
va trattato come un riuto domestico. In ottemperanza alla Direttiva UE 2012/19/UE sui
riuti di apparecchiature elettriche ed elettroniche (RAEE), questa prodotto elettrico non
deve essere smaltito come riuto municipale misto. Si prega di smaltire il prodotto riportan-
dolo al punto vendita o al punto di raccolta municipale locale per un opportuno riciclaggio.
Polski Jeśli na produkcie lub jego opakowaniu umieszczono ten symbol, wówczas w czasie
utylizacji nie wolno wyrzucać tego produktu wraz z odpadami komunalnymi. Zgodnie z
Dyrektywą Nr 2012/19/UE w sprawie zużytego sprzętu elektrycznego i elektronicznego
(WEEE), niniejszego produktu elektrycznego nie wolno usuwać jako nie posortowanego
odpadu komunalnego. Prosimy o usuniecie niniejszego produktu poprzez jego zwrot
do punktu zakupu lub oddanie do miejscowego komunalnego punktu zbiórki odpadów
przeznaczonych do recyklingu.
Slovensky Tento symbol na produkte alebo jeho balení naznačuje, že sa s produktom
nesmie zaobchádzať ako s domácim odpadom. Namiesto toho by malo byť zariadenie vzaté
do zberného miesta pre recykláciu elektrických a elektronických zariadení. Zabezpečením
správnej likvidácie napomáhate odstraňovať negatívne vplyvy na prostredie a ľudské
zdravie, ktoré by mohli byť spôsobené nevhodnou likvidáciou tohto výrobku. Pokiaľ vaše
zariadenie obsahuje jednoducho odnímateľné batérie alebo akumulátory, likvidujte ich
oddelene podľa miestnych požiadaviek. Recykláciou materiálov pomôžete zachovávať
prírodné zdroje. Pre podrobnejšie informácie o recyklácii tohto výrobku, kontaktujte
príslušný miestny obecný úrad, podniky komunálnych služieb alebo obchod, v ktorom ste si
zakúpili tento produkt. V krajinách mimo EÚ: Ak chcete odstrániť tento produkt, obráťte sa
na príslušné miestne úrady a informujte sa o správnom spôsobe likvidácie.
українська Цей знак на продукті чи упаковці означає, що продукт не можна
кваліфікувати як побутові відходи. Його необхідно відвезти до встановленого
пункту збору для утилізації електричного та електронного обладнання. Якщо
ви переконаєтесь, що цей продукт був правильно утилізований, ви допоможете
уникнути потенційних негативних наслідків для оточуючого середовища та
людського здоров’я, які можуть виникнути внаслідок невідповідного знищення
цього продукту. Якщо обладнання має батарейки чи акумулятори, що легко
виймаються, утилізуйте їх у відповідності з місцевими вимогами. Для країн, що не
входять до ЄС: якщо ви хочете викинути цей продукт, зв’яжіться з місцевою владою
та взнайте правильний спосіб утилізації.
Waste Electrical & Electronic Equipment
Disposal of Electric and Electronic Equipment (applicable in the European Union and other European countries with separate collection systems)
Regulatory Statements
FCC Class B
This equipment has been tested and found to comply with the limits for a Class B digital de-
vice, pursuant to Part 15 of Federal Communications Commission (FCC) Rules. These limits
are designed to provide reasonable protection against harmful interference in a residential
installation. This equipment generates, uses and can radiate radio frequency energy, and
if not installed and used in accordance with the instructions may cause harmful interfer-
ence to radio communications. However, there is no guarantee that interference will not
occur in a particular installation. If this equipment does cause harmful interference to radio
or television reception, which can be determined by turning the equipment o and on,
the user is encouraged to try to correct the interference by one or more of the following
measures: reorient or relocate the receiving antenna; increase the separation between the
equipment and the receiver; connect the equipment to an outlet on a circuit dierent from
the receiver; or consult the dealer or an experienced radio/TV technician for help.
CE / R&TTE
English: This device complies with the requirements of R&TTE Directive 1999/5/EC.
The Declaration of Conformity for this product is available at:
Deutsch: Dieses Gerät enspricht der Direktive R&TTE Direktive 1999/5/EC.
Die Konformitätserklärung für dieses Produkt nden Sie unter:
Español: Este dispositivo cumple con los requerimientos de la Directiva R&TTE 1999/5/EC.
La declaración de conformidad para este producto esta disponible en:
Français: Cet appareil satisfait aux exigences de la directive R&TTE 1999/5/CE.
La Déclaration de Conformité pour ce produit est disponible à l’adresset:
Polski: Urządzenie spełnia wymagania dyrektywy R&TTE 1999/5/EC.
Deklaracja zgodności dostępna jest na stronie internetowej producenta:
Italiano: Questo dispositivo è conforme alla Direttiva 1999/5/EC R&TTE.
La dichiarazione di conformità per questo prodotto è disponibile al:
Slovensky: Toto zariadenie vyhovuje požiadavkám Smernice R&TTE 1999/5/EC.
Vyhlásenie o zhode pre tento výrobok je k dispozícii na:
українська: Цей пристрій відповідає вимогам Директиви 1999/5/EC про радіо та
телекомунікаційні пристрої. Декларація відповідності доступна на сайті:
This guide presents the basic steps to
set up and operate this device.
For detailed installation instructions
and specifications, refer to the user
manual at manhattanproducts.com.
Windows XP
1.Insert the included driver CD.
2.Run the InstallShield Wizard.
3.When the wizard is finished, restart.
4.Connect the converter to the serial
device(s) and a USB port on the computer.
Note: In XP, a Software Certification screen
may display. Click Continue Anyway.
Windows Vista/7/8/8.1/10
1.Connect the converter to the serial
device(s) and a USB port on the computer.
2. Allow Vista/7/8/8.1/10 to automatically
search for updates on the Internet.
Note: Make sure the computer is connected
to the Internet. Vista/7/8/8.1/10 will
automatically download any appropriate
update(s) and install the proper driver
required for adapter operation. (If the
necessary updates are already on your
system, Vista/7/8/8.1/10 will find them.)
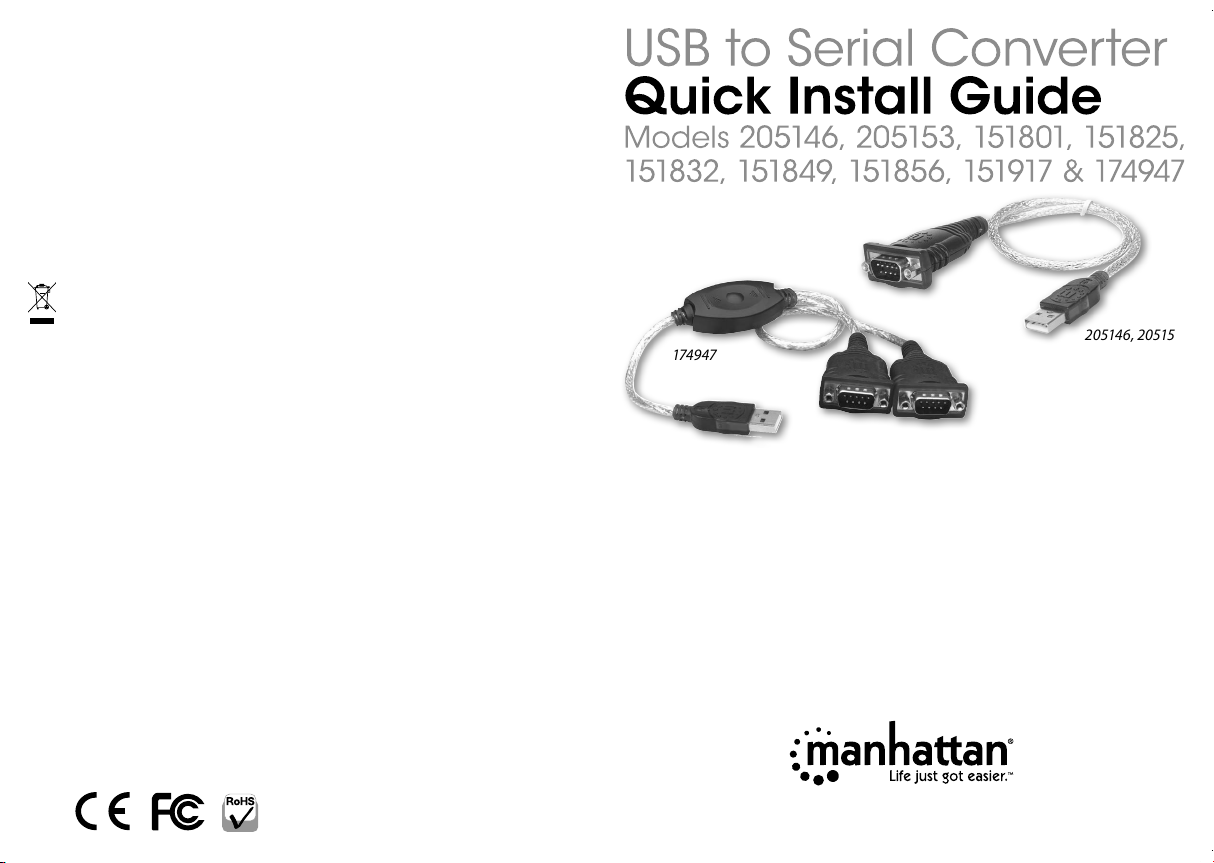
174947
205146, 205153,
151801, 151825,
151832, 151849,
151856, 151917
manhattanproducts.com
English: For warranty information, go to:
Deutsch: Garantieinformationen nden Sie unter:
Español: Si desea obtener información sobre la garantía, visite:
Français: Pour consulter les informations sur la garantie, visitez:
Polski: Informacje dotyczące gwarancji znajdują się na stronie:
Italiano: Per informazioni sulla garanzia, accedere a:
Slovensky: Pre informácie o záruke navštívte stránku:
у
країнська: Більше інформації про гарантію ви можете знайти на сайті:
manhattanproducts.com/warranty
Important: Read before use. • Importante: Leer antes de usar.
manhattanproducts.com
MH_174947_205146_205153_151801_151825_151832_151849_151856_151917_QiG_Rev5.01_0116.indd 1 1/28/16 9:04 AM
Poniższa instrukcja zawiera podstawowe informacje
dotyczące instalacji urządzenia. Pełną specyfikację
znajdą Państwo na stronie manhattanproducts.com.
Windows XP
1. Umieść płytę CD (w komplecie) w napędzie
CD/DVD-ROM komputera.
2. Uruchom kreatora instalacji.
3. Po zakończeniu instalacji zrestartuj komputer.
4. Podłącz konwerter do wolnego portu USB.
Podłącz do portów szeregowych konwertera
urządzenia, z których chcesz korzystać. Uwaga:
W systemie XP może się w trakcie instalacji
pojawić okno certyfikatu oprogramowania. Kliknij
Kontynuuj mimo wszystko (Continue Anyway).
Windows Vista/7/8/8.1/10
1. Podłącz konwerter do wolnego portu USB.
Podłącz do portów szeregowych konwertera
urządzenia, z których chcesz korzystać.
2. Zezwól, aby systemVista/7/8/8.1/10 automaty-
cznie wyszukał aktualizacje sterownika w trybie
on-line. Uwaga: Upewnij się, że komputer jest
podłączony do Internetu w trakcie instalacji,
tak aby system Vista/7/8/8.1/10 mógł wyszukać
wszystkie dostępne aktualizacje sterownika.
Questa guida fornisce le Informazioni basilari per installare
e far funzionare la periferica. Per Informazioni dettagliate
in merito all’installazione e alle specifiche, fare riferimento
al manuale d’istruzione disponibile su
manhattanproducts.com.
Windows XP
1. Inserire il CD incluso contenente i driver.
2. Avviare la procedura guidata di installazione.
3. Quando la procedura è terminata, riavviare il computer.
4. Collegare il convertitore alla/le periferica/che seriale/
i e alla porta USB del computer.
Nota: In XP, una videata di Certificazione del Software
potrebbe comparire. Cliccare Continue Anyway.
Windows Vista/7/8/8.1/10
1. Collegare il convertitore alla/le periferica/che seriale/
i e alla porta USB del computer.
2. Permettere a Vista/7/8/8.1/10 di ricercare
automaticamente gli aggiornamenti su Internet.
Nota: Assicurarsi che il computer sia connesso a Internet.
Vista/7/8/8.1/10 automaticamente scaricherà gli
aggiornamenti appropriate e installerà gli adeguati
driver necessari per un corretto funzionamento.
(Se gli aggiornamenti necessari sono già disponibili nel
vostro sistema, Vista/7/8/8.1/10 li troverà.)
Español: Convertidor de USB a Puerto Serie
Français: Convertisseur série USB
Polski: Konwerter USB na podwójne złącze szeregowe
Italiano: Convertitore da USB a Seriale
Slovensky: Konvertor z USB pripojenia na sériové
Esta guia presenta los pasos básicos para su configuración
y operación de este dispositivo. Para instrucciones
y especificaciones detalladas, consulte el manual de
usuario en manhattanproducts.com.
Windows XP
1. Inserte el controlador de CD incluido en la unidad
del equipo CD-ROM.
2. Ejecute el Assistente de instalación.
3. Cuando el asistente haya finalizado, reinicie el sistema.
4. Conecte el convertidor al dispositivo serial y conectelo
al puerto USB de la PC.
Nota: En XP, una pantalla de Certificación de Software.
Haga clic Continuar.
Windows Vista/7/8/8.1/10
1. Inserte el controlador de CD incluido en la unidad
del equipo CD-ROM.
2. Permita que Vista/7/8/8.1/10 busque automáticamente
actualizaciones en Internet.
Nota: Asegúrese de que el equipo está conectado a la
Internet. Vista/7/8/8.1/10 descargará automáticamente
cualquier actualización adecuada (s) e instale el controlador
adecuado que se requiere para el funcionamiento
del adaptador.
Deutsch: USB auf Seriell Konverter
All trademarks and trade names are the property of their respective owners.
Alle Marken und Markennamen sind Eigentum Ihrer jeweiligen Inhaber.
Todas las marcas y nombres comerciales son propiedad de sus respectivos dueños.
Toutes les marques et noms commerciaux sont la propriété de leurs propriétaires respectifs.
Wszystkie znaki towarowe i nazwy handlowe należą do ich właścicieli.
Tutti i marchi registrati e le dominazioni commerciali sono di proprietà dei loro rispettivi proprietari.
Všetky uvedené produkty sú ochrannými známkami alebo registrovanými ochrannými známkami príslušných vlastníkov.
Всі торгівельні марки та назви є власністю відповідних власників.
Ce guide décrit les bases pour configurer et utiliser cet
appareil. Pour des instructions et spécifications détaillées,
veuillez lire le manuel de l’utilisation, disponible sur
manhattanproducts.com.
Windows XP
1.Insérez le CD de pilote inclus dans le lecteur de votre PC.
2.Démarrez l’assistant d’installation.
3.Lorsque l’installation est complète,
redémarrez le système.
4. Connectez le Convertisseur au(x) dispositif(s)
série et un port USB de votre ordinateur.
Remarque: Sur XP, un écran de certification du logiciel
pourrait s’afficher. Cliquez sur Continue Anyway /
Continuer néanmoins.
Windows Vista/7/8/8.1/10
1. Connectez le Convertisseur au(x) dispositif(s) série
et un port USB de votre ordinateur.
2. PermettezVista/7/8/8.1/10 de rechercher automatique-
ment des mises à jour à l’Internet.
Remarque: Vérifiez que l’ordinateur a l’accès Internet.
Vista/7/8/8.1/10 télécharge automatiquement des mises à
jour appropriées et installe le pilote requis pour l’emploi du
convertisseur. Si les mises à jour se trouvent déjà sur votre
système, Vista/7/8/8.1/10 va les détecter.)
Táto príručka popisuje základné kroky pre nastave-
nie a používanie tohto zariadenia. Špecifikácie a po-
drobné inštrukcie nájdete v užívateľskom manuáli
alebo na stránke manhattanproducts.com.
Windows XP
1. Vložte priložené CD s ovládačmi.
2. Spustite sprievodcu inštaláciou InstallShield Wizard.
3. Po dokončení sprievodcu reštartujte počítač.
4. Pripojte konvertor ku sériovému zariadeniu
(zariadeniam) a ku USB portu počítača.
Poznámka: V XP sa môže zobraziť obrazovka
certifikácie softvéru Software Certification.
Pokračujte stlačením Continue Anyway.
Windows Vista/7/8/8.1/10
1. Pripojte konvertor ku sériovému zariadeniu
(zariadeniam) a ku USB portu počítača.
2. Povoľte operačnému systému Vista/7/8/8.1/10,
aby automaticky vyhľadal aktualizácie na Internete.
Poznámka: Uistite sa, že je váš počítač pripojený
k Internetu. Vista/7/8/8.1/10 automaticky stiahne
všetky potrebné aktualizácie a nainštaluje ovládače
potrebné pre prevádzku adaptéra. (Ak sa potrebné
aktualizácie už nachádzajú vo vašom systéme,
Vista/7/8/8.1/10 ich nájde).
Diese Kurzanleitung zeigt die grundlegenden Schritte zur
Einrichtung und Inbetriebnahme dieses Geräts. Weitere
Installationsanweisungen und Spezifikationen finden
Sie im Handbuch, verfügbar auf manhattanproducts.com.
Windows XP
1. Legen Sie die beiliegende Treiber-CD in Ihr Laufwerk ein.
2. Starten Sie den Installationsassistenten.
3. Ist die Installation abgeschlossen, starten Sie den PC neu.
4. Schließen Sie den Konverter an das/die seriellen Gerät(e)
sowie an einen USB-Port Ihres PCs an.
Hinweis: Unter XP wird Ihnen eventuell ein Zertifizierungs-
bildschirm für die Software angezeigt. Klicken Sie auf
Continue Anyway /Trotzdem fortsetzen.
Windows Vista/7/8/8.1/10
1. Schließen Sie den Konverter an das/die seriellen Gerät(e)
sowie an einen USB-Port Ihres PCs an.
2. Erlauben Sie Vista/7/8/8.1/10 die automatische Suche
nach Updates im Internet.
Hinweis: Achten Sie darauf, dass der PC mit dem Internet-
verbunden ist. Vista/7/8/8.1/10 lädt verfügbare Updates
automatisch herunter und installiert den passenden Treiber
für Ihr System. (Befinden sich die Updates bereits in Ihrem
System, wird Vista/7/8/8.1/10 diese erkennen).
Даний посібник містить основну інформацію
про установку та налаштування пристрою. Ця
інструкція представляє основні етапи встановити і
користуватися надалі пристроєм. Для специфікації
і докладні інструкції см. в керівництві користувача
на manhattanproducts.com.
Windows XP
1. Вставте компакт-диск (в комплекті)
у CD / DVD-привід.
2. Запустіть майстер установки.
3. Після завершення установки,
перезавантажте комп’ютер.
4. Підключіть конвертер в доступний порт USB.
Підключіть бажаний пристрій котрий ви хочете
використовувати до послідовного порту.
Примітка: У Windows XP може з’явитися вікно
для установки непідписанного драйверу
сертифікатом Microsoft, натисніть продовжити
(Все одно продовжити).
Windows Vista/7/8/8.1/10
1. Підключіть конвертер в доступний порт USB.
Підключіть бажаний пристрій котрий ви хочете
використовувати до послідовного порту.
2. Дозвольте системі Vista/7/8/8.1/10 провести
автоматичну інсталяцію драйвера в режимі
он-лайн (необхідний доступ до Internet)
і система сама підбере необхідний
драйвер та встановить його.
українська: Перехідник з USB на послідовний порт
© IC Intracom. All rights reserved. Manhattan is a trademark of IC Intracom, registered in the U.S. and other countries.
Printed on recycled paper.
MH_174947_205146_205153_151801_151825_151832_151849_151856_151917_QiG_Rev5.01_0116
MH_174947_205146_205153_151801_151825_151832_151849_151856_151917_QiG_Rev5.01_0116.indd 2 1/28/16 9:04 AM

This manual suits for next models

7

Other Manhattan Media Converter manuals

Manhattan 173384 User manual

Manhattan

Manhattan 173384 User manual

Manhattan 151443 User manual

Manhattan

Manhattan 151443 User manual

Manhattan 150095 User manual

Manhattan

Manhattan 150095 User manual

Manhattan 161336 User manual

Manhattan

Manhattan 161336 User manual

Manhattan 207614 User manual

Manhattan

Manhattan 207614 User manual

Manhattan 179041 User manual

Manhattan

Manhattan 179041 User manual

Manhattan 179225 User manual

Manhattan

Manhattan 179225 User manual

Manhattan 179041 User manual

Manhattan

Manhattan 179041 User manual

Manhattan 152303 User manual

Manhattan

Manhattan 152303 User manual

Manhattan 130622 User manual

Manhattan

Manhattan 130622 User manual

Manhattan 207959 User manual

Manhattan

Manhattan 207959 User manual

Manhattan 207959 User manual

Manhattan

Manhattan 207959 User manual

Manhattan 151047 User manual

Manhattan

Manhattan 151047 User manual

Manhattan 336581 User manual

Manhattan

Manhattan 336581 User manual

Manhattan 161336 User manual

Manhattan

Manhattan 161336 User manual

Manhattan 179225 User manual

Manhattan

Manhattan 179225 User manual

Manhattan 152297 User manual

Manhattan

Manhattan 152297 User manual

Manhattan 179133 User manual

Manhattan

Manhattan 179133 User manual

Manhattan 164115 User manual

Manhattan

Manhattan 164115 User manual

Manhattan 205146 User manual

Manhattan

Manhattan 205146 User manual

Manhattan 152969 User manual

Manhattan

Manhattan 152969 User manual

Manhattan 179225 User manual

Manhattan

Manhattan 179225 User manual

Manhattan 162579 User manual

Manhattan

Manhattan 162579 User manual

Manhattan 151542 User manual

Manhattan

Manhattan 151542 User manual

Popular Media Converter manuals by other brands

TRENDnet TFC-1000MGA Quick installation guide

TRENDnet

TRENDnet TFC-1000MGA Quick installation guide

SEW-Eurodrive MOVITRANS TPM12B operating instructions

SEW-Eurodrive

SEW-Eurodrive MOVITRANS TPM12B operating instructions

Atlona OmniStream AT-OMNI-512 manual

Atlona

Atlona OmniStream AT-OMNI-512 manual

Danfoss FC 300 operating instructions

Danfoss

Danfoss FC 300 operating instructions

CTC Union FRM220-10/100iS-2 user guide

CTC Union

CTC Union FRM220-10/100iS-2 user guide

Transition Networks CRS4F3111-100 user guide

Transition Networks

Transition Networks CRS4F3111-100 user guide

Wilson Electronics AG Pro 75 installation guide

Wilson Electronics

Wilson Electronics AG Pro 75 installation guide

Avenview C-SC-UNI user guide

Avenview

Avenview C-SC-UNI user guide

AudioEngine D1 user manual

AudioEngine

AudioEngine D1 user manual

Kentec Electronics DNP-R-2F/FC-K user manual

Kentec Electronics

Kentec Electronics DNP-R-2F/FC-K user manual

Delta Electronics Delphi Q48SP datasheet

Delta Electronics

Delta Electronics Delphi Q48SP datasheet

AJA OG-ROI Series Installation and operation guide

AJA

AJA OG-ROI Series Installation and operation guide

Data Translation MACH Series Getting started manual

Data Translation

Data Translation MACH Series Getting started manual

GRASS VALLEY 8950DAC datasheet

GRASS VALLEY

GRASS VALLEY 8950DAC datasheet

Renishaw TONiC RESM20 installation guide

Renishaw

Renishaw TONiC RESM20 installation guide

advidia VP-16 Series user manual

advidia

advidia VP-16 Series user manual

Westermo MD-62 AC installation manual

Westermo

Westermo MD-62 AC installation manual

Snell & Wilcox HD2300 Installation & operator's manual

Snell & Wilcox

Snell & Wilcox HD2300 Installation & operator's manual

manuals.online logo
manuals.online logoBrands
  • About & Mission
  • Contact us
  • Privacy Policy
  • Terms and Conditions

Copyright 2025 Manuals.Online. All Rights Reserved.