Manitoba Robot Games Robo-Critters Manual

Manitoba Robot Games
Presents
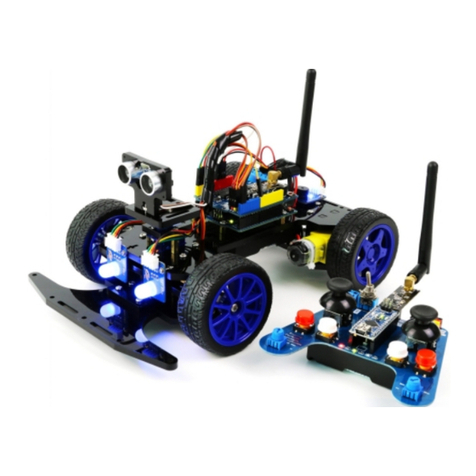
This Robo-Critter, robot building kit, was designed by Bill Smart and Ian Elwood-Oates
especially for rst time robot builders and is ideal for children in Grades 4 to 6.
With help from an adult, these Construction Details will help guide your elementary student to
build a working Robo-Critter robot which can be entered in the next
Manitoba Robot Games - Robo-Critter Competition .
Visit www.mbrobotgames.ca for details..
How to Build a Robo-Critter
What you will need
1 MRG Robo-Critter Kit which contains;
2 - 3 - 4.5 volt DC electric motors
2 - rubber wheels
1 - formed wire motor mount
1 - MRG 2 channel controller
1 - 5” x 10” piece of Fomecor.
Approx 12” PVC electrical tape or duct tape.
A hotmelt glue gun, general purpose glue sticks and a bowl of water.
A soldering pencil, stand, damp sponge and rosincore solder.
A very sharp knife and cutting board.
2 “AA” size batteries.
A grown-up who can show you how to solder, glue and cut safely.
R
o
b
o
-
C
r
i
t
t
e
r
s
A New Robot Competition for Grade 6 and under.
R
o
b
o
-
C
r
i
t
t
e
r
s
A New Robot Competition for Grade 6 and under.

Designing your Robot:
1 Make a sketch of how you want your robot to look.
Some things to consider...
Will the robot have its wheels in the center, front or rear?
What do you want the robot to do best?
2 When you have decided on a design, transfer your cutting
plan to the Fomecor.
More on Design:
* If the driving wheels are in the middle, be sure to add some skids
front and back so that the robot will rock only slightly on its wheels.
* If the driving wheels are in the front (a tail dragger design)
then keep the tail low.
* If the driving wheels are at the back you will probably need a
wheelie bar to stop the robot ipping backward on
full forward acceleration.
Adding wheels to your motors:
Though it may be hard to see, the wheels have been
pierced in the center of the wheel, from the small side.
3 Put the wheel, large side down, on a hard surface and place
the shaft of the motor in the center of the small side
as shown. With the motor in an upright position, care-
fully push downwards on the back of the motor with both
thumbs. Push as far as it will go to slide the wheel onto the
shaft. If it is very hard to get the wheel onto the motor shaft, try re-
piercing the center of the wheel with a compass point or stick pin.
Mounting the Motors:
4 Hold the formed wire motor mount so that the ends hang
down.
5 place a motor underneath one of the ends so that...
-the wheel is on the outside
-the two solder tabs on the back of the motor are horizon-
tal and parallel to the wire motor mount.
-the end of the wire motor mount acts as a stop to position
the motor.
6 Use some PVC tape to secure the motor tightly to the wire
motor mount.
7 Do the same with the second motor.
Completing the Body of your Robot:
8 Cut out the body from the Fomecor, saving all the pieces as
some will be used for skids and ns.
9 Glue the axle to the underside of the Robot using a scrap
of fomecor to ‘sandwich’ the motor mount to the body.
If you are intending on entering your robot in the next
Manitoba Robot Games then be sure to adjust your
robot so that it will be able to strike a 2” diameter target
whose center is 1 1/2” up from the ground.
Steps
1 & 2
Page 2

Assembling the Control Box:
10 Follow the instructions that come with the control box.
11 Be sure to grease all moving parts.
Making the electrical connections:
12 Make a small hole through the body of your robot just
large enough to be able to pass the 4 wires through.
13 Tie a knot in the wires so that the knot will sit at the
hole but the ends of the wires will be long enough to reach
the solder tabs on the motors.
14 Connect the wires to the motors as shown on the right.
15 Strip about 10-12mm (1/2”) of insulation from the ends
of the wires and twist the strands together
16 Thread them through the holes in the solder tabs and
fold them back to make a “U”.
At this point you can install the batteries and test that the wheels turn
in the correct rotation.
17 Follow the instructions below to solder the controller
wire directly to the solder tabs on the back of the motors.
How to Solder the Connections:
* When the soldering pencil is hot, wipe the tip an a piece
of damp sponge or a piece of folded wet paper towel to
remove any insulating oxides from the tip.
* Melt a small amount of solder on the tip and wipe again.
The tip should now be a shiny silver colour.
As the wire may get too hot to hold, it is a good idea
to hold the wire with a pair of needle nose pliers.
Don’t heat for too long! The motors can be damaged
if too much heat is applied to the solder tabs.
* Touch the silvered part of the tip to both the wire and
the tab on the motor- count slowly to three...
Add some solder - count to three...
* Watch to see the solder melt, then ow between the wire
and tab then slowly slide the tip away while still holding
the wire in place. You can blow on it a little to help it
cool.
* When the solder has cooled and set, give the wire a little
tug to check that the connection is sound.
* Solder all four wires in the same way, then you will be
ready to test your robot.
* Be sure to insulate any exposed wire joints that may
touch another to avoid short circuits.
Safety Notes...
Place a bowl of water in easy reach
when using any hot tools such as hot
glue guns and soldering equipment.
Skin that has come in contact with a
hot element should be cooled immedi-
ately in water to reduce damage to the
tissues.
Solder is made from Tin which is food
safe and Lead which is poisonous to
humans, especially children. Children
cannot expel lead so it is accumulated
in the body. Lead poisoning reveals its
self by the loss of melanin causing a
whitening of hair, memory loss and can
be fatal with sufcient exposure.
Lead is easily absorbed into young bod-
ies through contact with soft tissues.
Be sure to wash hands thoroughly af-
ter handling/before eating and do not
place Lead in the mouth.
When soldering, the rosin core be-
comes corrosive when heated and much
of it is leeched off as smoke. Position
yourself so that the fumes do not rise
into eyes or nose. Do not wear a peaked
cap when soldering.
When using sharp knives...
Always cut AWAY from ngers.
Front
As viewed
from underneath
Blue
Yellow
White
Red
Page 3

Powering up your Robot
* Install two “AA” size batteries in the controller. Be sure the + ends point in oposite directions.
Close the battery cover and enjoy driving your new Robo-Critter!
If your robot goes in circles when you push both levers forward, decide which motor is
going in the wrong direction then de-solder the wires to that motor and reverse them.
Congratulations!
Your Robo-Critter robot is now ready for a test run.
Tip
Place empty 600ml soft drink bottles on their side and aim your robot for the caps. They are the
same height as the center of the competition targets.
If you have any further questions about building the robots please email
If you want to look at the Competition Rules on the Web, go to
http://www.mbrobotgames.ca
then follow the links.
Page 4 Rev 5.1 - Feb/2013
