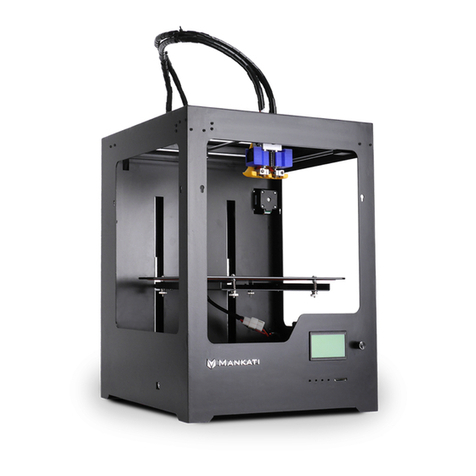
Mankati Fullscale XT User manual

Fullscale XT
a Fast, High Resolution, Huge Printing Volume 3D Printer
User Manual

WELCOME 1
Safty 2
Specications 3
How it Works 4
SETUP 5
Unpacking 6
Accessory 9
Tool Box 10
Setting Up Mankati Fullscale XT 11
Fullscale XT Outlook 15
LCD INSTRUCTION 16
LCD Menu Structure 17
LCD Menu 18
SOFTWARE 20
Download and Install 21
Interface 22
ParameterDenition 23
FIRST RUN 29
Stick the Kapton tape 30
Leveling Build Plate 33
Feed the Filament 35
Print from SD Card 36
Unload the Filament 37
MAINTENANCE 38
Maintenance 39
TROUBLESHOOTING 41
Setting and Calibration Problems 42
Hardware Problems 43
Printing Problems 45
Contents

TO THE
MANKATI FULLSCALE XT
WELCOME 1
To get perfect prints, your may need to experiment and tinker at the beginning.
This User Manual will guide you to start your journey with the Mankati Fullscale XT
easily and quickly.
Forget your existing knowledge of other 3D printers, take the time to learn about
your Mankati Fullscale XT, it will show you a completely new experience.
Print your idea right from now on!

2
Safty
GROUND CONNECTION
CAUTION: Make sure the power grounded, if not, may cause the accumulation of static-electricity so as to damage electronic system.
HEAT and HIT
WARNING: Mankati Fullscale XT 3D Printer generates high temperatures and includes moving parts that can cause injury. Please Never Touch the nozzle,
the heated aluminum block or the build plate after preheating or printing to avoid scalding.
CAUTION: Do not leave the printer attended for a long time during printing. If you have to do so, do follow these guidances:
• Ensure that the first layer of the print is properly land on the build plate.
• Ensure filament wound on the spool to keep feeding smoothly, in case of tangles.
• Monitor your print periodically.
CAUTION: The melt filament will emit the plastic odor during printing. Please keep ventilation in the work place.
CAUTION: In case of emergency disconnect power supply from wall socket.
CAUTION: Refit and modification privately may destroy the working and safty performance. So any refits and modifications not expressly approved by
Mankati can void the right of warranty and safty gurantee.
COMPLIANCE: Your Mankati Fullscale XT has been tested strictly by SGS with the permission of FCC, CE, IC, C-Tick and ROHS.
It complies with the rules and limits of EMC, MD and ROHS, to provide reasonable protection against harm to the human, from electromagnetic
compatibility, mechanical structure and chemical component.
The users have the right to ask for the testing report with Mankati.

www.mankati.com 3
Specifications
Fullscale XT
Forming Tech. Fused deposition modeling (FDM)
Extruder Number 1 or 2 (Dual extruders Perfect supported)
Build Size 250*250*300mm
Specication
Precision X,Y 0.01mm, Z 0.015mm
Layer Resolution 0.04mm-0.4mm
Nozzle Diameter 0.4mm
Max. Travel Speed 250mm/sec.
Max. Print Speed 180mm/sec.
Max. Extruder Temperature 270Deg.
Max. Hot Bed Temperature 110Deg.
Max. Extrude Speed 100mm/sec
Filament
Filament Type ABS, PLA(Spec.), PVA, PS, Nylon
Filament Diameter
3mm
Filament Temperature 150~270Deg.
Filament Colors Black, White, Red, Yellow, Green, Blue, etc.
Hardware
Controller Arduino ATmega2560 R3Micro Controller
Mother Board Mankati Stable Main Board V3.x
Stepper Motor X, Y axis 42*48, 1.3A; Z axis 42*63, 1.5A
Geared Motor E42*42, Ratio 1:10
Power Input 110~220V, 1.5A
Power Output 24V, 10.5A
Software
Operating System XP, Vista, Win7, Win8, Mac, Linux/Unbutu
File Format STL, OBJ, GCode
Printing Software and Slicer MankatiUM
Software Language
English, Deutsch, French, Nederlands, Spanish, Polish
Machinery
Dimensions 380*420*530mm
Weight Around 34KG

4
How it Works
Mankati Fullscale XT 3D Printer makes solid, three-dimensional objects out of melted filament.
Your 3D designed files are translated into instructions for the Mankati Fullscale XT and read by the machine via SD card.
The Mankati Fullscale XT then heats the filament and squeezes it out through a nozzle onto a heated surface to build a solid object,
layer by layer. This method is called Fused Deposition Modeling [FDM].
Preparing the model
Use a 3D modeling software
to output stl or obj format 3D
modelle.
MankatiUM
MankatiUM is a software to
preparethegcodeleforyour
Fullscale XT.
In MankatiUM, you can set
printing parameters for your
model, such as layer thickness,
printing speed and nozzle
temperature, then output a
gcodeleforprinting.
Transfer the GCode file
SavetheGCodeleintotheSD
card, and insert it into the SD
card reader of the printer.
Prepare the printer
Before 3D printing, you need to
loadthelamentfortheprinter.
Print it!
Operate the knob beside the LCD
and choose the model from the
SD card inserted into the printer.

SETUP 2
Your Mankati 3D Printer was built and packaged very carefully at the Mankati
factory. Please take your time and carefully unpacking it and getting set up.

6
Unpacking
1. PlacetheMankatiFullscaleXTontheoor.Leave
enough available space for unpacking
3. Removetherstcardboardlayer.Opentheplastic
bag.
2. Your Mankati Fullscale XT is packed multiply by
carton, cardboard, foam and sealed bag to ensure the
machine to your hands in perfect status.
NOTE: You can download a PDF copy of this User
manual under manual at the support page: http://www.
mankati.com/download.html

www.mankati.com 7
Unpacking
6. Removethestretchlmaroundthe3Dprinter.You
canseealltheaccessories,toolsandlaments.
5. Place it on a stable surface, and leave enough space
surrounding it to check accessories.
4. Now it’s time to take out your Mankati Fullscale
XT from the box. Lift it out by grasping the frame
rmlybutgentlyattheleft ①and right ②of the
Mankati Fullscale XT.
Caution: Be careful NOT to grip the belt or shaft of
the motion system.

8
Unpacking
8. T
akingoutthelaments:
Fortheeaseoftransport,thelamentsarexedtightly
by build plate supporter. Let’s take them out, following
thenext3steps:
1) Connect power wire to printer.
2) Turn on the printer.
3)GototheLCDmenu:"Prepare>Autohome",and
the two holders will go to the top of Z axis.
4)TakeoutthetwospoolsofPLAlamentandthetwo
feeding devices.
7. T
ake all the accessories out.

www.mankati.com 9
Accessory
Takingoutaccessories,toolboxandlamentandcheckifbelowthingsareincluded:
1)2spoolsofPLAlament,diameter3mm,1kg/spool;
2)1Buildplatform:ItispackedinthewhiteEPE.
3)1toolbox:includingthenecessarytoolsforinstallationandotheraccessories.
4)2feedingdevices:constitutedbygearmotorandfeederwiththeadvantagesof
high accuracy and easy to operate.
5)3enclosurecovers:installedon3sides(front,left,right)tokeepthetemperature
constant inside printing space.

10
Tool Box
Checking if you find that anything described in the manual is missing, email us at
1) 1*USB cable: Connect computer and printer when printing or renewing
hardware.
2) 1*Power wire: Supply power.
3) 1*8GB Kinston storage card to store Gcode file for printing.
4) 2*printer handles: Install on machine and help to move machine easily.
5) 2*filament holders: Hold filament spool.
6) 5*big nuts: 4 for installation of build platform, 1 for backup.
7) 1* black plastic nut: Backup nut for leveling the heat bed.
8) 5* small nuts: 4 to install on feeding device, 1 for backup.
9) 1* fuse: Backup for power interface.
10) 1* power switch: Backup for broken power switch.
11) 1* button: Backup for broken button.
12) 1* Heating tube: Backup for broken heating tube.
13) 1* temperature controller: Backup for broken temperature controller.
14) 1* Bottle lubricant oil: XY axis and guide rails need to lubricate terminally.
15) 1* Kapton tape: Stick on the build plate to ensure the model fixing on the
build plate.
16) 1* Scraper: To take out the model and clean the build plate.
17) 1* Screwdriver: Installation tool.
18) 1* Tweezer: Clean the platform after printing, or clean the nozzle and printer.
19) 2* Spanners: Installation tools
20) 1* Drill: Clean the nozzle.
21) 1* needle: Clean and unchoke the nozzle.

www.mankati.com 11
Setting Up Mankati Fullscale XT
1. Install the Holders
1). The four holes are
holders installation
position.
2). You need a screwdriver,
four screws and two
holders.
3). Use the screwdriver to
xthetwoholdersonleft
and right of the printer
top side.
Note: Please confirm
you have tightened the
screw to avoid accident
of getting loose when
moving the printer.
4). Holders installation
done.

12
4) Connect the power wire and data cable
of platform with the connectors.
Caution: Make sure the connection fully.
Otherwise, it can cause the platform
heating problems or connectors over-
heated.
5) Done.
Setting Up Mankati Fullscale XT
2. Install the Build Platform
1) Turn on your Fullscale XT, enter “Prepare
>Moveaxis>Move1mm>MoveZ”,
loweringZaxisalittle(forexample30mm)
to avoid collision between nozzle and
build platform while installation.
3) Take out the nuts ⑥and screwdriver
fromthetoolboxtoxtheplatformand
platformholderrmly.
Note: After installing the platform
installation, please tighten the four black
screws a little bit more under the build
plate to lower it to avoid knocking the
extruders in next operation.
2) Insert the platform’s holder into the
middle of platform.
Note: The end of platform with black
connection wire should toward the
printer.

www.mankati.com 13
4) Feeding device
installation done.
Setting Up Mankati Fullscale XT
3. Feeding Device Installation
1)Feedingmotor:
using small wrench
toxNo.1feeding
motor on position 1.
3) Connect the data cable
with feeding devices.
2) Insert the end
of feeding tube
into the socket of
feeding motor and
tightenrmly.

14
Setting Up Mankati Fullscale XT
4. Filament Spool Holder Installation
5. Lubricate the Guide Rails
1) Take the two spool
holders out of the tool
box.
We clean the guide
rails before sending
the printer out, so
please lubricate the
guide rails before the
rstprinting.
1). Lubricate the two
cross guide rails.
2). Lubricate the four
guide rails around the
printer framework.
Notice: Lubrication is very
important for good printing
performance, or else you
might encounter printhead
stuck problem.
2).Installlamentspool’s
holder.

www.mankati.com 15
Fullscale XT Outlook
1. SD-card slot
2. Push and rotate button
3. Display
4. Build plate screws
5. Build plate
10. Power Socket
11. Name plate
12. Spool holder
13. Material feeder
14. USB Socket
6. Print head
7. Filament guide tube
8. Printer holder
9. Power switch

LCD INSTRUCTION 3
In this chapter you will learn about detailed introductions of the LCD menus.

1 - Prepare
1.1 - Auto Home
1.2 - Disable Steppers
1.3 - Move Axis
1.3.1 - Move 10mm
1.3.1.1 - Move X
1.3.1.2 - Move Y
1.3.2 - Move 1mm
1.3.2.1 - Move X
1.3.2.2 - Move Y
1.3.2.3 - Move Z
1.3.2.4 - Extruder
1.3.2.5 - Extruder 2
1.3.3 - Move 0.1mm
1.3.3.1 - Move X
1.3.3.2 - Move Y
1.3.3.3 - Move Z
1.3.3.4 - Extruder
1.3.3.5 - Extruder 2
1.4 - Preheat PLA
1.4.1 - Preheat PLA 1
1.4.2 - Preheat PLA 2
1.4.3 - Preheat ALL
1.4.4 - Preheat PLA Bed
1.5 - PreheatABS
1.5.1 - Preheat ABS 1
1.5.2 - Preheat ABS 2
1.5.3 - Preheat ALL
1.5.4 - Preheat ABS Bed
1.6 - Leveling Bed
1.7 - Cool Down
2 - Control
2.1 - Temperature
2.1.1 - Nozzle
2.1.2 - Nozzle 2
2.1.3 - Bed
2.1.4 - Fan Speed
2.1.5 - Auto Temp
2.2 - Motion
2.3 - Restore Failsafe
2.4 - Save Memory
2.5 - Restore Factory
2.6 - Firmware Version
3 - Cool Down 4 - No SD Card
Info Screen
www.mankati.com 17
LCD Menu Structure

18
LCD Menu
Info Screen
1. Actual Temperature of Nozzle 1;
2. Preset Temperature of Nozzle 1;
3. Actual Temperature of Nozzle 2;
4. Preset Temperature of Nozzle 2;
5. Actual Temperature of Build Plate;
6. Preset Temperature of Build Plate;
7. Cooling Fan;
8. Fan Speed Rate;
9. Filament Feed Rate;
10. Printing Process Bar;
11. Printing Time;
12. Build Plate Coordinate;
1
9 10 11 12
2 3 4 5 6 7 8
Press the knob to enter the menu:
1 - Prepare: The printer enters ready state
1.1 - Auto home
Theprinterreturnstooriginalstate(InX.Ydirection,theextruderreturnstheleftbottomintop
view;InZdirection,thebuildplatereturnstotopposition)
1.3 - Move axis:
Move 10mm: Move 10mm each step
Move X: Move 10mm each step in X direction
Move Y: Move 10mm each step in Y direction
Move 1mm: Move 1mm each step
Move X: The extruder will move 10mm each step in X direction
Move Y: The extruder will move 10mm each step in Y direction
Move Z: The build plate will move 10mm each step in Y direction
Extruder: Thefeedingmotorofleftnozzlewillextrudethelamentineachstepof1mm
Extruder2: Thefeedingmotorofrightnozzlewillextrudethelamentineachstepof1mm
Move 0.1mm: Move 0.1mm each step
Move X: The extruder will move 0.1mm each step in X direction
Move Y: The extruder will move 0.1mm each step in Y direction
Move Z: The build plate will move 0.1mm each step in Y direction
Extruder: Thefeedingmotorofleftnozzlewillextrudethelamentineachstepof0.1mm
Extruder2: Thefeedingmotorofrightnozzlewillextrudethelamentineachstepof0.1mm
1.4 - Preheat PLA:
Preheat PLA1: PreheatextruderandbuildplatetotheworkingtemperatureofPLArequired(
Default:Extruder,215℃,
Build plate, 45℃)
Preheat PLA2: Preheat extruder 2 and Build plate to the working temperature of PLA
required(Default:Extruder,215℃; Build plate, 45℃)
Preheat PLA All: Preheat two extruders both and build plate to the working temperature of
PLArequired(Default:Extruder,215℃; Build plate, 45℃)
Preheat PLA Bed: PreheatbuildplatetotheworkingtemperatureofPLArequired(Default:
Build plate, 45℃)
1.5 - Preheat ABS:
Preheat ABS1: PreheatextruderandbuildplatetotheworkingtemperatureofABSrequired(
Default:Extruder,255℃; build plate, 45℃)
Preheat ABS2: Preheat extruder 2 and build plate to the working temperature of ABS
required(Default:Extruder,255℃; Build plate, 45℃)
Preheat ABS All: Preheat two extruders both and build plate to the working temperature of
Table of contents
Other Mankati 3D Printer manuals
