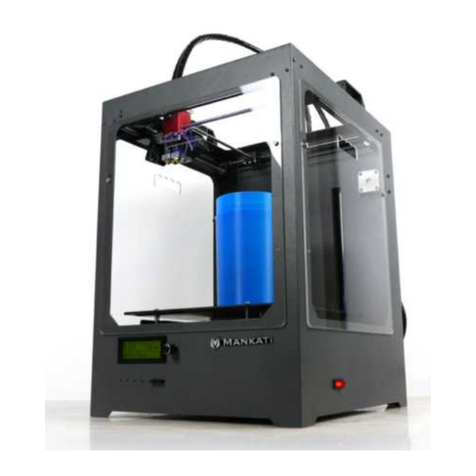
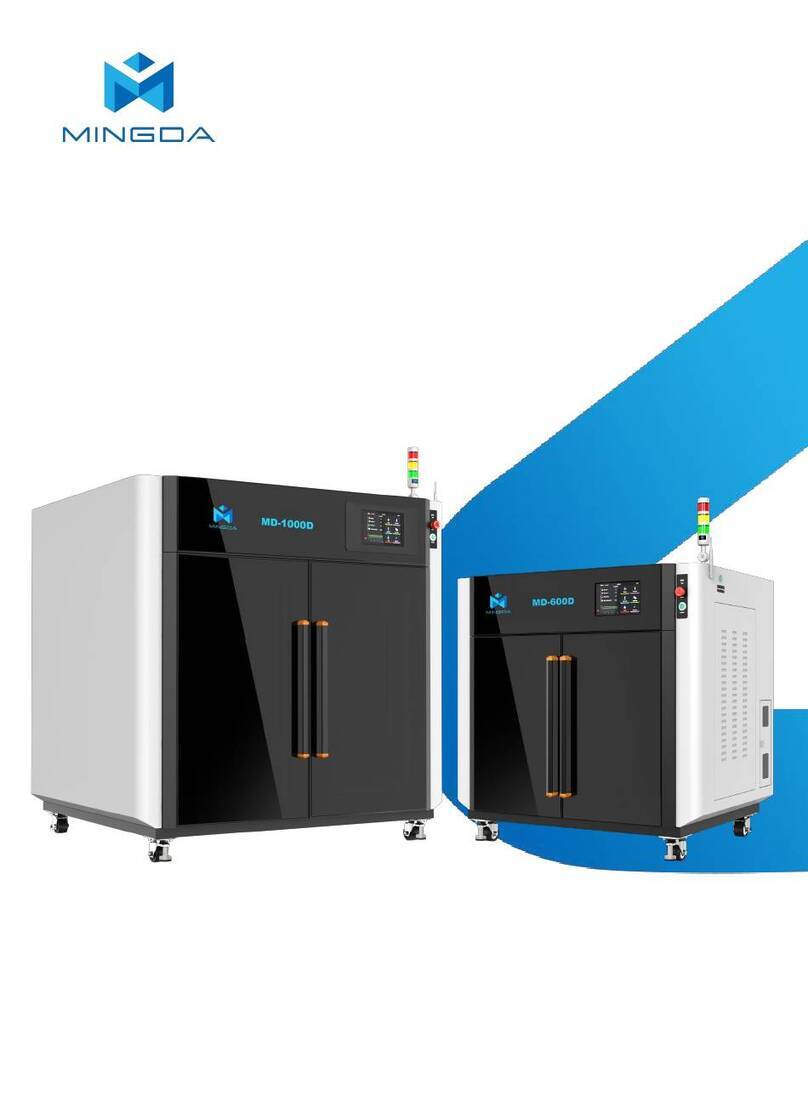
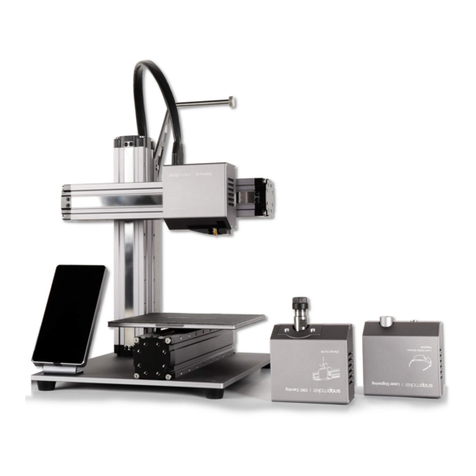
Mankati FULLSCALE XT PLUS User manual

TM
Desktop 3D Printer
User Manual

WELCOME 1
Safty 2
Specications 3
How it Works 4
SETUP 5
Unpacking 6
Accessory 9
Tool Box 10
Setting Up Mankati Fullscale XT Plus 11
Fullscale XT Plus Outlook 14
LCD INSTRUCTION 15
LCD Menu Structure 16
LCD Menu 17
SOFTWARE 19
Download and Install 20
Interface 21
ParameterDenition 22
FIRST RUN 28
Stick the Kapton tape 29
Leveling Build Plate 31
Feed the Filament 34
Print from SD Card 35
Unload the Filament 36
MAINTENANCE 37
Maintenance 38
TROUBLESHOOTING 40
Setting and Calibration Problems 41
Hardware Problems 42
Printing Problems 44
How to 46
Contents

WELCOME
TO THE MANKATI
FULLSCALE XT PLUS
1
This User Manual will guide you to quick start with the Mankati
Fullscale XT Plus easily. Being a thrilling reform to the next
level, Mankati Fullscale XT PLUS will provide you with higher
resolution, bigger printing volume and more user friendly
functions.
Print your ideas right from now on!

www.mankati.com
2
Safty
GROUND CONNECTION
CAUTION: Make sure the power is grounded, if not, fire accident or wires melting may be caused.
HEAT and HIT
WARNING: Mankati Fullscale XT Plus 3D Printer generates high temperatures and moving parts contained may cause injury. To avoid scalding, please never
touch the extruder or the heated aluminum block during preheating the nozzle or printing.
CAUTION: Do not leave your machine unattended for a long time during the printing. Do follow these guidances if you have to do it :
• Ensure that the first layer of your printing is properly landed on the heat bed;
• Ensure that filament is twined tightly on the spool, with no knot or tangle, for smooth feeding.
• Monitor your print periodically.
CAUTION: Filament melting will emit plastic odor during printing. Please keep ventilation in the work place.
CAUTION: In case of emergency disconnect power supply from wall socket.
CAUTION: Remoulding or modification by yourself may cause damage or performance exception. Any remoulding or modification, not approved by
Mankati , will make your machine no longer under the right of warranty or post-sale services.
COMPLIANCE: Your Mankati Fullscale XT Plus has been tested strictly by SGS with the permission of FCC, CE, IC, C-Tick and ROHS.
Mankati products complies with rules and limits of EMC, MD and ROHS, to reasonably protect human against harm from electromagnetic compatibility,
mechanical structure and chemical component.
Users have the right to be informed of the testing report from Mankati.

www.mankati.com
3
Specifications
Fullscale XT Plus
Forming Tech. Fused deposition modeling
Extruder Number 1 or 2 (Dual extruders Perfect supported)
Build Size 260*260*300 mm / 10.2*10.2*11.8 inch
Specication
Precision X,Y axis 0.01 mm, Z axis 0.015 mm
Layer Resolution 0.04 mm ~ 0.4 mm
Nozzle Diameter 0.4 mm
Max. Travel Speed 250 mm/s
Max. Print Speed 180 mm/s
Max. Extruder Temperature 300 ℃/ 572 ℃
Max. Hot Bed Temperature 110 ℃/ 230 ℃
Max. Extrude Speed 100 mm/s
Filament
Filament Type ABS, PLA(Spec.), PVA, PS, Nylon
Filament Diameter
3 mm
Filament Temperature 150~300 ℃/ 302~572 ℃
Filament Colors Multicolor
Hardware
Controller Arduino ATmega 2560 R3 Micro Controller
Mother Board Mankati Stable Main Board V1.0
Stepper Motor X, Y axis 42*48, 1.3 A; Z axis 42*40, 1.3 A
Geared Motor E42*42, Ratio 1:10
Power Input 100~230 V, 1.5 A
Power Output 24 V, 10.5 A
Software
Operating System Windows XP/Vista/7/8, Mac OS, Ubuntu
File Format STL, OBJ, GCode
Printing Software and Slicer MankatiUM V6,5
Software Language
English, Deutsch, French, Nederlands, Spanish, Polish
Machinery
Dimensions 384*434*535 mm
Weight 46 kg

www.mankati.com
4
How it Works
The Mankati Fullscale XT Plus 3D Printer makes solid, three-dimensional objects out of melted Filament. Your 3D designed files are
read from SD card and translated into instructions by Mankati Fullscale XT Plus. The machine then heats the filament and through a
nozzle squeezes it out onto heat bed to build a solid object, layer by layer. This method is called Fused Deposition Modeling [FDM].
Preparing the model
Use a 3D modeling software
to output stl or obj format 3D
modelle.
MankatiUM
MankatiUM is a software to
preparethegcodeleforyour
FullscaleXTPlus.
In MankatiUM, you can set
printing parameters for your
model, such as layer thickness,
printing speed and nozzle
temperature, then output a
gcodeleforprinting.
Transfer the GCode file
SavetheGCodeleintotheSD
card, and insert it into the SD
cardreaderoftheprinter.
Prepare the printer
Before 3D printing, you need to
loadthelamentfortheprinter.
Print it!
Operate the knob beside the LCD
and choose the model from the
SDcardinsertedintotheprinter.

SETUP
2Every Mankati product has been passed stringent tests before
leaving factory, and packaged very carefully to deliver. Hope you
would take your time reading this chapter and get your machine
set up.

www.mankati.com
6
Unpacking
1. PlaceMankatiFullscaleXTPlusontheoor.Leave
enoughavailablespaceforunpacking.
3. Removetherstcardboardlayer.Opentheplastic
bag and lift it out by pulling it up gently at the left and
rightframesofyourmachine.
Caution: Be careful NOT to grip the belts or shaft of the
motion system.
2. Your machine is packed with carton, cardboard, foam
and sealed bag to ensure the perfect status when you
receivedit.
NOTE: You can download a PDF copy of this User
manual at the support page: http://www.mankati.com/
download.html

www.mankati.com
7
Unpacking
6. Takealltheaccessoriesout.5. Removingthestretchlmoff,youcanseeallthe
accessories,toolsandlaments.
4. “Hello, Mankati Fullscale XT Plus! “
Place your machine on a stable surface, and leave
enoughspacesurroundingittocheckaccessories.
Caution: When taking your 3D printer out of the
box, please be careful NOT to grip the belt or shaft
of the motion system.

www.mankati.com
8
8. Takingoutthelaments:
Foreasyandsafetransport,spoolsoflamentare
xedtightlybetweenthebuildplatesupporters.
Takethemoutandfollowthe3stepsbelow:
1) Connect power wire to your machine;
2) Turn it on;
3)EnterintoLCDpanel’smenu:”Prepare>
Autohome”,Thenthetwobuildplatesupporters
will lift to the top of Z axis;
4)TackingoutthespoolsofPLAlamentand
feedingdevices.
Unpacking

www.mankati.com
9
Accessory
Takingoutaccessories,toolboxandlamentandcheckifbelowthingsareincluded:
1)2spoolsofPLAlament,diameter3mm,1kg/spool;
2)1Buildplate.
3)1toolbox:includingthenecessarytoolsforinstallationandotheraccessories.
4)2feedingdevices:constitutedbygearmotorandfeeder,withtheadvantagesof
highaccuracyandeasyoperation.
5)3PCcoverboards:installedon3sides(front,left,right)tokeepthetemperature
ofinsideprintingspaceconstant.

www.mankati.com
10
Tool Box
Check if the following tools are complete. If anything described is missing, please
contact:
1) 1*diagonal pliers: to dismantle the support underneath your printing model or
to prune filament.
2) 4* Spanners: installation tools.
3) 1* Glove pairs: as gift for the user.
4) 1* Lubricant oil: to lubricate XY axis and guide rails regularly.
5) 1* Kapton tape: sticked on the build plate to fix your printing model on it.
6) 1* Scraper: to shovel out the model and clean the build plate.
7) 1* Screwdriver: the installation tool.
8) 1*Art knife: to improve the surface texture of your model printed out.
9) 1* Tweezer: to clean filament extruded out by the nozzle.
10) 2*Filament holders: holding filament spools.
11) 2*Printer handles: installed on your machine for moving it easily.
12) 3* Inner hexagonal spanner ( L-shape wrench): installation tools.
13) 1* Drill: to clean the nozzle.
14) 1* Plastic scraper: to clean the heat bed after printing.
15) 1*SD card to store Gcode file for printing.
16) 2* Screw & Nut bags: as spare parts.
17) 1*Power wire: supplying power.
18) 1*USB cable: connecting the computer and your printer when printing or
upgrading firmware.

www.mankati.com
11
5) Connect the power wire and data cable
ofplatformwiththeconnectors.
Caution: Make sure the connection fully.
Otherwise, it can cause the platform
heating problems or connectors over-
heated.
6)Done.
Setting Up Mankati Fullscale XT Plus
1. Install the Build Plate
1) Turn on your Fullscale XT Plus, enter
“Prepare>Moveaxis>Move1mm>
MoveZ”,lowerZaxisalittle(e.g.,30mm)
to avoid collision of nozzle and build plate
duringinstallation.
3) Take out the nuts ⑥and screwdriver
fromthetoolboxtoxtheplatformrmly.
Note: Do not screw the screws too tight!
Or your build plate glass maybe cracked.
4) After installing the plate, please tighten
the 4 screws under it properly to lower it
and avoid knocking the extruders in the
platelevelingoperation.
2) Insert the build plate’s holder into the
middleofplate.
Note: The wire connection side should be
put toward your machine.
1
2
34

www.mankati.com
12
4) Feeding device
installationdone.
Setting Up Mankati Fullscale XT Plus
3. Feeding Device Installation
1)Feedingmotor:
using the small
spannertoinstallNo.
1 feeding motor on
position1.
3) Connect the data cable
tothefeedingdevices.
2) Insert the end
of feeding tube
into the socket of
feeding motor and
tightenitrmly.

www.mankati.com
13
Setting Up Mankati Fullscale XT Plus
4. Filament Spool Holder Installation
1) Take the two spool
holders out of the tool
box.
2).Installlament
spool’sholder.

www.mankati.com
14
Fullscale XT Plus Outlook
1. SD-card slot
2. Push and rotate knob
3. LCD screen
4. Build plate screws
5. Build plate
6. Print head
7. Filament guide tube
8. Printer holder
9. Power switch button
10. Power Socket
11. Machine label
12. Spool holder
13. Feeder motor
14. USB Socket

LCD INSTRUCTIONS
3In this chapter you can learn about detailed instructions of the
LCD menus.

1 - Prepare
1.1 - Auto Home
1.2 - Disable Steppers
1.3 - Move Axis
1.3.1 - Move 10mm1.3.1.1 - Move X
1.3.1.2 - Move Y
1.3.2 - Move 1mm
1.3.2.1 - Move X
1.3.2.2 - Move Y
1.3.2.3 - Move Z
1.3.2.4 - Extruder
1.3.2.5 - Extruder 2
1.3.3 - Move 0.1mm
1.3.3.1 - Move X
1.3.3.2 - Move Y
1.3.3.3 - Move Z
1.3.3.4 - Extruder
1.3.3.5 - Extruder 2
1.4 - Preheat PLA
1.4.1 - Preheat PLA 1
1.4.2 - Preheat PLA 2
1.4.3 - Preheat ALL
1.4.4 - Preheat PLA Bed
1.5 - PreheatABS
1.5.1 - Preheat ABS 1
1.5.2 - Preheat ABS 2
1.5.3 - Preheat ALL
1.5.4 - Preheat ABS Bed
1.6 - Leveling Bed
1.7 - Cool Down
2 - Control
2.1 - Temperature
2.1.1 - Nozzle
2.1.2 - Nozzle 2
2.1.3 - Bed
2.1.4 - Fan Speed
2.1.5 - Auto Temp
2.2 - Motion
2.3 - Restore Failsafe
2.4 - Save Memory
2.5 - Restore Factory
2.6 - Firmware Version
3 - Cool Down 4 - No SD Card
Info Screen
www.mankati.com
16
LCD Menu Structure

www.mankati.com
17
LCD Menu
Info Screen
1. Actual Temperature of Nozzle 1;
2. Preset Temperature of Nozzle 1;
3. Actual Temperature of Nozzle 2;
4. Preset Temperature of Nozzle 2;
5. Actual Temperature of Build Plate;
6. Preset Temperature of Build Plate;
7. Cooling Fan;
8. Fan Speed Rate;
9. Filament Feed Rate;
10. Printing Process Bar;
11. Printing Time;
12. Build Plate Coordinate;
1
9 10 11 12
2 3 4 5 6 7 8
Press the knob to enter the menu:
1 - Prepare: The printer enters into ready state
1.1 - Auto home
Theprinterreturnstooriginalstate(InX.Ydirection,theextruderreturnstotheleftbottomintop
view; In Z direction, the build plate returns to top position)
1.3 - Move axis:
Move 10mm: Move 10mm each step
Move X: Move 10mm each step in X direction
Move Y: Move 10mm each step in Y direction
Move 1mm: Move 1mm each step
Move X: The extruder will move 10mm each step in X direction
Move Y: The extruder will move 10mm each step in Y direction
Move Z: The build plate will move 10mm each step in Y direction
Extruder: Thefeedingmotorofleftnozzlewillextrudethelamentineachstepof1mm
Extruder2: Thefeedingmotorofrightnozzlewillextrudethelamentineachstepof1mm
Move 0.1mm: Move 0.1mm each step
Move X: Theextruderwillmove0.1mmeachstepinXdirection
Move Y: Theextruderwillmove0.1mmeachstepinYdirection
Move Z: Thebuildplatewillmove0.1mmeachstepinYdirection
Extruder: Thefeedingmotorofleftnozzlewillextrudethelamentineachstepof0.1mm
Extruder2: Thefeedingmotorofrightnozzlewillextrudethelamentineachstepof0.1mm
1.4 - Preheat PLA:
Preheat PLA1: PreheatextruderandbuildplatetotheworkingtemperatureofPLArequired(
Default:Extruder,210℃,
Build plate, 45℃)
Preheat PLA2: Preheat extruder 2 and Build plate to the working temperature of PLA
required(Default:Extruder,210℃; Build plate, 45℃)
Preheat PLA All: Preheat two extruders both and build plate to the working temperature of
PLArequired(Default:Extruder,210℃; Build plate, 45℃)
Preheat PLA Bed: PreheatbuildplatetotheworkingtemperatureofPLArequired(Default:
Build plate, 45℃)
1.5 - Preheat ABS:
Preheat ABS1: PreheatextruderandbuildplatetotheworkingtemperatureofABSrequired(
Default:Extruder,235℃; build plate, 70℃)
Preheat ABS2: Preheat extruder 2 and build plate to the working temperature of ABS
required(Default:Extruder,235℃; Build plate, 70℃)
Preheat ABS All: Preheat two extruders both and build plate to the working temperature of

www.mankati.com
18
ABSrequired(Default:Extruder,230℃; Build plate, 70℃)
Preheat ABS Bed: PreheatbuildplatetotheworkingtemperatureofABSrequired(
Default:Buildplate,70℃).
1.6 - Leveling Bed: Buildplatecalibrationassist-function.Rotatethebutton,theextruderwill
movetonextpositioninclockwisedirectionfromtopview.
1.7 - Cool down: Cooldowntheextruderandbuildplatetonormaltemperature.
2 - Control: Adjust printer settings
2.1 - Temperature:
Nozzle: Left temperature setup
Nozzle 2: Right temperature setup
Bed: Build plate temperature setup
Fan speed: Cooling fan speed setup
Auto Temp: All the above data setup automatically
2.2 - Motion: PleasedoNOTchangeanydatainthismenuifwithoutspecialistexperience.
Accel:Acceleratedspeedofextrudermotion
Vmax x: Max speed in X direction
Vmax y: Max speed in Y direction
Vmax z: Max speed in Z direction
Vmax e: Max speed of feeding motor
Vmin: Min printing speed
VTrav min: Min travel speed
Amax x: Max accelerated speed in X direction
Amax y: Max accelerated speed in Y direction
Amax z: Max accelerated speed in Z direction
Amax e: Max accelerated speed of feeding motor
A-retract: Accelerated speed of retract
Xsteps/mm: Transmission ratio of X motor
Ysteps/mm: Transmission ratio of Y motor
Zsteps/mm: Transmission ratio of Z motor
Esteps/mm: Transmission ratio of feeding motor
2.3 - Restore Failsafe: PleasedoNOTchangeanydatasettinghereinthismenu.
2.4 - Save memory: Record the coordinate of printing stop
2.5 - Restore factory: Restore the manufacturer default settings
2.6 - Firmware version:Currentrmwareversion
LCD Menu
Menus in Printing Process
During the printing, you can press the knob to change some printing settings.
1. Tune: Re-set some parameters
- F/R: the actual printing speed takes the percentage of the pre-set speed in the software. It can be
adjusted while printing according to the actual situation.
- Nozzle: Temperature setup of left nozzle
- Nozzle 2: Temperature setup of right nozzle
- Bed: Temperature setup of build plate
- Fan speed: Fan speed setup
- Flow: Filament feeding flow rate
- Flow 0: Filament feeding flow rate of left nozzle
- Flow 1: Filament feeding flow rate of right nozzle
- Auto Temp: Set all the above temperature automatically
- Change filament: To stop the printing and change the filament. It will record the printing stop position
so as to continue to print after filament changing.
2. Control: Please do NOT change any data in this menu if without specialist experience.
3. Pause: To stop the printing, but it will record the printing stop position to continue the printing.
4. Stop Print: To finish the printing job
Table of contents
Other Mankati 3D Printer manuals
