ENGLISH
CONTENTS
LIST
page
FOREWORD
ics
secsac
csnscces
sadecscectctcelendccuteusccadesnesevensGocescascepconesckcudsocdubdes
uence
eceuiy
actdcoaddesdsvateassseuwGie\adonsueddesgneasdeteveneesatoessbnes
4
WARNINGS
5.coiescoveccsavcenstetteteied
chereeses
ce
eceddeccvusegu
yiesecisseee
sucaee
wastecesteducesis
devavecesucteecupcwecseeveledsausatevacedssedudeteuenaeesecvssesécaaseers
4
EQUIPMENT
MAINS
WORKING
SETTING
..u......ccccccsccccssecscessseesseerenasesaeesenaeeeaeseenenmeaaensssuseescsuaueanssaeuessoeansoeenseeseseeesens
4
COPVRIGHT
iis
cecidcclacoecc
das
sachs
voids
fegeve
cen
sesovassctsa5ep
ccoecvaceccenad
ledesctewoulactveusaneseghesaecadecivausdavacinedivongertbeevie
neveweatssatsinnesdasaves
4
ABOUT
THIS
USER’S
GUIDE
oui...
ceccccccccssscseesssesccessssesnscnanecessecensensensacnscasssaeeesseeesessseensonesarsenansaeseeseneansasaeaneuenenees
4
PRECAUTIONS
oa
essifcieseviaicvesseicecvjncecoccccecccestvososccsccsssdsssspéseevepassenascccvvsendusccdvearsscuceanvasesereatedsscedeoeradvesVassegerseaaderdarsensatedonneevens
4
GENERAL
PRECAUTIONS
..........ccccccccccccscesssscsssscessceceseceseesenessessensesenaaecaaanenecesecsuseasuseauenavesuusnnescnessaneceepaesesdeasecasnseneens
4
COMPACT:
DISCS
sec
isesescciccvssvedecvencicscrdisceecasessastaesecezessvigootdpa
code
sedellvcceawendvenedeccueccacecosedcasucducdsuens¥esesusscagaae
covgeeduapsnesdegetannens
4
CONTROLS,
CONNECTIONS
AND
INDICATORS
............:::.:ccssccssssesecessneeeeeeesseesecueceuuavaasensusscuecseasensassaeneetanssseaepnouseaasanes
5
WORMIAL
PLAYBACK
cei
corcccesccestclea
to2
alte
Seine
acieaaiss
ans
wees
wast
ctace
de
averteatens
ehrnroearlal
atenatsaboeie
bree
usidetes
6
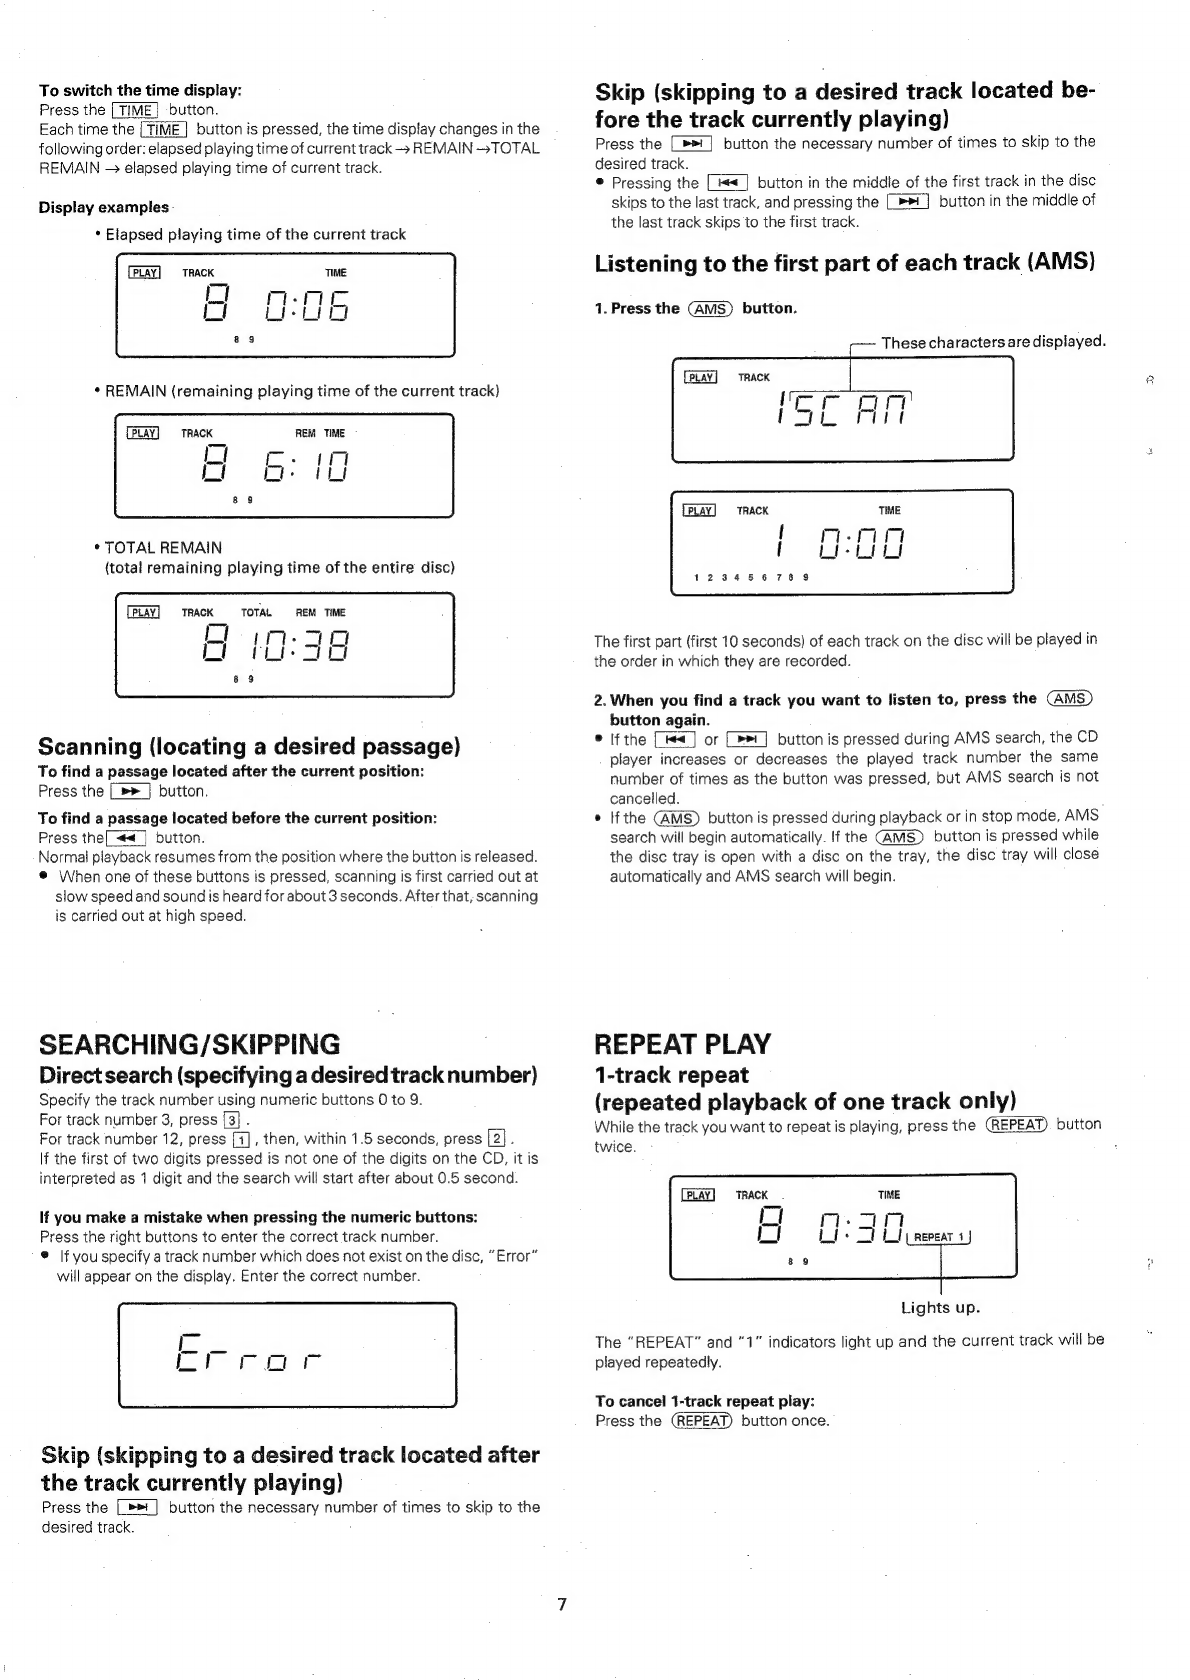
Scanning
(locating
a
desired
PAaSSaGe)
........ccsssesssessessseesesseseseeseesecceessstectesenecaecssssearscanasacenavareceueronesenscenensaantaey
7
SEARCHING
/SKIPPING
.............c.cccccccccccsssssccccsescsscensecssesscesessecsensasensaaesnaseeesannesaseessessscneasnseusnnueneusvacesseraneseneseeeeeneneeueneeses
7
Direct
search
(specifying
a
desired
track
MUMbEL)
..........ccccseeseeessenesssesecsssseescesensesteceeteeesaeeseeenssauseanoaeaseaesnacnensages
7
Skip
(skipping
to
a
desired
track
located
after
the
track
currently
playing)
.........-..:--:sssesssesereerneseserentneneetnns
7
Skip
(skipping
to
a
desired
track
located
before
the
track
currently
playing)
...........-.sesseseeseseeesensenesenesnerseneeenes
7
Listening
to
the
first
part
of
each
track
(AMS)
........ccesseessseessesseeseseeseeeensneeseneassneneeseusecneysansesasnaansneeconeaeeanessanenss
7
REPEAT.
PLAY.
icisiceciccivcdseccdsccdinscctsccecssssdcccecedeccibavosanebadecncaccuvecceeeecaecessvehwesacssectircceueciceedenscesddncsinssensssupeeseentschtarersdecagacagseete
7
1-track
repeat
(repeated
playback
of
one
track
Only)
..........cccccssscseneeeeteteetseeteeneetnesnenesensesernsacesenseesssegeenenennaasgges
7
All-track
repeat
(repeated
playback
of
all
tracks
on
the
CISC)
..........:scccssecreeeeneeeenerereteeseeeeistsneenseseensersesaaensntsnnen
8
A-B
repeat
(repeated
playback
of
a
specified
passage)
..........csseseseseeseseersseersesnsensnrenesesnsseannnensecsenensnnsaenanennetines
8
RANDOM
PLAY
........ccccccscccsccssecseucesesceseccesnesessesnsressennsenesneesaaeeeneeeeeasseesnenausaususeuenseeesgeenesaeessenesseesnasensuevaeenmanennesaeaaneneenegnagens
8
Delete
random
playback
..........::.ccccccssecsccsssesessscesserssssseseasseseuneeeeesseseesrsseseassennesesesesseasessaserseanecsensuseuaeuanapanenaneseeegenens
8
PROGRAM
PLAY
......cccccscsscsssssecscccccereccsrecesscessesnseescesesssessscnsasessacneaseceessasenseesecaesseaasausesuasesensetansenacerssssesenesananstevseonmenssenssaaee®
8
To
play
the
desired
tracks
in
a
certain
order
(programming)
.........ssscsecereeseeereeeetenetssanenennereensnsensneenansenecenrerenetenes
8
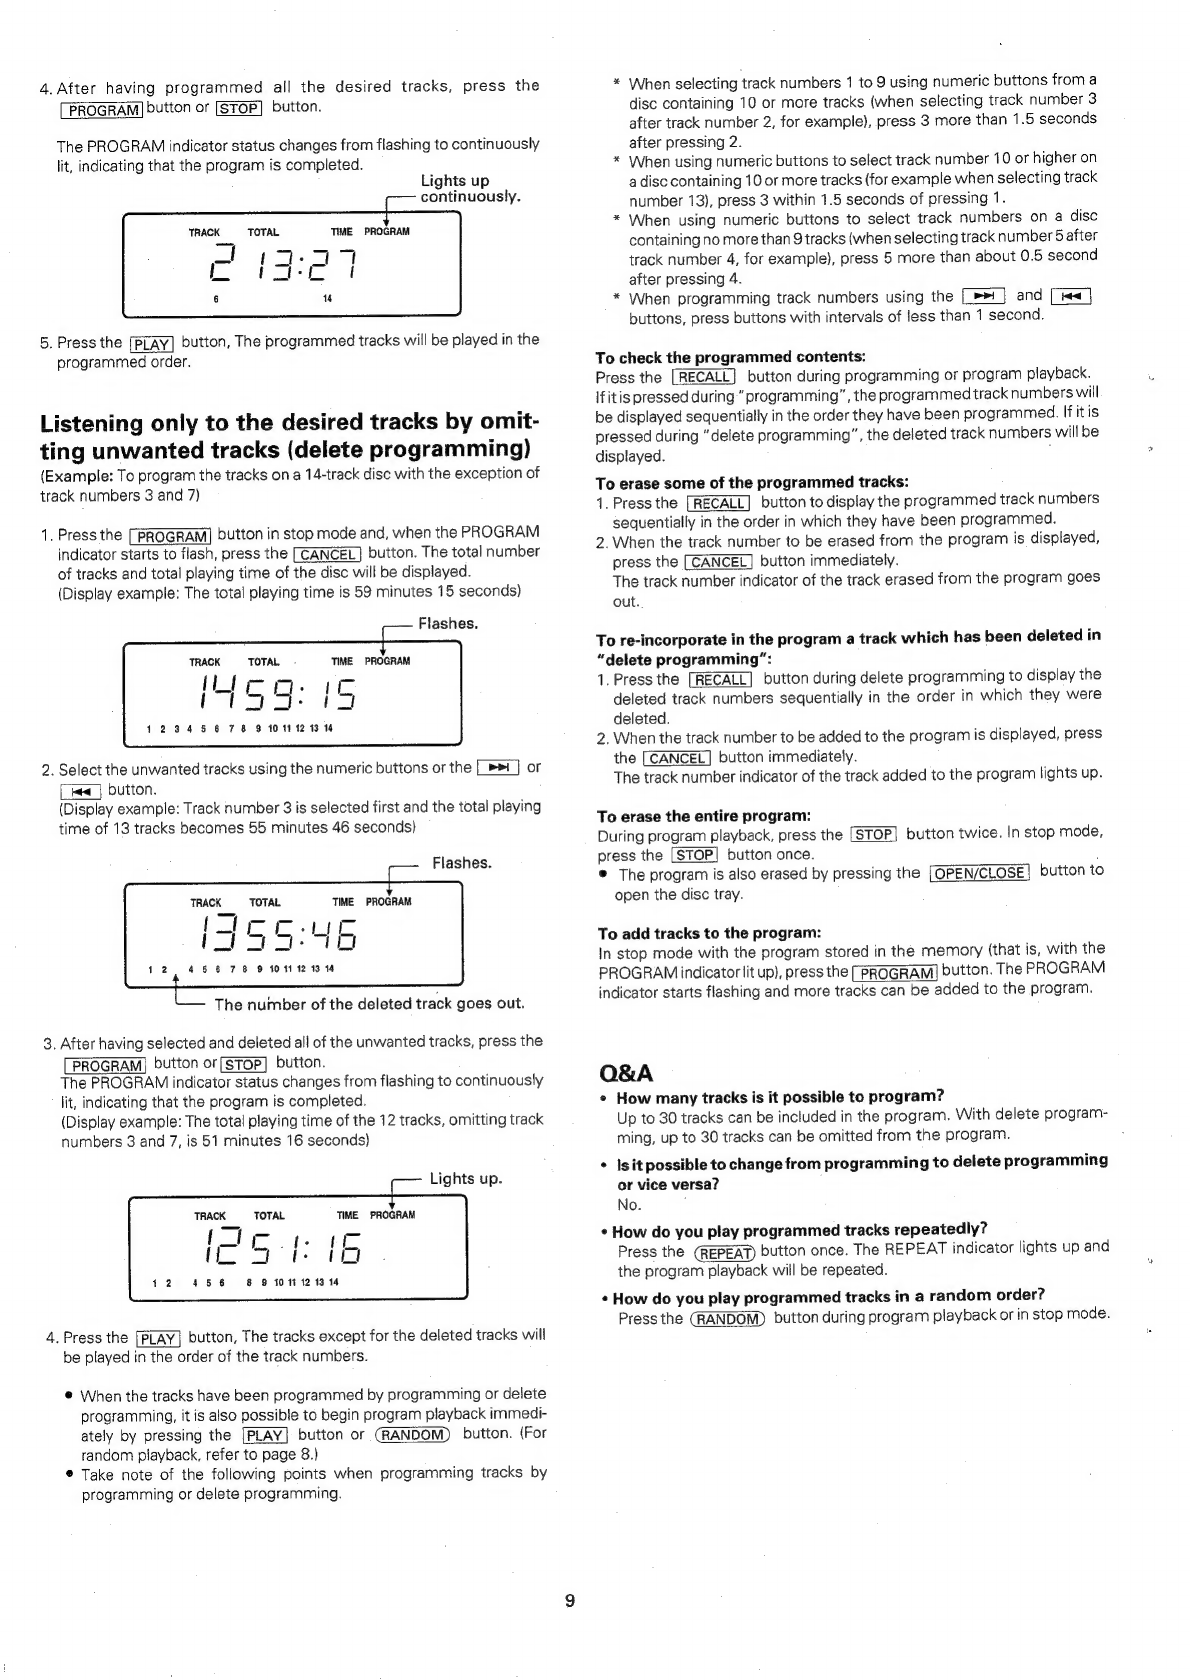
Listening
only
to
the
desired
tracks
by
omitting
unwanted
tracks
(delete
programming)
.............:seeeeeree
9
OBA
es
esececcicearisceeticsaecee
ack
fat bls
ieécaisvas
tec
Gususiieve
thea
ticnsalndecsnsatijeasaaincdudt
dadeeseduncdeds
setecedisduaved
suesuirsudvenaddecsesesacnstuapenpadeasetaerniae
9
EDITING.
,........ccccscsssssccsescecsseccccsssensevsceccsrasnsecesoscnseeseacesssessesesnesneasseessenesseceussnearnransssoscesucnessarenscenscsensasneseceesnenenecnaaueneeeeneans
10
Auto
peak
level
Search
..........cccccssssscssseeseessseseesrseesnseesenensenesaesessesseeneeseneaseneenensenssceucssssnanensesansnseeseansanananeeeanenenenensy
10
Simple
@dit
.........cceeeeseeceseeeeeseeecenesssesneansesaecaeseeeenesennenesseseenssesessenecensesseesneceesonsaesaneacesersseetussaenensnsaesasnseaansqanaeaeenseeneaeas
10
Program
Cit
........ceeceeseesssesesssesssssscsesenseeansneenarsscssenessescausresssesseaeeaesenseossoasesaacenaeraccsscasstseunnenusesneseusenasuansnecseganacanees
seen
10
Delete
program
Cit
20.0...
eeceseecessssssessnsessesenececeseseeesseenessesaeensassncanenaaesnenstessansediseeusuoascensaaavesuecsenensgeenencantaeranensnenat
10
REMOTE
CONTROL
UNIT
RC-63CD
.........ccccccscecssesssscceecescsesneeseeeeseeasisseseseeneacsanseeseevanesenseeeesteserneseneessscsaeeeneeseperatenseneeges
11
USING
THE
REMOTE
CONTROL
UNIT
|........cccscccsccsssessecssseeesnevscarsscnesaessnaucsnsecseeesessenvesevagensaesssanensaoaeenssenanneeneeeeenes
12
USING
THE
OPTICAL
OUTPUT
JACK
ON
THE
CD-63
REAR
PANEL
...............cccccssssseeseneeeeeeneesnesseaseaseaaaenacananeorenmansaans
12
TROUBLESHOOTING
.....ccccccccccsssesececsrssseeusssecsssessesessecssesccessccuecsacsneeseatsesacecsnessasenseuavacenssaeeeaaesaeeessenseaeecssaugensresnequanensenens
12
OPERATING
PRECAUTIONS
.0........cccccesscsccccccesssecsreccnecnsseeeseesaeseesensanescnaaceesnascaueneavsneeesesessessagensenesnanauaneeespansansengensene
13
CLEANING
OF
EXTERIOR
SURFACES.
...........ccscccstessseesseessesesenenecneneesenaucnueseseseaeeessseaseseuessaseauaesssessensraaeagusnvagegeeneniees
13
REPAIRS
siccscviscercasecesscovaccssncesdcsccobesueiciastseceupevabecacediveveuadassasnarseencnstecoseaansqesebecsersdsnepianaceeave
chsoesqcatansecacsysuasesvaaqoagaqcssesenss
13