Marathon MBWC24 Assembly instructions

MBWC24 |MWD24-D |MBWC24-2D
Wine & Beverage Coolers
Premium Built-In
Owners use and care guide
V. 02

Congratulations
Important Safety Information
Parts Description
4!4!4!
4!4!4!
Congratulations on the purchase of your new Marathon Appliance!
To activate your Warranty, please register your appliance at www.stirlingmarathon.com or by completing
and mailing the enclosed Warranty Registration Card. We are condent you will have years of hassle free
enjoyment and ask that you please retain the Use & Care Guide for future reference and your safety.
WARNING
SUFFOCATION HAZARD AND RISK OF CHILD ENTRAPMENT
Before installing please read your Use & Care guide carefully and pay special attention to the Safety and Warning
Information outlined in the following pages.
To avoid the possibility of child entrapment, please take the following precautions before throwing out the refrigerator
Remove all doors from the unit.
Leave the shelves in place so that children may not easily climb inside
Never allow children to operate, play with, or crawl inside the refrigerator.
Before connecting the refrigerator to an electrical power supply, let it stand upright for approximately 4
hours to let the refrigerant settle in the compressor. This will reduce the possibility of malfunctions in the
cooling system due to transportation. Please wipe and clean the interior of the refrigerator thoroughly with a
damp, non-abrasive cloth.
MBWC24 MBWC24 MBWC24-D
1. Removable shelves
2. Stainless steel handle
3. Ventilation grill
4. Removable tempered glass insert
MBWC24-D
1. Pull-out shelves
2. Stainless steel handle
3. Ventilation grill
4!4!4!
4!4!4!

MBWC24 | MWD24-D | MBWC24-2D
MBWC24-2D MBWC24-2D
1. Adjustable glass shelves
2. Stainless steel handles
3. Ventilation grill
4. Adjustable wooden shelves
Before using your new Wine and/or Beverage Cooler, we recommend leaving Cooler door open and un-
plugged for 24 hours prior to installation or use. This will allow time to clear any residual odors from the
interior liner and hardwood shelves.
Your Premium Marathon Wine and/or Beverage cooler is engineered for built-in or freestanding installation.
The front bottom vent is the ventilation grill and must not be covered.
Choosing the right location for your Marathon Wine and/or Beverage Cooler is important. We highly recom-
mend the following location criteria:
• Unencumbered and well ventilated
• Dry area, not too damp or humid – ideally at maximum 65% relative humidity for peak performance and
reduced sweating on the interior door when opening. Preferably not in a laundry room, pantry, garage
or bathroom.
• Flat, level oor
• Approved electrical outlet (preferably with surge protector) within 3 feet of the Wine and/or beverage cooler.
• Minimum 1 meter from any microwave oven. Certain microwave ovens do not have a wave interference
shield. When placed too close to the wine or beverage cooler, the performance may be aected.
CAUTION
Your Marathon wine and/or Beverage Cooler is equipped with a three prong power cord which has a ground
wire. The plug should never be altered or used with an extension cord or power bar. Improper use of the
grounding plug can result in the risk of electric shock. Consult a qualied electrician or service person if the
grounding instructions are not completely understood. If the supply cord is damaged, it must be replaced by
a qualied person in order to avoid electrical hazard.
Installation
4!4!4!
4!4!4!

Marathon Wine and/or Beverage Coolers are NOT CERTIFIED for outdoor use. Outdoor use will
void your warranty and possibly cause a safety hazard and result in re or personal injury.
Your Marathon Wine and/or Beverage Cooler Wine cellar should be placed where the ambient temperature is
regulated (ideally ambient humidity of 65% +/- 5%). If the temperature is above or below this range, it may
aect the performance of the Wine and/or beverage cooler. Placing in cold, hot or humid temperature conditions
may cause temperature uctuations and increased running operation costs.
Installing your Marathon Wine and/or Beverage Cooler
Unpack and remove all of the protection and adhesive strips from the packaging around and inside the wine
and/or beverage cooler.
The appliance must be positioned such that the plug and power outlet is accessible. Release the power cord.
Move your appliance to its nal location. The appliance should be installed in a suitable place where the
compressor will not be subject to physical contact.
1. Please follow the installation diagram when installing built-in wine cellars. No less than the minimum
installation dimension, or it will aect the venting of cellar.
2. Built-in wine cellars draw air from right of ventilation frame and expel through left of ventilation frame
under the front door.
3. “Built in” wine cellars have a power switch located on the control panel so power point location is not critical.
4. The wine cellar requires a standard 120 volt/15 amp dedicated power supply.
5. The power cord is approx. 6 ft./2M in length and is xed on the right side at the back when looking from
front of cabinet.
6. As with most appliances of today, your Marathon appliance has sensitive electronic components which
are susceptible to damage through lightning and electricity supply surges. It is therefore advised to use a
surge protected power outlet to avoid power interruptions or damage to the appliance.
In “Extreme and Hot locations”, an air vent or grid, with a minimum ventilation size of 200mm x 40mm
MUST be cut out at the rear top of the back partitioning or at the top of either side of the partitioning, allow-
ing cool fresh air full access to ow into the 30mm gap located at the rear of the cabinet.
This air vent or grid must not be opened on the same side as other appliances such as ovens or an area that is
sealed and without access to fresh cool air. Failing to comply with the above specications could result in
WARRANTY void.

MBWC24 | MWD24-D | MBWC24-2D
Minimum Installation Requirements for Model MBWC24-2D
Minimum Installation Requirements for Model MBWC24-2 and MBWC24-2
Your Marathon Wine and/or beverage cooler is equipped with 4 adjustable feet to facilitate easy leveling.
We recommends that you tighten the back feet rst and adjust then adjust the front feet to level the wine
cooler.
24.4” | 62cm
24.2” | 61.5c
m
34.6” - 35.2” | 88 - 89.5cm
43” | 109.2cm
22.1” | 56.2cm
20.9” | 53cm
23.5” | 59.6cm
34.65” | 87.6cm
1
1
5
0
23.6” | 60cm
23.8” | 60.5cm
34.3” - 35” | 87cm - 89cm
3.3” | 8.5cm
23.23” | 59cm
23.82” | 60.5cm
32.7” - 35.24” | 83 - 89.5cm
44.5” | 113cm
22.44” | 57cm
22.1” | 56cm
23.82” | 60.5cm
34.65” | 88cm
1
1
5
0
21.7” | 55cm
22.2” | 56.4cm
17.72” | 45cm

Installing the Stainless Steel Handle(s) and Ventilation Grill (MBWC24-2D)
To protect your wine and/or beverage cooler while in transit, we have carefully packed the heavy duty stain-
less steel handles inside the wine cooler for you to assemble. Please see the simple directions below, for any
questions or concerns, please contact us.
French Door Model MBWC24-2D
Please note that for model MBWC24-2D, the legs are adjustable to 2 inches to assist with varied counter
heights. A minimum of 34.5” height is required for the front ventilation plate to be properly secured once
installed. The stainless front ventilation grill is packaged separately in the wine cooler. Once the wine and
beverage cooler is leveled and place into the location, the front ventilation grill is easily installed and se-
cured by the 4 stainless screws included.
MBWC24-2D is designed for standard counter high installations which requires adjusting the legs to 34.5”
in order to t the standard 5.25” ventilation grill. If you have a custom installation between 32.5”-34.5”, a
smaller 3.25” ventilation grill is available by contacting [email protected]
Model: MBWC24-2D
1. Remove the two handles packed inside the wine and beverage cooler and remove the 4pcs 4x35 screws
from accessory bag
2. Pull open the gasket (door seal) from the side of door and insert screws into the 2 handle holes as shown
below. Tighten with a Philips screwdriver until rmly attached. IMPORTANT-DO NOT OVER TIGHTEN
Handle Assembly and Ventilation Grill

MBWC24 | MWD24-D | MBWC24-2D
Models: MBWC24 / MWC24-D
1. Remove the handle packed inside the wine and/or beverage cooler and remove the 2pcs 4x35 screws from
accessory bag
2. Pull open the gasket (door seal) from the side of door and insert screws into the 2 handle holes as shown
below. Tighten with a Philips screwdriver until rmly attached. IMPORTANT-DO NOT OVER TIGHTEN
Once positioned, plug the wine & beverage cooler into the power outlet and turn “ON” by pressing the
“Power Button” for 3 seconds.
When you use your Marathon wine and beverage cooler for the rst time (or restart the appliance after hav-
ing it shut o for a long time), there will be a few degrees variance between the temperature you have se-
lected and the one indicated on the LED readout. This is normal and will adjust to the desired temperature
once the compressor and cooling system has been running for several hours.
Important: If the unit is unplugged, power is lost, or turned o, wait 3 to 5 minutes before restarting the
unit. The compressor will not re-start immediately and requires this time to automatically re-start.
Frost Free Fan Cooled Operation
Your Marathon is engineered with a high eciency compressor cooling system that uses a fan to cool and
regulate your desired temperature setting and is Frost Free. This means you never have to worry about
defrosting your wine and beverage cooler and it will provide years of hassle free enjoyment. Like all Frost
Free, compressor appliances, you will hear the fan operating and the compressor cycling on and o while it
also defrosts itself. The following sounds will most likely occur during normal operation:
• Gurgling sound - caused by the refrigerant owing through the appliance’s coils.
• Cracking/popping sounds - resulting from the contraction and expansion of the refrigerant gas to produce cold.
• Fan operating sound - to circulate the air within the wine cellar.
3s
Use and Care

Loading your Wine & Beverage Cooler
Depending on the bottle size, you can load your wine bottles in single or double rows provided the bottles
are evenly distributed throughout the wine and/or beverage cooler with small gaps between bottles to ensure
peak chilling and energy eciency.
Model MBWC24 (Single Zone Wine and Beverage Cooler)
For your convenience, the MBWC24 is convertible from a single zone wine cooler to a full or combina-
tion beverage cooler with the tempered glass shelf inserts. For ease of refrigerating cans, the tempered
glass shelves should be used so that the cans t at on the shelf to maximize the capacity. For chilling wine
bottles, simply remove the tempered glass shelf inserts and place the bottles on the beechwood shelves for
optimum chilling. The shelves also pull out and adjustable.
Model MWC24-D (Dual Zone Wine Cooler)
• Do not remove adjustable wooden shelves to accommodate larger type of bottles or increase the capacity
of the cellar by stacking the bottles up when necessary. (See removing shelves)
ATTENTION
• Do not overload your wine cellar as this will aect air circulation.
• Do not stack more than 1.5 rows of standard 750ML bottles per shelves to facilitate air circulation
• Avoid obstructing the fan cooled system located inside the wine and beverage cooler at the back panel.
• Do not slide the shelves outwards beyond the xed position to prevent the bottles from falling
• Do not pull out more than one loaded shelf at a time as this may cause the wine cellar to tilt forward.
• Do not cover the wooden shelves with aluminum foil or other materials, as it will obstruct air circulation.
• Do not move your wine and beverage cooler when it is loaded with cans or bottles
Important: The LED temperature displays the actual internal air temperature of your Marathon Wine and/or
Beverage cooler.
The temperature settings are preset at the factory and in the event of a power interruption, all previous tem-
perature settings are automatically erased and it will revert back to the factory preset temperature settings.
Once you program your desired temperature setting, it is strongly recommended not to adjust frequently.
The thermostat is accurate and will maintain the temperature inside the wine cellar +/- 2.5º C. Please note
that the depending on the thickness of the wine bottle, and loading, the actual temperature of the wine may
dier from the wine and beverage cooler setting by +/- 1ºC.
4!4!4!
4!4!4!
LED Temperature Control

MBWC24 | MWD24-D | MBWC24-2D
MBWC24-2D French Door Wine & Beverage Cooler
Temperature Control Panel
1. Temperature Display
Displays the current temperature.
2. Temperature Adjustment / °C or °F Temperature Conversion
Press once and each time afterwards the inside temperature will reduce by 1°C. To set, simply stop when
you have reached your desired temperature setting. The temperature display will then revert back to the
current temperature and start cooling to your desired temperature. If pressed several times, the temperature
setting will reach its lowest setting (5°C - wine cooler, 2°C - Beverage cooler), then start again at the maxi-
mum temperature setting (20°C - wine cooler, 10°C - Beverage cooler). To change the temperature display
to Celsius or Fahrenheit simply press and hold the button for 3 seconds.
3. Interior light & Power “ON/OFF”
Press the Interior light button to turn ON or OFF the interior LED light.
Press and hold the button for 3 seconds to turn the power ON or OFF
MBWC24 Single Zone Wine and Beverage Cooler Temperature Control Panel
1. Energy Saving Mode
Press and hold the button 3 seconds to enter (digital countdown will start on display screen (m) starting…3,
2, 1, then automatically adjusts the temperature setting to a preset temperature. To exit the energy saving
mode simply press the Temp +/- button (oor p ) to exit and set your desired temperature.
3s
1 2 3
3s
ECO
3s 3s
C
F
+
-
1 2 3456 78
ECO
3s

2. ON/OFF the power button
Press the button 3 seconds to power o (n digital countdown displays 3, 2, 1, Remark: The other functions
will turn o except light switch when the power turns o. Press again (without delay), the power turns on.
3. Interior light
Press the Interior light button to turn ON or OFF the interior LED light
4. Temperature Display
Displays your desired or energy saving temperature setting.
5. Temperature Display
Displays the current temperature.
6. Temperature Adjustment Up
Press once and each time afterwards the inside temperature will increase by 1°C (as displayed in window m).
To set, simply stop when you have reached your desired temperature setting. If pressed several times, the
temperature setting will reach its highest setting (10°C).
7. Temperature Adjustment Down
Press once and each time afterwards the inside temperature will decrease by 1°C (as displayed in window m). To
set, simply stop when you have reached your desired temperature setting. If pressed several times, the tem-
perature setting will reach its highest setting (2°C).
8. °C/°F Temperature Conversion
To change the temperature between °C/°F, press and hold the Temperature Adjustment (button 2) for 3 seconds.
MBWC24-D Dual Zone Wine Cooler Temperature Control Panel
1. ON/OFF
Press the button 3 seconds to power o (n digital countdown displays 3, 2, 1, Remark: The other functions
will turn o except light switch when the power turns o. Press again (without delay), the power turns on.
3s
+
-
C
F
3s 3s
1 2 3 4 5 6 7 8
oC/oF
3s

MBWC24 | MWD24-D | MBWC24-2D
2. Upper Zone - Temperature Adjustment Up
Press once and each time afterwards the inside temperature will increase by 1°C (as displayed in window
m). To set, simply stop when you have reached your desired temperature setting. If pressed several times,
the temperature setting will reach its highest setting (20°C).
3. Upper Zone - Temperature Adjustment Down
Press once and each time afterwards the inside temperature will decrease by 1°C (as displayed in window
m). To set, simply stop when you have reached your desired temperature setting. If pressed several times,
the temperature setting will reach its highest setting (12°C).
4. Temperature Display
Displays your desired and actual temperature in the UPPER Zone.
5. Temperature Display
Displays your desired and actual temperature in the Lower Zone.
6. Lower Zone - Temperature Adjustment Up
Press once and each time afterwards the inside temperature will increase by 1°C (as displayed in window n.
To set, simply stop when you have reached your desired temperature setting. If pressed several times, the
temperature setting will reach its highest setting (12°C).
7. Lower Zone - Temperature Adjustment Down
Press once and each time afterwards the inside temperature will decrease by 1°C (as displayed in window
n. To set, simply stop when you have reached your desired temperature setting. If pressed several times,
the temperature setting will reach its highest setting (5°C).
8. Interior Light and °C/°F Temperature Conversion
Press the Interior light button to turn ON or OFF the interior LED light
To change the temperature display to Celsius or Fahrenheit simply press and hold the button for 3 seconds.
The chart below is a guide to recommended temperatures for wines. This is a guide only as personal
preferences vary…enjoy!
Champagne NV Sparkling Spumante 6ºC 43ºF
Dry White Semillon Sauvignon Blanc 8ºC 43ºF
Champagne Vintage 10ºC 50ºF
Dry White Chardonnay 10ºC 50ºF
Dry White Gewürztraminer Riesling Pinot Grigio 10ºC 50ºF
Sweet White Sauternes Barsac Montbazillac Ice Wine Late Harvest 10ºC 50ºF
Beaujolais 13ºC 55ºF
C/F3s
Recommended Wine Serving Temperature Chart

Sweet White Vintage: Sauternes 14ºC 57ºF
White Vintage Chardonnay 14ºC 57ºF
Red Pinot Noir 16ºC 61ºF
Red Grenache Syrah 16ºC 61ºF
Red Vintage Pinot Noir 18ºC 64ºF
Cabernet & Merlot: French Australian New Zealand 20ºC 68ºF
Chilean, Italian Spanish Californian Argentinean
Vintage Bordeaux Room temperature not exceeding 20ºC 68ºF
IMPORTANT INFORMATION ABOUT STORING YOUR WINE
Your Marathon wine and/or beverage cooler has been “engineered to perform” and provide the perfect conditions
for storing and/or serving your wine.
Fine wines require long and gentle development and need specic conditions in which to reach their full
potential.
Ideally, for long term storage, we suggest keeping your wine cooler at a constant temperature between 12ºC
and 14ºC.
Please note that not all wines will improve over the years, and some must be consumed within the rst few years
of bottling, while other ne wines are capable of ageing over 50 years. For questions regarding the maturity of
your wines, we suggest you consult your local wine retailer for information on the wine of your choice.
For convenience and performance, your Marathon wine and/or beverage cooler is designed with an “Auto De-
frost” fan forced air cooling system. There is no need to ever defrost your wine /beverage cooler.
One of the benets of the Marathon Auto Defrost system is that during “O-cycle” of the cooling system, the
refrigerated surface of the wine and/or beverage cooler defrost automatically and out of sight. The Defrost
water is collected and drains automatically into a container located at the back of the wine cellar next to the
compressor. The heat from the compressor then evaporates the defrost water and circulates humidity back into the
wine cooler to create the perfect humidity level required by the natural corks to maintain a long lasting seal.
All wine and/or beverage coolers are equipped with a double glazed glass door that has a third internal
acrylic layer to minimize condensation on the glass door. However, depending on the room temperature and
humidity vs. the wine cooler - when the door is opened, and closed, condensation or fogging on the glass
may appear, but once the temperature is stabilizes again in the wine and/or beverage cooler, the condensa-
tion/fogging on the glass will gradually disappear. This is normal.
Auto Defrost Cooling System

MBWC24 | MWD24-D | MBWC24-2D
MBWC24 and MBWC24-2D
For easy access to the storage content, you must pull the shelves approximately 1/3 of its depth out of the
rail compartment. The shelves designed with a notch on each side of the shelf tracks to prevent bottles from
falling.
When removing any of these shelves out of the rail compartment, tilt the shelf as per the diagram and simply
pull out, or push in the shelf until it sits on the support brackets securely. Then simply press the shelf limit
pin “A” on both sides and then lift slightly and pull gently to remove .
1. ”A” is shelf limit pin
MWC24-D: To remove pull out the shelf to support bracket j, press two sides of sliding roller buckles and
pull out the shelf following the arrow mark k. To reinstall push in the shelf alignment with two sides of
sliding roller following the arrow mark l.
A
AA
Adjusting the Removable Wooden Shelves

Due to the one piece seamless stainless steel door design, your Marathon wine and/or beverage cooler is fac-
tory set for Right hand Hinge only and is not reversible. Please contact www.stirlingmarathon.com for door
exchange options if a LH door is required.
In the event of a power interruption, all previous temperature settings are automatically saved and will revert
to a preset temperature setting.
Most power failures are corrected within a short period of time. An hour or two’s loss of power will not
aect wine cooler’s temperatures. To keep the temperature maintained during a short power outage, avoid
opening the door. For longer periods of power failure, please take alternative steps to protect your wine.
Problem Possible cause
Wine cellar does not
operate.
Not plugged in.
The appliance is turned o.
The circuit breaker tripped or the fuse is broken.
Wine cellar is not
cold enough.
Check the temperature control setting.
External environment may require a higher setting.
The door is opened too often.
The door is not closed completely.
The door gasket does not seal properly.
Turns on and o frequently.
The room temperature is hotter than normal.
A large amount of contents has been added to the Wine Cooler.
The door is opened too often.
The door is not closed completely.
The temperature control is not set correctly.
The door gasket does not seal properly.
Reversing the Door Swing
Important
Troubleshooting

MBWC24 | MWD24-D | MBWC24-2D
The light does not work.
Not plugged in.
The circuit breaker tripped or a blown fuse.
The bulb is defective and requires changing.
The light button is “OFF”.
Vibrations Check to assure that the Wine Cooler is level.
The Wine cellar seems to
make too much noise.
The rattling noise may come from the ow of the refrigerant,
which is normal.
As each cycle ends, you may hear gurgling sounds caused by
the ow of refrigerant in your Wine Cooler.
Contraction and expansion of the inside walls may cause
popping and crackling noises.
The Wine Cooler is not level.
The door will not
close properly.
The Wine Cooler is not level.
The gasket is faulty. ( magnet or rubber is spoiled)
The shelves are out of position.
For any Questions or concerns, please contact us at [email protected] or visit us at
www.stirlingmarathon.com

When operated and maintained according to the instructions in the Use & Care Guide, Marathon, a registered trademark of Stirling Marathon Limited, agrees to repair or replace
this product for 2 years from the date of original purchase and/or agrees to pay for parts and service/labor required to correct defects in materials or workmanship. Any and all
Service must be approved and provided by an Authorized Stirling Marathon Service provider. YOUR EXCLUSIVE REMEDY UNDER THIS LIMITED WARRANTY
SHALL BE PRODUCT REPAIR OR REPLACEMENT AT THE SOLE DISCRETION OF STIRLING MARATHON LIMITED AS PROVIDED HEREIN. This
limited warranty is valid only in Canada and the Continental United States with proof of original purchase and conrmed warranty registration.
TERMS OF WARRANTY BY PRODUCT
Capacity/Type Warranty Type
Refrigerators, Freezers & Wine Coolers Less than 6 cu.ft. Carry-In
Refrigerators & Freezers Greater than 6 cu.ft. In-Home
Electric & Gas Ranges All Sizes In-Home
Premium Wine Coolers Premium Built-in In-Home
Carry-In: The original purchaser must deliver or ship the defective product to an authorized Stirling Marathon Service present a copy of the original bill of sale or Warranty
Registration Conrmation
In-Home: Contact Authorized Service Center and provide a copy of the Original bill of sale or Warranty Registration Card. If you are in a remote area or the closest Authorized
Service Center is further than 100 km (60 miles), you will be required to deliver the appliance to the closest Service Center at your expense.
Stirling Marathon is not be responsible or liable for any spoilage or damage to food or other contents of this appliance, whether due to any defect of the appliance, or its use,
whether proper or improper.
• Damages due to shipping damage or improper installation.
• Damages due to misuse or abuse.
• Content losses due to failure of the unit
• Commercial or Rental Use Limited to 90 days Parts & Labor
• Plastic parts such as door bins, panels, door shelves, racks, light bulbs, etc.
• Punctures to the evaporator system due to improper defrosting of the unit.
• Service or Repairs by unauthorized service technicians
• Service calls that do not involve defects in material and workmanship such as instruction on proper use of the product, door reversal or improper installation.
• Replacement or resetting of house fuses or circuit breakers.
• Delivery costs incurred as the result of a unit that fails
• Expenses for travel and transportation for product service if your appliance is located in a remote area where service by an authorized service technician is not available.
• The removal and reinstallation of your appliance if it is installed in an inaccessible location or is not installed in accordance with published installation instructions.
• Liability under this warranty is limited to repair, replacement or refund. If a replacement unit is not available or the unit cannot be repaired, liability is limited to the actual
purchase price paid by the consumer.
• This warranty applies only to the original purchaser and does not extend to any subsequent owner(s) and is non-transferable.
• No warranty or insurance herein contained or set out shall apply when damage or repair is caused by any of the following
• Accident, alteration, abuse or misuse of the appliance such as inadequate air circulation in the room or abnormal operating conditions (extremely high or low room temperature).
• Use for commercial or industrial purposes (ie. If the appliance is not installed in a domestic residence).
• Fire, water damage, theft, war, riot, hostility, acts of God such as hurricanes, oods etc
• Service calls resulting in customer education.
• Improper Installation (ie. Building-in of a free standing appliance or using an appliance outdoors that is not approved for outdoor application).
For Service or Assistance please contact us at: [email protected] or visit us at www.stirlingmarathon.com
2 Year Limited Warranty
Items Excluded from Warranty
How to Obtain Service

MBWC24 |MWD24-D |MBWC24-2D
Premium Encastrés
Réfrigérateurs à Vin & Boissons
Manuel d’utilisation et d’entretien
V. 02

Félicitations
Important Safety Information
Description des Pièces
Nous vous félicitons pour votre achat d’un nouvel appareil Appareil Marathon!
Pour activer votre Garantie, veuillez enregistrer votre appareil sur www.stirlingmarathon.com ou en rem-
plissant et en postant la Carte d’Enregistrement de Garantie ci-incluse. Nous sommes certains que vous
proterez de nombreuses années vore appareil pendant de nombreuses années sans problèmes, et vous prions
de bien vouloir conserver ce Manuel d’Utilisation & d’Entretien pour toute référence future ainsi que pour
votre sécurité.
AVERTISSEMENT
RISQUE D’ÉTOUFFEMENT ET RISQUE PIÉGEAGE DES ENFANTS
Avant l’installation, veuillez lire soigneusement nos consignes d’Utilisation & Entretien, et prêter une attention
spéciale aux précautions et consignes de sécurité mentionnées dans les pages suivantes.
Pour éviter la possibilité de piégeage des enfants, prenez les précautions suivantes avant de jeter le réfrigérateur
Retirez toutes les portes de l’unité.
Laissez les étagères en place an que des enfants ne puissent pas s’y introduire facilement Ne laissez
jamais des enfants opérer, jouer ou pénétrer à l’intérieur du réfrigérateur.
Avant de connecter le réfrigérateur à une alimentation électrique, laissez-le reposer en position verticale
pendant environ 4 heures an de laisser le réfrigérant reposer dans le compresseur. Ceci réduira les chances
de pannes du système de réfrigération suite au transport. Nettoyez soigneusement l’intérieur du réfrigérateur
à l’aide d’un chion doux et humide.
MBWC24 MBWC24 MBWC24-D
1. Etagères amovibles
2. Poignée en acier inoxydable
3. Grille de ventilation
4. Insert amovible en verre trempé
MBWC24-D
1. Etagères glissantes
2. Poignée en acier inoxydable
3. Grille de ventilation
4!4!4!
4!4!4!

MBWC24 | MWD24-D | MBWC24-2D
MBWC24-2D MBWC24-2D
1. Etagères règlables en verre
2. Poignée en acier inoxydable
3. Grille de ventilation
4. Etagères règlables en verre
Avant d’utiliser votre nouveau réfrigérateur à Vin et/ou Boissons, nous vous recommandons d’en laisser la
porte ouverte et le réfrigérateur débranché pendant 24 heures avant son installation ou utilisation Ceci per-
mettra l’élimination des odeurs provenant de la garniture intérieure et des étagères en bois.
Votre réfrigérateur à Vin et/ou Boissons Premium Marathon est conçu pour une installation indépendante.
L’évent avant inferieur est la grille de ventilation, et ne doit pas être recouverte.
Il est important de choisir le bon emplacement pour votre réfrigérateur à Vin et/ou Boissons. Nous vous con-
seillons de suivre les critères suivants:
• Libre et bien ventilé
• Zone sèche, et non humide – idéalement 65% d’humidité relative, pour une performance optimale et
moins de condensation sur l’intérieur de la porte lors de l’ouverture. Préférablement pas à l’intérieur
d’une buanderie, garde-manger, garage ou salle de bains.
• Sol plat et à niveau
• Prise électrique approuvée (préférablement avec protecteur de surtension_ à moins de 1m du réfrigérateur
à Vin et/ou Boissons.
• Distance de 1 mètre minimum d’un four à micro-ondes. Certains fours à micro-ondes ne possèdent pas
d’écran à interférences d’ondes. Lorsqu’un tel four est placé trop près d’un réfrigérateur à vin ou bois
sons, sa performance peut être aectée.
AVERTISSEMENT
Votre réfrigérateur à vin et/ou boissons Marathon est équipé d’un câble d’alimentation à trois branches et
prise de terre. La prise ne doit ni être modiée ni utilisée en association avec une rallonge ou barre élec-
trique. Une mauvaise utilisation de la prise de terre peut entrainer une électrocution. Consultez un élec-
tricien ou technicien qualié si les instructions de mise à la terre ne sont pas entièrement comprises. Si le
câble d’alimentation est endommagé, il doit être remplacé par une personne qualiée an d’éviter tout
accident électrique.
Installation
4!4!4!
4!4!4!

Les Réfrigérateurs à Vin et/ou Boissons Marathon ne sont PAS CERTIFIES pour utilisation extéri-
eure. Toute utilisation à l’extérieur annulera votre garantie, et peut entrainer un risque pour votre
sécurité, un incendie ou des blessures corporelles.
Votre Réfrigérateur à Vin et/ou Boissons doit être placé dans un endroit où la température ambiante est ré-
gulée (idéalement, une humidité ambiance et 65% +/- 5%). Si la température est supérieure ou inférieure à
ces valeurs, la performance du réfrigérateur à Vin et/ou Boissons peut être aectée. Une installation dans des
conditions de température ou trop froides ou chaudes ou humides peut causer des uctuations de tempéra-
tures ainsi qu’une augmentation des frais de fonctionnement.
Installer votre réfrigérateur à Vin et/ou Boissons Marathon
Déballez votre appareil, et retirez toutes les protections et bandes adhésives autour et à l’intérieur du réfri-
gérateur à vin et/ou boissons.
L’appareil doit être positionné de manière à ce que la prise et le câble d’alimentation soit accessible. Relâ-
chez le câble d’alimentation. Déplacez votre appareil vers son emplacement nal. L’appareil doit être instal-
lé dans un endroit à le compresseur ne sera pas sujet à un contact physique.
1. Veuillez suivre le schéma d’installation lors de l’installation des caves à vin encastrées. Dimensions
minimum de la taille de l’installation, ou la ventilation de la cave sera aectée.
2. Les caves à vin encastrées prennent l’air de la ventilation droite, et l’expulsent pas la ventilation gauche
sous la porte avant.
3. Les caves « encastrées » possèdent un commutateur marche/arrêt situé sur le tableau de bord,
l’emplacement de la prise n’est donc pas vraiment important.
4. La cave à vin requiert une alimentation électrique individuelle standard 120 Volts / 15 Ampères.
5. Le câble d’alimentation est d’environ 2m de long, et est xé sur la droite de l’arrière lorsque vous
regardez l’avant de la cave.
6. Tout comme sur la plupart des appareils d’aujourd’hui, votre appareil Marathon possède des
composants électroniques sensibles, susceptibles d’être endommagés par la foudre et les surtensions. Il
est par conséquent recommandé d’utiliser une prise à protection de surtension, an d’éviter les
interruptions d’alimentation électrique ou l’endommagement de l’appareil.
Dans des endroits « Extrêmement Chauds ou Froids », un évent ou une grille, d’une taille de ventilation de
200mm x 40mm DOIT être découpée dans le haut à l’arrière de la partition arrière, ou au-dessus de chaque
partition latérale, permettant la circulation complète de l’air frais dans l’espace de 30mm situé à l’arrière de
la cave.
Cet évent ou grille ne doit pas être ouvert du même côté que d’autres appareils tels qu’un four, ou dans
une zone fermée et sans accès à de l’air frais. Le non-respect des spécications ci-dessus peuvent entrainer
l’annulation de la GARANTIE.
Other manuals for MBWC24
1
This manual suits for next models
2
Table of contents
Languages:
Other Marathon Accessories manuals
Popular Accessories manuals by other brands

Eaton
Eaton CurrentWatch EGFL Series Instruction leaflet
APG
APG LPU-2428 user manual
ML Accessories
ML Accessories Knightsbridge SK005A Installation & maintenance manual
ETH-messtechnik
ETH-messtechnik DRBK operating instructions

Saeco
Saeco RI9127/12 Maintenance manual
ROSE DISPLAYS
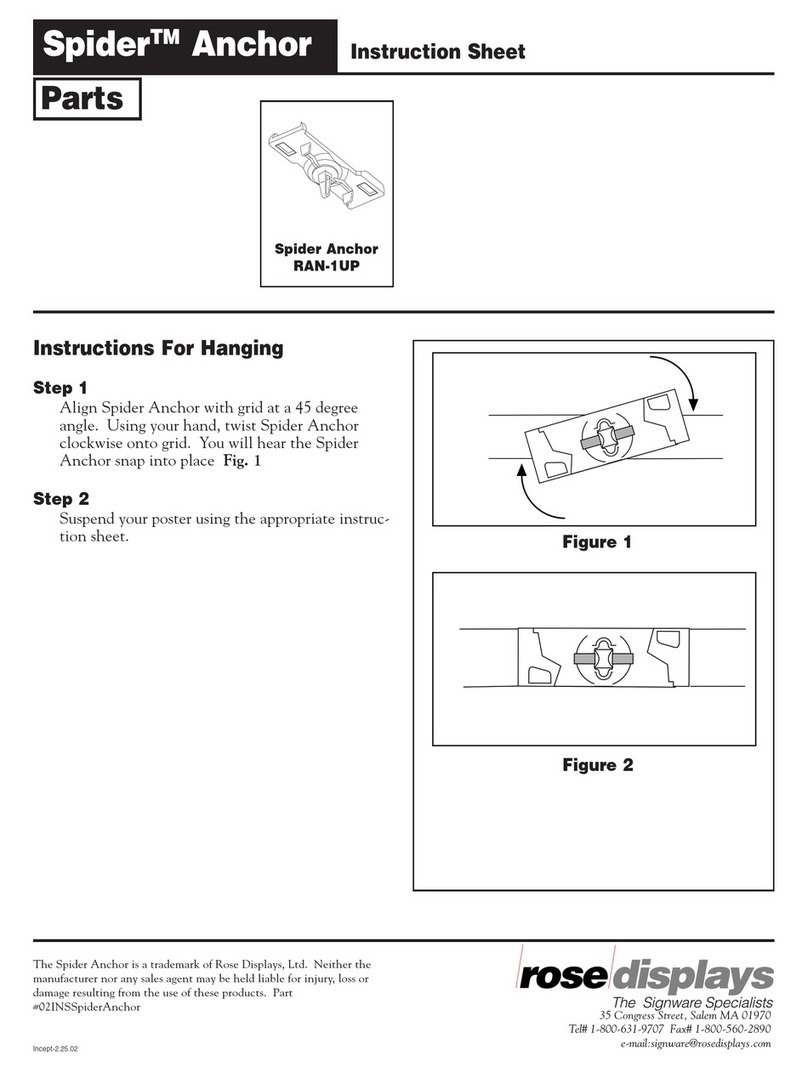
ROSE DISPLAYS RAN-BAS-CC SPIDER ANCHOR-GENERIC instruction sheet
