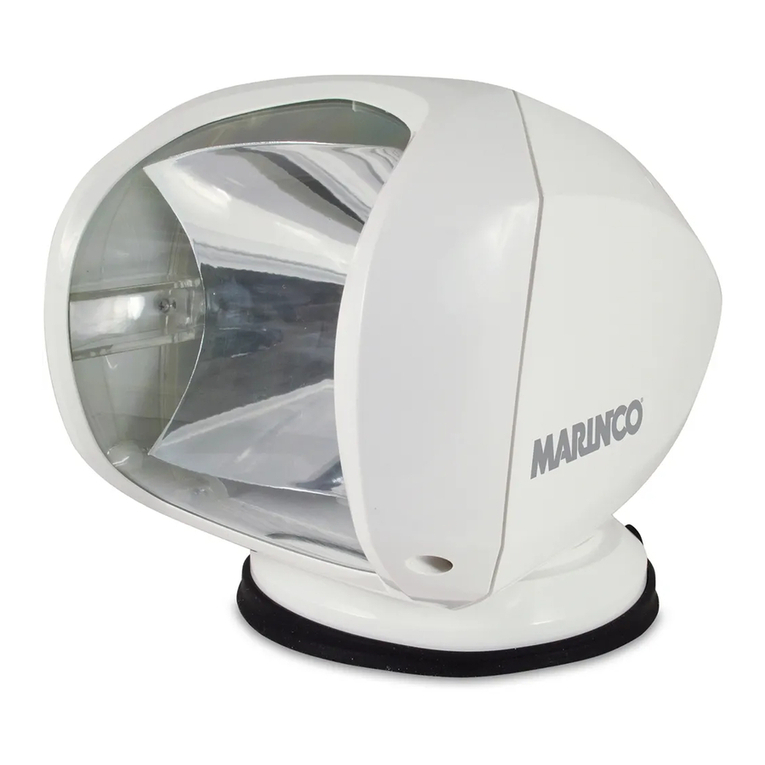
marinco SPL-12W User manual

502-2 & 503-2 instructions
Instructions
marinco.com
Installing and Using the
Precision Spotlight
IMPORTANT!
READ THESE INSTRUCTIONS BEFORE INSTALLING AND USING THIS PRODUCT.
The Marinco Precision spotlight uses a super bright 100 Watt, replaceable H3 Halogen bulb
that produces a rich yet intense beam that can illuminate objects up to 1,000 ft away. It is
IP56 Weatherproof rated for extreme enironments, with a UV weather resistant housing and
fully enclosed tilt function driven by quiet motors that can withstand extreme temperatures
(5°F to 113°F or -15°C to 45°C). It has been designed and tested to withstand the harsh
marine environments including high humidity, salt water spray, shock, and vibration.
Innovative construction allows for upside down mounting and reverse motion programming.
Precision circuitry allows for remarkable aiming and tracking with two speed choices.The
spotlight has a 30 minute shut-down timer. If the spotlight is left unattended for more than
30 minutes, the spotlight will turn off. The shut-down has no effect on the SOS function of
the spotlight.
The Precision remotes have glow in the dark buttons and include one touch Automatic
Sweep and SOS options.The wireless remotes transmit a signal up too 200ft (60m). While
the spotlight comes with a wireless bridge remote there are two more optional remotes:
a wireless handheld remote w/lanyard (SPLR-1) and a hard wired bridge mount remote
(SPLR-3).
Package Includes:
• Spotlight with 12 Volt bulb installed
• Mounting bracket (no fasteners included)
• Wireless Bridge Remote (SPLR-2)
• Instruction manual
• Additional 24 Volt bulb**
**(models SPL-12W, SPL-12B, SPL-12C only)
MODELS: SPL-12W, SPL-12B, SPL-12C
SPLR-2 (included)
SPLR-1
SPLR-3
Español................................. 8
Français.............................. 16

Precision Spotlight Instructions
2
Required for Installation:
• Four (4) No. 10 stainless steel pan head screws for spotlight bracket
(Length and type of screws to be determined by mounting surface)
• Two (2) No. 6 stainless steel pan head screws
(Length and type of screws to be determined by mounting surface)
• Two (2) #16 AWG butt wire connectors
!WARNING IF THE APPLICATION IS 24 VOLTS, THE 12 VOLT BULB WILL NEED TO BE
REPLACED WITH THE 24 VOLT BULB. TO REPLACE THE BULB REFER TO THE BULB
REPLACEMENT SECTION. (PAGE 5).
Failure to use the appropriate bulb wattage will damage the spotlight.
!WARNING BEFORE OPERATION REMOVE BLUE FILM FROM LENS. FAILURE TO
REMOVE FILM WILL DAMAGE THE SPOTLIGHT.
Mounting and wiring of the Precision Spotlight
1. Select a flat surface to mount the spotlight. Make sure there are no obstructions around
the spotlight that could interfere with the rotation (template included with light). Be sure
you will have wiring access to the underside of the chosen location and that drilling holes
will not damage existing wiring or structures. Avoid locations where lines, anchors and
sails might entangle or damage the light.
2. Refer to the template for mounting and wire hole location.
3. While installing the mounting bracket make sure that the securing screw is opposite the
direction that the light will be facing. Mark the mounting holes and center wire hole. Be
sure that there is at least a 6" (145 mm) radius of clearance from the center hole. See
dotted line on figure 1 (page 7).
4. Drill hole sizes appropriate for the type of screws or bolts being used. Note: the maximum
bracket hole sizes are No. 10 screws.
5. Drill the appropriate hole size to accommodate the wires. This will depend on the type of
wire being used.
6. The spotlight requires 12 or 24 volt power supplied through appropriate gauge wire.
(Note: If the wired bridge remote version is used, then 2 additional wires will need to
be routed from the remote to the spotlight.)
!WARNING CORRECT WIRE SIZE FOR THE RUN AND PROPER CIRCUIT PROTECTION
NEEDS TO BE SELECTED BASED ON ABYC STANDARDS. FAILURE TO FOLLOW
ABYC STANDARDS MIGHT LEAD TO SEVERE INJURY, DEATH OR DAMAGE
TO VESSEL.
7. Mount the mounting bracket after applying a small amount of non silicone sealant to the
area the screws or bolts penetrate the mounting surface. (Note: mounting bracket screw
heads should not protrude more than 0.2" (5 mm) above mounting bracket.)
8. Connect wires to spotlight using butt connectors. Red wire is positive, Black wire is
negative.
!WARNING POLARITY OF THE WIRES NEEDS TO BE CORRECT TO OPERATE THE
SPOTLIGHT! FAILURE TO WIRE CORRECTLY WILL DAMAGE THE SPOTLIGHT SYSTEM!
9. Slide spotlight over mounting bracket making sure the wires are not pinched and the
two holding tabs engage the light in the proper location. Align the securing screw hole
in the back of the spotlight base with the securing screw hole in the mounting bracket.
This will require a degree of pressure and effort as the mounting seal must be suitably
compressed during this process. For easier alignment, slightly lift the back side of the

Precision Spotlight Instructions
3
spotlight (containing the securing screw hole)
while depressing the gasket on the front side of the
spotlight (opposite the securing screw hole). Insert
securing screw and ensure that it is fully
engaged and secure.
!WARNING YOU MUST FEEL THE SCREW REACH
A TWISTING TORQUE TO KNOW THAT IT IS
PROPERLY ENGAGED
Note: In the photograph, the purple and yellow control
wires are shown for the wired-remote. If a wireless bridge remote is used, then the purple
and yellow leads are not necessary and can be tucked away within the spotlight base
Mounting the wired and wireless bridge remote
1. The remotes are all IP54 weather resistant.
2. Please choose a mounting location based on the gasket supplied with the remote (large
hole should be towards top)
3. Drill holes the correct size for the mounting screws.The holes through the remotes are
sized for a No. 6 pan head screw. The length and thread type will need to be determined
by the application. Remove and set aside the 2 screw covers.
4. Drill hole for the wiring. Note that the hole needs to be 5/8" to allow the unit to sit flat.
5. If mounting the wireless bridge remote it will require a 12V or 24V power source.
If mounting the hard wired bridge remote then it does not need a local power source
and instead uses the purple and yellow wires connecting from the spotlight to the
remote. These two wires will supply the remote with power and control the spotlight.The
terminals on the remote can handle a 16 AWG to 26 AWG wire. Maximum torque on the
terminals is 2.21 in lbs (.25 nm).
6. Feed wires through drilled surface hole and gasket from below.
7. For the wireless bridge remote attach the power source wires to the remote (+) positive
and (-) negative terminals. For the hard wired bridge remote attach the 2 wires from
the
spotlight. The yellow wire needs to connect to the (+) positive and the purple wire needs to
connect to the (–) negative. Maximum torque on the terminals is 2.21 in lbs (.25 nm)
8. Place remote in desired location, align holes and tighten down.
9. Apply screw covers to remote to hide screws.
Pairing of wireless bridge and hand held wireless remote to spotlight
1. Disconnect all power to the spotlight.
2. Apply power to wireless remote. Press and hold the power button on the wireless remote.
3. While pressing the power button connect power to the spotlight.
4. After a few seconds you will hear the relay click and the light will turn on.
5. When the light turns on the paring is complete, release power button.
Paring multiple spotlights with separate remotes
If multiple spotlights will be within 200’ of one another and you want to control each spotlight
with independent remotes, please follow the instructions below.
1. For 1st spotlight, follow the “Pairing of wireless bridge and hand held wireless remote to
spotlight” instructions above.
2. For 2nd spotlight, follow instructions above except press and hold the power button AND
the UP button while inserting the battery in an SPLR-1 remote or connecting power to an
SPLR-2 remote.
3. For 3rd spotlight, follow instructions above except press and hold the power button AND
the RIGHT button while inserting the battery in an SPLR-1 remote or connecting power to
an SPLR-2 remote.

Precision Spotlight Instructions
4
4. For 4th spotlight, follow instructions above except press and hold the power button AND
the DOWN button while inserting the battery in an SPLR-1 remote or connecting power
to an SPLR-2 remote.
5. For 5th spotlight, follow instructions above except press and hold the power button AND
the LEFT button while inserting the battery in an SPLR-1 remote or connecting power to
an SPLR-2 remote.
Programming the remote when mounting the spotlight upside down
NOTE: This procedure reverses the directional buttons on the remote.
1. Pairing of the remote described above must be completed first.
2. Disconnect all power to the spotlight.
3. Hold down the tilt UP and DOWN buttons on the remote.
4. While pressing the 2 buttons apply power to the spotlight and continue to hold down the
buttons for a few seconds until the spotlight tilts up or down.
5. The spotlight is now configured for inverted mode. Release buttons.
6. To return the spotlight to the standard configuration repeat steps above.
!WARNING BEFORE OPERATION REMOVE BLUE FILM FROM LENS
Operation
SOS
(· · · — — — · · ·)
Pressing this button the light will begin
to signal the Morse code distress signal.
Press again to turn off.
Power on/off
Speed Control
Pressing this button will allow
you to change speed of the light,
SOS, and Sweep Angle function.
Auto Sweep
When this button is pressed
the light will begin to sweep left
and right at 90° for slow speed
and 70° for high speed. Press
the button again or a directional
button to stop the sweep.

Precision Spotlight Instructions
5
BULB REPLACEMENT CAUTION! AVOID
TOUCHING THE GLASS SURFACE OF
THE NEW BULB. (TOOLS REQUIRED:
MEDIUM PHILLIPS SCREWDRIVER AND
SMALL FLATHEAD SCREWDRIVER)
1. Remove 2 screws on bottom of lens
bezel.
2. Remove the bezel by inserting a small
flathead screwdriver into the two
locations circled. Gently separate the
bezel from the body at both locations
using a straight separating motion until
you feel the bezel release from the lens.
3. Remove 6 screws from around the lens.
4. Remove lens and reflector as an
assembly.
5. Remove the screw holding the metal
grounding bar behind the reflector.
Remove the bulb assembly by pushing
on the bulb so it exits the back of the
reflector.
6. Unplug bulb and replace with new bulb.
(or 24 volt bulb if installation requires).
DO NOT TOUCH THE GLASS
SURFACE OF THE BULB. During
reassembly, hand tighten all screws until
snug. Do not overtighten or use a power
driver as doing so may strip the threaded
screw bosses.

Precision Spotlight Instructions
6
Description Color Item # OEM #
12/24 Volt, 100 Watt white SPL-12W —
12/24 Volt, 100 Watt black SPL-12B —
12/24 Volt, 100 Watt chrome SPL-12C —
12 Volt, 100 Watt white — SPL-12W.OEM
12 Volt, 100 Watt black — SPL-12B.OEM
12 Volt, 100 Watt chrome — SPL-12C.OEM
24 Volt, 100 Watt white — SPL-24W.OEM
24 Volt, 100 Watt black — SPL-24B.OEM
24 Volt, 100 Watt chrome — SPL-24C.OEM
Remote Specifications
Included *
Wireless Bridge Remote
(SPLR-2)
(Optional) †
Hand Held Bridge Remote
(SPLR-1)
(Optional) s
Wired Bridge Remote
(SPLR-3)
Power 12 or 24 Volt
(hard wired to power) CR2450 button
cell battery 12 or 24 Volt
(hard wired to spotlight)
Current draw
(idle / in use) negligible negligible negligible
Wireless range 200 ft (65m) 200 ft (65m) —
Estimated
battery life — > 40 hours
(continuous use) —
Dimensions 3.5"W x 2.25"H x .75"D
88mm x 57mm x 19mm
2.0"W x 3.78"H x 1"D
51mm x 96mm x 25mm
3.5"W x 2.25"H x .75"D
88mm x 57mm x 19mm
Weight 2.12 oz. (60g) 2.82 oz. (80g) 2.12 oz. (60g)
Housing material UV resistant PC/ASA UV resistant PC/ASA UV resistant PC/ASA
Button material Silicone (glow in the dark) Silicone (glow in the dark) Silicone (glow in the dark)
Wire 16AWG — 24AWG
Operating
temp range 5°F to 113°F (-15°C to 45°C) 5°F to 113°F (-15°C to 45°C) 5°F to 113°F (-15°C to 45°C)
IP Rating IP54 IP56 IP54
* There is no wiring required from the spotlight to the bridge remote. The spotlight and the bridge remote must be wired locally to power.
†
The hand held bridge remote includes a wrist lanyard and a surface mount cradle.
s The wired bridge remote requires hard wiring of 2 leads from the spotlight to the bridge.
Replacement Parts
202319 12V, H3 halogen replacement bulb
202320 24V, H3 halogen replacement bulb
SPLR-1 Spotlight remote, wireless hand-held
SPLR-2 Spotlight remote, wireless bridge mount
SPLR-3 Spotlight remote, wired bridge mount
Bulb 100 Watt, H3 Halogen (replaceable)
(12 Volt installed / 24 Volt included)
Power
(Input voltage) 12 Volt or 24 Volt
(note: must match bulb with voltage)
Current draw
(idle / in use) 0.03 Amps / 7.0 Amps
Peak beam
intensity 210,000 cp
Peak beam
distance 917 ft (280 m)
Lux @ 66' (20m) 525 Lux
Coverage at 66'
(20 m)
132 sq Ft
(12 sq m)
Rotatation 370° (built in limit stops)
Tilt 120° Tilt (75°◦up and 45° down)
Wireless range 200 ft (65m)
Dimensions 7.5"W x 7.5"H x 9.25"D
(19cm x19cm x 23.5cm)
Weight 3.30 lbs (1.5 kg)
Housing material UV resistant PC/ASA
Lens material UV resistant Lexan®
Wire type 16 AWG power
24 AWG control
Operating
temp range 5°F to 113°F (-15°C to 45°C)
IP Rating IP56
Tested in accordance with ANSI/NEMA standard FL1
Specifications

Precision Spotlight Instructions
7
FRONT
HOLDING
TABS
[ 55mm ]
25
32"
[ 24 mm ]
15
16 "
[ 58 mm ]
9
32"
[ 35mm ]
1"
[ Ø286 mm ]
11 "
ROTATIONAL
CLEARANCE
[ Ø158 mm ]
6"SECURING
SCREW
A
A
7
32
MOUNTING
BRACKET
3
8
1
4
FIGURE 1
74.0
[2.91]
15.0
[0.59]
47.0
[1.85]
n15.9
(5/8" drill)
[0.63]
28.5
REF
[1.12]
57.0
REF
[2.24]
88.0
REF
[3.46]
Screw hole diameter
to suit mounitng screw.
Gasket outline

502-2 & 503-2 instructions
Instrucciones
marinco.com
Instalación y uso
del reflector Precision
¡IMPORTANTE!
LEA ESTAS INSTRUCCIONES ANTES DE INSTALAR Y USAR ESTE PRODUCTO.
El reflector Precision de Marinco usa una bombilla súper brillante y reemplazable de 100
vatios y Halógeno H3, que produce un haz de luz brillante e intenso que puede iluminar
objetos que están a distancias de hasta 300 m. Está clasificado como resistente a la
intemperie IP56 para ambientes extremos, con una carcasa resistente a la intemperie y
a los rayos UV, e incluye una función de inclinación accionada por motores silenciosos
que pueden soportar temperaturas extremas (entre -15 °C hasta 45 °C). El reflector ha
sido diseñado y probado para soportar rigurosos ambientes marinos que incluyen mucha
humedad, agua salada pulverizada, impactos y vibraciones. Su innovadora construcción
permite que se monte boca abajo y que se programen movimientos inversos. Sus circuitos
de precisión le conceden una extraordinaria puntería y rastreo con dos opciones de
velocidad. El reflector tiene un temporizador de apagado de 30 minutos. Si el reflector se
deja sin supervisión durante más de 30 minutos, se apagará. El apagado no tiene efecto en
la función de SOS del reflector.
Los controles remotos Precision tienen botones fosforescentes e incluyen opciones de un
solo toque de barrido automático y de SOS. Los controles remotos inalámbricos transmiten
una señal de hasta 60 m. Cuando el reflector incluye un control remoto puente inalámbrico,
hay dos controles remotos adicionales: un control remoto inalámbrico portátil con acollador
(SPLR-1) y un control remoto de montaje puente conectado por cableado permanente
(SPLR-3).
MODELOS: SPL-12W, SPL-12B, SPL-12C
SPLR-2 (Incluido)
SPLR-1
SPLR-3
8

El reflector Precision Instrucciones
9
El paquete incluye:
• Reflector con una bombilla
de 12 voltios instalada
• Soporte de montaje (no se incluyen
de sujeción)
• Manual de instrucciones
• Control remoto puente inalámbrico
(SPLR-2)
• Bombilla de 24 voltios adicional**
**(solo en los modelos SPL-12W, SPL-12B, SPL-12C)
Para la instalación se necesita:
• Cuatro (4) tornillos de cabeza troncocónica de acero inoxidable n.° 10 para el soporte del
reflector (la longitud y el tipo de los tornillos lo determinará la superficie de montaje)
• Dos (2) tornillos de cabeza troncocónica de acero inoxidable n.° 6 (la longitud y el tipo de
los tornillos lo determinará la superficie de montaje)
• Dos (2) conectores a tope para cables AWG n.° 16
!
ADVERTENCIA SI LA APLICACIÓN ES DE 24 VOLTIOS, SE NECESITARÁ CAMBIAR LA
BOMBILLA DE 12 VOLTIOS POR LA DE 24 VOLTIOS. PARA REEMPLAZAR LA BOMBILLA,
CONSULTE LA SECCIÓN DE REEMPLAZO DE LA BOMBILLA (PÁGINAS 13 Y 14).
Si no se usa el voltaje de bombilla adecuado, se dañará el reflector.
!ADVERTENCIA ANTES DEL FUNCIONAMIENTO, RETIRE LA PELÍCULA AZUL DE LA
CÁMARA. SI LA PELÍCULA NO SE RETIRA, SE DAÑARÁ EL REFLECTOR.
Montaje y cableado del reflector Precision
1. Seleccione una superficie plana para montar el reflector. Asegúrese de que no haya
obstrucciones alrededor del reflector que puedan interferir con su rotación (plantilla
incluida con la luz). Asegúrese de que tendrá acceso de cableado en la parte inferior
de la ubicación seleccionada y que los orificios perforados no dañarán los cables o
estructuras existentes. Evite ubicaciones donde haya cuerdas, anclas y velas que
puedan enredar o dañar la luz.
2. Consulte la plantilla de la ubicación del montaje y el orificio para los cables.
3. Mientras instala el soporte de montaje, asegúrese de que el tornillo de fijación esté en la
dirección opuesta a la de la luz que tendrá en frente. Marque los orificios de montaje y
el orificio central del cable. Asegúrese de que haya un radio de espacio de al menos 150
mm para el orificio central. Consulte la línea de puntos de la figura 1 (página 16).
4. Perfore orificios con el tamaño adecuado para el tipo de tornillos o pernos que se usarán.
Nota: el tamaño máximo de los orificios del soporte es para tornillos n.° 10.
5. Perfore un orificio del tamaño adecuado para dar cabida a los cables. Esto dependerá del
tipo de cable que se use.
6. El reflector necesita energía de 12 o 24 voltios suministrada a través de un cable de
calibre adecuado. (Nota: Si se usa la versión con control remoto puente conectado por
cableado, entonces se tendrán que tender 2 cables adicionales desde el control remoto
hacia el reflector).
!ADVERTENCIA EL TAMAÑO DE CABLE CORRECTO PARA EL FUNCIONAMIENTOY
PROTECCIÓN ADECUADA DEL CIRCUITO SE DEBE SELECCIONAR EN BASE A LAS
NORMAS ABYC. EL INCUMPLIMIENTO DE LAS NORMAS ABYC PUEDE PROVOCAR
LESIONES GRAVES, MUERTE O DAÑOS AL NAVÍO.
7. Monte el soporte de montaje después de aplicar una pequeña cantidad de sellador
que no sea de silicona en el área donde los tornillos o pernos penetran la superficie de
montaje. (Nota: Las cabezas de los tornillos del soporte de montaje no deben sobresalir
de él por más de 5 mm).

El reflector Precision Instrucciones
10
8. Conecte los cables al reflector con conectores a tope. El cable rojo es positivo y el negro
es negativo.
!ADVERTENCIA ¡LA POLARIDAD DE LOS CABLES DEBE SER LA CORRECTA
PARA QUE EL REFLECTOR FUNCIONE! ¡SI LOS CABLES NO SE CONECTAN
CORRECTAMENTE EL SISTEMA DE REFLECTOR SE DAÑARÁ!
9. Deslice el reflector por sobre el soporte de montaje, asegurándose de que los cables
no estén comprimidos y de que las dos lengüetas sujetadoras acoplen la luz en el
lugar correcto. Alinee el orificio del tornillo de fijación de la parte posterior de la base
del reflector con el orificio del tornillo de fijación del soporte de montaje. Esto requerirá
un grado de presión y esfuerzo, ya que el sello de montaje debe ser comprimido
adecuadamente durante este proceso. Para una alineación más fácil, levante ligeramente
la parte posterior del reflector (que contiene el orificio del tornillo de fijación) mientras
presiona la empaquetadura de la parte delantera del reflector (en la posición opuesta a
la del orificio del tornillo de fijación). Inserte el tornillo de fijación y asegúrese de que esté
completamente acoplado y fijo.
!ADVERTENCIA DEBE SENTIR QUE EL TORNILLO
ALCANZA UN PAR TORSOR CUANDO ESTÁ
CORRECTAMENTE ACOPLADO.
Nota: En la fotografía se muestran los cables púrpura
y amarillo del control remoto para el control remoto
conectado por cableado. Si se usa un control remoto
puente inalámbrico, entonces los conductores púrpura
y amarillo no son necesarios y se pueden guardar
dentro de la base del reflector.
Montaje del control remoto puente conectado por cableado e inalámbrico
1. Todos los controles remotos tienen protección IP54, lo que los hace resistentes a la
intemperie.
2. Escoja una ubicación de montaje basada en la empaquetadura suministrada con el
control remoto (el orificio grande debe estar hacia la parte superior)
3. Perfore orificios del tamaño correcto para los tornillos de montaje. El tamaño de los
orificios en los controles remotos es para tornillos de cabeza troncocónica n.° 6. La
longitud y el tipo de rosca deberán determinarse según la aplicación. Retire y deje a un
lado las 2 cubiertas de los tornillos.
4. Perfore un orificio para el cableado. Tenga en cuenta que el orificio debe ser de 1,6 cm
para que la unidad pueda permanecer nivelada.
5. Si va a montar el control remoto puente inalámbrico, necesitará una fuente de
energía de 12 V o 24 V.
Si va a montar el control remoto puente conectado por cableado permanente, no
necesitará una fuente de energía local, y en su lugar, puede usar los cables púrpura
y amarillo que van desde el reflector hacia el control remoto. Estos dos cables le
proporcionarán energía al control remoto y controlarán el reflector. Los terminales del
control remoto admiten un cable de 16 AWG hasta 26 AWG. La torsión máxima de los
terminales es de 0,25 Nm.
6. Pase los cables a través del orificio perforado en la superficie y la empaquetadura desde
abajo.
7. Para el control remoto puente inalámbrico, conecte los cables de la fuente de energía
a los terminales positivo (+) y negativo (-) del control remoto. Para el control remoto
puente conectado por cableado permanente, conecte los 2 cables del reflector. El

El reflector Precision Instrucciones
11
cable amarillo debe conectarse en positivo (+) y el cable púrpura en el negativo (-). La
torsión máxima de los terminales es de 0,25 Nm.
8. Coloque el control remoto en la ubicación deseada, alinéelo con los orificios y apriételo.
9. Instale las cubiertas de los tornillos al control remoto para ocultarlos.
Emparejamiento del puente inalámbrico y del control remoto inalámbrico
portátil con el reflector
1. Desconecte toda la energía del reflector.
2. Conecte la energía al control remoto inalámbrico. Mantenga presionado el botón de
encendido del control remoto inalámbrico.
3. Mientras presiona el botón de encendido, conecte la energía al reflector.
4. Después de unos segundos, escuchará que el relé hace un clic y la luz se encenderá.
5. Cuando se encienda la luz y el emparejamiento esté completo, suelte el botón de
encendido.
Emparejamiento de varios reflectores con controles remotos separados
Si van a haber varios reflectores a 60 m de distancia uno del otro y usted quiere controlar
cada uno de ellos con controles remotos independientes, siga las siguientes instrucciones.
1. Para el primer reflector, siga las instrucciones “Emparejamiento del puente inalámbrico y
del control remoto inalámbrico portátil con el reflector” descritas anteriormente.
2. Para el segundo reflector, siga las instrucciones mencionadas anteriormente, pero
mantenga presionado el botón de encendido Y el botón ARRIBA mientras inserta la
batería en un control remoto SPLR-1 o conecta la energía a un control remoto SPLR-2.
3. Para el tercer reflector, siga las instrucciones mencionadas anteriormente, pero
mantenga presionado el botón de encendido Y el botón DERECHA mientras inserta la
batería en un control remoto SPLR-1 o conecta la energía a un control remoto SPLR-2.
4. Para el cuarto reflector, siga las instrucciones mencionadas anteriormente, pero
mantenga presionado el botón de encendido Y el botón ABAJO mientras inserta la
batería en un control remoto SPLR-1 o conecta la energía a un control remoto SPLR-2.
5. Para el quinto reflector, siga las instrucciones mencionadas anteriormente, pero
mantenga presionado el botón de encendido Y el botón IZQUIERDA mientras inserta la
batería en un control remoto SPLR-1 o conecta la energía a un control remoto SPLR-2.
Programación del control remoto cuando el reflector se monta boca abajo
NOTA: Este procedimiento invierte los botones direccionales del control remoto.
1. Primero se debe completar el emparejamiento del control remoto descrito anteriormente.
2. Desconecte toda la energía del reflector.
3. Mantenga presionados los botones de inclinación ARRIBA y ABAJO del control remoto.
4. Mientras presiona los 2 botones, conecte la energía al reflector y continúe presionando
los botones por unos cuantos segundos hasta que el reflector se incline hacia arriba o
hacia abajo.
5. Ahora el reflector está configurado para el modo invertido. Suelte los botones.
6. Para volver a la configuración estándar del reflector, repita los pasos descritos
anteriormente.
!ADVERTENCIA ANTES DE LA OPERACIÓN, RETIRE LA PELÍCULA AZUL DE
LA CÁMARA

El reflector Precision Instrucciones
12
Operación
SOS
(· · · — — — · · ·)
Cuando presione este botón, la luz
comenzará a indicar el código morse
de señal de socorro. Presione
nuevamente para apagarla.
Encendido y apagado
Control de velocidad
Presionar este botón le permitirá
cambiar la velocidad de la luz,
el SOS, y la función del ángulo
de barrido.
Barrido automático
Cuando se presiona este botón,
la luz comienza a moverse 90°
a la izquierda y a la derecha en
la velocidad baja y a 70° en la
velocidad alta. Presione este
botón nuevamente o un botón
direccional para detener el
barrido.
¡PRECAUCIÓN AL REEMPLAZAR LA BOMBILLA! EVITE TOCAR LA SUPERFICIE
DE VIDRIO DE LA BOMBILLA NUEVA. (HERRAMIENTAS NECESARIAS:
DESTORNILLADOR PHILLIPS MEDIANO Y DESTORNILLADOR DE CABEZA PLANA
PEQUEÑO)
1. Retire 2 tornillos de la parte inferior del
bisel de la lente.
2. Para retirar el bisel, inserte un destornillador
de cabeza plana pequeño en las dos
ubicaciones marcadas con un círculo.
En ambas ubicaciones, separe suavemente
el bisel del cuerpo con un movimiento
de separación recto hasta que sienta
que el bisel se separa de la lente.

El reflector Precision Instrucciones
13
3. Retire 6 tornillos en torno a la lente.
4. Retire la lente y el reflector como un conjunto.
5. Retire el tornillo que fija la barra metálica
de anclaje a tierra detrás del reflector.
Para retirar el conjunto de bombilla, empuje
la bombilla de manera que salga por la
parte posterior del reflector.
6. Desconecte la bombilla y reemplácela con
una nueva (o una bombilla de 24 voltios si
la instalación lo requiere). NO TOQUE LA
SUPERFICIE DE VIDRIO DE LA BOMBILLA.
Cuando se vuelvan a montar las piezas,
apriete todos los tornillos manualmente hasta
que estén ajustados. No apriete en exceso
ni use un destornillador eléctrico, ya que
podría estropear las protuberancias de los
tornillos roscados.

El reflector Precision Instrucciones
14
Descripción Color Item # OEM #
12/24 voltios, 100 vatios blanco SPL-12W —
12/24 voltios, 100 vatios negro SPL-12B —
12/24 voltios, 100 vatios cromado SPL-12C —
12 voltios, 100 vatios blanco — SPL-12W.OEM
12 voltios, 100 vatios negro — SPL-12B.OEM
12 voltios, 100 vatios cromado — SPL-12C.OEM
24 voltios, 100 vatios blanco — SPL-24W.OEM
24 voltios, 100 vatios negro — SPL-24B.OEM
24 voltios, 100 vatios cromado — SPL-24C.OEM
Especificaciones
del control remoto
Incluido *
Control remoto puente
inalámbrico
(SPLR-2)
(Opcional) †
Control remoto puente portátil
(SPLR-1)
(Opcional) s
Control remoto puente
conectado por cableado
(SPLR-3)
Energía 12 o 24 voltios (cableado
permanente a la energía) Batería de botón CR2450 12 o 24 voltios
(cableado permanente al reflector)
Consumo de corriente
(detenido / en uso) mínima mínima mínima
Alcance inalámbrico 60m 60m —
Vida útil estimada
de la batería — > 40 horas (uso continuo) —
Dimensiones 88mm x 57mm x 19mm 51mm x 96mm x 25mm 88mm x 57mm x 19mm
Peso 60g 80g 60g
Material de la carcasa PC/ASA resistente a rayos UV PC/ASA resistente a rayos UV PC/ASA resistente a rayos UV
Material del botón Silicona (fosforescente) Silicona (fosforescente) Silicona (fosforescente)
Cable 16AWG — 24AWG
Margen de temp. de
funcionamiento 5°F to 113°F (-15°C to 45°C) 5°F to 113°F (-15°C to 45°C) 5°F to 113°F (-15°C to 45°C)
Clasificación IP IP54 IP56 IP54
* No se necesita un cableado proveniente del reflector hacia el control remoto puente. El reflector y el control remoto puente deben
estar cableados de manera local a la energía.
†
El control remoto puente portátil incluye un acollador de muñeca y una base de montaje en superficie.
s El control remoto puente conectado por cableado requiere un cableado permanente de 2 conductores desde el reflector
hacia el puente.
Piezas de repuesto
202319 Bombilla de repuesto de 12 V y Halógeno H3
202320 Bombilla de repuesto de 24 V y Halógeno H3
SPLR-1 Control remoto inalámbrico y portátil del reflector
SPLR-2 Control remoto de montaje puente inalámbrico
del reflector
SPLR-3 Control remoto de montaje puente conectado por
cableado permanente del reflector
Bombilla 100 vatios y Halógeno H3
(reemplazable) (de 12 voltios
instalada, de 24 voltios incluida)
Energía (voltaje
de entrada)
12 voltios o 24 voltios
(Nota: Debe coincidir con el
voltaje de la bombilla)
Consumo de corriente
(detenido / en uso) 0,03 amperios / 7,0 amperios
Intensidad máxima
del haz de luz 210.000 cp
Distancia máxima
del haz de luz 280 m
Lux a 20 m 525 Lux
Cobertura a 20 m 12 metros cuadrados
Rotación 370° (frenos integrados)
Inclinación Inclinación de 120°
(75° hacia arriba y 45° hacia
abajo)
Alcance
inalámbrico 60 m
Dimensiones 19 cm A x 19 cm A x 23,5 cm P
Peso 1,5 kg
Material de la carcasa PC/ASA resistente a rayos UV
Material de la lente Lexan®resistente a rayos UV
Tipo de cable 16 AWG de energía
24 AWG de control
Margen de temp.
de funcionamiento Entre -15 °C a 45 °C
Clasificación IP IP56
Probado de acuerdo con la norma FL1 de ANSI/NEMA
Especificaciones

El reflector Precision Instrucciones
15
PARTE DELANTERA
LENGÜETAS
DE SUJECIÓN
ESPACIO
ROTACIONAL
TORNILLO
DE FIJACIÓN
A
A
SOPORTE
DE MONTAJE
55mm
35mm
Ø286mm
Ø158mm
24mm
58mm
74.0
[2.91]
15.0
[0.59]
47.0
[1.85]
n15.9
(Broca de taladro de 5/8")
[0.63]
28.5
REF
[1.12]
57.0
REF
[2.24]
88.0
REF
[3.46]
Diámetro del orificio
del tornillo para que
quepa el tornillo
de montaje
Contorno de
la empaquetadura
FIGURA 1

502-2 & 503-2 instructions
Mode d’emploi
marinco.com
Installation et utilisation du
projecteur Precision
IMPORTANT !
LIRE CES INSTRUCTIONS AVANT D’INSTALLER ET D’UTILISER CE PRODUIT.
Le projecteur Marinco Precision comporte une ampoule halogène H3 remplaçable
hautement lumineuse de 100 W qui produit un faisceau riche mais intense capable
d’illuminer des objets jusqu’à une distance de 300 m (1000 pi). Résistant aux intempéries,
il est classé IP56 pour les environnements extrêmes, avec un boîtier anti-intempéries
résistant aux UV et un mécanisme d’inclinaison totalement fermé entraîné par des moteurs
silencieux conçus pour résister aux températures extrêmes (-15 °C à 45 °C [5 °F à 113 °F]).
Il est conçu et testé pour résister aux milieux marins agressifs, notamment aux fortes
humidités, aux embruns salés et aux vibrations. Sa configuration innovante permet un
montage tête en bas avec programmation de mouvement inversé. Les circuits de précision
permettent un pointage et une poursuite remarquables, avec deux vitesses au choix. Le
projecteur comporte une minuterie de mise à l’arrêt de 30 minutes. Si le projecteur ne reçoit
aucune commande pendant 30 minutes, l’éclairage s’éteint. La minuterie d’arrêt est sans
effet sur la fonction de SOS du projecteur.
Les télécommandes Precision ont des boutons phosphorescents visibles de nuit et
comprennent des commandes de balayage automatique et de SOS. La télécommande
sans fil a une portée d’émission de signal de 60 m (200 pi). Alors que le projecteur
est fourni avec une télécommande de pont sans fil, deux autres télécommandes sont
proposées en option : une télécommande sans fil portable avec dragonne (SPLR-1) et une
télécommande de pont fixe câblée (SPLR-3).
MODÈLES : SPL-12W, SPL-12B, SPL-12C
SPLR-2 (Inclus)
SPLR-1
SPLR-3
16

Le projecteur Precision Mode d’emploi
17
L’ensemble comprend :
• Projecteur avec ampoule de 12 V installée
• Support de fixation (visserie non fournie)
• Télécommande de pont sans fil (SPLR-2)
• Manuels d’instruction
• Ampoule de 24 V supplémentaire**
**(modèles SPL-12W, SPL-12B, SPL-12C seulement)
L’installation nécessite :
• Quatre (4) vis à tête cylindrique bombée n° 10 en acier inoxydable pour le support de
projecteur (type et longueur en fonction de la surface de montage)
• Deux (2) vis à tête cylindrique bombée n° 6 en acier inoxydable (type et longueur en
fonction de la surface de montage)
• Deux (2) connecteurs bout à bout n° 16 AWG
!
AVERTISSEMENT S’IL S’AGIT D’UNE INSTALLATION SOUS 24 V, L’AMPOULE DE
12 V DOIT ÊTRE REMPLACÉE PAR L’AMPOULE DE 24 V. SE REPORTER AUX
INSTRUCTIONS DE REMPLACEMENT D’AMPOULE (PAGES 23-24).
L’utilisation d’une ampoule de puissance inadaptée endommagerait le projecteur.
!AVERTISSEMENT RETIRER LA PELLICULE BLEUE DE L’OPTIQUE AVANT
UTILISATION. LE MAINTIEN DE LA PELLICULE EN PLACE ENDOMMAGERAIT LE
PROJECTEUR.
Montage et câblage du projecteur Precision
1. Choisir une surface plane pour le montage du projecteur. S’assurer qu’il n’y a aucune
obstruction autour du projecteur susceptible d’entraver sa rotation (gabarit fourni avec le
projecteur). Veiller à pouvoir accéder à l’espace sous l’emplacement choisi pour effectuer
le câblage et s’assurer que le perçage des trous n’endommagera pas les câblages ou
structures existants. Éviter les emplacements où les cordages, les ancres et les voiles
peuvent s’emmêler ou endommager le projecteur.
2. Utiliser le gabarit pour l’emplacement des trous de fixation et de câblage.
3. Lors de la pose du support de fixation, s’assurer que la vis de blocage est du côté
opposé à la direction d’éclairage du projecteur. Marquer l’emplacement des trous de
fixation et du trou de câblage central. S’assurer qu’il y a un dégagement d’au moins
150 mm (6 po) de rayon autour du trou central. Voir le trait pointillé à la Figure 1 (page 26).
4. Percer des trous de diamètre adapté au type de vis ou de boulon utilisé. Remarque : Les
trous du support acceptent des vis de taille n° 10 maximum.
5. Percer un trou de diamètre approprié pour le passage des câbles. Cela dépend du type
de conducteur utilisé.
6. Le projecteur nécessite une alimentation électrique de 12 ou 24 V fournie par des
conducteurs de calibre adapté. (Remarque : Si la télécommande de pont câblée est
utilisée, deux conducteurs supplémentaires devront être tirés entre la télécommande et
le projecteur.)
!AVERTISSEMENT VEILLER À CHOISIR DES CONDUCTEURS DE CALIBRE CORRECT
ET UNE PROTECTION DE CIRCUIT APPROPRIÉE EN CONFORMITÉ AVEC LES
NORMES ABYC. LE NON-RESPECT DES NORMES ABYC PEUT ENTRAÎNER DES
BLESSURES GRAVES VOIRE MORTELLES ET DES DÉGÂTS MATÉRIELS.
7. Poser le support de fixation après avoir appliqué une petite quantité de pâte d’étanchéité
sans silicone aux points où les vis ou boulons pénètrent la support de fixation.
(Remarque : Les têtes de vis ne doivent pas dépasser de plus de 5 mm [0,2 po] du
support de fixation.)
8. Raccorder les fils au projecteur à l’aide de connecteurs bout à bout. Le conducteur rouge
est positif, le conducteur noir négatif.

Le projecteur Precision Mode d’emploi
18
!AVERTISSEMENT RESPECTER LA POLARITÉ DES CONDUCTEURS POUR QUE LE
PROJECTEUR FONCTIONNE! UN CÂBLAGE INCORRECT ENDOMMAGERAIT LE
PROJECTEUR.
9. Enfiler le projecteur sur le support de fixation en veillant à ne pas pincer les conducteurs
et à engager correctement les deux pattes de retenue sur le projecteur. Aligner le trou
de vis de blocage à l’arrière du socle de projecteur avec celui du support de fixation.
Cela nécessite un certain degré de pression et d’effort car le joint de fixation doit
être correctement comprimé durant le processus. Pour faciliter l’alignement, soulever
légèrement l’arrière du projecteur (côté du trou de vis de blocage) tout en appuyant sur
le joint à l’avant du projecteur (côté opposé au trou de vis de blocage). Engager la vis de
blocage et s’assurer qu’elle est complètement engagée et serrée.
!AVERTISSEMENT UNE RÉSISTANCE AU SERRAGE
DOIT ÊTRE RESSENTIE LORSQUE LA VIS EST
CORRECTEMENT ENGAGÉE.
Remarque : La photo montre les conducteurs de
commande violet et jaune pour la télécommande
câblée. Si une télécommande de pont sans fil est
utilisée, alors les conducteurs violet et jaune ne sont
pas nécessaires et peuvent être repliés à l’intérieur
du socle du projecteur.
Montage de la télécommande de pont câblée et sans fil
1. Toutes les télécommandes sont classées IP54 pour la résistance à l’eau.
2. Choisir un emplacement de fixation en fonction du joint fourni avec la télécommande
(le grand trou doit être vers le haut).
3. Percer des trous de dimension correcte pour les vis de fixation. Les trous à travers les
télécommandes sont prévus pour des vis à tête cylindrique n° 6. La longueur et le type
de filetage devront être déterminés en fonction de l’installation considérée. Retirer les 2
capuchons de vis et les mettre de côté.
4. Percer le trou pour câblage. On notera que le trou doit être de 16 mm (5/8 po) pour que
l’appareil repose à plat.
5. La télécommande de pont sans fil nécessite une alimentation électrique de 12 V ou
24 V. La télécommande de pont câblée ne nécessite pas d’alimentation électrique
locale mais utilise les conducteurs violet et jaune qui raccordent le projecteur à la
télécommande. Ces deux conducteurs assurent l’alimentation de la télécommande et la
commande du projecteur. Les bornes de la télécommande acceptent des fils de 16 AWG
à 26 AWG. Le couple de serrage maximal des bornes est de 2,21 po-lb (0,25 Nm).
6. Tirer les fils par le dessous à travers le trou percé dans la surface et le joint.
7. Pour la télécommande de pont sans fil, raccorder les fils de l’alimentation électrique
aux bornes positive (+) et négative (-) de la télécommande. Pour la télécommande de
pont câblée, raccorder les 2 fils du projecteur. Le fil jaune doit être raccordé à la borne
(+) et le fil violet à la borne (-). Le couple de serrage maximal des bornes est de 2,21
po-lb (0,25 Nm).
8. Placer la télécommande à l’emplacement souhaité, aligner les trous et serrer.
9. Poser les capuchon de vis sur la télécommande pour masquer les vis.

Le projecteur Precision Mode d’emploi
19
Appariement d’une télécommande sans fil de pont ou portable au projecteur
1. Couper l’alimentation électrique du projecteur.
2. Mettre la télécommande sous tension. Tenir le bouton d’alimentation de la télécommande
enfoncé.
3. Tout en tenant le bouton d’alimentation enfoncé, mettre le projecteur sous tension.
4. Au bout de quelques secondes, le déclic du relais doit être audible et la lampe doit
s’allumer.
5. Lorsque la lampe s’allume, l’appariement est effectué; relâcher le bouton d’alimentation.
Appariement de plusieurs projecteurs avec des télécommandes séparées
Pour commander plusieurs projecteurs placés à moins de 60 m (200 pi) les uns des autres
avec des télécommandes distinctes, suivre les instructions ci-dessous.
1. Pour le premier projecteur, suivre les instructions « Appariement d’une télécommande
sans fil de pont ou portable au projecteur » ci-dessus.
2. Pour le deuxième projecteur, suivre les instructions ci-dessus mais en tenant le bouton
d’alimentation ET le bouton fléché HAUT enfoncés tout en mettant la pile en place
(télécommande SPLR-1) ou en raccordant l’alimentation électrique (télécommande
SPLR-2).
3. Pour le troisième projecteur, suivre les instructions ci-dessus mais en tenant le bouton
d’alimentation ET le bouton fléché DROIT enfoncés tout en mettant la pile en place
(télécommande SPLR-1) ou en raccordant l’alimentation électrique (télécommande
SPLR-2).
4. Pour le quatrième projecteur, suivre les instructions ci-dessus mais en tenant le bouton
d’alimentation ET le bouton fléché BAS enfoncés tout en mettant la pile en place
(télécommande SPLR-1) ou en raccordant l’alimentation électrique (télécommande
SPLR-2).
5. Pour le cinquième projecteur, suivre les instructions ci-dessus mais en tenant le bouton
d’alimentation ET le bouton fléché GAUCHE enfoncés tout en mettant la pile en place
(télécommande SPLR-1) ou en raccordant l’alimentation électrique (télécommande
SPLR-2).
Programmation de la télécommande lors de pose du projecteur tête en bas
REMARQUE : Cette procédure inverse les boutons directionnels de la télécommande.
1. L’appariement de la télécommande tel que décrit plus haut doit d’abord être effectué.
2. Couper l’alimentation électrique du projecteur.
3. Tenir les boutons d’inclinaison HAUT et BAS de la télécommande enfoncés.
4. Toute en tenant les deux boutons enfoncés, mettre le projecteur sous tension et continuer
d’appuyer sur les boutons pendant quelques secondes jusqu’à ce que le projecteur
s’incline vers le haut ou le bas.
5. Le projecteur est à présent configuré en mode inversé. Relâcher les boutons.
6. Pour revenir à la configuration normale du projecteur, répéter les étapes ci-dessus.
!AVERTISSEMENT RETIRER LA PELLICULE BLEUE DE L’OPTIQUE AVANT UTILISATION

Le projecteur Precision Mode d’emploi
20
¡PRECAUCIÓN AL REEMPLAZAR LA BOMBILLA! EVITE TOCAR LA SUPERFICIE
DE VIDRIO DE LA BOMBILLA NUEVA. (HERRAMIENTAS NECESARIAS:
DESTORNILLADOR PHILLIPS MEDIANO Y DESTORNILLADOR DE CABEZA
PLANA PEQUEÑO)
1. Retire 2 tornillos de la parte inferior del
bisel de la lente.
2. Para retirar el bisel, inserte un destornillador
de cabeza plana pequeño en las dos
ubicaciones marcadas con un círculo.
En ambas ubicaciones, separe suavemente
el bisel del cuerpo con un movimiento
de separación recto hasta que sienta
que el bisel se separa de la lente.
Utilisation
SOS
(· · · — — — · · ·)
Appuyer sur ce bouton pour produire le signal
de détresse en morse avec le projecteur.
Appuyer de nouveau pour l’arrêter.
Alimentation marche/arrêt
Commande de vitesse
Appuyer sur ce bouton pour
changer la vitesse de la fonction
de balayage et de SOS du
projecteur.
Balayage automatique
Appuyer sur ce bouton pour
activer le balayage du projecteur
de gauche à droite, sur un angle
de 90° à vitesse lente et de 70°
à vitesse rapide. Appuyer sur ce
bouton une nouvelle fois ou sur
un bouton fléché pour arrêter le
balayage.
Other manuals for SPL-12W
1
This manual suits for next models
7
Table of contents
Languages:
Other marinco Spotlight manuals
Popular Spotlight manuals by other brands

Teknik
Teknik FLEXI SENSOR user manual

Vector
Vector Sportspot 90519935 instruction manual

Volt
Volt VSAL-9002-BBZ installation instructions

Chauvet DJ
Chauvet DJ LED Followspot 75ST Quick reference guide

Castaldi Lighting
Castaldi Lighting D55/T2 Installation and maintenance sheet

LIVARNO home
LIVARNO home 898-S-2 manual

Stanley
Stanley LIONLEDS instruction manual

RUSTA
RUSTA STARTER KIT 913013270101 manual

MELINERA
MELINERA 286719 Assembly, operating and safety instructions

Francis
Francis FR560 User instruction & installation manual

LIVARNO
LIVARNO home 387731 2101 Operating and safety instructions

Varytec
Varytec PAR 64 long manual