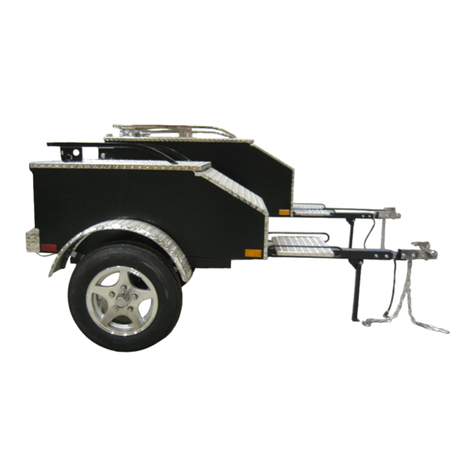
Marlon 10' Single Multi Trailer User manual

IMPORTANT SAFETY CHECKLIST
PLEASE NOTE: Trailers are not generally used every day. A trailer may
sit for extended periods of time between uses.
It is very important to check all components thoroughly on the trailer before use.
•Make sure that the towing vehicle and the hitch on your vehicle are more than
capable of towing the trailer. It is important to check your vehicle owner’s manual
for trailer ratings.
•Make sure the hitch is properly secured to the ball of the towing vehicle.
•Make sure the coupler is locked and the safety chains are attached to the trailer and
the vehicle.
•Check the operation of all lights. Operating lights are mandatory on a trailer and
must operate correctly.
•Inspect the trailer and all parts before use.
•Check to insure that all wheel bolts are tight. Torque to 95 ft/lbs. Re-tighten
after the first 50 miles (80 kilometers).
•Check the tire pressure. Maximum 80 PSI (552 KPA) when carrying the maximum rated
load.
•Repack the wheel bearings every 2,000 miles (3,200 kilometers) or a minimum of once
every year.
•The trailer ball must be a 2” ball. Check that the trailer coupler is fastened securely onto
the towing vehicles ball.
•If your trailer has an optional side kit, make sure all the bolts and pins are in place
and secured tight before transporting your trailer.
•Do not exceed the Gross Vehicle Weight Rating ( G.V.W.R.) which is shown on
the trailer serial / certification label.
•Balance and secure the load on the trailer. See the trailer loading section in this
manual.
•Lubrication of the coupler, springs, and the tilt mechanism should be done
periodically to stop corrosion and keep parts moving freely.
By following these simple instructions, you will maximize the life of your
trailer and help safely transport your cargo.
OWNER’S MANUAL / www.marlonproducts.com

WARNING!!!
DO NOT ABUSE THE TRAILER.Performance of the Marlon trailer is best if you
follow the guidelines in this manual. Do not force the Marlon trailer to do a job it is not
designed for. Know your Marlon trailer; learn its limitations and applications.
•KEEP CHILDREN AWAY.Be sure children are kept a safe distance from the
Marlon trailer operating area.
•NEVER sit or ride on the Marlon trailer. Serious injury or death could
occur.
•EXERCISE EXTREME CAUTION WHEN TILTING THE TRAILER.
There are many areas of the Marlon trailer where injury can occur if used
improperly. The Marlon trailer may tilt quickly and unexpectedly during
the loading and unloading process. The tilt option should not be used for heavy
loads.
•Ramps should always be used for loading heavy items.
•DO NOT drive with the Marlon trailer in tilted position.
•If the Marlon trailer is incorrectly attached to the vehicle, it could pull away from the
vehicle and detach.
•Always check your tire pressure before transporting your trailer.
•Secure trailer to the towing vehicle before transportation. Make sure the coupler is
locked and the safety chains are attached to the trailer and the vehicle.
•Secure your cargo into the trailer properly and in compliance to local laws.
•Always test your trailer lights before transporting your trailer and check your light
hookup periodically during transport.
•When driving do not exceed the speed limit. Braking time can be considerably
longer when a vehicle is towing a loaded trailer.
•Any modifications made to the trailer or parts of the trailer will void the trailer
warranty and release Marlon and any related companies of any responsibility
for liability, damages, injuries or accidents incurred.
•Any improper use or failure to follow the safety check list herein will void the
trailer warranty and release Marlon and all related companies of any
responsibility for liability, damages, injuries or accidents incurred.
OWNER’S MANUAL / www.marlonproducts.com
FEATURES

A. How To Use The “2 Position Axle” 10’ Single Multi Trailer
1= Back Position 2 = Front Position
The Marlon trailer comes with a 2 position axle design. This feature allows the user to
control how much of the trailers load is distributed to the vehicle. This feature has the benefit
of improved handling under low load conditions and reduced tongue weight under heavy load
conditions. This feature also allows the trailer to use a tilt position.
B. How to Use the “Tilt” Feature
The Marlon trailer has a tilt feature to help with loading and unloading of cargo.
How to: First make sure the trailer is attached to the towing vehicle. Loosen the tongue clamp
locking bolt enough to allow the brace to turn out of the way of the tongue, this will allow you
to tilt the trailer to the dump position.
CAUTION WHEN TILTING THE TRAILER: The trailer may tilt quickly and
unexpectedly during the loading and unloading process.
OWNER’S MANUAL / www.marlonproducts.com
BOLT TORQUE SPECIFICATIONS

PLEASE NOTE: All bolts should be properly tightened on your trailer. To properly
transport your trailer the torque specification for key components are given below. Please refer
to diagram #2 and the parts list located on page 10 to identify the items referenced.
DESCRIPTION
TORQUE IN FT / LBS
Tire / Wheel lug nuts
95
Axle mounting bolts
75
Fender and fender brackets
40
Attach tongue to trailer
75
Attach coupler to tongue
80
LIGHTING & WIRING (See Figure #3)
SYMBOL
COLOR
DESCRIPTION
OPERATION
G
GREEN
Passenger Side / Right
Right Signal
Brakes
B
BROWN
Running Lights
Taillight
Marker
Yellow Side
Marker
Y
YELLOW
Driver Side / Left
Left Signal
Brake
W
WHITE
Ground
Trailer
Ground
To test vehicle wiring:
You will need a 12V light tester. Attach the wire clamp of the tester to the ground wire on
the vehicle plug (see Fig 3). Then touch the tester pin to one of the vehicles plug contacts.
Turn on the corresponding vehicle operation i.e. running lights. This will illuminate the
tester light if the vehicle wiring is correct. Follow the same procedure for the signal and
brake lights.
To test the trailer wiring:
Once you have confirmed that the vehicle trailer plug is operating properly, connect the
trailer plug to your vehicle. Proceed to test each of the lights and power leads using your 12V
light tester. Follow the wiring legend and diagram to test each corresponding wire for power
when trailer light is not operating.
Always be sure to check your brake, running, and signal lights before each use. Make sure
that all of your connections are solid and that all wiring is in good condition.
Note: Bare, striped or pinched wire will cause a short in the trailer, which will cause the
vehicle to blow a fuse. A solid ground is required for your lights to work properly. All
contacts must be to bare metal. Light covers should be well maintained and kept clean. Be sure
that your lights are always visible, not obstructed by your load.
OWNER’S MANUAL / www.marlonproducts.com

LOADING THE TRAILER
•Distribute the weight evenly on the bed of the trailer.
•Center the load over the axle, keeping about 10% of the weight on the tongue.
•Center the load from side to side.
•Always secure your cargo into the trailer properly and in compliance to local laws.
•The trailer needs to be loaded so the frame is parallel to the ground and not tongue or tail-
heavy. Uneven loads will cause the trailer to not tow properly.
TRAILER CAPACITY
Never overload your trailer. Each trailer has a maximum payload that should not be
exceeded. Overloading your trailer could cause serious damage to your trailer as well as to
the towing vehicle. Please refer to your trailer serial/certification label located on the frame
of the trailer for capacity details.
The Gross Vehicle Weight Rating (G.V.W.R.) is: 1,850 lbs.
The weight of the trailer + the maximum payload the trailer can carry. The trailer weight
and the payload must not exceed this (G.V.W.R.) weight rating.
Be sure that any load carried in your trailer does not extend beyond the frame of your trailer.
Never place loads on one side only.
TONGUE WEIGHT
The tongue weight is 10% of the load (this does not include the weight of the trailer).
The load is divided so that 90% of the load is over the axle and 10% is over the tongue.
OWNER’S MANUAL / www.marlonproducts.com

TRAILER COUPLER
ITEM#
DESCRIPTION
1
2" Trailer coupler
2
Locking handle
3
Channel lock
4
Adjustment nut
5
2" Trailer ball (not included)
To adjust coupler to ball:
Set the coupler and tongue on to the 2" trailer ball on your vehicle.
Raise the locking lever, push up on channel lock and turn the nut to tighten or loosen the
coupler. Proper adjustment is obtained when the coupler is as tight as possible on the ball and
the locking lever can still be opened and closed.
Before towing your trailer be sure to check the capacity of your trailer hitch on your
vehicle (never exceed this or your trailers capacity). The Marlon trailer is equipped with a 2"
coupler and must be used with a 2" trailer ball. Make sure that the trailer ball is completely
engaged in the coupler ball.
WHEEL & HUB ASSEMBLY
NOTE: Bearings should be repacked every 2,000 miles (3,200 kilometers). Your trailer dealer
or any automotive shop is equipped and able to repack the bearings if you’re unable to do
yourself. For your convenience, a grease zerk fitting is located behind each wheel which
only requires the use of a grease gun to service, or you can do it manually as follows;
Repacking Wheel Bearings
1. Loosen wheel bolts (Do not remove!).
2. Support trailer so wheels are off the ground safely and secured.
3. Remove bolts and wheel.
4. Disassemble hub.
5. Clean hub and pack bearings with wheel bearing grease.
6. Reinstall bearings, nut, and cotter pin.
Caution: DO NOT over tighten nut. The hub must turn freely and without play.
7. Re-attach bolts and wheel (Torque to 80 lbs.).
OWNER’S MANUAL / www.marlonproducts.com

TRAILER LICENSING
In order to license your trailer, you will need to have two items in your possession.
1. The Manufacturers Certificate of Origin: This form is provided at the time of purchase.
2. Bill of Sale; This is the cash register receipt provided from the business that you purchased
the trailer from.
You must have both items when you go to your local insurance office or state department of
motor vehicles to register and license your trailer. Once you pay the appropriate fees you will be
issued a title / registration and a license plate.
If you require any further information regarding this issue please call your local insurance office
or state motor vehicle department (DMV), or visit online DMV.org for specific state
information.
OWNER’S MANUAL / www.marlonproducts.com

Description
Material
Quantity
Washers
Nuts
1
Tongue locking bolt
100 x 10mm
2
4
2
2
Wiring harness
one end flat 4
1
0
0
3
Tongue clamp bolt
270 x 12.5mm
1
1
1
4
Axle mounting bolts
180 x 10mm
4
8
4
5
Fender bracket mounting bolts
40 x 7mm
4
4
4
6
Fender mounting bolts
20 x 7mm
4
4
4
7
Adhesive backed barrier
270 x 50mm
2
0
0
8
License plate bracket bolts
20 x 7mm
4
4
4
9
Coupler mounting bolts
80 x 10mm
2
2
2
OWNER’S MANUAL / www.marlonproducts.com

ASSEMBLY INSTRUCTIONS
1. Apply the adhesive backed barrier to the axle mounts on both sides of the axle.
2. Bolt the axle to trailer frame 180 x 10mm bolts, washers and nylocks. Torque to 75 ft/lbs
of pressure.
Note: There are 2 sets of holes in the frame. The front set are used for carrying snowmobiles
and the rear set are used when carrying 50” SXS/UTV’s.
Note it is imperative for proper towing & safety to have the axle in the correct position.
OWNER’S MANUAL / www.marlonproducts.com

4. Attach the fender mounting brackets to the side rail using the 40 x 7mm bolts. Note, there
are 4 sets of holes per side. If you put the axle in the forward position (sled) then use the 2
sets of forward fender bracket holes. If you mounted the axle in the back position
(SXS/UTV) then use the rear holes for the fender mounting brackets.
5. Mount the fenders to the fender brackets using the 20 x 7mm bolts.
Make sure the bracket orientation matches the picture below.
OWNER’S MANUAL / www.marlonproducts.com

6. Install the tongue clamp bolt and brace and front tongue tie down bolt (if required). This
bolt is the 100 x 10mm and is used if the customer does not want to use the tilt function of
the trailer. This is a requirement when using the trailer to carry 50” SXS/UTV due to the
weight of the machines. Optional SXS/UTV ramps must be used in place of the tilt option.
7. Attach the coupler to the tongue and the safety chains at the same time. Use the coupler
mounting bolts, 80 x 10mm. The center link of the safety chain slides through the front
bolt. Torque to 95 ft/lbs.
OWNER’S MANUAL / www.marlonproducts.com

Single Multi Trailer Options
SuperGlides install.
1. Slide wide SuperGlides into siderail extrusion, 4 pieces will fit, then slide on the
SuperGlide extrusion.
2. Rivet the extrusion down 1 inch from each end. Then starting at the back of the trailer at
29.5” then 59” then again at 88.5”for a total of 5 rivets per length of SuperGlide
extrusion. Then rivet the end of the front and rear glide as per picture below, it is not
necessary to rivet any of the middle 2 glides.
OWNER’S MANUAL / www.marlonproducts.com

Salt Shield with Rubber Seal
1. Assemble the salt shield completely first. (All required parts to assemble and attach
the shield come in the kit.) Start with bolting the sides on. Then bolt on the angle
pieces to the bottom of the side as shown in the picture.
OWNER’S MANUAL / www.marlonproducts.com

Push the rubber seal onto the bottom edge of the shield. Ensure the steel clips slide all the
way over the aluminum.
2. Position the shield over the leading edge of the trailer. Center it between the siderails
and forward so that the leading edge of the trailer is inline with the bottom bend on the
shield. (See pic below.)
OWNER’S MANUAL / www.marlonproducts.com
Table of contents
Other Marlon Utility Vehicle manuals