Marquardt Just Drive Comfort 4313 Series User manual

2010-10-29
Recommended contents for
Operating manual
Just Drive Comfort control unit for pedelecs and e-scooters
Similar to the picture.
Series 4313
Store for future use!

Just Drive Comfort control unit for pedelecs and e-scooters
2 Just Drive Comfort control unit for pedelecs and e-scooters
Table of Contents
1About this operating manual...........................................................3
1.1 Display modes..........................................................................3
1.2 Copyright protection.................................................................4
1.3 Contact details..........................................................................4
2Safety Instructions ...........................................................................4
3Overview of Comfort control unit ...................................................6
3.1 Technical data..........................................................................6
4Mounting the Comfort control unit .................................................6
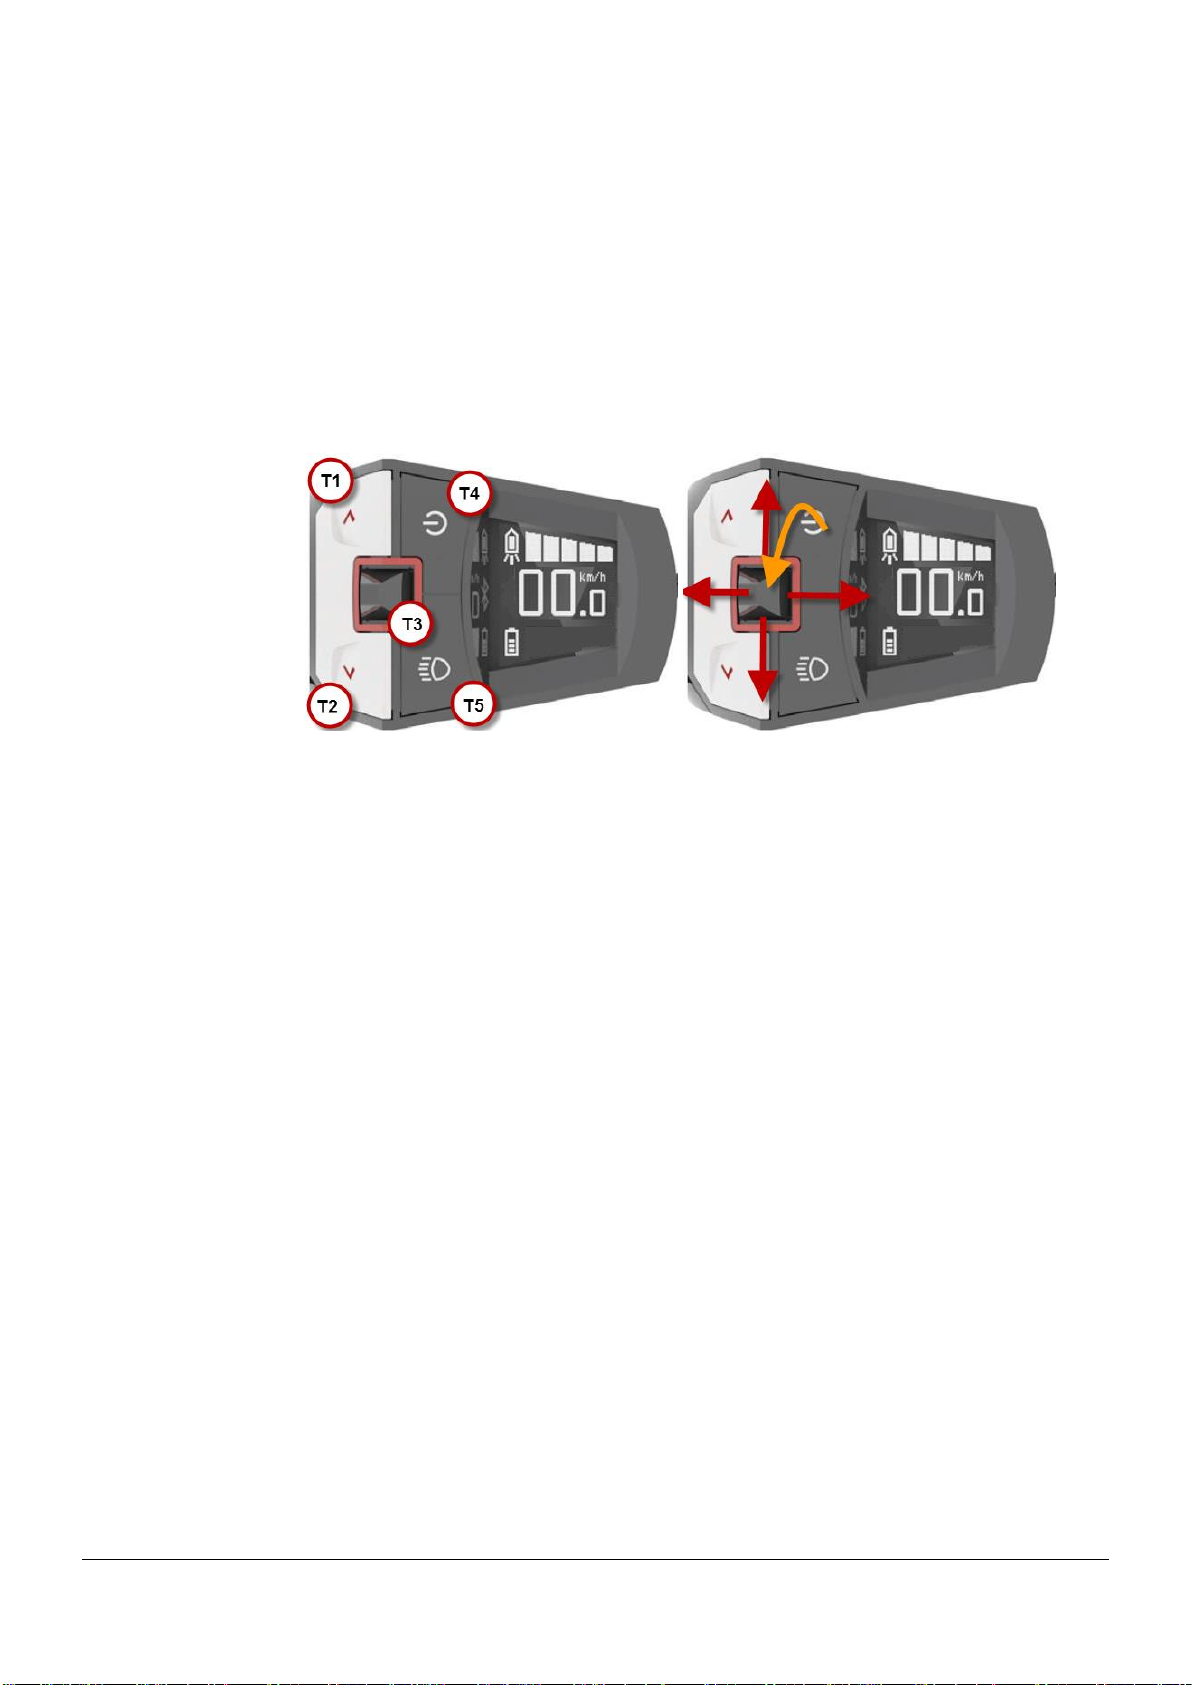
5Operating and display elements.....................................................8
5.1 Operating keys .........................................................................8
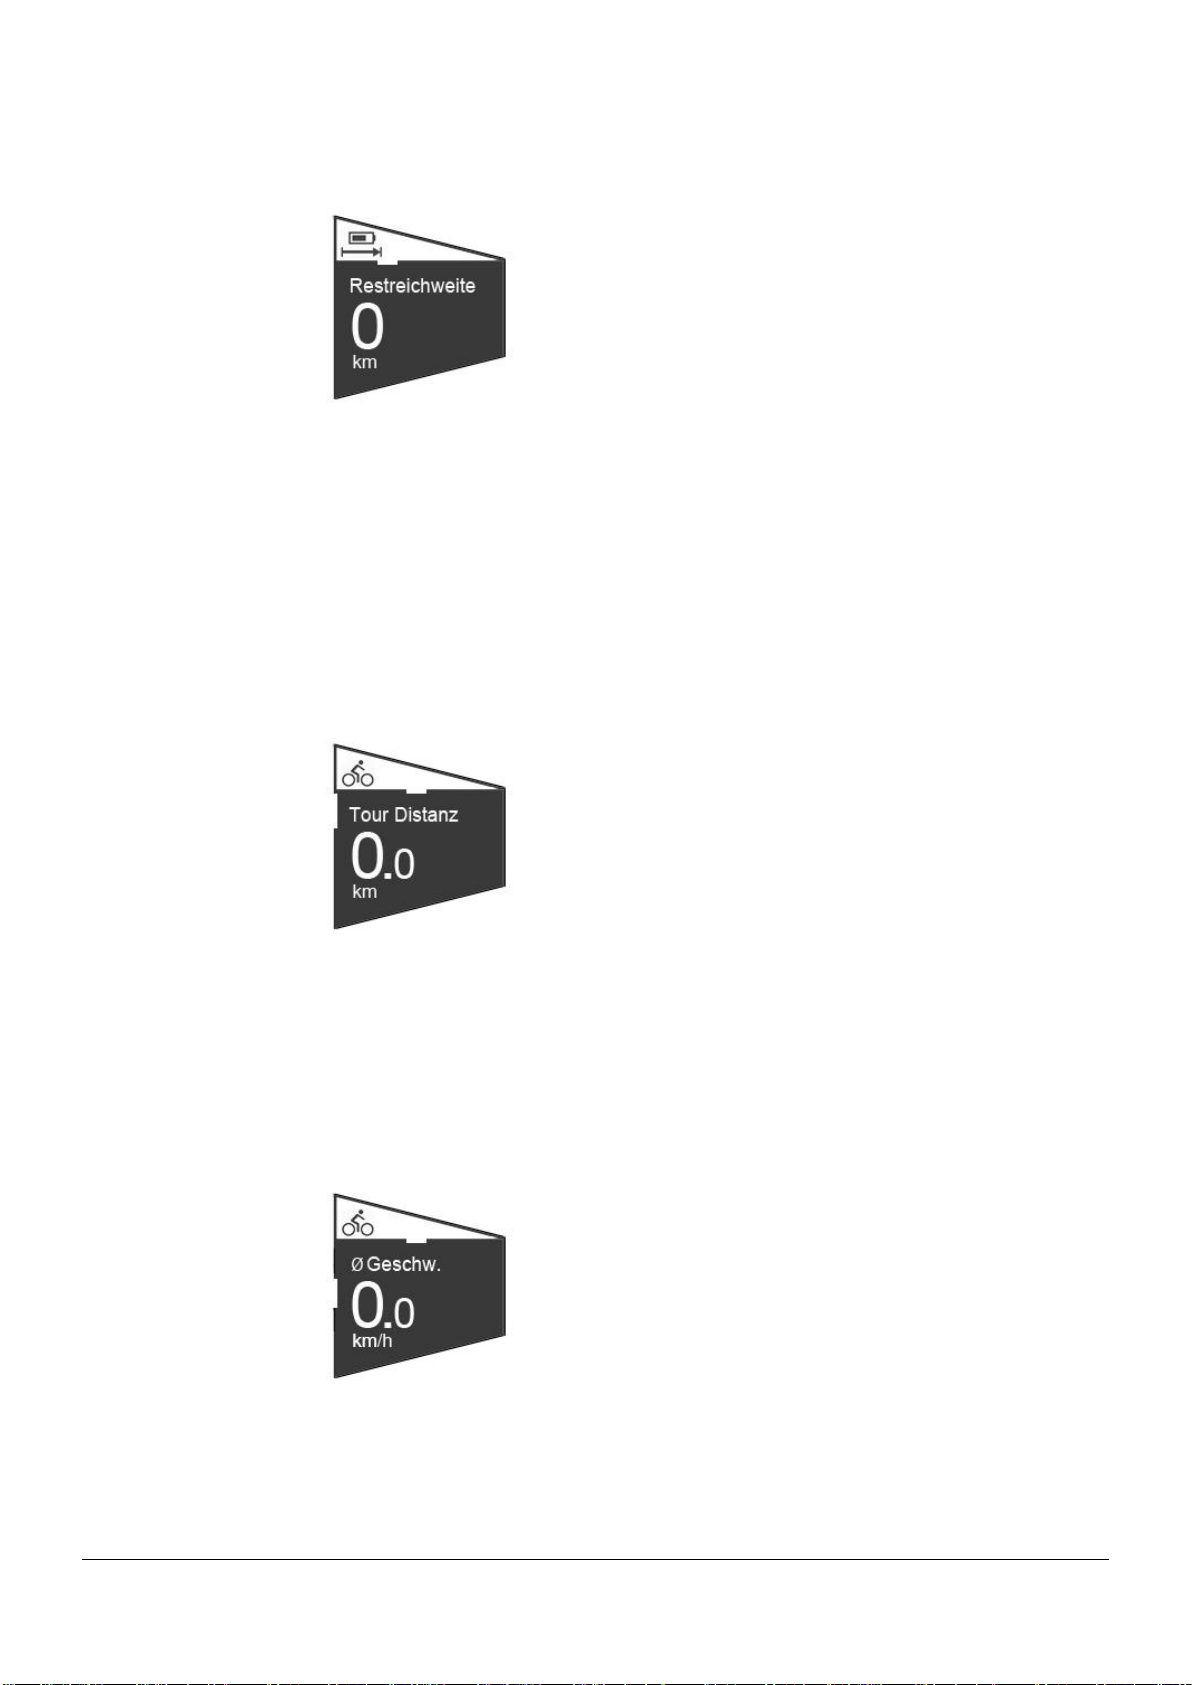
5.2 Displays of the Comfort control unit .........................................9
6Operating.........................................................................................14
6.1 Switching on and off...............................................................14
6.2 Operation................................................................................14
6.2.1 Headlight.................................................................14
6.2.2 Setting support........................................................15
6.2.3 Sliding aid ...............................................................16
6.3 USB port.................................................................................16
7Error codes......................................................................................18
8Disposal...........................................................................................22

Just Drive Comfort control unit for pedelecs and e-scooters 3
1 About this operating manual
This manual serves as a content recommendation for the overall system manual of an overall
system and does not serve as an end customer operating manual.
1.1 Display modes
The following display modes are used to highlight special elements of the operating manual:
Safety instructions
Safety instructions in this manual are identified by symbols. The safety instructions are intro-
duced by signal words which express the extent of the danger.
WARNING!
This combination of symbol and signal word indicates a potentially dangerous
situation which, if not avoided, could result in death or serious injury.
CAUTION!
This combination of symbol and signal word indicates a potentially dangerous sit-
uation which, if not avoided, may result in minor or moderate injury.
NOTE!
This combination of symbol and signal word indicates a potentially dangerous
situation which, if not avoided, may result in property damage and environmen-
tal damage.
Tips and recommendations
This symbol highlights useful tips and recommendations as well as information
for efficient and trouble-free operation.
Other markings
The following markings are used in this manual to highlight instructions for action, results, lists,
references and other elements:
Steps for action
Steps for action are displayed as a numbered list. The sequence of the steps must be observed.
The system reactions to the respective operating action are marked by an arrow.
Example:
1. First operating action / step
2. Second operating action / step
Reaction of the system to the operating action enumerations

4 Just Drive Comfort control unit for pedelecs and e-scooters
Enumerations
Enumerations without a mandatory sequence are displayed as a list with enumeration points.
Example:
Point 1
Point 2
1.2 Copyright protection
The contents of this manual are protected by copyright. Their use is permitted within the scope
of using the device and creating a complete system operating manual. Any other use is not per-
mitted without the written consent of the manufacturer.
1.3 Contact details
Address Marquardt GmbH
Schlossstraße 16
78604 Rietheim-Weilheim
Telephone +49 7424 99-28301
E-Mail support-emobility@marquardt.com
Internet www.marquardt.com
2 Safety Instructions
Read this operating manual and observe all safety instructions. Failure to follow the
safety instructions can result in electric shock, fire and/or serious injury.
Keep this operating manual in a safe place. This will enable you to read the information
on various functions later, for example.
The Comfort control unit is part of the pedelec's drive system. Read and follow the
safety notes and instructions in all pedelec operating instructions, especially in the elec-
tric drive operating instructions. This is the only way to ensure safe use of the pedelec.
Do not be distracted by the Comfort control unit display. If you do not concentrate exclu-
sively on traffic, you run the risk of being involved in an accident. While driving, check
the displayed elements, change the support level, activate the sliding aid and switch the
light on or off. To change the settings, stop and enter the appropriate data.
Do not open the Comfort control unit. The Comfort control unit may be damaged if it is
opened and the warranty is void.
Do not use the Comfort control unit as a handle. If you lift the pedelec by the Comfort
control unit, you may irreparably damage the Comfort control unit.

Just Drive Comfort control unit for pedelecs and e-scooters 5
Do not place the bicycle upside down on the handlebars as this may damage the con-
trol unit, but use a suitable bicycle mounting stand approved for the total weight.
WARNING!
Configure the basic settings on the Comfort control unit before driving.
Unconcentrated driving endangers you and other road users.
Familiarize yourself with the functions of the pedelec and the Comfort control
unit before starting your first ride.
Carry the operating manual with you on all trips. This means that you can also
read up on less frequently used functions at any time.

6 Just Drive Comfort control unit for pedelecs and e-scooters
3 Overview of Comfort control unit
Switch the pedelec on and off at the Comfort control unit. Use the two keys and the joystick to
activate and control support from the electric motor or switch on the headlights.
The Comfort control unit's display shows the current driving speed. You can also see which sup-
port level is active, how long the power for the support motor will last, the charge level of the
battery and whether the light is switched on. You can also view the trip kilometers, average
speed and maximum speed for the current tour. The Comfort control unit also displays the total
mileage of the pedelec and the maximum speed over the entire distance.
3.1 Technical data
Comfort control unit
Length x width x height
72.8 x 50.2 x 44.6 mm
Operating temperature
-10 °C to 45 °C
Storage temperature
-20 °C to 85 °C
Protection class
IP65 (HMI) dustproof, water spray proof
ESD model
Human Body Model (HBM)
USB interface
Micro USB Standard 2.0 Full Speed
USB charging function
USB Battery Charging Standard BC1.2 Max. 1.0 A
CAN Interface ISO 11898-5
High-speed CAN
4 Mounting the Comfort control unit
Check the fastening screws at regular intervals. Shocks, heat and cold may
cause the screws to loosen.
Tighten all screws to the required torque.
The Comfort control unit can be mounted on the left or right handlebar side. The protruding
page faces inwards. It is not above the handlebar grips. Position the control unit close to the
handle. All keys must be easy to operate with your thumb.
1. Unscrew the hexagon socket screw with a hexagon socket SW 2.5 on the bracket of the
control unit. Open the mounting bracket.
2. Position the control unit on the left-hand side of the handlebar.
3. Position the connecting cable in the control unit bracket. It must lie in the guide troughs
on the inside of the bracket and be guided through a recess in the bracket to the con-
nection.
4. Close the bracket. Pay attention to the connecting cable.
The connecting cable must not be crushed by the bracket.

Just Drive Comfort control unit for pedelecs and e-scooters 7
5. Turn the hexagon socket screws on the bracket back in with a hexagon socket SW 2.5.
Do not tighten the screws yet.
Check the position of the Comfort control unit. Are all keys accessible with the thumb?
Is the advertisement clearly visible?
6. Tighten the hexagon socket screw with the hexagon socket (min. torque 0.3 Nm, max.
torque 0.5 Nm).
7. Connect the purple plug of the control unit to the socket of the same color on the wiring
harness. Ensure that the cut-outs in the plug and socket meet so as not to damage the
connection
The Comfort control unit is installed.

8 Just Drive Comfort control unit for pedelecs and e-scooters
5 Operating and display elements
Use the keys on the Comfort control unit to regulate the functions of the pedelec system ergo-
nomically. The hand can remain on the handlebar grip, while the thumb can operate the keys on
the Comfort control unit. The displays on the control unit display provide information about the
driving situation and the support aids.
5.1 Operating keys
The keys on the Comfort control unit are used to control the functions of the pedelec system.
Fig. 1 Keys and joystick of the Comfort control unit (figure shows left-hand installation. The display and
function of the keys are mirrored when mounted on the right-hand side). Shown amount of support levels
and battery indicators may vary due to your system configuration.
Key
Function
T1
Increase support level
Hold > 3s: Switch on push mode until key is no longer held.
T2
Reduce support level
T3
Joystick:
One page up.
Switch to editing mode.
One entry higher in editing mode.
Move to the next page to the left.
In editing mode, exit the mode and confirm the value.
In edit mode, edit the highlighted value.
Switch to the next page to the right.
In editing mode, exit the mode and confirm the value.
Move one page down.
Switch to editing mode.
One entry higher in editing mode.
T4
Switch the Comfort control unit on and off.
T5
Short press: Switch on the light.
Long press: Switch off the light.
In automatic mode: The light is switched on or off depending on the ambient light. The
light can always be switched on or off manually using this switch.

Just Drive Comfort control unit for pedelecs and e-scooters 9
5.2 Displays of the Comfort control unit
The displays of the Comfort control unit offer different information on different pages. The joy-
stick moves sideways to switch between the pages. Some of the pages offer additional pages
that are controlled by vertical movements of the joystick.
The main page provides the following information:
1
Indication of the current support.
Shown amount of support levels and battery indica-
tors may vary due to your system configuration.
2
Speed
3
Status display for
Triangle symbol: Sliding aid active.
Lighting: Symbols show the status.
4
Battery charge status.
The other pages are designed according to the following pattern:
1
Symbol for the page.
2
Horizontal navigation position.
3
Page content.
4
Vertical navigation position: Refers to further
pages and shows the current position.
Driver Performance
Fig. 2 Comfort Page Driver performance
Shows the current power output by the user to drive the pedelec in watts. This value is transmit-
ted by the motor to the control unit.

10 Just Drive Comfort control unit for pedelecs and e-scooters
Remaining range
Fig. 3 Comfort Page Remaining range
Indicates the remaining range of the pedelec. The remaining range is determined by the control
unit itself using information from the system. The remaining range changes depending on the
driving style and takes into account long and short-term experience values. This offers signifi-
cantly higher reliability during daily journeys with a constant driving profile. Short-term changes
to the driving profile are also included in the range calculation
Tour Distance
Fig. 4 Comfort Page Tour Distance
Displays the distance travelled since the value was last reset.
This page contains additional pages.
Tour Distance / Average Speed
Fig. 5 Comfort page Tour average speed
Medium speed.
Displays the average speed of the current route.

Just Drive Comfort control unit for pedelecs and e-scooters 11
Tour Distance / Maximum Speed
Fig. 6 Comfort page Tour-Max. Speed
Maximum speed.
Displays the highest speed of the current route.
Tour Distance / Reset
Fig. 7 Comfort page Tour-Reset
Reset - Move the joystick (T3) down to activate the RESET function (change the color
of the menu item from black to white).
By briefly pressing the joystick, the tour values are reset to "0".
The values for the distance, average speed and maximum speed of the current tour are
deleted and set to "0".
Total Distance
Fig. 8 Comfort Page Total Distance
Displays the total distance covered by the pedelec.
Another page belongs to this display.

12 Just Drive Comfort control unit for pedelecs and e-scooters
Total distance / maximum speed
Fig. 9 Comfort Page Max. Speed.
Shows the highest speed on the total distance covered by the pedelec.
Automatic light (setting menu)
Fig. 10 Comfort page Automatic light
Activate the automatic mode for the headlight here. The light is then switched on or off depend-
ing on the ambient brightness.
If the automatic mode is switched on, the headlight symbol is displayed with an "A" on the main
page.
The light can be switched on or off at any time using the T5 key.
Language (Settings menu)
If you want to change the language of the operating element, this can be done in the settings
menu. If you select the Language menu option with the joystick, the selection page for the avail-
able languages opens.
Now select the desired language and confirm the selection by activating the respective check-
box.
The language is changed without a restart. There may be a short waiting time during which the
operating element does not react for a short time.
By pressing the joystick to the left for right installation or by pressing the joystick to the right for
left installation, you return to the settings menu.

Just Drive Comfort control unit for pedelecs and e-scooters 13
Installation position (Settings menu)
If you want to change the installation position of the operating element, this can also be done in
the settings menu. If you select the menu item Installation position with the joystick, the corre-
sponding selection page opens.
Now select the desired installation side and confirm the selection by activating the respective
checkbox.
Changing the installation position is associated with an automatic restart of the operating ele-
ment. Subsequently, you are back on the main page of the operating element.
Imperial (Settings menu)
If you want to change the used unit of the operating element, this can be done in the setting
menu. If you use the joystick to select the Imperial menu item and activate the checkbox, all
data will be converted from km to miles.
The change does not require a restart and takes effect immediately.
Bluetooth
Fig. 11 Comfort page Bluetooth
Displays Bluetooth connection options.
OFF: Bluetooth is turned off.
Smartphone: Connecting to a telephone
This is how you change the current selection:
1. Move the joystick forward or backward.
A new value is highlighted.
2. A vertical movement of the joystick marks another option.
3. Press the joystick to activate the selected option.
The change is applied immediately.
Please contact your system manufacturer for a smartphone app compatible with your system.
Move the joystick left/right to the next page.

14 Just Drive Comfort control unit for pedelecs and e-scooters
6 Operating
6.1 Switching on and off
Switching on the Comfort control unit
Press the T4 key for less than 2 seconds.
The display shows the home screen, then changes to the Main screen.
Switching off the Comfort control unit
Press and hold (>2s) the T4 key.
The display goes out.
6.2 Operation
6.2.1 Headlight
Press the T5 key to switch the light on or off. If the automatic light function is activated, the light
is switched on or off according to the ambient light.
The main page shows the current status of the running light with the following symbols:
Symbol
Headlight
-
Headlight off
Headlight on
Automatic mode on - Headlight off
Automatic mode Headlight on
Switch on the headlight
Briefly press the T5 key.
The headlight is switched on.
The headlight symbol shows the normal light status.
Switching off the headlight
Press and hold (>2 sec) the T5 key.
The headlight is switched off.
The headlight symbol shows the current status.
Automatic mode Switching the headlights on and off
You activate the automatic mode for the headlight on the "Automatic light" page.
The automatic mode switches the headlight on or off according to the ambient light.
In automatic mode, you can switch the headlight on or off at any time with the T5 key.

Just Drive Comfort control unit for pedelecs and e-scooters 15
6.2.2 Setting support
The electric motor of your pedelec supports your pedaling power. Several support levels are
available. You can also drive without motor assistance.
You set the support levels on the Comfort control unit (T4 / T2).
The current support level indicates Comfort with a scale.
The selected level is immediately effective.
You can see the active level from the bright segments of the support display on the main page
of the Comfort control unit.
Level
Description
None
Normal cycling conditions. Motor inactive.
ECO
Efficient support for maximum battery range
TOUR
Consistent support for long distances with large
battery range
SPORT
Powerful support for sporty driving, on mountainous
roads and in city traffic with normal battery range
BOOST
Powerful support for sporty driving on steep and
mountainous tracks with low battery range
Enable support
The display shows no support level.
1. Press the T4 key on the Comfort control unit.
The electric motor supports the drive.
The first segment is shown in the support display.
Increasing support
1. Press the T4 key. You switch to the next higher level.
The electric motor provides more support to the drive.
Further segments are displayed in the support display.
Reducing support
1. Press the T2 key.
The electric motor is less supportive.
In the support display, the number of segments displayed decreases.
Driving without assistance
1. Press the T2 key until no segment of the support display is visible.
You are driving without motor support.

16 Just Drive Comfort control unit for pedelecs and e-scooters
6.2.3 Sliding aid
The sliding aid is available for starting or pushing the wheel. The drive of the pedelec supports
the movement of the wheel. The sliding aid can be activated up to a speed of < 6 km/h.
You use the sliding aid when sliding the wheel, when starting off or when assisted starting on a
hill. If you push the wheel, you move beside the wheel. Use the sliding aid as a starting aid
when sitting on the bike.
In both cases, the activated sliding aid moves the pedelec.
WARNING!
The sliding aid moves the pedelec.
Grasp the handlebar grips and be ready to apply the brakes.
When sitting on the bike, do not press the pedals. Your power and the sliding
aid could accelerate the pedelec very strongly. The second pedal also moves
and can injure you when you climb up!
Do not use the sliding aid for slow driving.
Switch on the sliding aid:
Press and hold the T1 key.
The sliding aid is active and moves the wheel.
The triangle symbol for the sliding aid is displayed on the main page of the display.
Switch off the sliding aid:
Release the T4 key.
The sliding aid is switched off.
The triangle symbol is no longer displayed on the main page of the display.
6.3 USB port
The Comfort control unit has a Micro USB AB plug. The USB plug is located in the tip of the de-
vice above the handlebar and is protected against dirt and moisture by a rubber cap. A con-
nected USB device is supplied with max. 1 A charging current.

Just Drive Comfort control unit for pedelecs and e-scooters 17
Fig. 12 USB port
NOTE!
No liability is accepted for damage to the mobile phone caused by the connec-
tion to the Comfort control unit.
Connecting the USB Device
1. Open the rubber protection cap of the USB port.
2. Connect the USB device to the USB port - direct connection or with a suitable USB ca-
ble. A so-called OTG USB cable must be used to charge a device. The direction of con-
nection must be observed.
The new connection is displayed on the connected device.
Removing the USB device
NOTE!
Please observe the instructions for disconnecting the USB connection in the op-
erating manual of the connected device.
1. Disconnect the USB device or the connecting cable from the USB port on the Comfort
control unit.
2. Close the USB port with the rubber cap.
NOTE!
The Comfort control unit is only protected against water and dirt when the rub-
ber protection is closed.
NOTE!
To prevent damage to the USB port of the control unit, it is recommended that
the USB cable is also securely attached to the handlebars.

18 Just Drive Comfort control unit for pedelecs and e-scooters
7 Error codes
The Comfort control unit displays error codes for the entire pedelec system. The error codes
represent errors detected by the system. The following table shows the meaning of the error
codes. Please observe the recommended reaction to the error codes.
WARNING!
Note the error codes!
Error codes can indicate serious errors in the pedelec system. These errors pre-
vent safe operation of the pedelec. Accidents with personal injury and damage
to the pedelec may occur.
Stop using the pedelec. Inform yourself about the meaning of the error code and
observe the solution approach.
If the meaning of the error code is unclear, stop the drive and turn off the wheel.
Contact the manufacturer, the dealer or your garage for information on the next
steps.
Error codes provided by the drive system:
Error code
Description
Solution approach
10
The battery voltage is too low
Charge the battery pack with the battery charger.
11
The battery voltage is too high
Switch the system completely off and on again using
the T4 key on the control unit. If the problem per-
sists, contact your e-bike dealer.
12
The battery is almost completely dis-
charged
Charge the battery pack with the battery charger.
20
Electrical measurements are erroneous
Switch the system completely off and on again using
the LED key (28) on the battery pack (26). If the
problem persists, contact your e-bike dealer.
21
Thermocouple defective
23
Thermocouple defective
24
The internal voltage is beyond the oper-
ating range
Charge the battery pack with the battery charger.
25
Error in the motor current measurement
Switch the system completely off and on again using
the T4 key on the control unit. If the problem per-
sists, contact your e-bike dealer.
26
A software reset has been performed
31
Shortcut in light circuit
Check cable harness.
40/41
Detection of overcurrent in the motor
Reduce the load on the motor by pedaling less or re-
ducing the support level.

Just Drive Comfort control unit for pedelecs and e-scooters 19
Error code
Description
Solution approach
42
Fault in the engine rotation
Switch the system completely off and on again using
the T4 key on the control unit. If the problem per-
sists, contact your e-bike dealer.
43
Short-circuit in the motor
44
Overheating of the motor
Reduce the load on the motor by pedaling less or re-
ducing the support level.
45
The software has corrected an error
when turning the motor
Switch the system completely off and on again using
the T4 key on the control unit. If the problem per-
sists, contact your e-bike dealer.
46
No motor movement detected although
a current > 2 A was measured
60
Interruption of data exchange on the
CAN-BUS
Check the cables and plug connections of all com-
ponents of the e-Bike system.
70
Force on the pedal is not within the valid
range
Switch the system completely off and on again using
the T4 key on the control unit. If the problem per-
sists, contact your e-bike dealer.
71
Pedal rotation is not detected
72
Force on the pedal is not detected
73
Connection to pedal force sensor is
faulty
74
Errors were detected in the data
75
Cadence sensing not plausible
Switch the system completely off and on again using
the T4 key on the control unit. If the problem per-
sists, contact your e-bike dealer.
76
Brake signal missing or not plausible
Switch the system completely off and on again using
the T4 key on the control unit. If the problem per-
sists, contact your e-bike dealer.
80
Erroneous motor parameter
Switch the system completely off and on again using
the T4 key on the control unit. If the problem per-
sists, contact your e-bike dealer.
81
Speed signal is not detected
Make sure that the spoke magnet is correctly posi-
tioned opposite the speed sensor.
82
The program has been manipulated
Switch the system completely off and on again using
the T4 key on the control unit. If the problem per-
sists, contact your e-bike dealer.
83
Error in the program flow
84
Erroneous motor parameter
85
No communictation to throttle switch
No throttleswitch-support until error fixed.
86
Wrong values from throttle switch
No throttleswitch-support until error fixed.
87
Stucking throttle switch
No throttleswitch-support until error fixed.

20 Just Drive Comfort control unit for pedelecs and e-scooters
Error code
Description
Solution approach
90
Software program flow error detected
Switch the system completely off and on again using
the T4 key on the control unit. If the problem per-
sists, contact your e-bike dealer.
91
TorqueSensor send erroneous data
Switch the system completely off and on again using
the T4 key on the control unit. If the problem per-
sists, contact your e-bike dealer.
92
TorqueSensor send erroneous data
93
TorqueSensor send erroneous data
94
Overcurrent detected
95
Break light test failed
Break light current too high. Check breaklight func-
tion and specification.
Table of contents
Popular Control Unit manuals by other brands

IBM
IBM color LaserJet 5500 Operational, installation, and maintenance guide

Tektronix
Tektronix 80C12B Series user manual

Wurth Elektronik
Wurth Elektronik ANR004 Proteus manual

Mattel Electronics
Mattel Electronics IntelliVoice 3330 Service manual

ABB
ABB EAN823 instructions

WAGO
WAGO WAGO-I/O-SYSTEM 750 Series manual