Marquis Spas Quest User manual

PUMP PRIMING (Pr)
Pump priming feature begins at start-up. When your spa
is energized, the LCD window displays a “Pr” message.
This mode lasts approximately four to five minutes, if
not exited manually by pressing the TEMP pad.
UNDERWATER AND ENTRYWAY LIGHTS
Press the LIGHT pad to turn the underwater and
Entryway lights on and off. The low-voltage system
produces a night light for evening use and makes
entering and exiting the spa safer. After being on for
60 minutes, the lights automatically turn off.
AQUA AMBIANCE™
Use SPA LIGHT pad. Step one: turn on light. Step two:
turn off and then on within 2-3 seconds. Repeat for
all options: white, aqua, violet, blue, gold, green, red,
color wash, and blinking party mode. When switched
off for over 10 seconds your last color mode will be
saved in memory. To reset synchronization (two light
systems) turn light off for 5 seconds and turn back on.
WATERFALL FEATURE
The Waterfall feature and Convenience Center
attaches securely to the dual Vortex skimmer tops.
The water flow is controlled by an independent valve.
NOTE: Don’t remove the waterfall top while the
pumps are running.
JETS
Use the JETS pad on the bather panel or remote
control. First press of the JETS pad activates pump
on low-speed (and starts soak timer). Second press
of the JETS pad activates pump on high-speed. Third
press of the JETS pad turns jets off for all-quiet mode.
Fourth press of the JETS pad turns pump back to
low-speed. If the pump is already on low (heating,
filter cycle) then the first press starts the soak timer.
After running on low- or high-speed for 15 minutes,
the pump automatically turns off (unless in heating or
filtering cycle).
PAGE 27
THE QUEST
spa control operation
REMOTE CONTROL
MARQUIS SPAS

SOAK TIMER
The soak timer starts the first time you press a JETS
pad. The LCD window displays the elapsed time (1-
30) for 55 seconds then switches to the current
water temperature for five seconds then back to the
timer. It continues to alternate for the entire 30
minutes. The timer runs for 30 minutes regardless of
other functions in use (jets, temperature, or light). You
can manually cancel the timer by pressing the
TEMP+- pad and then the LIGHT pad.
CONSTANTCLEAN™ WATER MANAGEMENT
WITH BUILT-IN SANITATION SYSTEM
(See Spa Frog Sanitation System page 48)
Factory Default Settings:
• Filter Cycle Duration: F2 (2 hours)
• Filter Cycles: 2C (twice per day)
• Smart Logic: 1H (1 hour)
These settings represent the most commonly used
settings, but your use may be different, depending
upon many variables – frequency, number of bathers,
duration, water capacity, etc. These variables affect
the quality of water and the way it should be managed
to achieve the most effective cleansing. Selectable
choices for the settings of the operation systems
allows flexibility and ensures your Marquis spa remains
easy to maintain for your particular set of circumstances.
SOLID-STATE OZONATOR
The ozone generator functions whenever the system
is running on filter or clean up cycles. You should
occasionally inspect your ozonator to ensure it
continues to light (see MAINTENANCE, Every Three to
Four Months).
SMARTCLEAN FILTRATION
Your spa is preset at the factory with a default setting
to filter itself using the jet pump on low-speed for two
hours twice in a 24 hour period. These settings
represent the filter settings necessary for average
use. The timing of the first filter cycle is determined by
when the spa was initially energized. The first cycle
begins six minutes after this initial power-up. The
second filter cycle begins 12 hours after the first cycle.
To adjust the filter settings
Press the SETTING pad to display the filter time
settings (F1, F2, F4, F6). Use the TEMP+- pad to scroll
through the options. When desired selection has
been reached, press the SETTING pad again to enter
selection and advance to the filter cycle settings (2C,
1d, 1n). For example, if you select 2C and F2, your spa
will filter two hours twice a day for a total of four hours
of filtration daily.
PAGE 28
spa control operation
Marquis Ozonator
reduces the need for
chemical sanitizers.
MARQUIS SPAS

Use the TEMP+- pad to scroll through filter cycle
options. When desired selection has been reached,
press the SETTING pad to enter selection and ad-
vance to the smart logic settings.
Selectable filter cycles and cycle duration
• 2C: twice per day (once every 12 hours)
• 1d: once during the day
• 1n: once during the night
• F1: 45 minutes
• F2: 2 hours
• F4: 4 hours
• F6: 6 hours
SMARTCLEAN™
Since a spa is always covered when not in use, it stays
fairly free of debris or outside contamination. Contami-
nation to a spa’s water occurs during usage, so
filtering immediately after usage is the most effective
time to clean the spa water. Your spa is preset at the
factory with a default setting to filter for one hour (1H)
every time your spa is used. This filtration cycle begins
30 minutes after the spa light or jet pump has been
deactivated. The pump runs on low-speed to filter the
water for the cycle’s duration.
Selectable SmartClean Settings
• 1H: 1 hour
• 2H: 2 hours
• 3H: 3 hours
• 4H: 4 hours
• OH: Off
To adjust the SmartClean settings:
Use the TEMP+- pad to scroll through options. When
desired selection has been reached. Press SETTING
pad to enter selection and exit settings mode.
TEMPERATURE DISPLAY AND ADJUSTMENT
Factory Default Settings:
• Temperature: 102°F (39°C)
The LCD window displays the actual water tempera-
ture. Pressing the TEMP+- pad makes the numbers
flash, then pressing the pad again (repeatedly)
increases the set temperature one degree at a time,
up to 104°F (40°C). After a short pause, the actual
temperature displays. Press TEMP+- pad repeatedly
to decrease the set temperature to 80°F (27°C).
HEAT LIGHT
The HEAT light illuminates when the heater is on. The
pump circulates on low-speed whenever the thermo-
stat calls for heat.
PAGE 29
spa control operation
MARQUIS SPAS

HEAT MODE
Your spa comes preset in the standard heat mode.
For most applications, the standard mode should be
used. If you are in a warm weather climate and the spa
does not require as much heat, the economy mode
may work best. For a vacation home or for very
infrequent use, the sleep mode provides filtration and
circulation with lower energy demand. In economy
mode your spa heats only during the filter cycle. In
sleep mode your spa will maintain a water tempera-
ture that is 20°F (7°C) below the set temperature. This
ensures your spa will be ready to use more quickly
(allow about one hour per one degree F for heating
your spa’s water) when increasing the temperature to
the desired level.
The spa’s heat mode can be adjusted to one of three
different settings:
Standard Mode (St)
The spa water heats to the temperature as set at the
bather’s panel. In this mode the filtration pump turns
on for two minutes every half-hour to “poll” or check
the water. If heat is needed the unit heats to the set
temperature. The LCD window steadily displays the
actual temperature in this mode.
Economy Mode (Ec)
In this mode the spa only heats to the set temperature
during a filter cycle. The LCD window displays “Ec”
alternately flashing with the actual temperature when
the spa is up to temperature and “Ec” steadily when
the spa’s water temperature is below the set tempera-
ture.
Sleep Mode (SL)
Your spa will maintain a water temperature that is 20°F
(7°C) below the set temperature. Heater functions only
during a filter cycle. The LCD window displays “SL”
flashing alternately with the actual temperature when
the spa is up to set temperature and displays “SL”
steadily when below set temperature.
To Adjust the Heat Mode:
First press the SETTING pad to display the heat mode
settings (St, Ec, SL). Use the TEMP+- pad to scroll
through the options. When desired selection has
been reached, press SETTING pad again to enter
selection and advance to the filter cycle settings (F1,
F2, F4, F6).
Maintenance Reminders
• CL: Clean Filter LED will illuminate every 30 days.
•CH: Change Water LED will illuminate every 90
days.
PAGE 30
spa control operation
MARQUIS SPAS

SYSTEM LOCK
Once you find and establish the settings that work best
for your individual needs, use system lock to keep from
inadvertently changing the settings.
Press the TEMP+- pad and then immediately press the
SETTING pad. Unlock by repeating sequence. While the
system is locked, you may still operate the jets and light.
The LCD window displays LC to indicate the system is
locked when you try to change the temperature or
settings.
REMOTE CONTROLS
Underwater and Entryway lights
Press the LIGHT pad to turn the underwater and
Entryway lights on and off. The low-voltage system
produces a night light for evening use and makes
entering and exiting the spa safer. After being on for
60 minutes, the lights automatically turn off.
Jets
First press of the JETS pad activates pump on low-
speed (and starts soak timer). Second press of the
JETS pad activates pump on high-speed. Third press
of the JETS pad turns jets off for all-quiet mode.
Fourth press of the JETS pad turns pump back to
low-speed. If the pump is already on low (heating,
filter cycle) then the first press starts the soak timer.
After running on low- or high-speed for 15 minutes,
the pump automatically turns off (unless in heating or
filtering cycle).
Dolphin Remote spa functions
Use the Light and Jets pads to control spa functions.
Dolphin Remote Soundsations™ operation
(See SPA CONTROL OPERATION, Remote Controls.)
spa control operation
PAGE 31
MARQUIS SPAS

PUMP PRIMING (Pr)
Pump priming feature begins at start-up. When your spa
is energized, the LCD window displays a “Pr” message.
This mode lasts approximately four to five minutes, if not
exited manually by pressing the TEMP+ pad.
UNDERWATER AND ENTRYWAY LIGHTS
Press the SPA LIGHT pad to turn the underwater
and Entryway lights on and off. The icon appears in
the lower center of the display when the light is on.
The low-voltage system produces a night light for
evening use. After being on for 60 minutes, the
lights automatically turn off. See SETTINGS for
automatic light programming.
AQUA AMBIANCE™
Use SPA LIGHT pad. Step one: turn on light. Step two:
turn off and then on within 2-3 seconds. Repeat for
all options: white, aqua, violet, blue, gold, green, red,
color wash, and blinking party mode. When switched
off for over 10 seconds your last color mode will be
saved in memory. To reset synchronization (two light
systems) turn light off for 5 seconds and turn back on.
WATERFALL LIGHT
Press WATERFALL LIGHT pad to turn on the Waterfall
light. The Waterfall light operates the same as the
Aqua Ambiance light. The icon appears in the lower
right of the display when the light is on.
WATERFALL FEATURE
The Waterfall feature and Convenience Center
attaches securely to the dual Vortex skimmer tops.
The water flow is controlled by an independent valve.
NOTE: Don’t remove the waterfall top while the
pumps are running.
SOAK TIMER
The soak timer starts the first time you press the
TIMER pad. The LCD window displays “E” for the
elapsed time followed by time in minutes (“00, 01,
02”, etc.). A second press of the TIMER pad will exit
the timer mode. The timer display and the current
temperature display will alternate every 10 seconds.
PAGE 32
DESTINY, REWARD AND EPIC
spa control operation
MARQUIS SPAS
Pr

SETTINGS
Clock
Press the CLOCK pad followed by the SETTING pad.
“Program” will be shown in the upper left corner of the
panel display and the hour will begin flashing. To
adjust, press the TEMP+ or TEMP- pad. Once the
correct hour has been set, press SETTING pad to set
the minutes. “Minutes” will flash. Follow above proce-
dure to set the correct minutes.
Filter Cycle 1:
Follow Clock programming above. Then press the
SETTING pad to enter Filter 1 programming mode.
“Program filter 1 start time” will be shown in the upper
left corner of the panel display and the hour will begin
flashing. To adjust press the TEMP+ or TEMP- pads.
Once the correct hour has been set press SETTINGS
pad to set the minutes. Follow above procedure to set
the correct minutes. Press the SETTING pad again
and “Program filter 1 end time” will be shown in the
upper left corner of the panel display and the hour will
begin flashing. Follow above procedures to set the
correct hour and minutes. NOTE: When in a filter cycle
the Filter Cycle LED will illuminate.
Filter Cycle 2:
Press SETTING pad to enter filter 2 programming
mode. “Program filter 2 start time” will be shown in the
upper left hand corner of the panel display and the
hour will begin flashing. Follow above procedure to set
the correct hour and minutes. Press the SETTING pad
again and “Program filter 2 end time” will be shown in
the upper left corner of the panel display. Follow above
procedure to set correct hour and minutes.
Spa Light:
Press SETTING pad to enter spa light programming
mode. The light icon will begin flashing at the bottom
of the panel display. “Start time” will be shown in the
upper left hand corner of the panel display and the
hour will begin flashing. Follow above procedure to set
the correct hour and minutes. Press the SETTING pad
again and “end time” will be shown in the upper left
corner of the panel display and the hour will begin
flashing. Follow above procedure to set the correct
hour and minutes. Press the CLOCK pad to exit the
programming mode.
NOTE: Any time during the setting of features you
may exit the programming mode by pressing the
CLOCK pad. If you don not want to run any of the filter
modes or spa light cycles, set the start and end times
for the same time.
PAGE 33
spa control operation
MARQUIS SPAS

PAGE 34
spa control operation
MARQUIS SPAS
HEAT MODE
Your spa comes preset in the standard heat mode. For
most applications, the standard mode should be used. If
you are in a warm weather climate and the spa does not
require as much heat, the economy mode may work
best. For a vacation home or for very infrequent use, the
sleep mode provides filtration and circulation with lower
energy demand. In economy mode your spa heats only
during the filter cycle. In sleep mode your spa will main-
tain a water temperature that is 20°F (7°C) below the set
temperature. This ensures your spa will be ready to use
more quickly (allow about one hour per one degree F for
heating your spa’s water) when increasing the tempera-
ture to the desired level.
The spa’s heat mode can be adjusted to one of three
different settings:
Standard Mode
The spa water heats as necessary to maintain the set
temperature. “Standard” will display until the mode is
changes.
NOTE: The last measured temperature displayed is
current only when Pump 1 has been running for at
least two minutes.
Economy Mode
In this mode the spa only heats to the set temperature
during a filter cycle. The “Economy” icon will display
until the mode is changed. Press the JETS 1 pad to put
the spa in “Standard-in-Economy” mode which
operates the same as Standard mode (both Economy
and Standard will display). The spa reverts to Economy
mode automatically after one hour.
Sleep Mode
The spa water heats to within 20°F (7°C) of the set
temperature only during filter cycles. “Sleep” will
display until the mode is changed.
To Adjust Heat Mode
First press the Settings pad. The current heat mode will
start flashing. Use the Temp- pad to scroll through the
modes. When desired mode is displayed touch the
Settings pad again to lock the mode.
Panel Lock
Press TEMP+ or TEMP- pad followed by QUIET SOAK
pad to lock. Then press TEMP+ or TEMP- pad followed
by QUIET SOAK pad to unlock.
• Lock feature locks all user settings: time, filter cycles,
modes, Smart Clean and temperature settings.
• Lock feature does not lock Jets 1, Jets 2, Timer,
Spa Light, Waterfall Light, Quiet Soak, or Clock.
• Secured LED will illuminate when system is locked.

PAGE 35
spa control operation
MARQUIS SPAS
CONSTANTCLEAN™ WATER MANAGEMENT WITH
BUILT-IN SANITATION SYSTEM
(See Spa Frog Sanitation System page 48)
Ozonator Operation
The ozone generator operates when pump 1 is on low-
speed in Filter Cycles and Smart Clean Cycles ONLY. The
O3 icon appears to the left of the temperature display
when the ozone generator is operating. The icon does not
indicate if the ozone generator is actually operating. See
TROUBLESHOOTING to check ozonator operation.
SMARTCLEAN™
Since a spa is always covered when not in use, it stays fairly
free of debris or outside contamination. Contamination to a
spa’s water occurs during usage, so filtering immediately
after usage is the most effective time to clean the spa water.
User Preference Settings
Suppress reminders: Displayed as (Sr.n) for no, and
(Sr.Y) for yes. When set to (Sr.Y), reminders are never
shown in the display. When set to (Sr.n), all reminders
are shown.
Temperature display in Celsius: Displayed as (tc.n)
for no, and (tc.Y) for yes.
24 hour time: Displayed as (24.n) for no (12 hour AM/
PM), and (24.Y) for yes (24 hour (military).
SmartClean settings: Displayed as (cc.0) for Smart-
Clean off, (cc.1) 1 hour, (cc.2) 2 hour, (cc.3) 3 hour, and
(cc.4) for 4 hour Smart Logic durations. When the spa is in
a SmartClean cycle, the SmartClean LED will illuminate.
To Enter the User Preference Mode
• Press the TEMP+ button
• Press the JETS 1 button (displays (Edt))
• Press the LIGHT button (displays (USr))
• Press the JETS 1 button (displays (Sr.n))
• Use TEMP + or TEMP– pad to scroll through options
- Sr.n: Reminders not suppressed
- tc.n: Temperature display not in Celsius
- 24.n: 12 hour AM/PM
- cc.1: One hour Smart Logic
• Once the desired selection has been reached
press the JETS 1 pad. The last number or
letter will flash. Use the TEMP + or TEMP– pad to
change the setting. Press the JETS 1 pad to
enter selection and return to previous mode.
• Press the LIGHT pad twice to return to
normal operation.
• At any point, if a pad is not pressed within thirty
seconds of a previous pad press, the mode will
cancel and the spa will return to normal operation.
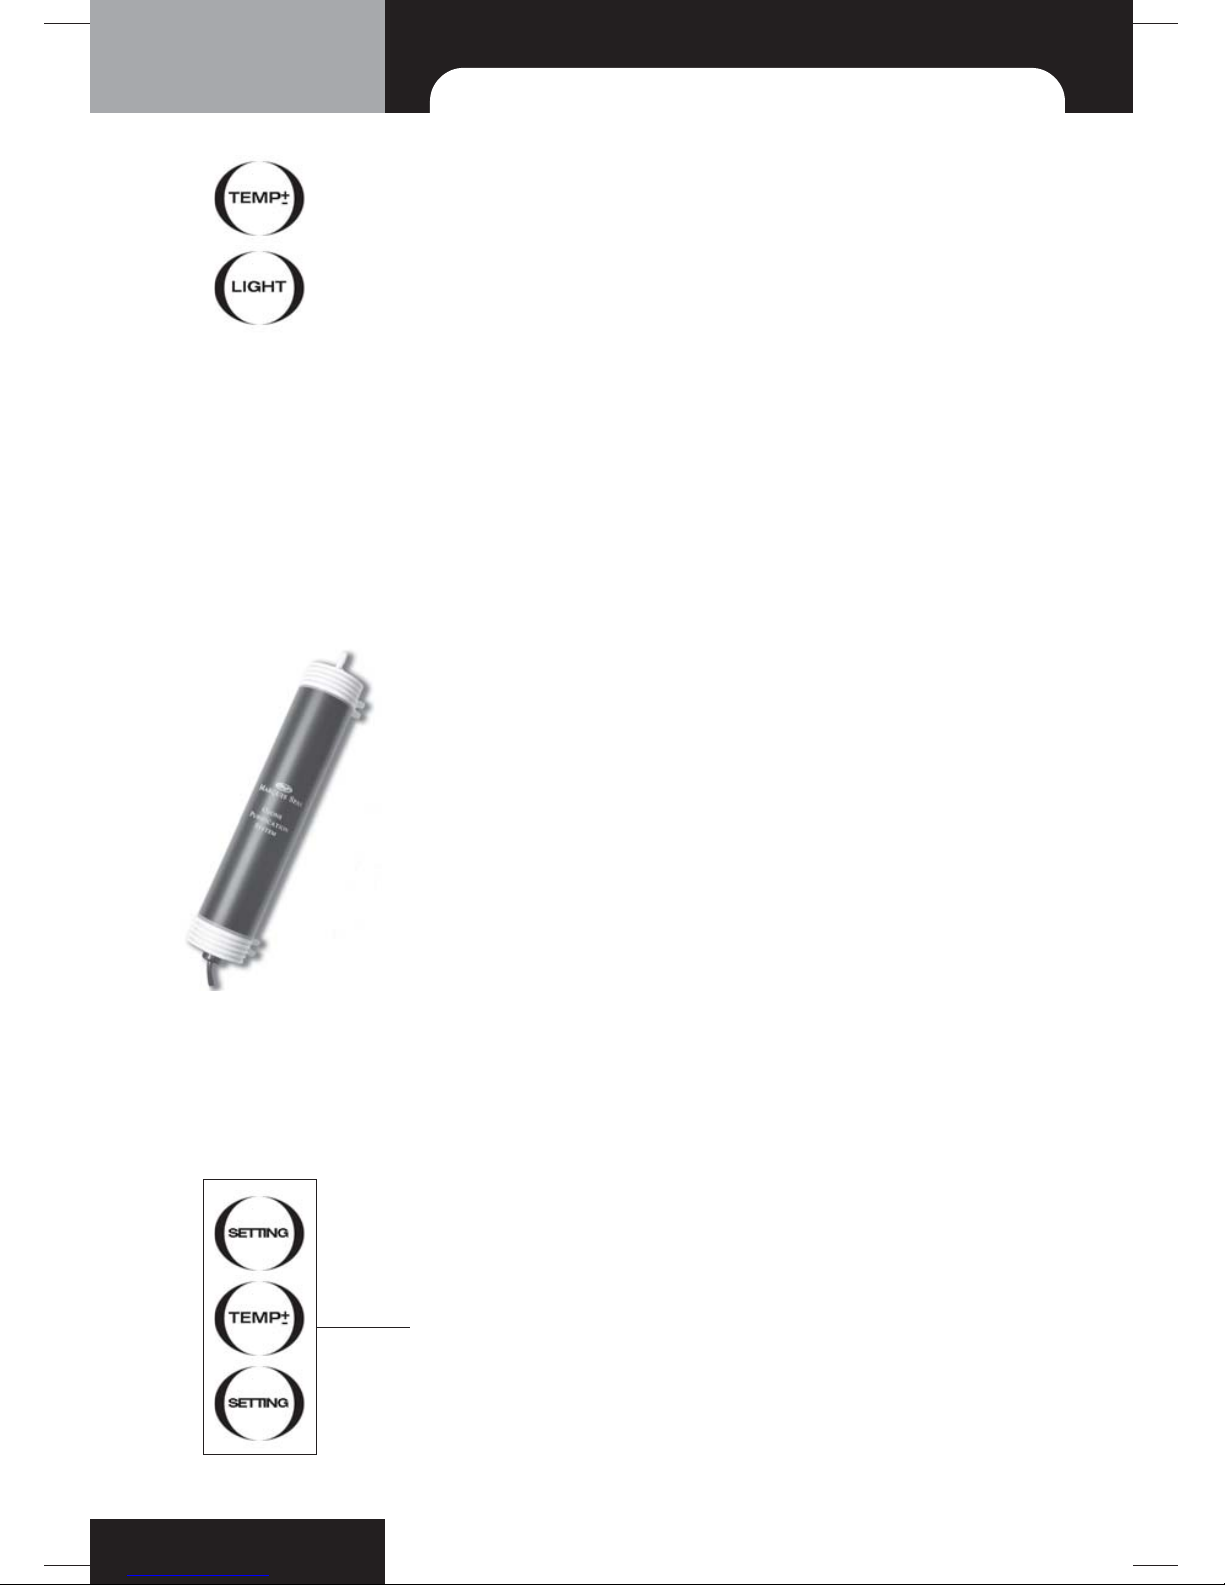
To Change the Set Temperature
Factory default temperature setting: 102°F (39°C). The LCD
window displays the actual water temperature.
Press the TEMP+ or the TEMP- pad. Each pad press
changes the set temperature by one degree. Tempera-
ture can be set between 80°F and 104°F (26°C and 40°C).
When the spa is heating the Heat icon will be shown in the
lower right corner of display.

PAGE 36
spa control operation
MARQUIS SPAS
Quiet Soak
Press the QUIET SOAK pad to enter the soak mode.
All automatic functions related to the pumps are
disabled (i.e., filter cycles, smart clean cycles). If either
pump 1 or pump 2 are operating, they will be turned
off. Soak mode lasts for 30 minutes then the spa
returns to normal operation. All button functions
operate as normal while in a Soak mode. When in a
Soak Mode, the Soak LED will illuminate.
Maintenance Reminders
• Check Bromine LED will illuminate every 21 days.
rSA will be displayed in the LCD window.
• Clean Filter LED will illuminate every 30 days.
rCL will be displayed in the LCD window.
•Change Water LED will illuminate every 90 days.
rCH will be displayed in the LCD window.
• Change Minerals LED will illuminate every 90 days.
rCA will be displayed in the LCD window.
JETS
Use JETS 1 pad on either bather’s panel or remote
control. First press JETS 1 pad to activate pumps on
low-speed. Second press of JETS 1 pad activates
pumps on high-speed. Third press of JETS 1 pad
turns jets off for all-quiet soak setting. Fourth press of
JETS 1 pad returns pumps to low-speed. Repeat
above procedure for JETS 2.
Pump 1: Destiny, Reward, Epic
• High-speed run timeout: 15 minutes
• Low-speed run timeout: 15 minutes (if not in filter
cycle or SmartClean).
• Pump 1 icon will be shown in lower left corner of
the display. It spins slowly when on low-speed,
and spins fast when on high-speed.
Pump 2: Destiny, Reward, Epic
• High-speed run timeout: 15 minutes
• Low-speed run timeout: 15 minutes (if not in filter
cycle or SmartClean).
• Pump 2 icon will be shown in lower left corner of
the display. It spins slowly when on low-speed,
and spins fast when on high-speed.
Marquis Ozonator
reduces the need for
chemical sanitizers.

REMOTE CONTROLS
Round floating remote
Use the jets, light, and Waterfall pads to control spa
functions. See OPERATING YOUR SPA, Light, and
Jets.
Spa Monitor in-house remote
See Spa Monitor manual for complete set up and
operation instructions.
Dolphin Remote Control spa functions
Use the Waterfall, lights, jets, soak, clock, and timer
pads to control spa functions.
Dolphin Remote Soundsations™ operation
It is designed with sophisticated technology that will
allow you to consolidate many of your existing
remote controls along with the Soundsations audio-
ready system in your spa. It’s packed with easy-to-
use features such as:
• Preprogrammed to operate the cable converter
supplied by your cable system provider.
• Preprogrammed technology for easy setup.
• Color-coded keys to quickly locate popular
functions
• Code library for video and audio components
• Code Search to help program control of older
components
• Learning function to allow programming with
another infrared (IR) remote
• Combination IR and RF (radio frequency) capabil-
ity that can send commands through the optional
RF base station to devices in your house.
Before you can use your Dolphin remote, you will
need to program it to operate the specific home
entertainment components you wish to control.
Follow the instructions detailed in Dolphin Remote
manual to set up your remote and enjoy your new
remote control.
PAGE 37
spa control operation
MARQUIS SPAS
REMOTE CONTROL
DOLPHIN REMOTE
CONTROL

SOUNDSATIONS™ AUDIO-READY SYSTEM
Spa location and speaker cord routing
The factory-installed speaker cord located inside the
spa’s equipment compartment is 100 ft. long. You
must locate the spa close enough to the audio
source to allow the cord to be run so it is not exposed
to damage and does not create a trip hazard.
NOTE: A 200 ft. long speaker cord is available as an
optional replacement for the supplied 100 ft. cord.
Ask your Marquis Spas retailer for details.
Do not replace the supplied speaker cord with any
other type of cord.
WARNING! Risk of electric shock: Audio source must
be placed in a protected location at least five feet
from the spa. Do not use a portable stereo. Do not
use home audio equipment outside.
Decide on the best path for the speaker cord and
then route the speaker cord out of the equipment
compartment in the most appropriate manner for the
installation.
The speaker cord must be installed by a licensed
electrician in accordance with the National Electric
Code and all local building codes. Additional installa-
tion advise from an A/V technician may be helpful or
necessary if there are any special circumstances,
such as connecting to unique or complicated home
theater systems.
Connections
CAUTION! Risk of electric shock: The stereo cord-
connection within the equipment compartment and
the supplied 100 ft. cord which is used to conduct the
audio signal to the spa are intended to carry a low
voltage (12V) audio signal supplied by a conventional
household-type audio system. The cord-connection
and cord are not to be used for any other purpose.
CAUTION! Before making any connections, turn off
the stereo receiver and unplug it from the power
source. Failure to do so may result in damage to the
system.
1. To prepare the end of the speaker cord, strip
approximately 2" off the outer jacket.
2. To prepare the ends of the wires, strip approximately
½" of insulation from each wire. Then, twist the bare
ends of each wire so there are no loose strands of wire.
WARNING! Never use broken or frayed wire, as
damage or electrical shock may result.
2 inches (5.0cm)
Outer jacket
1/2 inch (1.3cm)
Strip approximately 2" off
the outer jacket of the
speaker cord.
PAGE 38
spa control operation
MARQUIS SPAS

CAUTION! Exposing too much wire or having wires
with frayed ends could cause wires to touch each
other, which could damage the equipment.
3. Wire connections
A. Red = Right (+)
B. Black = Right (-)
C. White = Left (-)
D. Green = Left (+)
NOTE: Do not connect speaker cord to any speaker
terminals already in use.
4. Check all connections to the stereo receiver.
Make sure all wires are connected in phase
(+ to + and – to –). Correct any wiring problems
before reconnecting the stereo receiver to the
power source.
You should perform a routine inspection (every
three months) of the Soundsations Audio System
to ensure that the system is operating properly.
If the cord or cord-connection is damaged; if the
door to the equipment compartment shows signs
of deterioration; if excessive water is entering the
equipment compartment; or if there are other signs
of damage to related components, turn off the spa
and have the damaged component repaired by a
qualified service person.
Recommended components
Use stereo receivers rated from 60 to 120 peak
watts per channel and rated from 8 to 16 ohms.
The Soundsations audio system has automatic
protection circuits to protect against overload. This
circuit activates at high volume levels to reduce
output, causing a decrease in volume. This is
normal operation and indicates that the power
input may be exceeding safe levels. If this
protection circuit has been activated, turn down
the volume to allow the system to reset itself and
resume normal operation. Sustained listening at
high volume settings is not recommended.
CAUTION! Please read this installation guide
completely before the installation. Failure to follow
the instructions in this guide voids all warranties on
the Soundsations audio system.
RED
BLACK
WHITE
GREEN
R
L
+
+
-
-
Wire connections.
PAGE 39
spa control operation
MARQUIS SPAS

QUEST
# Component Quantity
1 Control box and heater 1
2 Ozonator 1
3 MP120 pump
(or MP160 Pump 240V upgrade) 1
4 Mazzei injector 1
5 Slice valves 2
6 Check valve 1
7 GFCI cord (120V only) 1
8 Pump unions 2
9 Pump plug 1
10 Motor mounts 4
11 Drain valve 1
12 Light 1
14 Soundsations installation plug 1
PAGE 40
equipment diagram
MARQUIS SPAS
3
5
5
8
10
2
6
9
11
1
1
12 14

PAGE 41
equipment diagram
DESTINY, REWARD AND EPIC
MARQUIS SPAS
# Component Quantity
1 Control box and heater 1
2 Ozonator 1
3 MP160 pumps 2
6 Slice valves 2
7 Check valve 1
8 Pump unions 4
10 Motor mounts 8
11 Drain valve 1
12 Light 1
13 Soundsations installation plug 1
14 Spa Monitor transceiver 1
2
8
8
3
6
8
10
3
1
6
11
12
13
7
14

PLEASE NOTE: The following corrective actions
may be performed by the spa owner. If the trouble
cannot be corrected in the steps below, please
contact your Marquis spa dealer for service. (Im-
proper servicing by an unauthorized service provider
or spa owner could result in damage not covered by
the warranty and could cause serious injury.)
EQUIPMENT WILL NOT OPERATE
• Check the control panel LCD window for
diagnostic code.
• 240V Spas: Check the circuit breaker on the
main circuit panel.
• 120V Spas: Check the GFCI power cord and
reset if necessary (see IMPORTANT SAFETY
INSTRUCTIONS at beginning of manual).
• Check the condition of the power cord.
INADEQUATE JET ACTION
• Be sure the shut-off valves are completely open.
• Open the jets by turning the jet face to allow for
maximum water flow.
• Check that the air control valve is open (rotate
lever counterclockwise to open).
• Check for obstruction or restrictions at suction
guard(s) or filters, such as leaves, etc.
NO HEAT
• Check temperature displayed in the LCD window
for desired temperature setting.
• Inspect the filter cartridge(s) for dirt and debris.
• Check that the water is at proper level, 2/3 up
the Vortex skimmer opening(s).
• Lower ambient temperatures may result in heat loss.
NOTE: Do not expect instant hot water from the
jets. It will take the heater 12-24 hours to heat the
water to the temperature you desire.
LIGHT DOES NOT WORK
• Press the LIGHT pad on the control panel.
• Reposition the light bulb in the socket. (See
REPLACING LIGHT BULB.)
• Replace the light bulb with a 6 WATT BULB (GE
918 ONLY).
troubleshooting
PAGE 42
MARQUIS SPAS

LCD DIAGNOSTIC MESSAGES
The advanced technology built into the spa allows it
to perform a number of self-diagnostic system
checks and it can display a variety of messages in
the LCD window on the control panel.
OHH:
Over heat protection. If a malfunction occurs and the
spa water reaches 112°F (44°C), the system com-
pletely shuts down. In such a condition, DO NOT
ENTER THE WATER. Turn off all power to the spa.
Remove spa cover and allow water to cool. Once
the heater has cooled, reset by pushing any pad. If
spa does not reset, shut off the power to the spa
and contact your dealer for service. Several condi-
tions could lead to overheating, for example, low
water level, shut-off valves closed while heater is on,
dirty filter, and restriction in the plumbing lines. After
the power is turned back on, the spa will not restart
itself until the water temperature within the spa
drops to a lower, predetermined temperature.
OHS:
Over heat protection. The spa has shut down. Once
of the sensors had detected that the spa water is
110 F (43.3 C). DO NOT ENTER THE WATER. Turn
off all power to the spa. Remove spa cover and
allow water to cool. Once the heater has cooled,
reset by pushing any pad. If spa does not reset,
shut off the power to the spa and contact dealer for
service.
ICE:
Freeze protection has been activated. Contact your
dealer for service.
SnA:
A sensor that is plugged into the Sensor “A” jack is
not working. The spa turns off. Contact your dealer
for service.
Snb:
A sensor that is plugged into the Sensor “B” jack is
not working. The spa turns off. Contact your dealer
for service.
SnS:
Sensors are out of balance. If this is alternating with
the temperature, it may just be a temporary condi-
tion. If the display show only this message (periodi-
cally blinking), the spa is shut down. Contact dealer
for service.
troubleshooting
PAGE 43
MARQUIS SPAS

*NOTE: If power is shut off or a power outage
occurs the 240V system has a battery backup. All
user settings are retained.
HFL:
A substantial difference between the temperature
sensors was detected. This could indicate a flow
problem. Check water level in spa. Refill if necessary.
If the water level is okay, make sure the pumps have
been primed. If problem persists, contact your
dealer.
LF:
Persistent low flow problems. (Displays on the fifth
occurrence of the HFL message within 24 hours.)
Heater is shut down, but other spa functions
continue to run normally. Follow active required for
HFL message. Heating capacity of the spa will not
reset automatically. You may press any pad to reset.
dr:
Inadequate water detected in heater. Check water
level in spa. Refill if necessary. If the water level is
okay, make sure the pumps have been primed.
Press any pad to reset
drY:
Inadequate water detected in heater. (Displays on
third occurrence of dr message.) Spa is shut down.
Follow action required for “dr” message. Spa will not
automatically reset; you may press any pad to reset.
Pr:
When your spa is first actuated, it will go into Priming
mode. It will last for up to four minutes and then the
spa will begin to heat and maintain the water tem-
perature in the Standard mode.
- - F; - - C:
Temperature unknown. After the pump has been
running for two minutes, the temperature will
display.
- - -:
The temperature is not current. The spa is in
Economy or Sleep mode. The pump may have
been off for hours. If you wish to see the current
spa temperature, either switch to Standard mode or
turn Jets 1 on for at least two minutes.
troubleshooting
PAGE 44
MARQUIS SPAS

SbY:
Standby mode has been activated by pressing a pad
combination on the user panel. Press any pad to leave
Standby Mode and return to normal operation.
MAINTENANCE REMINDERS:
The following reminders will be shown on the LED
lights indicating it is time for maintenance. Reminder
messages will also be displayed in the LCD window.
Reset the reminders by pressing the Temp Up, Temp
Down, or Settings pad.
• Check Bromine: LED will illuminate every 21 days.
rSA will be displayed in the LCD window.
• Clean Filter: LED will illuminate every 30 days.
rCL will be displayed in the LCD window.
• Change Water: LED will illuminate every 90 days.
rCH will be displayed in the LCD window.
• Change Minerals: LED will illuminate every 90 days.
rCA will be displayed in the LCD window.
troubleshooting
PAGE 45
MARQUIS SPAS

MARQUIS SPACARE™ START-UP KIT
Because we want you to enjoy your spa right away –
every Marquis spa includes a start-up kit featuring the
Spa Frog®system. The instructions guide you through
the initial elements of spa water care. After the initial
start-up, your dealer can provide everything you
need for ongoing care and familiarize you with
specialty products you may need for the specific
water conditions in your area.
To ensure the most enjoyment possible from your
Marquis spa, we have compiled this easy to follow
guide. Keep this guide by the spa for a day-to-day
reference of Marquis spa care.
Water Treatment
This includes a step-by-step water treatment regi-
men to familiarize you with the products that make
Marquis spa water care a breeze.
Maintenance
Includes an easy to follow program to care for all of
the spa components. Specific product recommenda-
tions included in this section may extend the life of
your Marquis spa and remove the guesswork.
PAGE 46
marquis care and enjoyment guide
MARQUIS SPAS
This manual suits for next models
3
Table of contents
Other Marquis Spas Hot Tub manuals
Popular Hot Tub manuals by other brands

Jacuzzi
Jacuzzi J - LX owner's manual

Jacuzzi
Jacuzzi SIGNA 5 PLUS Specification sheet

Watkins Wellness
Watkins Wellness HotSpring Hot Spot TX owner's manual

Sundance Spas
Sundance Spas Maxxus Installation & owner's manual

Westerbergs
Westerbergs Marstrand Installation instructions and user manual

KIRAMI
KIRAMI Cello Instructions for use

Spa Builders
Spa Builders MC-MP-SBD owner's manual

Roca
Roca Broadway Maxi User handbook

Jacuzzi
Jacuzzi Pure Air operating manual

Master Spas
Master Spas LEGACY owner's manual

avenli
avenli 17618 Series Installation and user manual

glass 1989
glass 1989 MySpa 195 E Installation, operation & maintenance manual