manuals.online logo
Brands
  1. Home
  2. •
  3. Brands
  4. •
  5. Masterbuilt
  6. •
  7. Smoker
  8. •
  9. Masterbuilt 20250918 User manual

Masterbuilt 20250918 User manual

Pellets have been around for quite some time as a fuel source for heating, but wood pellets for food smoking has moved
from trend to tradition for outdoor cooking enthusiasts. Whether you’re a novice smoker or a BBQ pro, there are a few
things you should know about pellet smoking before you get started. While wood stick, propane, electric, and charcoal
smokers can provide an intense amount of smoke during the cooking process, wood pellet smoking gives a unique and
different experience. You will notice stronger smoke amounts at temperatures less than 190 degrees. Above 200 degrees,
you will notice the smoke is not as intense. The pellet smoking experience lends to a lighter thin, blue smoke. You’ll love
the smoke flavor it imparts on your food and the ease of use, versus loading wood chips or chunks continually in other
smokers. Have fun experimenting and mastering the art of wood pellet smoking.
PELLET SMOKING 101
AUGER PRIMING INSTRUCTIONS
1. Before turning the smoker on, fill the hopper with food grade wood pellets.
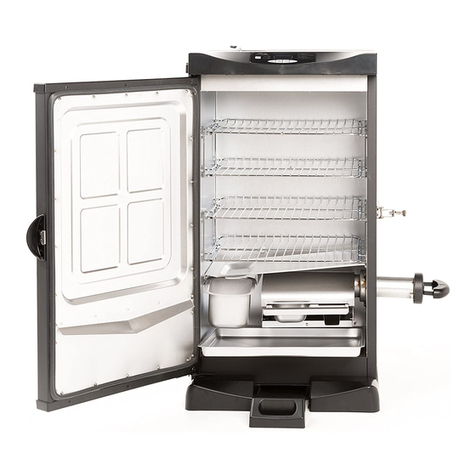
2. Remove the bottom two smoking racks so you can access (A) grease deflector and
(B) heat diffuser.
3. Remove the grease deflector and the heat diffuser. This will allow you to see the
pellets falling into (C) crucible.
4. Press the on/off button.
5. Press and hold the smoke button until the letter “P” (prime) appears on the
display screen.
6. Pellets will begin falling into the crucible in about 4.5 minutes.
7. Once pellets are seen falling into the crucible, press the smoke button.
This will stop the auger from feeding pellets into the crucible.
>You have successfully primed the auger.
Next, let’s pre-season the smoker. This will rid your smoker of chemicals and oils from
the manufacturing process. Even though this is necessary before you use your
smoker for the first time, you should pre-season or cure the smoker periodically to
prevent excessive rust.
A. GREASE DEFLECTOR
B. HEAT DIFFUSER
C. THE CRUCIBLE
PRE-SEASON INSTRUCTIONS
1. Set temperature to 350°F and run the smoker for 3 hours.
Note: Water tray should be empty.
To set temperate and time:
• Press the temperature button. Use the up and down arrows to set
temperature to 350°F.
• Press the temperature button once more. The temperature is now set.
• Press the time button. Use the up and down arrows to set the cook
time for 3 hours.
• Press the time button once more. The cook time is now set.
2. Once pre-seasoning is complete, press the on/off button.
• Do not unplug the smoker yet.
• The unit is off, but the fan will continue to run for 5 minutes.
This will prevent any burn back in the auger.
• Once the fan has turned off, unplug smoker.
>Not ready to cook just yet? Follow the Cleaning Instructions on the next page.
HELLO.
Let’s get ready to craft your
first masterpiece.
2MASTERBUILT® |Quick Start Guide | Pellet Smoker MASTERBUILT® |Quick Start Guide | Pellet Smoker 3
SMOKE PROGRAM OPTIONS
This smoker has 10 smoke program options that range from SP0 to SP9. Your smoker will default to SP 4
(smoke program 4). If the desired smoke is not produced, this setting can be changed. See all of the smoke program
options in the table below.
SP 0: Moves the pellets to the crucible for 15 seconds, then the auger rests for 45 seconds.
SP 1: Moves the pellets to the crucible for 15 seconds, then the auger rests for 55 seconds.
SP 2: Moves the pellets to the crucible for 15 seconds, then the auger rests for 65 seconds.
SP 3: Moves the pellets to the crucible for 15 seconds, then the auger rests for 75 seconds.
SP 4: Moves the pellets to the crucible for 15 seconds, then the auger rests for 85 seconds.
SP 5: Moves the pellets to the crucible for 15 seconds, then the auger rests for 95 seconds.
SP 6: Moves the pellets to the crucible for 15 seconds, then the auger rests for 105 seconds.
SP 7: Moves the pellets to the crucible for 15 seconds, then the auger rests for 115 seconds.
SP 8: Moves the pellets to the crucible for 15 seconds, then the auger rests for 125 seconds.
SP 9: Moves the pellets to the crucible for 15 seconds, then the auger rests for 135 seconds.
To change the SP (smoke program) setting:
1. Press the smoke button. You should see the letter “S” on the display screen.
2. Press the temperature button. Using the up and down arrows change the SP setting.
3. Press the temperature button again. You have successfully change the smoke program.
NOTE: The default setting of SP 4 is for optimum smoking in most climates. When smoking in cooler climates, choose
a lower SP setting. Pellets will be added to the crucible faster, not giving the crucible time to cool before more pellets
are added. When smoking in hotter climates, the crucible will need to cool slightly so the pellets don’t ignite as quickly;
choose a higher SP setting.
The smoker will default to the SP 4 program when the unit is turned on, but can be changed using the instructions above.
OPERATING INSTRUCTIONS
1. Before turning the smoker on, fill the hopper with food grade wood pellets.
2. Prime the auger using the Auger Priming Instructions.
3. Fill the water tray with water, juice, or vinegar. This will add flavor and moisture.
4. Add food to the center of the rack leaving space between food and smoker sides making sure not to cover more than
75% of the rack. This will ensure even cooking and proper heat circulation.
5. Set the cook cycle (this includes the cook time and temperature).
• Press the temperature button. Use the up and down arrows to set the desired temperature.
•Press the temperature button once more. The temperature is now set.
•Press the time button. Use the up and down arrows to set the cook time.
• Press the time button once more. The cook cycle time and temperature is now set.
6. Set the smoke cycle (this is the amount of time heavy smoke is generated).
HINT: Start with heavy smoke then allow the remainder of the time for cooking. When the smoker is in cook mode,
blue smoke is generated but this smoke will be very thin and light and not always visible (this is normal).
• Press the smoke button. The letter “S” should appear.
•Press the time button. Use the up and down arrows to set the smoke time.
•Press the time button once more. The smoke cycle time is now set.
NOTE: The smoke cycle is designed to generate smoke. The temperature may drop during this cycle so the pellets
can smolder to produce smoke. The smoker will return to the cook cycle and the temperature set after the smoke
cycle is complete. If the smoke cycle is not set, the smoker will only run the cook cycle. The smoke cycle will run for
the desired time while subtracting from the time of the overall cooking process.
Example: Set cook cycle for 4 hours | Set smoke cycle for 30 minutes | Total run time=4 hours (30 minutes of time was
devoted to smoke cycle)
HINT: We recommend running the smoke cycle first. Uncooked meat will absorb the smoke flavor better before it is
thoroughly cook. You’ll get a light, thin blue smoke while cooking. If you prefer more smoke flavor, you can add
additional smoking cycles throughout the cooking process by repeating step 6.
7. Once cooking is complete press the on/off button.
• Do not unplug the smoker yet. The unit is off, but the fan will continue to run for 5 minutes.
This will prevent any burn back in the auger.
• Once the fan has turned off, unplug smoker.
> Enjoy your masterpiece!
WORLD CLASS CUSTOMER SERVICE...EVERY TIME.
IF YOU NEED US, CALL 1.800.489.1581. OUR TEAM IS AVAILABLE
MONDAY-FRIDAY FROM 8AM-5PM EST. YOU CAN ALSO FIND US
ON FACEBOOK AND SEND US A PRIVATE MESSAGE.
WE WILL HAVE SOMEONE RESPOND WITHIN 24 HOURS.
REST ASSURED, WE’RE HERE TO HELP.
CLEANING INSTRUCTIONS
1. Make sure the unit is cool prior to cleaning.
2. Wash racks, water tray (bowl), grease tray and grease deflector with mild dish detergent.
3. Remove ash from the ash tray.
4. We recommend you remove the pellets from the smoker prior to storing since they are susceptible to moisture. If
they are exposed to moisture they will expand, making the smoker components hard to clean. Remove all the pellets
from the hopper and from the auger. To remove them from the auger:
• Remove the last two racks in the smoker; remove the grease deflector then the heat diffuser. This is a perfect
time to remove the ash from the crucible using a vacuum, but make sure there aren’t any embers and everything
is cool to the touch.
• Turn the unit on, press and hold the smoke button until the letter “P” appears on the display screen. This will
move any remaining pellets from the auger to the crucible and make them easy to remove with a vacuum.
> You are now ready to master the art of pellet smoking.
PLEASE SEE THE INSTRUCTION MANUAL FOR WARNINGS,
SAFEGUARDS, AND ASSEMBLY INSTRUCTIONS.
9825170002
@MASTERBUILT | MASTERBUILT.COM

Other Masterbuilt Smoker manuals

Masterbuilt PORTABLE SMOKER BAG User manual

Masterbuilt

Masterbuilt PORTABLE SMOKER BAG User manual

Masterbuilt MB20075617 User manual

Masterbuilt

Masterbuilt MB20075617 User manual

Masterbuilt 710 User manual

Masterbuilt

Masterbuilt 710 User manual

Masterbuilt 20070712 User manual

Masterbuilt

Masterbuilt 20070712 User manual

Masterbuilt MES 130P User manual

Masterbuilt

Masterbuilt MES 130P User manual

Masterbuilt 20076716 User manual

Masterbuilt

Masterbuilt 20076716 User manual

Masterbuilt 20070407 DIGITAL SMOKEHOUSE Guide

Masterbuilt

Masterbuilt 20070407 DIGITAL SMOKEHOUSE Guide

Masterbuilt MES 130B Operating and maintenance manual

Masterbuilt

Masterbuilt MES 130B Operating and maintenance manual

Masterbuilt 20070211 Guide

Masterbuilt

Masterbuilt 20070211 Guide

Masterbuilt MB20070219 User manual

Masterbuilt

Masterbuilt MB20070219 User manual

Masterbuilt 20051011 Guide

Masterbuilt

Masterbuilt 20051011 Guide

Masterbuilt 20070710 User manual

Masterbuilt

Masterbuilt 20070710 User manual

Masterbuilt 20070710 Guide

Masterbuilt

Masterbuilt 20070710 Guide

Masterbuilt GRAVITY Series User manual

Masterbuilt

Masterbuilt GRAVITY Series User manual

Masterbuilt MES 30B User manual

Masterbuilt

Masterbuilt MES 30B User manual

Masterbuilt 20050614 Guide

Masterbuilt

Masterbuilt 20050614 Guide

Masterbuilt THE ROOK GMCS User manual

Masterbuilt

Masterbuilt THE ROOK GMCS User manual

Masterbuilt 20078715 Guide

Masterbuilt

Masterbuilt 20078715 Guide

Masterbuilt 20071011 Guide

Masterbuilt

Masterbuilt 20071011 Guide

Masterbuilt GMES User manual

Masterbuilt

Masterbuilt GMES User manual

Masterbuilt MES 35B MB20070210 User manual

Masterbuilt

Masterbuilt MES 35B MB20070210 User manual

Masterbuilt MES 130B User manual

Masterbuilt

Masterbuilt MES 130B User manual

Masterbuilt ES40G1.5DW1 User manual

Masterbuilt

Masterbuilt ES40G1.5DW1 User manual

Masterbuilt MES 430G Installation instructions

Masterbuilt

Masterbuilt MES 430G Installation instructions

Popular Smoker manuals by other brands

Southern Pride BBR-79-2-SSE Specification sheet

Southern Pride

Southern Pride BBR-79-2-SSE Specification sheet

Dansons Group PIT BOSS PB340 Instructions and recipes

Dansons Group

Dansons Group PIT BOSS PB340 Instructions and recipes

Pit Boss PB0600SS owner's manual

Pit Boss

Pit Boss PB0600SS owner's manual

Master Forge MFW784BDP operating instructions

Master Forge

Master Forge MFW784BDP operating instructions

Charmate CM160-001 manual

Charmate

Charmate CM160-001 manual

Yoder Smokers YS 480 Instructions for installing

Yoder Smokers

Yoder Smokers YS 480 Instructions for installing

Yoder Smokers S Series Operation manual

Yoder Smokers

Yoder Smokers S Series Operation manual

Kingsford Sierra owner's manual

Kingsford

Kingsford Sierra owner's manual

SUNWIND FRIGG user manual

SUNWIND

SUNWIND FRIGG user manual

Cookshack SM160 manual

Cookshack

Cookshack SM160 manual

Rational VarioSmoker Applications manual

Rational

Rational VarioSmoker Applications manual

Wildfire LONGHORN owner's manual

Wildfire

Wildfire LONGHORN owner's manual

KAKADU OZPIG instruction manual

KAKADU

KAKADU OZPIG instruction manual

Smokenator 1000 user guide

Smokenator

Smokenator 1000 user guide

Southern Pride SRG-400 owner's manual

Southern Pride

Southern Pride SRG-400 owner's manual

Town MASTERRANGE SM-24 user guide

Town

Town MASTERRANGE SM-24 user guide

Bradley Smoker P10 owner's manual

Bradley Smoker

Bradley Smoker P10 owner's manual

Masterpro MPSMOKER operating instructions

Masterpro

Masterpro MPSMOKER operating instructions

manuals.online logo
manuals.online logoBrands
  • About & Mission
  • Contact us
  • Privacy Policy
  • Terms and Conditions

Copyright 2025 Manuals.Online. All Rights Reserved.