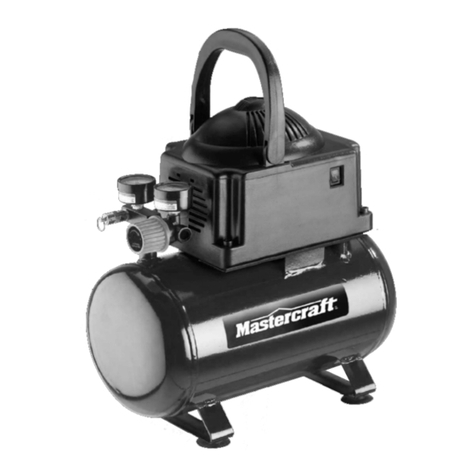
MasterCraft 058-9863-6 User manual

20 V MAX* AIR COMPRESSOR
058-9863-6
TANK
OUTLET
IMPORTANT:
Read and understand this instruction manual thoroughly
before using the product.
INSTRUCTION
MANUAL

headline bars
continuation tabs
notes
warnings
headline bars
continuation tabs
notes
warnings
headline bars
continuation tabs
notes
warnings

headline bars
continuation tabs
notes
warnings
headline bars
continuation tabs
notes
warnings
headline bars
continuation tabs
notes
warnings
3
TABLE OF CONTENTS
Technical Specifications 4
Safety Guidelines 5
Key Parts Diagram 11
Operating Instructions 12
Maintenance 16
Troubleshooting 17
Exploded View 18
Parts List 19
Warranty 20
TABLE OF CONTENTS
NOTE:
If any parts are missing or damaged, or if you have any questions,
please call our toll-free helpline at 1-800-689-9928.
SAVE THESE INSTRUCTIONS
• This manual contains important safety and operating instructions. Read all
instructions and follow them with use of this product.

headline bars
continuation tabs
notes
warnings
headline bars
continuation tabs
notes
warnings
headline bars
continuation tabs
notes
warnings
model no. 058-9863-6 | contact us 1-800-689-9928
4
TECHNICAL SPECIFICATIONS
Voltage 20 V
Air Tank Capacity 1 gal. (3.8 L)
Max Pressure 120 psi
Air Delivery 0.75 SCFM @ 40 psi
0.5 SCFM @ 90 psi
*Maximum battery voltage without workload; with workload nominal voltage is 18 V.

headline bars
continuation tabs
notes
warnings
headline bars
continuation tabs
notes
warnings
headline bars
continuation tabs
notes
warnings
5
SAFETY GUIDELINES:
WARNING!
Safety symbols in this Instruction Manual are used to flag possible dangers. The safety
symbols and their explanations require your full understanding. The safety warnings do not,
by themselves, eliminate any danger, nor are they substitutes for proper accident prevention
measures.
WARNING!
This Safety Alert Symbol indicates caution, warning, or danger. Failure to obey a safety
warning can result in serious injury to yourself or others. To reduce the risk of injury, fire, or
electric shock, always follow the safety precautions.
KNOW YOUR TOOL
To operate this tool, carefully read this Instruction Manual and all labels affixed to the air compressor
before using. Keep this instruction manual available for future reference.
IMPORTANT
This tool should only be serviced by a qualified service technician. For more information, call the toll free
helpline at 1-800-689-9928.
READ ALL INSTRUCTIONS THOROUGHLY.
SAVE THESE INSTRUCTIONS.
GENERAL POWER TOOL SAFETY WARNINGS
WARNING!
Read all safety warnings, instructions, illustrations and specifications provided with
this power tool. Failure to follow all instructions listed below may result in electric shock,
fire and/or serious injury.
SAVE ALL WARNINGS AND INSTRUCTIONS FOR FUTURE REFERENCE.
The term “power tool” in the warnings refers to your mains-operated (corded) power tool or battery-
operated (cordless) power tool.
WORK AREA SAFETY
• Keep work area clean and well lit. Cluttered or dark areas invite accidents.
• Do not operate power tools in explosive atmospheres, such as in the presence of
flammable liquids, gases or dust. Power tools create sparks which may ignite the dust or
fumes.
• Keep children and bystanders away while operating a power tool. Distractions can cause
you to lose control.
SAFETY GUIDELINES

headline bars
continuation tabs
notes
warnings
headline bars
continuation tabs
notes
warnings
headline bars
continuation tabs
notes
warnings
6
model no. 058-9863-6 | contact us 1-800-689-9928
ELECTRICAL SAFETY
• Power tool plugs must match the outlet. Never modify the plug in any way. Do not use
any adapter plugs with earthed (grounded) power tools. Unmodified plugs and matching
outlets will reduce risk of electric shock.
• Avoid body contact with earthed or grounded surfaces, such as pipes, radiators,
ranges and refrigerators. There is an increased risk of electric shock if your body is earthed or
grounded.
• Do not expose power tools to rain or wet conditions. Water entering a power tool will
increase the risk of electric shock.
• Do not abuse the cord. Never use the cord for carrying, pulling or unplugging the power
tool. Keep cord away from heat, oil, sharp edges or moving parts. Damaged or entangled
cords increase the risk of electric shock.
• When operating a power tool outdoors, use an extension cord suitable for outdoor use.
Use of a cord suitable for outdoor use reduces the risk of electric shock.
• If operating a power tool in a damp location is unavoidable, use a ground fault circuit
interrupter (GFCI) protected supply. Use of a GFCI reduces the risk of electric shock.
PERSONAL SAFETY
• Stay alert, watch what you are doing and use common sense when operating a power
tool. Do not use a power tool while you are tired or under the influence of drugs,
alcohol or medication. A moment of inattention while operating power tools may result in
serious personal injury.
• Use personal protective equipment. Always wear eye protection. Protective equipment
such as a dust mask, non-skid safety shoes, hard hat or hearing protection used for appropriate
conditions will reduce personal injuries.
• Prevent unintentional starting. Ensure the switch is in the off position before
connecting to power source and/or battery pack, picking up or carrying the tool.
Carrying power tools with your finger on the switch or energizing power tools that have the switch
on invites accidents.
• Remove any adjusting key or wrench before turning the power tool on. A wrench or a key
left attached to a rotating part of the power tool may result in personal injury.
• Do not overreach. Keep proper footing and balance at all times. This enables better control
of the power tool in unexpected situations.
• Dress properly. Do not wear loose clothing or jewellery. Keep your hair and clothing
away from moving parts. Loose clothes, jewellery or long hair can be caught in moving parts.
• If devices are provided for the connection of dust extraction and collection facilities,
ensure these are connected and properly used. Use of dust collection can reduce dust-
related hazards.
• Do not let familiarity gained from frequent use of tools allow you to become
complacent and ignore tool safety principles. A careless action can cause severe injury
within a fraction of a second.
SAFETY GUIDELINES

headline bars
continuation tabs
notes
warnings
headline bars
continuation tabs
notes
warnings
headline bars
continuation tabs
notes
warnings
7
POWER TOOL USE AND CARE
• Do not force the power tool. Use the correct power tool for your application. The correct
power tool will do the job better and safer at the rate for which it was designed.
• Do not use the power tool if the switch does not turn it on and off. Any power tool that
cannot be controlled with the switch is dangerous and must be repaired.
• Disconnect the battery pack from the power tool before making any adjustments,
changing accessories, or storing power tools. Such preventive safety measures reduce the
risk of starting the power tool accidentally.
• Store idle power tools out of the reach of children and do not allow persons unfamiliar
with the power tool or these instructions to operate the power tool. Power tools are
dangerous in the hands of untrained users.
• Maintain power tools and accessories. Check for misalignment or binding of moving
parts, breakage of parts and any other condition that may affect the power tool’s
operation. If damaged, have the power tool repaired before use. Many accidents are
caused by poorly maintained power tools.
• Keep cutting tools sharp and clean. Properly maintained cutting tools with sharp cutting
edges are less likely to bind and are easier to control.
• Use the power tool, accessories and tool bits, etc., in accordance with these
instructions, taking into account the working conditions and the work to be performed.
Use of the power tool for operations different from those intended could result in a hazardous
situation.
• Keep handles and grasping surfaces dry, clean and free from oil and grease. Slippery
handles and grasping surfaces do not allow for safe handling and control of the tool in unexpected
situations.
BATTERY TOOL USE AND CARE
• Recharge only with the charger specified by the manufacturer. A charger that is suitable
for one type of battery pack may create a risk of fire when used with another battery pack.
• Use power tools only with specifically designated battery packs. Use of any other battery
packs may create a risk of injury and fire.
• When battery pack is not in use, keep it away from other metal objects, like paper clips,
coins, keys, nails, screws or other small metal objects, that can make a connection
from one terminal to another. Shorting the battery terminals together may cause burns or a
fire.
• Under abusive conditions, liquid may be ejected from the battery; avoid contact. If
contact accidentally occurs, flush with water. If liquid contacts eyes, additionally seek
medical help. Liquid ejected from the battery may cause irritation or burns.
• Do not use a battery pack or tool that is damaged or modified. Damaged or modified
batteries may exhibit unpredictable behaviour resulting in fire, explosion or risk of injury.
• Do not expose a battery pack or tool to fire or excessive temperature. Exposure to fire or
temperature above 265°F (130°C) may cause explosion.
SAFETY GUIDELINES
headline bars
continuation tabs
notes
warnings
headline bars
continuation tabs
notes
warnings
headline bars
continuation tabs
notes
warnings
8
model no. 058-9863-6 | contact us 1-800-689-9928
• Follow all charging instructions and do not charge the battery pack or tool outside the
temperature range specified in the instructions. Charging improperly or at temperatures
outside the specified range may damage the battery and increase the risk of fire.
SERVICE
• Have your power tool serviced by a qualified repair person using only identical
replacement parts. This will ensure that the safety of the power tool is maintained.
• Never service damaged battery packs. Service of battery packs should only be performed by
the manufacturer or authorized service providers.
SPECIFIC SAFETY RULES
• Do not exceed the pressure rating of any component in the system.
• Protect material lines and air lines from damage or puncture. Keep hose away from sharp
objects, chemical spills, oil, solvents, and wet floors.
• Check hoses for weak or worn condition before each use, making certain all
connections are secure. Do not use if defect is found. Purchase a new hose or notify an
authorized service centre for examination or repair.
• Do not attempt to pull or carry the air compressor by the hose.
• Make sure the hose is free of obstructions or snags. Entangled or snarled hoses can cause
loss of balance or footing and may become damaged.
• Do not continue to use a tool or hose that leaks air or does not function properly.
• Never leave a tool unattended with the air hose attached.
• Release all pressures within the system slowly. Dust and debris may be harmful.
• Drain tanks of moisture after each day’s use. If unit will not be used for a while, it is best to
leave drain valve open until such time as it is to be used. This will allow moisture to completely
drain out and help prevent corrosion on the inside of tanks.
• Risk of Fire or Explosion. When used in conjunction with a dedicated spray system, do not
spray flammable liquid in a confined area. Spray area must be well ventilated. Do not smoke while
spraying or spray where spark or flame is present. Keep compressors as far from the spraying
area as possible, at least 25’ (7.62 m) from the spraying area and all explosive vapors.
• Risk of Bursting. Do not adjust regulator to result in output pressure greater than marked
maximum pressure of attachment. Do not use at pressure greater than 120 psi.
• Inspect tanks yearly for rust, pin holes, or other imperfections that could cause it to
become unsafe. Never weld or drill holes in the air tanks.
• Do not operate this air compressor if it does not contain a legible warning label.
• Your tool may require more air consumption than this air compressor is capable of
providing.
• Never direct a jet of compressed air toward people or animals. Take care not to blow
dust and dirt towards yourself or others. Following this rule will reduce the risk of serious
injury.
SAFETY GUIDELINES

headline bars
continuation tabs
notes
warnings
headline bars
continuation tabs
notes
warnings
headline bars
continuation tabs
notes
warnings
9
SAFETY GUIDELINES
• Do not use this air compressor to spray chemicals or paint. Your lungs can be damaged by
inhaling toxic fumes. A respirator may be necessary in dusty environments.
• This equipment incorporates parts such as snap switches, receptacles, and the like
that tend to produce arcs or sparks and therefore, when located in a garage, it should be in a
room or enclosure provided for the purpose, or should be 18” (45.7 cm) or more above the floor.
• Never store a tool with air connected. Storing the tool with air connected can result in
unexpected firing and possible serious personal injury.
ADDITIONAL SAFETY GUIDELINES FOR THE AIR COMPRESSOR
• The label on your tool may include the following symbols. The symbols and their
definitions are as follows:
V ...................... Volts
A ...................... Amperes
Hz .................... Hertz
W ..................... Watts
min .................. Minutes
or d.c. .... Direct current
n0..................... No-load speed
…/min or…min-1
.. Revolutions or reciprocation per minute
psi ................... Pounds per square inch
SCFM ............... Standard cubic feet per minute
gal. .................. Gallon
................. WARNING – To reduce the risk of injury, user must read instruction manual.
................. WARNING – To reduce the risk of injury, always wear eye protection.
................. WARNING – To reduce the risk of injury, always wear ear protection.

headline bars
continuation tabs
notes
warnings
headline bars
continuation tabs
notes
warnings
headline bars
continuation tabs
notes
warnings
headline bars
continuation tabs
notes
warnings
headline bars
continuation tabs
notes
warnings
headline bars
continuation tabs
notes
warnings
10
model no. 058-9863-6 | contact us 1-800-689-9928
WARNING!
To reduce the risk of electric shock or damage to the charger and battery, use only the
Mastercraft®and PWRPODTM batteries and chargers listed.
BRAND BATTERY PACK CHARGER
Mastercraft®054-3124-0, 054-7553-4,
054-7557-6, 054-2434-8
054-3126-6, 054-7559-2,
054-8299-4
PWRPODTM 054-7563-0, 054-7564-8,
054-7558-4 054-7565-6, 054-7567-2
• For best results, your battery and tool should be charged, stored and used in a location
where the temperature is more than 41°F (5°C) but less than 104°F (40°C). Do not store
outside or in vehicles.
SAFETY GUIDELINES
headline bars
continuation tabs
notes
warnings
headline bars
continuation tabs
notes
warnings
headline bars
continuation tabs
notes
warnings
11
headline bars
continuation tabs
notes
warnings
headline bars
continuation tabs
notes
warnings
headline bars
continuation tabs
notes
warnings
PACKAGE CONTENTS:
Air compressor
KEY PARTS DIAGRAM
TANK
OUTLET
3
2
5
6
7
4
8
9
11
1
10
No. Description No. Description
1 Tank Pressure Gauge 7 Drain Valve
2 Outlet Pressure Gauge 8 Tank
3 Handle 9 On/Off Switch
4 Rubber Straps 10 Safety Valve
5 Quick Coupler 11 Reset Switch
6 Air Pressure Regulator Knob
WARNING!
• Remove the air compressor from the package and examine it carefully. Do not discard the carton or any
packaging material until all parts have been examined.
• If any part of the air compressor is missing or damaged, do not attach battery pack to the compressor or use the
tool until the part has been repaired or replaced. Failure to heed this warning could result in serious injury.
• Do not allow familiarity with the air compressor to cause a lack of alertness. A fraction of a second of
carelessness is enough to cause severe injury.
FPO
KEY PARTS DIAGRAM

headline bars
continuation tabs
notes
warnings
headline bars
continuation tabs
notes
warnings
headline bars
continuation tabs
notes
warnings
headline bars
continuation tabs
notes
warnings
headline bars
continuation tabs
notes
warnings
headline bars
continuation tabs
notes
warnings
model no. 058-9863-6 | contact us 1-800-689-9928
12
OPERATING INSTRUCTIONS
TO ATTACH THE BATTERY PACK
(fig. 1)
1. Make sure that the air compressor is switched off.
2. Align the raised rib on the battery pack with the
grooves on the compressor, and then slide the
battery pack onto the air compressor.
TO DETACH THE BATTERY PACK
(fig. 1)
1. Make sure that the air compressor is switched off.
2. Depress the battery-release button located on the
front of the battery pack to release the battery pack.
3. Pull the battery pack out and remove it from the air compressor.
TO ATTACH HOSE WITH QUICK COUPLER
(fig. 2)
1. Make sure the air compressor is turned off and the
battery pack is not installed.
2. Rotate the air pressure regulator knob fully in
the counter-clockwise direction so that the outlet
pressure is at zero (0) psi.
3. Attach hose with quick coupler. Make sure to push
the hose end fully into the coupler until the release
sleeve snaps forward to lock it in place.
TO DETACH HOSE FROM QUICK COUPLER
(fig. 2)
1. Confirm that the outlet pressure is at zero (0) psi.
2. When disconnecting a hose, always firmly hold release end of hose.
3. Pull back on the release sleeve on the quick coupler and then pull out the hose.
OPERATING INSTRUCTIONS
FPO
WARNING!
• Never exceed the air tool’s pressure rating as recommended by the manufacturer. When using this air
compressor as an inflation device, always follow the maximum inflation guidelines stated by the manufacturer
of the item being inflated.
fig. 1 Battery-Release Button
Detach
Attach
TANK
OUTLET
fig. 2
Air Pressure Regulator Knob
Connect
Disconnect

headline bars
continuation tabs
notes
warnings
headline bars
continuation tabs
notes
warnings
headline bars
continuation tabs
notes
warnings
13
headline bars
continuation tabs
notes
warnings
headline bars
continuation tabs
notes
warnings
headline bars
continuation tabs
notes
warnings
BREAK-IN PERIOD
Before first use, install a fully charged battery pack, then run the air compressor at zero tank pressure
with the drain valve fully open for 30 minutes or until the battery pack is completely discharged,
whichever happens first.
TO TURN THE AIR COMPRESSOR ON/OFF
(fig. 3)
1. Install the battery pack.
2. To turn the air compressor ON: push the on/off
switch to the “I” position.
3. To turn the air compressor OFF: push the on/off
switch to the “O” position.
TO CHECK THE SAFETY VALVE
(fig. 4)
1. Install the battery pack.
2. Turn the air compressor on and allow the tank to
fill. The compressor will shut off when the pressure
reaches the cut-out pressure (120 psi).
3. Turn the air compressor off.
4. Pull the ring on the safety valve to release air for
three to five seconds to allow pressurized air to
escape. Release the ring. The safety valve must reset and hold pressure before all compressed air is
exhausted from the tank.
5. Any continued loss of air after performing the above steps indicates a problem with the safety valve.
Discontinue use and seek service before continued use of the air compressor.
OPERATING INSTRUCTIONS
WARNING!
• Always ensure the switch is in the OFF (O) position and the outlet pressure gauge reads zero before changing
air tools or disconnecting the hose from the quick coupler on the air compressor. Failure to do so could result in
possible serious personal injury.
• Do not attempt to tamper with the safety valve. Anything loosened from this device could fly up and hit you.
Failure to heed this warning could result in death or serious personal injury.
• If air leaks after the ring has been released or if the valve is stuck and cannot be actuated by the ring, do not
use the air compressor until the safety valve has been replaced. Use of the air compressor in this condition
could result in serious personal injury.
FPO
fig. 3
On/Off Switch
TANK
fig. 4
Safety Valve
Pull

headline bars
continuation tabs
notes
warnings
headline bars
continuation tabs
notes
warnings
headline bars
continuation tabs
notes
warnings
14
model no. 058-9863-6 | contact us 1-800-689-9928
TO USE THE AIR COMPRESSOR
(fig. 5)
1. Ensure that the on/off switch is in the OFF position
and the battery pack is not installed.
2. Attach air hose with quick coupler and the accessory
or tool you intend to use.
3. Install the battery pack.
4. Move the on/off switch to the ON position.
5. Set the amount of air pressure desired using the
air pressure regulator knob. Turn the knob clockwise to increase or counter-clockwise to decrease the air
pressure through the hose.
6. Following all safety precautions in this manual and the manufacturer’s instructions in the air tool manual,
you may now proceed to use your air-powered tool.
7. When finished, always drain the tank, turn the unit off, and remove the battery packs. Never leave the unit
on and/or running unattended.
OPERATING INSTRUCTIONS
WARNING!
• Risk of bursting. Do not adjust air pressure regulator knob to result in output pressure greater than marked
maximum pressure of attachment and/or the item being inflated. Never use at pressure greater than 125 psi.
Failure to heed this warning could result in possible serious personal injury.
• Air-powered tools may require more air consumption than this air compressor is capable of providing. Check
the tool manual to avoid damage to the tool or risk of personal injury.
FPO
NOTICE:
• Always use the minimum amount of pressure necessary for your application. Using a higher pressure than needed will drain air
from the tank more rapidly, cause the unit to cycle on more frequently, and reduce battery run time between charges.
• The air compressor will shut off during an electrical overload. Press the reset switch to let the air compressor work again.
TANK
OUTLET
fig. 5
Air Pressure Regulator Knob

headline bars
continuation tabs
notes
warnings
headline bars
continuation tabs
notes
warnings
headline bars
continuation tabs
notes
warnings
15
NOTICE: Condensate is a polluting material and should be disposed of in compliance with local regulations.
TO DRAIN THE TANK
(fig. 6)
To help prevent tank corrosion and keep moisture out
of the air used, the air tank of the compressor should
be drained daily.
1. Turn the air compressor off and remove the battery
pack.
2. Pull the ring on the safety valve to release air until
tank pressure gauge reads less than 20 psi.
3. Release the ring.
4. Turn the drain valves 90° counter-clockwise to the ON (open) position.
5. Tilt tank to drain moisture from tank into a suitable container.
6. If a drain valve is clogged, release all air pressure, remove and clean drain valve, then reinstall.
7. After the water is completely drained, turn the drain valve 90° clockwise to the OFF (closed) position.
TO STORE HOSE WITH THE RUBBER
STRAPS
(fig. 7)
1. The rubber straps have many grooves so that you
can adjust the length of the straps as needed.
2. Wind the hose into straps and align the grooves on
the straps with raised rib on the tool.
OPERATING INSTRUCTIONS
TANK
OUTLET
fig. 6
Drain Valve
TANK
OUTLET
fig. 7
Rubber Strap
Rib
Grooves

headline bars
continuation tabs
notes
warnings
headline bars
continuation tabs
notes
warnings
headline bars
continuation tabs
notes
warnings
model no. 058-9863-6 | contact us 1-800-689-9928
16
MAINTENANCE
BEFORE EACH USE
1. Inspect the air compressor and the accessories for damage.
2. Check for damaged, missing, or worn parts.
3. Check for loose screws, misalignment or binding of moving parts, or any other condition that may affect
the operation.
4. If abnormal vibration or noise occurs, turn the tool off immediately and have the problem corrected before
further use.
5. Detach the battery pack from the tool before cleaning or performing any maintenance. Always wear safety
goggles when cleaning tools using compressed air.
MAINTENANCE
WARNING!
• Turn off the air compressor, remove battery packs, and release all air from the tank before servicing. Failure
to depressurize tank before attempting to remove valve could cause serious personal injury.
• Do not let brake fluids, gasoline, petroleum-based products, penetrating oil, etc., come into contact with
plastic parts. These substances contain chemicals that can damage, weaken, or destroy plastic.
• When servicing, use only identical replacement parts. The use of any other parts may create a hazard or
cause damage to the product.
• Use only accessories that are recommended for this air compressor by the manufacturer. Accessories that
may be suitable for one tool may become hazardous when used with another tool.
• To ensure safety and reliability, all repairs should be performed by a qualified service technician.
FPO

headline bars
continuation tabs
notes
warnings
headline bars
continuation tabs
notes
warnings
headline bars
continuation tabs
notes
warnings
17
TROUBLESHOOTING
Problem Possible Causes Solution
Compressor will not
run.
Low battery capacity. Charge the battery pack.
Tank is full of air. Compressor will turn on when
tank pressure drops to cut-in
pressure.
Electrical overload. Press the reset switch to restart
the tool.
Excessive moisture in
discharge air.
Excessive water in air tank. Drain the tank.
High humidity. Move to area of less humidity.
Air output lower than
normal.
Connections leaking. Tighten connections.
If the problem remains unsolved after performing the checks described above, call the toll-free helpline
at 1-800-689-9928.
TROUBLESHOOTING

headline bars
continuation tabs
notes
warnings
headline bars
continuation tabs
notes
warnings
headline bars
continuation tabs
notes
warnings
model no. 058-9863-6 | contact us 1-800-689-9928
18
EXPLODED VIEW
EXPLODED VIEW

headline bars
continuation tabs
notes
warnings
headline bars
continuation tabs
notes
warnings
headline bars
continuation tabs
notes
warnings
19
No. Part No. Description No. Part No. Description
1 0589863601 Screw 24 0589863624 Overload protector
2 0589863602 Flat washer 25 0589863625 Power switch
3 0589863603 Foot pad 26 0589863626 Rubber strap
4 0589863604 Lock nut 27 0589863627 Safety valve
5 0589863605 Screw 28 0589863628 Raising block
6 0589863606 Shaking pad 29 0589863629 Pressure gage
7 0589863607 PCB 30 0589863630 Regulating valve
8 0589863608 Fixed board 31 0589863631 Handle seat
9 0589863609 Motor assembly 32 0589863632 Pin roll
10 0589863610 Pressure switch 33 0589863633 Hand shank
11 0589863611 Air intake tube 34 0589863634 Head board
12 0589863612 Components 35 0589863635 Valve panel
13 0589863613 Right-angle elbow 36 0589863636 Right angle elbow
adapter
14 0589863614 Quarter bend 37 0589863637 Screw cap
15 0589863615 Inner wire 38 0589863638 Screw
16 0589863616 Female terminal 39 0589863639 Clamping band
17 0589863617 Plug-in seat 40 0589863640 Screw
18 0589863618 Female terminal 41 0589863641 Quick connector
19 0589863619 Screw 42 0589863642 Rubber hose
20 0589863620 Stop block 43 0589863643 Tank assembly
21 0589863621 Enclosure 44 0589863644 Sewage valve
22 0589863622 Tie belt buckle 45 0589863645 Spring washer
23 0589863623 Screw
If any parts are missing or damaged, or if you have any questions, please call the toll-free helpline at
1-800-689-9928.
PARTS LIST

headline bars
continuation tabs
notes
warnings
headline bars
continuation tabs
notes
warnings
headline bars
continuation tabs
notes
warnings
headline bars
continuation tabs
notes
warnings
headline bars
continuation tabs
notes
warnings
headline bars
continuation tabs
notes
warnings
model no. 058-9863-6 | contact us 1-800-689-9928
20
This Mastercraft®product is guaranteed for a period of 3 years from the date of original retail
purchase against defects in workmanship and materials, except for the following components:
a) Component A: Batteries, chargers and carrying case, which are guaranteed for a period of 2 years from the
date of original retail purchase against defects in workmanship and materials;
b) Component B: Accessories, which are guaranteed for a period of 1-year from the date of original retail
purchase against defects in workmanship and materials.
Subject to the conditions and limitations described below, this product, if returned to us with proof
of purchase within the stated warranty period and if covered under this warranty, will be repaired or
replaced (with the same model, or one of equal value or specification), at our option. We will bear the
cost of any repair or replacement and any costs of labour relating thereto.
These warranties are subject to the following conditions and limitations:
a) a bill of sale verifying the purchase and purchase date must be provided;
b) this warranty will not apply to any product or part thereof which is worn or broken or which has become
inoperative due to abuse, misuse, accidental damage, neglect or lack of proper installation, operation or
maintenance (as outlined in the applicable owner’s manual or operating instructions) or which is being
used for industrial, professional, commercial or rental purposes;
c) this warranty will not apply to normal wear and tear or to expendable parts or accessories that may be supplied
with the product that are expected to become inoperative or unusable after a seasonable period of use;
d) this warranty will not apply to routine maintenance and consumable items such as, but not limited to, fuel,
lubricants, vacuum bags, blades, belts, sandpaper, bits, fluids, tune-ups or adjustments;
e) this warranty will not apply where damage is caused by repairs made or attempted by others (i.e. persons
not authorized by the manufacturer);
f) this warranty will not apply to any product that was sold to the original purchaser as a reconditioned or
refurbished product (unless otherwise specified in writing);
g) this warranty will not apply to any product or part thereof if any part from another manufacturer is installed
therein or any repairs or alterations have been made or attempted by unauthorized persons;
h) this warranty will not apply to normal deterioration of the exterior finish, such as, but not limited to, scratches,
dents, paint chips, or to any corrosion or discolouring by heat, abrasive and chemical cleaners; and
i) this warranty will not apply to component parts sold by and identified as the product of another company,
which shall be covered under the product manufacturer’s warranty, if any.
WARRANTY
Table of contents
Other MasterCraft Air Compressor manuals

MasterCraft
MasterCraft Maximum User manual

MasterCraft
MasterCraft 2-GALLON (7.6 L)AIR COMPRESSOR User manual

MasterCraft
MasterCraft 058-7936-6 User manual

MasterCraft
MasterCraft 058-8386-8 User manual

MasterCraft
MasterCraft 299-3118-4 User manual

MasterCraft
MasterCraft 299-3117-6 User manual

MasterCraft
MasterCraft 058-1893-2 User manual

MasterCraft
MasterCraft 099-4119-2 User manual

MasterCraft
MasterCraft 5 U.S. GALLONS (18.9 L) User manual

MasterCraft
MasterCraft 058-7947-0 User manual