Matchmaster 05MM-RE03 User manual

05MM-RE03
Remote Control
Extender
User’s Manual


Introduction
This Remote Control Extender uses the smartest and easiest
technology in extending the remote control operation. By
installing the transmitter in the battery pocket only, your remote
control now detects the key signals and transmits them far away.
This extender kit (called Remote Control Extender) includes
transmitter (battery type), receiver (UFO shape), adaptor, eye
emitter, two 2/3 AAA rechargeable batteries and AA sleeve.

1) AA sleeve
2) RF transmitter
3) Adaptor
4) 2/3AAA Rechargeable battery
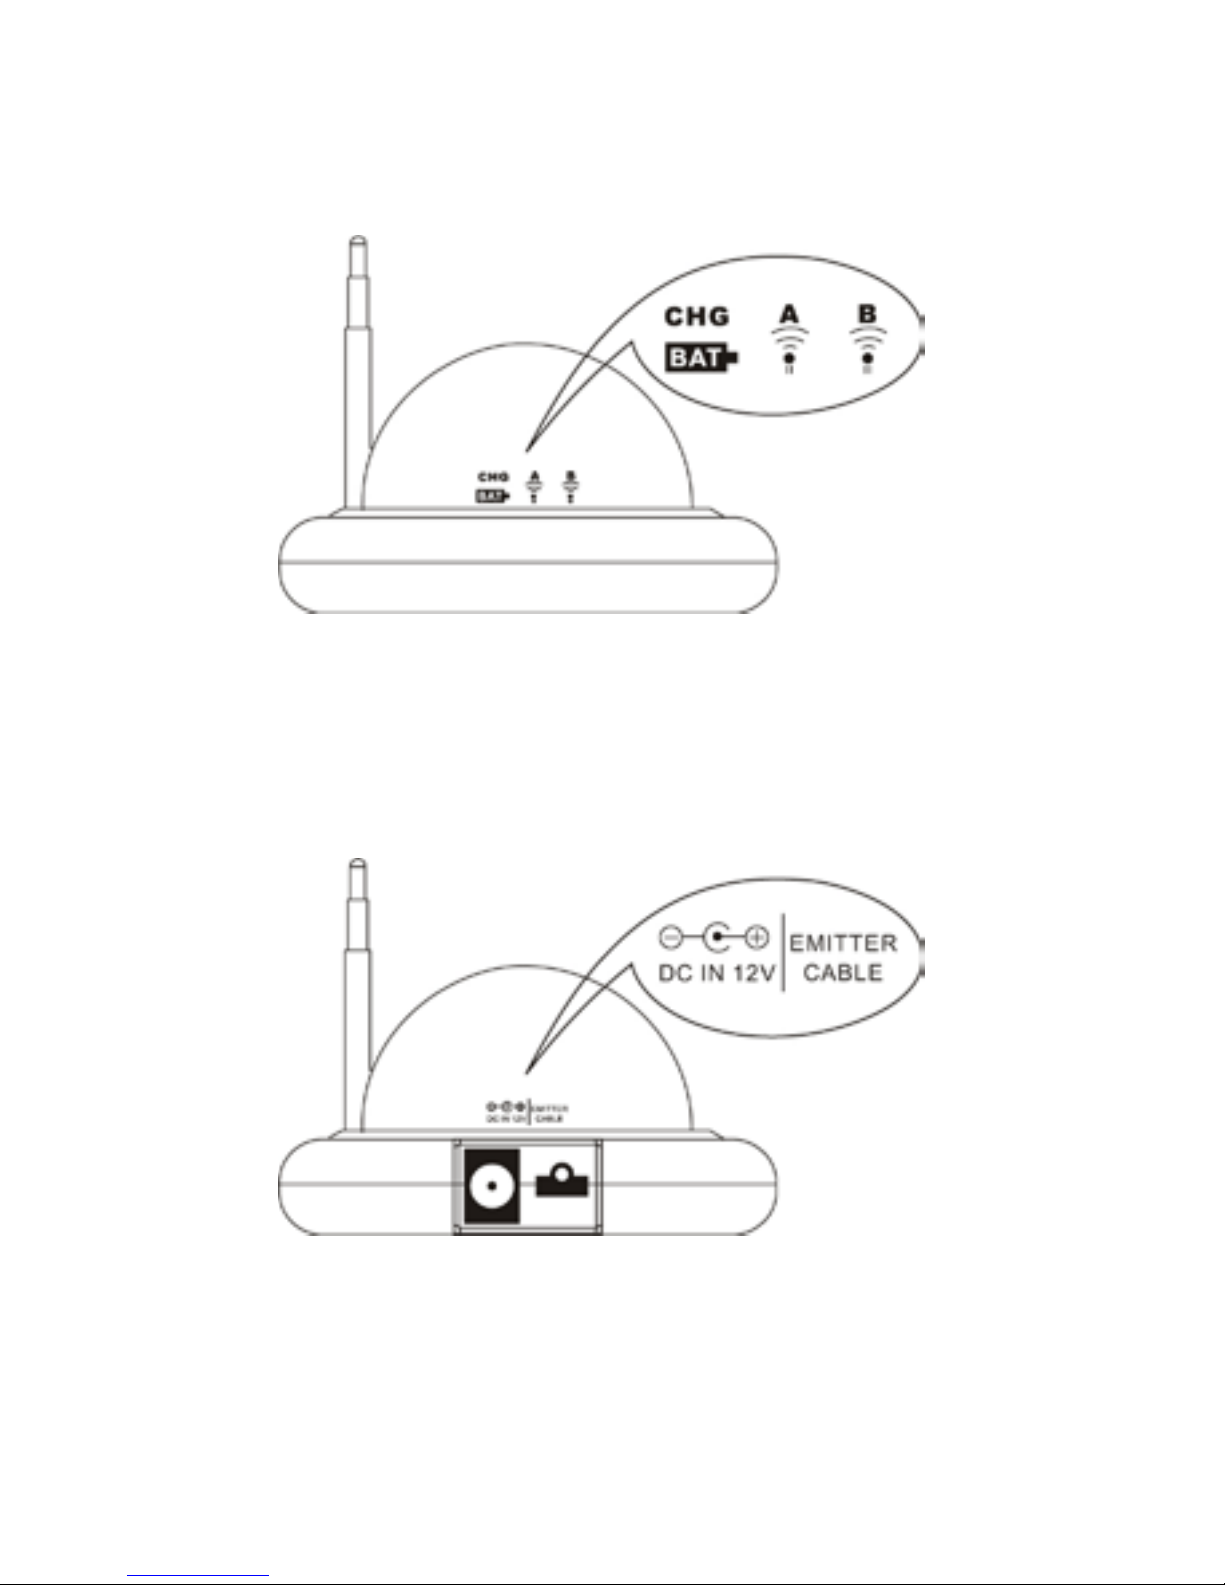
5) RF receiver
6) Eye emitter
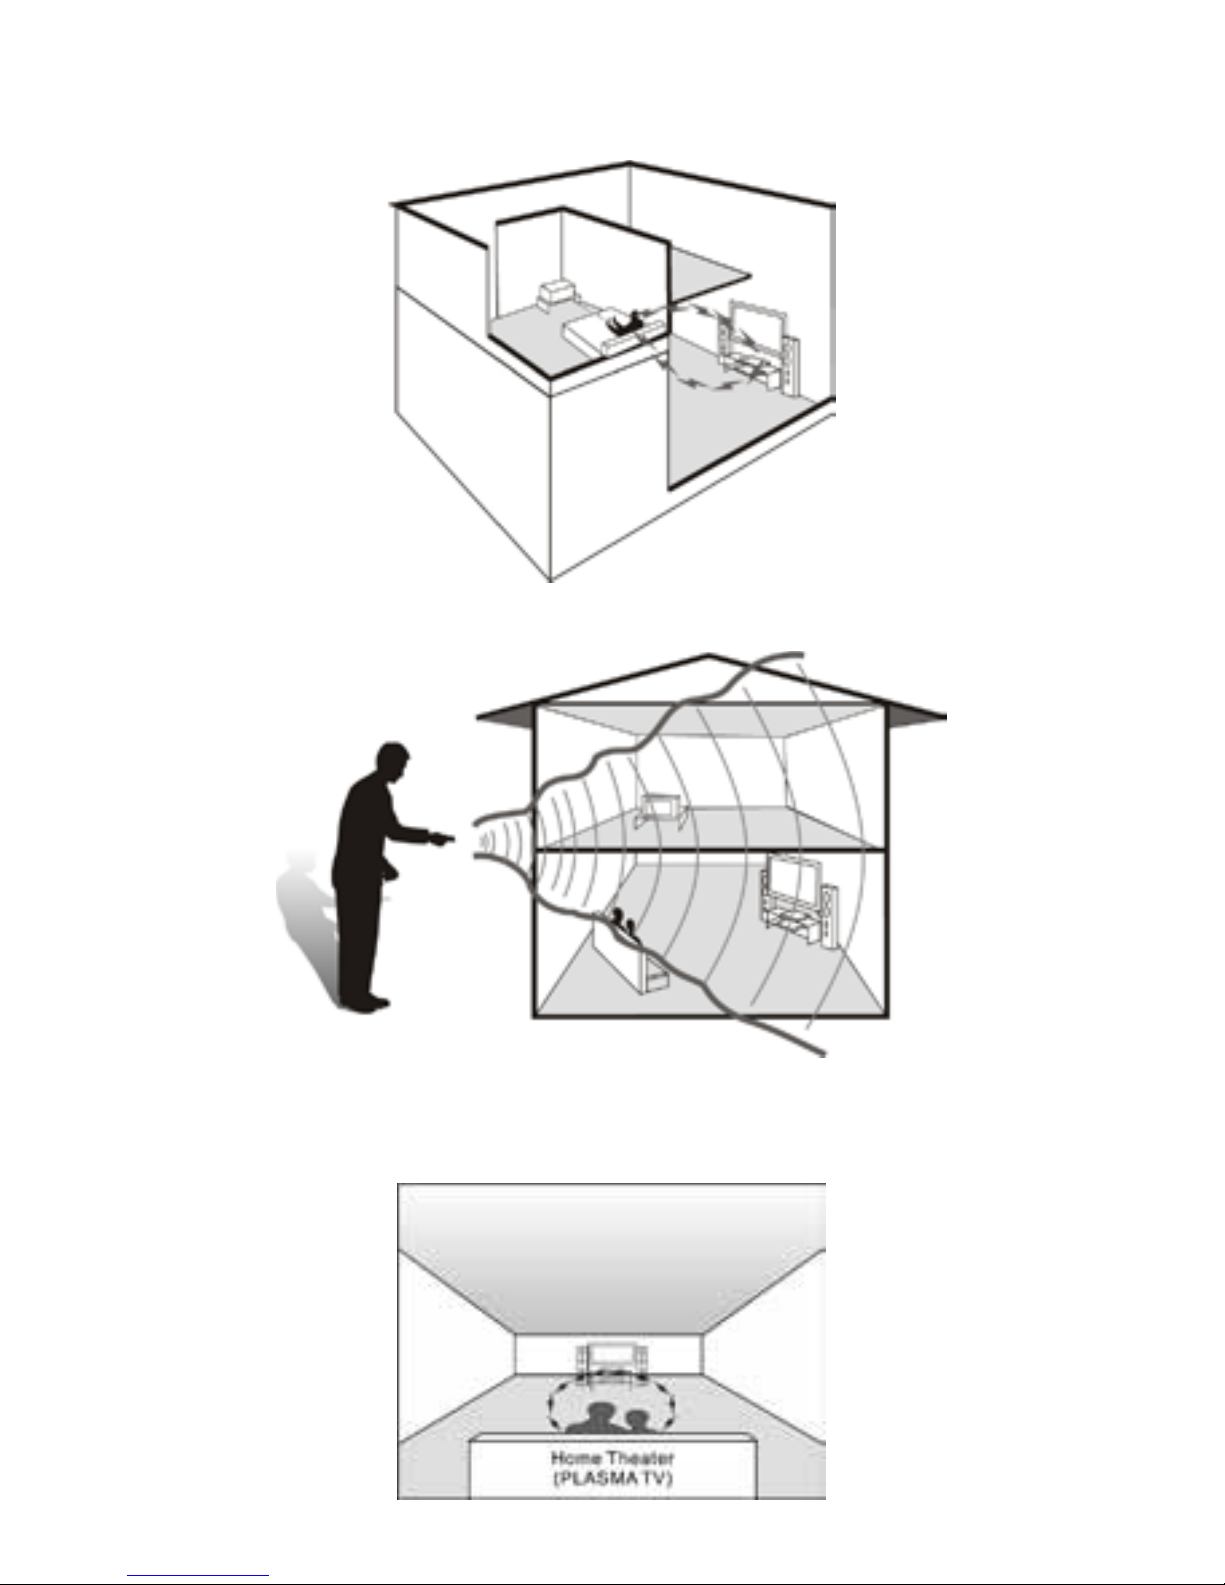
The upgraded remote controls with RF transmitter can operate
through doors, windows, oors and walls, And this extender kit
removes the worry about line of sight requirements.
When the RF transmitter is installed, the remote control still
transmits the normal infrared signal like a normal remote
control. That is, your remote control will transmit both signals
in Infrared(IR) and radio frequency(RF) at the same time,
regardless of distance or line of sight.
51 3 4 6
2

1. Normal use in living room
2. Side view control
3. Living to bedroom
Control satellite/cable in living room from bedroom
Installing and Operating Cases

4. Floor to oor
Control satellite/cable in living room from the second oor
5. Outside control
6. Normal longer range

1. AAA battery
Install AAA size transmitter like a normal AAA battery
2. AA battery
Insert AAA transmitter into AA size sleeve and install like a
normal AA battery
Installing the RF Transmitter
Your remote control will use several AAA or AA size batteries,
normally 2 to 4. Please install RF transmitter instead of a battery
(one of batteries only). Below shows the battery AAA and AA
size using in normal remote control.

Front
Rear
Place the receiver in front of the audio/video and direct it
towards the audio/video equipment.
Installing the Receiver

1) Within 5-10 meters of the audio/video equipment.
2) The front of the receiver should directly face the audio/video
remote sensor.

3) If there is no space for the receiver in front of audio/video
equipment, please place near the audio/video equipment and
use the eye emitter(see section to Connecting the Eye Emitter).
Connecting Adaptor
1. Connect the AC/DC adaptor’s barrel plug into receiver’s 12V
jack then connect the adaptor’s AC plug to a standard AC outlet.
2. When the power is connected initially in the receiver, the
LEDs on the receiver will blink alternately and stop.
4) Fully extend the antenna.

Connecting the Eye Emitter
You can connect the supplied Eye Emitter cord when you need
to place the receiver next to your audio/video equipment
instead of in front of it .
1. Insert the Eye Emitter cord plug into the receiver IR output
jack on the back of the receiver.
2. Position the Emitter bulb facing your audio/video equipment’s
IR sensor.
3. Remove the adhesive tape on the bottom of the bulb and stick
it on front of the audio/video equipment sensor.
4. Recommendation for best position is in the center of
receiving window of audio/video. Normally, the receiving window
is square or round shape in a glass/plastic plate.
Eye Emitters (length: 1.8 meters)
You will have one eye emitter with 1 eye, 2eyes, or 3eyes.
Please refer to the pictures below.
1) 1 eye:TV or Cable or Satellite etc
2) 2 eyes: TV, Cable or Satellite etc
3) 3 eyes: TV, Cable or Satellite, Audio etc

Function Switch Selection (A,B,C)
You will nd slide switch on the bottom of receiver if you
remove the Plastic case. The positions A,B,C are used to set the
receiver to different remote controls .The factory setting is on
position B (Most of remote control use position B).
Interference
Your extender can cause TV or radio interference even when
it is operating properly. To determine whether your extender
is causing the interference if your receiver does not function
properly, the two LEDs(A & B)will blink continuously or one
LED will blink even without you using a remote control. IF THIS
OCCURS PLEASE SEE BELOW.
1. Move your transmitter away from the receiver
and check then realign.
2. Reduce the antenna length.
3. Select position “C” of slide switch on the back of the receiver.
Please remove the plastic cover rst.
4. If you cannot eliminate the interference,
please contact your dealer.
A: 56KHz(a few special remotes)
B: 38KHz(most of remote controls)
C: Sensitivity lower(external interference etc.)

Recharging Battery
Your RF transmitter is installed with small recharging battery
(2/3 AAA size) and the performance of the extender
deteriorates (the LEDs do not blink when you press the remote
button), you need to recharge (replace) the battery.
1. Remove the RF transmitter from your remote control and
take rechargeable battery out.
2. Find the recharging pocket on the bottom of receiver. There
should be an extra battery, fully charged already in the pocket.
3. Install fully-charged battery in transmitter and insert old
battery onto the 2/3 AAA pocket for recharging. Close the
cover. While the battery is recharging, the LED CHG (BAT) will
blink in the receiver. LED will blink when the recharging battery
is inserted in the pocket. Full recharging time is approx. 12 hours
and 6-8 hours when the battery is not fully at.
After replacement of rechargeable battery, you need to test
the function. If you feel it has working problem, replace normal
battery (AA or AAA) with new one.
Caution
1. Do not use a normal battery in recharging pocket.
2. Only use a rechargeable battery.
Care
Keep the extender dry, if it gets wet, wipe it dry immediately.
Use and store the extender only in normal temperature
environments. Handle the extender carefully and do not drop it.
Keep the extender away from dust and dirt, and wipe it with a
damp cloth occasionally to keep it looking new.

Limited Warranty
Warrants this product against defects of workmanship for one
year from the date of purchase. During this warranty period, this
product will be repaired or replaced, at option, without charge.
Please read your instructions thoroughly and use this product
only as directed. This warranty does not cover any damage due
to commercial use, accidental, misuse, abuse or negligence.
Repair or replacement as provided under this warranty is the
exclusive remedy of the consumer. The retailer shall not be liable
for any incidental or consequential damage due to breach of any
expressed or implied warranty of merchantability or tness for
a particular purpose on this product is limited to the duration of
this warranty.
Specications
Operating Range: Up to 30+ meters(100+ feet )
Operating Frequency: 433.92MHz
A/C adaptor Voltage: according to specication of national
electricity
Ex)USA:
Input: 120V AC, 60Hz Output: DC 12V, 200mA over
Ex)Europe:
Input: 210-220V AC, 55or 60Hz, Output DC 12V, 200mA over
Battery (included): two 1.2V 2/3AAA(Rechargeable)
F.C.C Caution
This device complies with FCC Rules Part 15. Operation is
subject to the following two conditions:(1)this device may not
cause harmful interference, and(2)this device must accept any
interference received, including interference that may cause
undesired operation.


For more information call:
AUST TOLL FREE: 1800-AERIAL
(1800-237425)
www.matchmaster.com.au
NZ TOLL FREE: 0800-AERIAL
(0800-237425)
www.matchmaster.co.nz
Table of contents
Other Matchmaster Extender manuals