We have included this section for your safety. Please read this information carefully
before using your built-in oven.
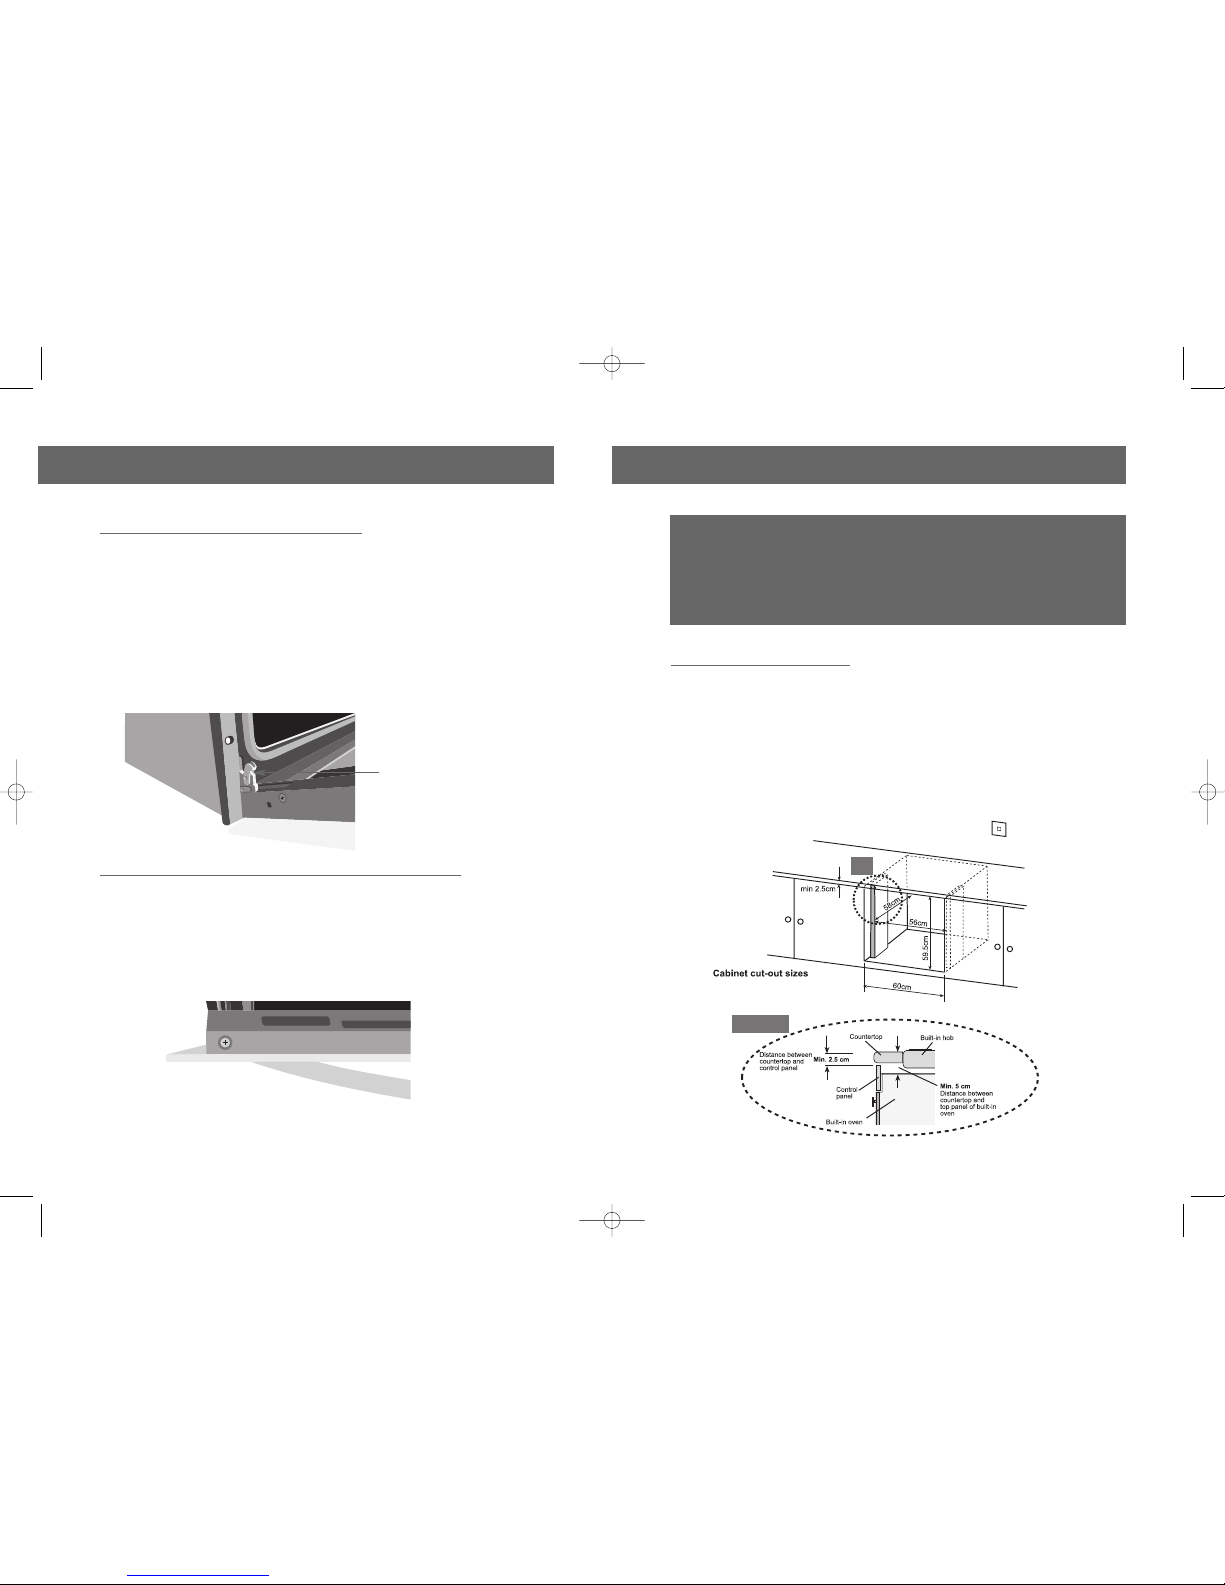
nThis oven has been designed for home use and should be built-in to a kitchen unit.
nAfter removing the packaging,check if there is any damage, if found never attempt to
use the oven, but contact your authorised service centre immediately.
nRetain this user guide and your receipts for future reference.
nDo not operate the oven before it is fully installed.
nSome parts of the oven may preserve their heat for a long time, please wait until
they have cooled off before touching them.
nDo not keep flammable items/substances near the oven while it is in use.
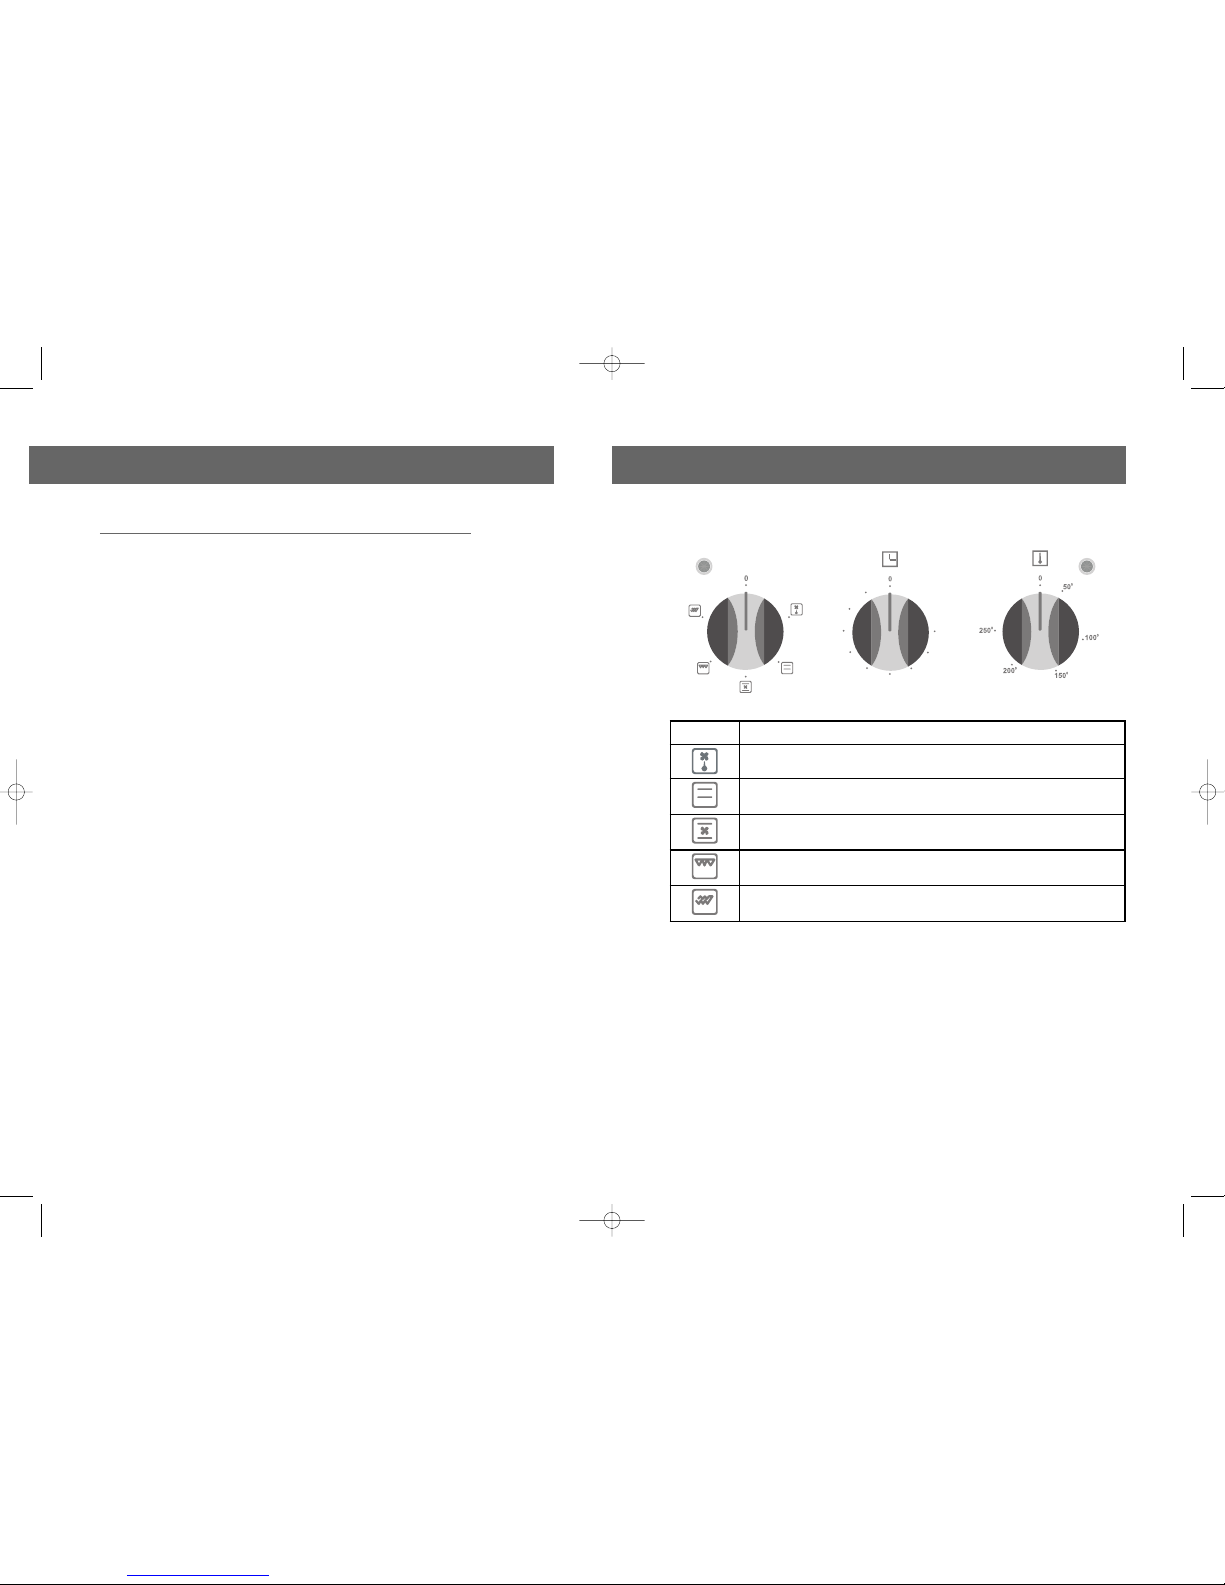
nWhen the oven is not in use, make sure the control dials are in the ‘0’ (off) position.
nYour oven needs sufficient air circulation while it is operating,keep it well ventilated.
nKeep children away from the oven.
nBefore replacing the internal light, turn off the power to the oven.
When using your oven
nWhen you first use your oven, smells may come from the insulation materials and
the heating elements. For this reason, before using your oven for the first time,
switch it on while empty, at its maximum temperature for 45 minutes.
nDo not touch the interior or the heating elements of the oven, as they will be hot.
nDo not put flammable and combustible materials into the oven.
nBe careful when using the oven, as the outer surface can be hot.
nWhile the door is open, do not let children climb on the door or sit on it.
WARNING:
nIt is hazadous for anyone other than authorised service personal, to carry out
servicing or repairs which involve the removal of covers.
nToavoid the risk of an electric shock, do not attempt repairs yourself.
nIn the event of any damage that occurs as a result of improper connection or
installation, the warranty will not be valid.
5
PLEASE NOTE:The electrical connection of this hob should be carried out by a
qualified electrician, according to the instructions in this guide and in compliance with
the current regulations. Give this guide to your electrician, the connection instructions
are on page 14.
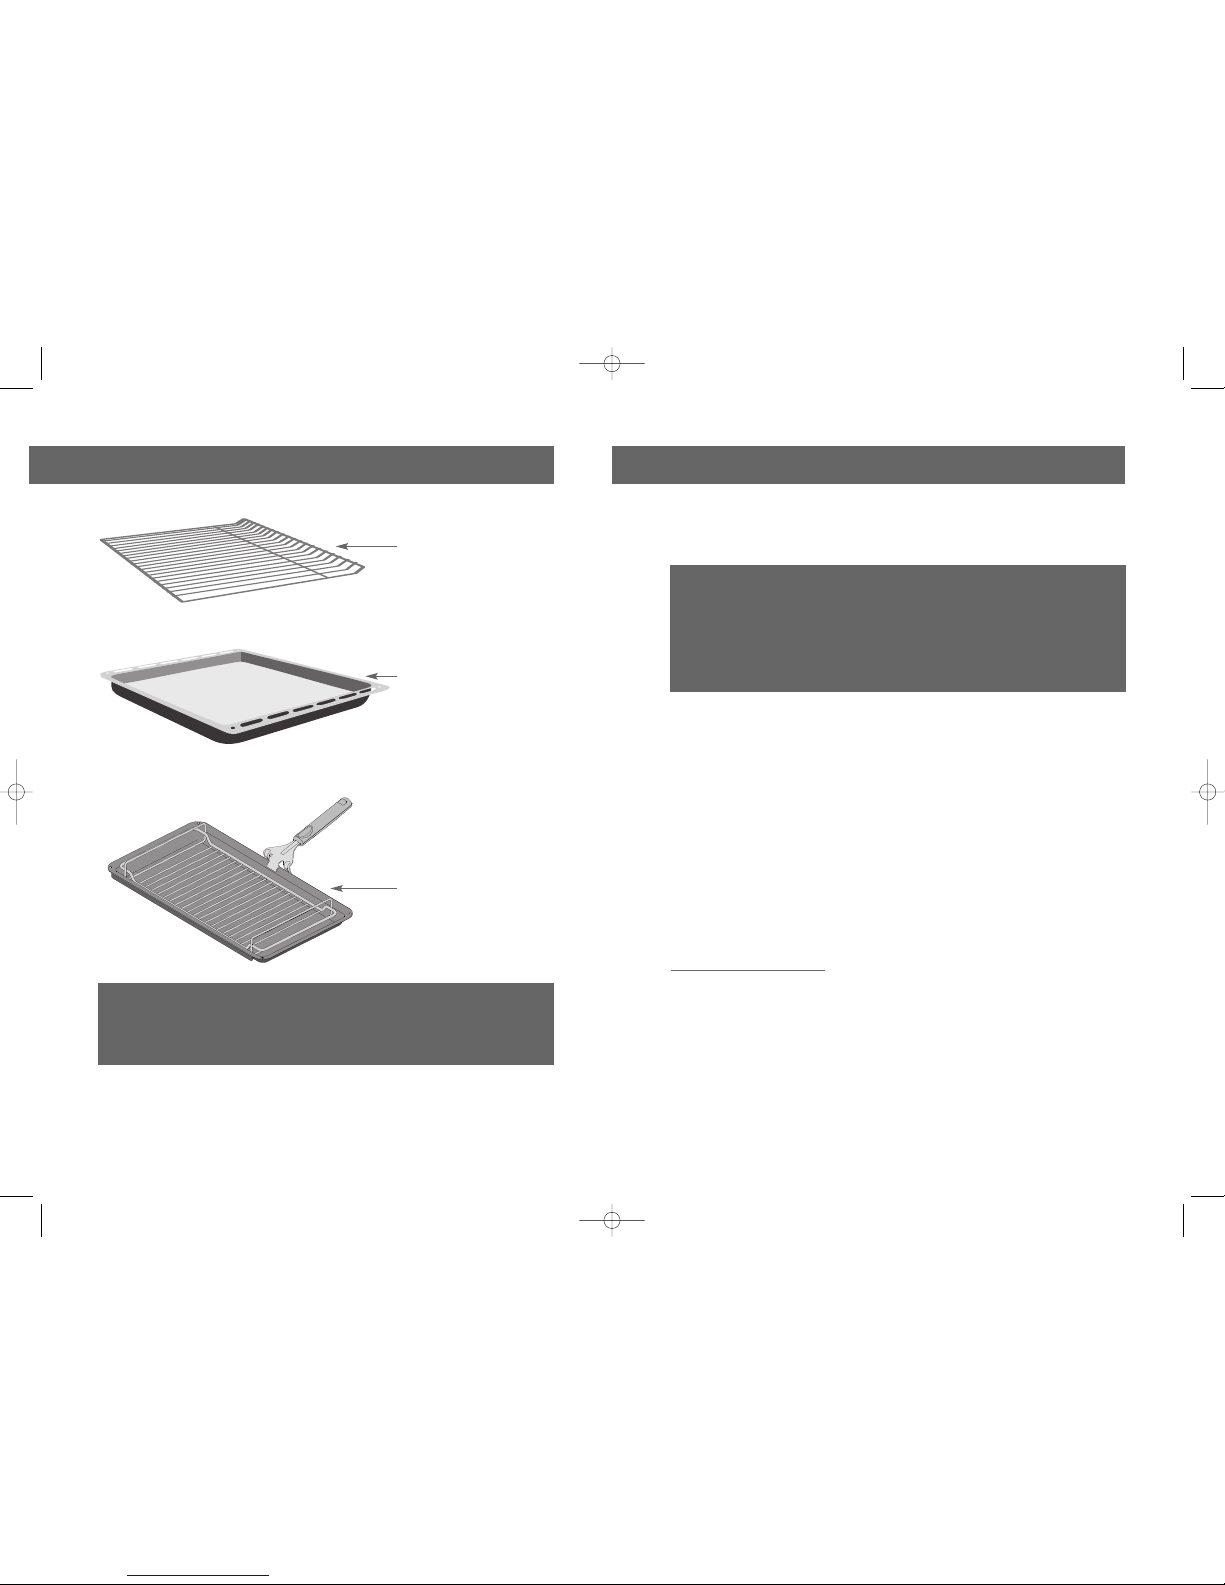
Wire shelf
Tray
Broil pan and handle set
4
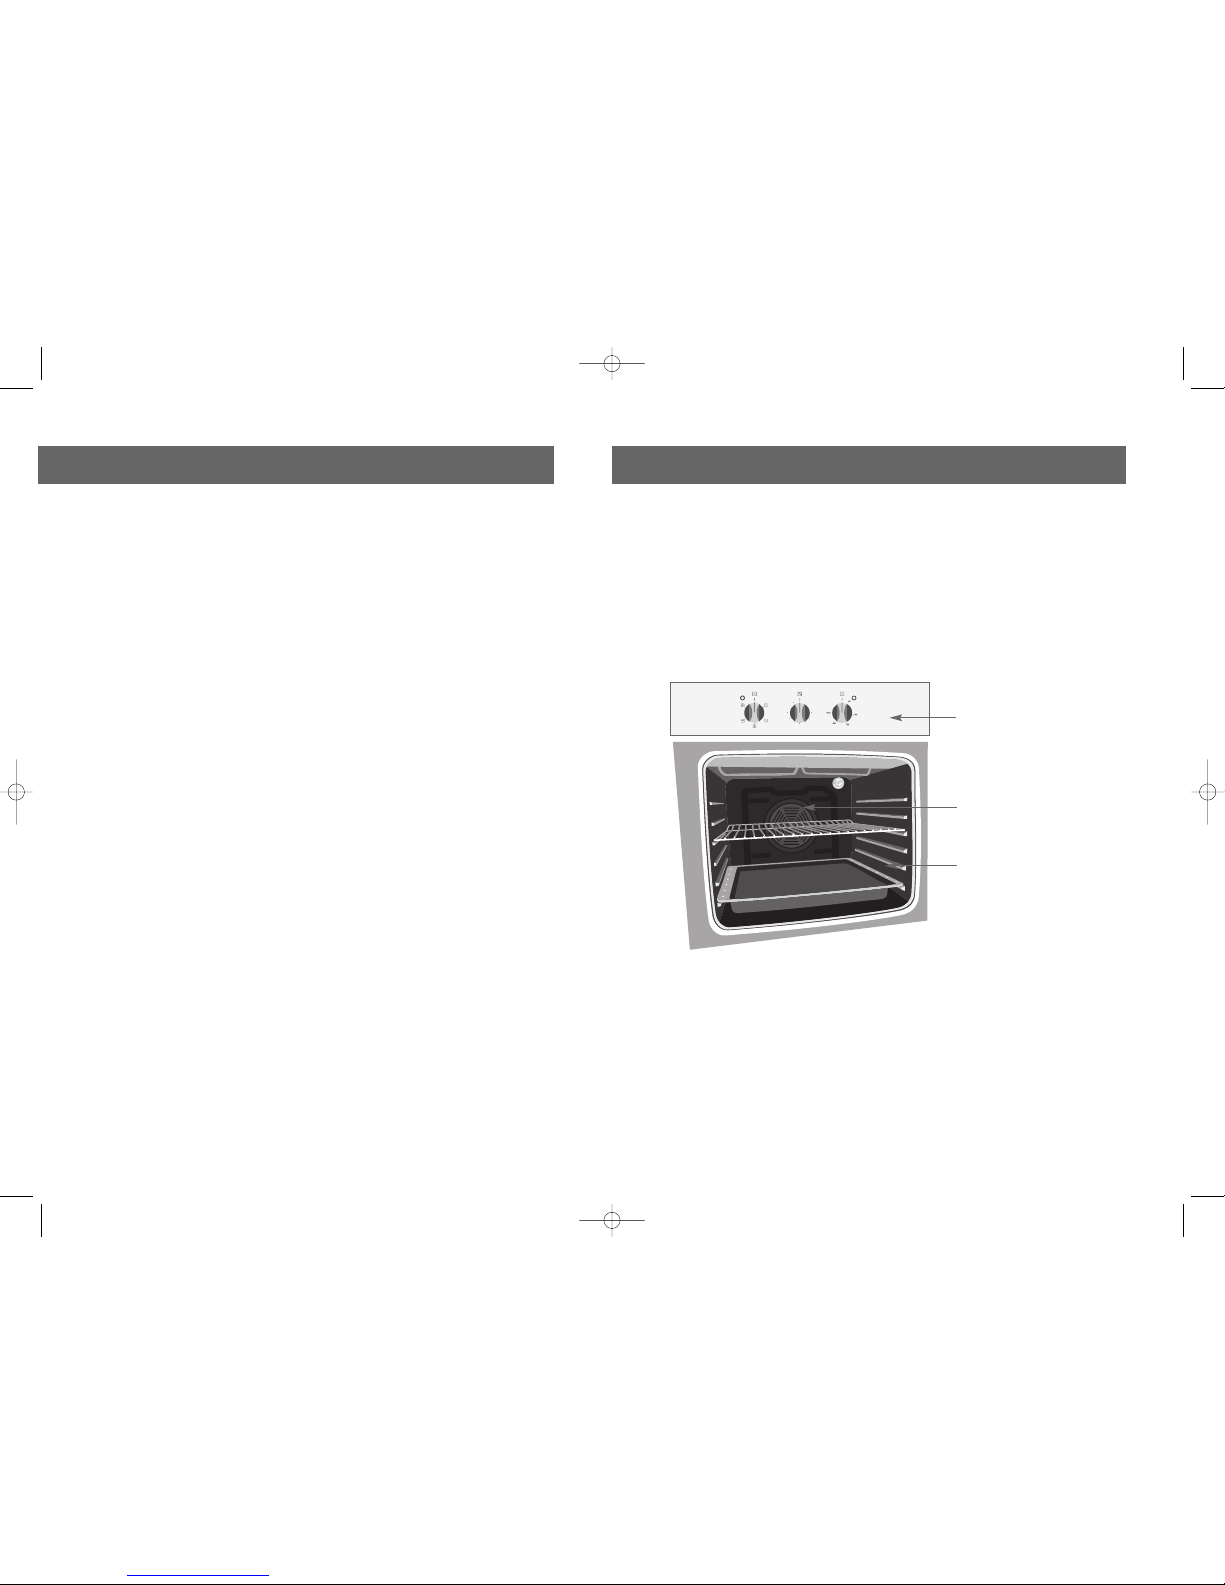
getting to know your built-in oven important safety notes
MSP60SS Oven-Gas Guide D4.qxd 4/7/06 13:42 Page 4