NATIONAL
TAPE
RECORDER
SERVICE
MANUAL
aT
Sica
Say
NEY
MODEL
RQ-152S
A.C
D.C
2
SOURCE
TAPE
RECORDER
CONTENTS
SPECIFICATIONS
i
v'e.
cs
cess
ves
cnstids
cesietidusstuatsedned
tasougsiedvuue
cre
cronvestgeesastadanss
PARTS
LOCATION.
ssessdcewciacitenedieineedavietewed
soigdacseateasadvecdoss
sa
sasectens
diese
BLOCK
DIAGRAM
OF
ELECTRICAL
CIRCUITS
........csccccescecsseneeesensonees
DISASSEMBLY
INSTRUCTION
uu...
cece
cee
eee
cee
ee
eee
eee
e
ne
nee
teen
ee
eeneneees
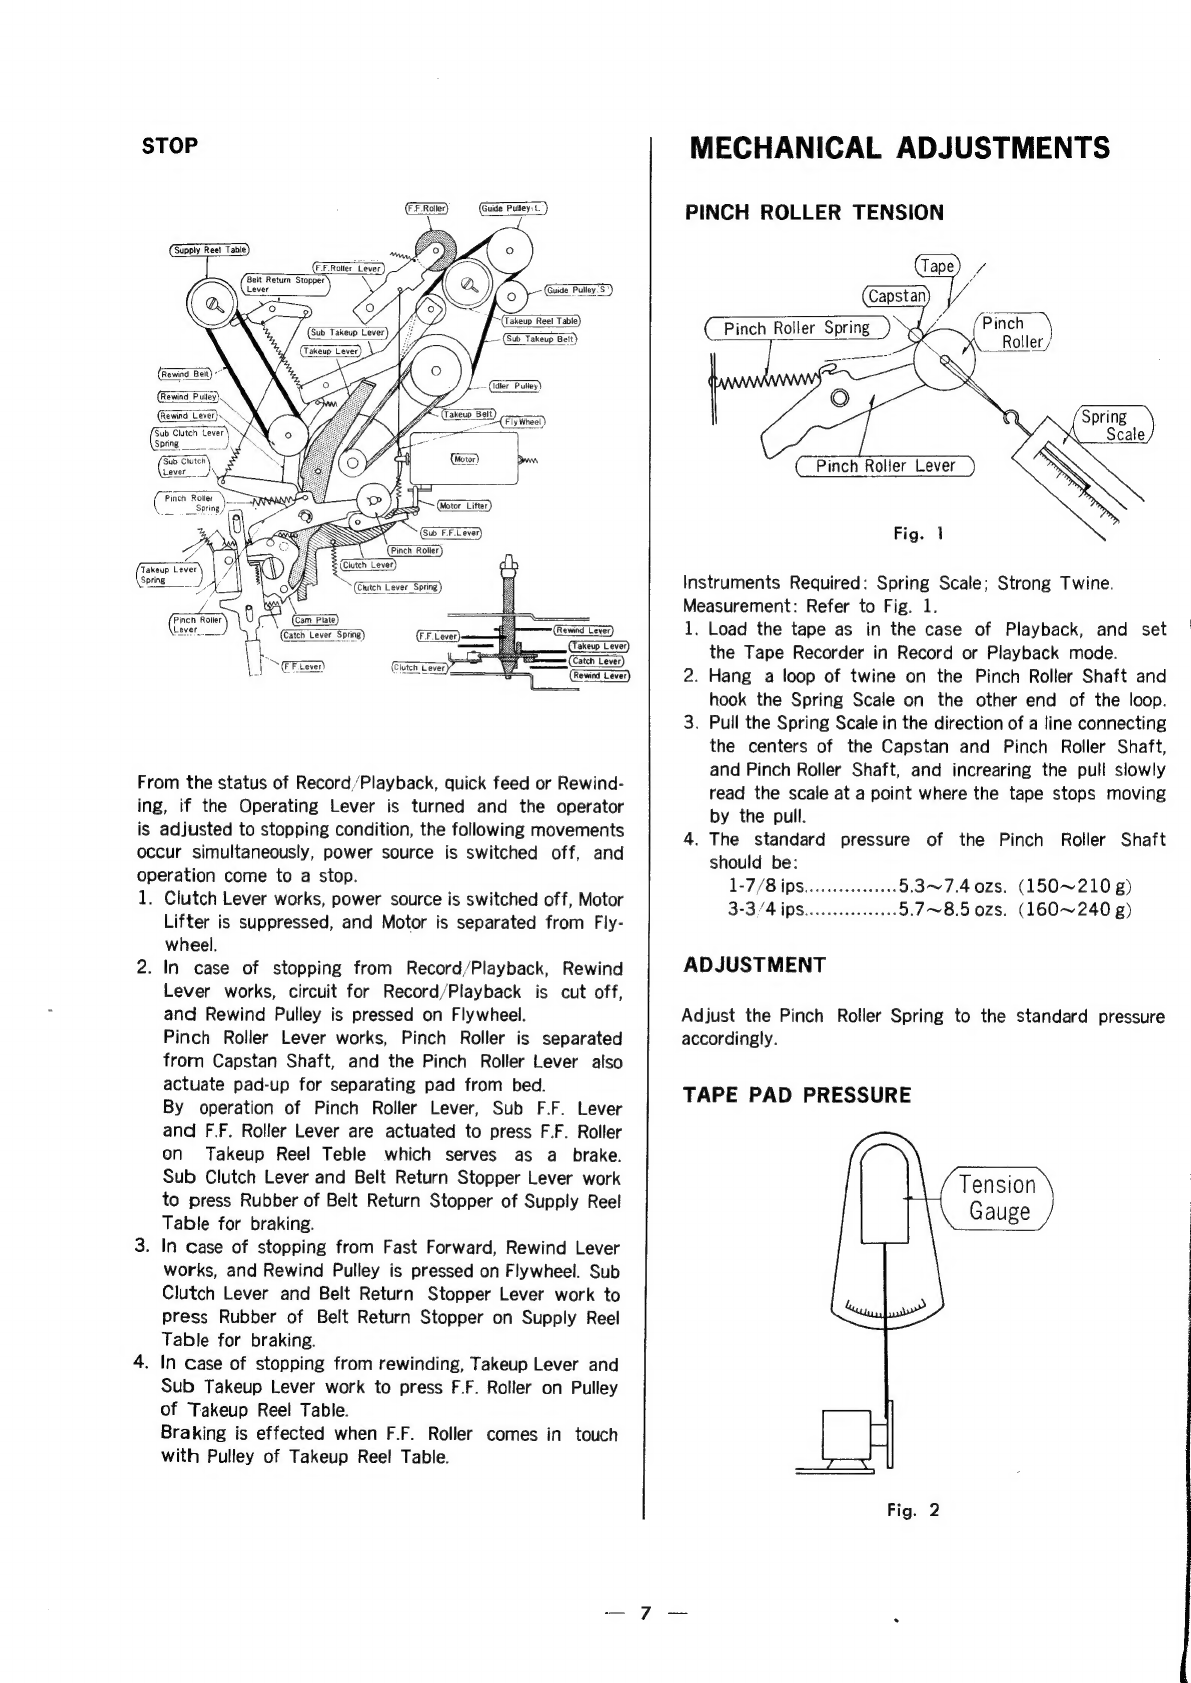
MECHANICAL
OPERATING
CONTROLS.
...........
0c:
ccecee
cee
ce
esse
ee
een ene
ee
een eee
TAPE
TRANSPORT
OPERATION
cicarcsacsncat
an
tavewuinsia
shaehieadwan
ena
aeduuanceate
MECHANICAL
ADJUSTMENTS.
.........
0c
cece
ccecee
eee
reece
aeeneeeeeene
nee
eenee
snes
AMPLIFIER
ADJUSTMENTS?
sus
seiveies
densatatmdsneniaaevetads
anata
ded
eotieeteiyaasse
TROUBLE:
“SHOOTING
“GUIDE.
sic
caitoutiancodsimavantectasina
rt
dvtananazsantaeices
REPLACEMENT
PARTS
ELISE
si
ecuviveciiiiiniceedeavelsveanth
bedaaes
sonacdeeedeasegas
CIRCUIT
BOARD
-sisccuctwcnitacdtodiaw
pani
<isda
staan
sta
Debesaa
eu
nidseeadecelisbeeutaeiye
CABINET
;PARTS
a:
cvs
teheemadattaiosttaeeievivads
eters
bsaes
i
aduarudscpenealiate
EXPLODES
VIEWS.
seistitate
scissors
etn
acs
tuatiiaails
cde
oh oe
galls
saith
de
semana
hamuanses¥
WIRING
CONNECTION
DIAGRAM
.............:eceecse
eee cen
eee
ee
tet
eeeaee
nse
eueueenes
SCHEMATIC
CIRCUIT
DIAGRAM:
\aiscs
trad
vesaisian
Gatien
gh
alvackainn
paveclan
eaves
PLECTRICAL
PARIS
LOCATION
tes.icdisane
nouetaestsa
ta
aanvigs
ea
aeeectesaas
ACCESSORIES
©
serene
coccinea
va
torsisdadebadtekoctengheatesanad
ate
cna
Lnter
nw
aeetdat
COMPONENT
PACKING
® 3
occseentt
ats
deol
sa
cen
tosYeaat
Sealine
vaevaailes
ditect
sta
tiaekas
MATSUSHITA
ELECTRIC
JAPAN