Maxsepct MIC-V6 User manual

Maxsepct
WIFI Control remote
MIC-V6
USER MANUAL
Guangzhou maiguang Electronic Science Technology Co., Ltd
Unit8,388 Zengnan Road , Liwan District, Guangzhou, P.R. China

1. Establish connection with ICV6 controller from the app
Open the WLAN or Wi-Fi setting screen, search for the SSID of the device
with a prefix of “maxspect”, and connect to it.
If you own more than one unit of ICV6 controller, you can identify them by
the serial number on the SSID, for example, the
SSID“maxspect-16A1B000209”contains the serial number “16A1B000209”. The
serial number of the ICV6 controller can be found on the back side of the
device.
2. Establishing connection between the ICV6 and Ethereal system
Open the ICV6 app after the connection between the app and the ICV6
controller has been established. You should see the menu “My Devices”, as

shown below:
Touch the icon on the upper right corner to enter the “Disconnected
Devices” menu, as shown below:

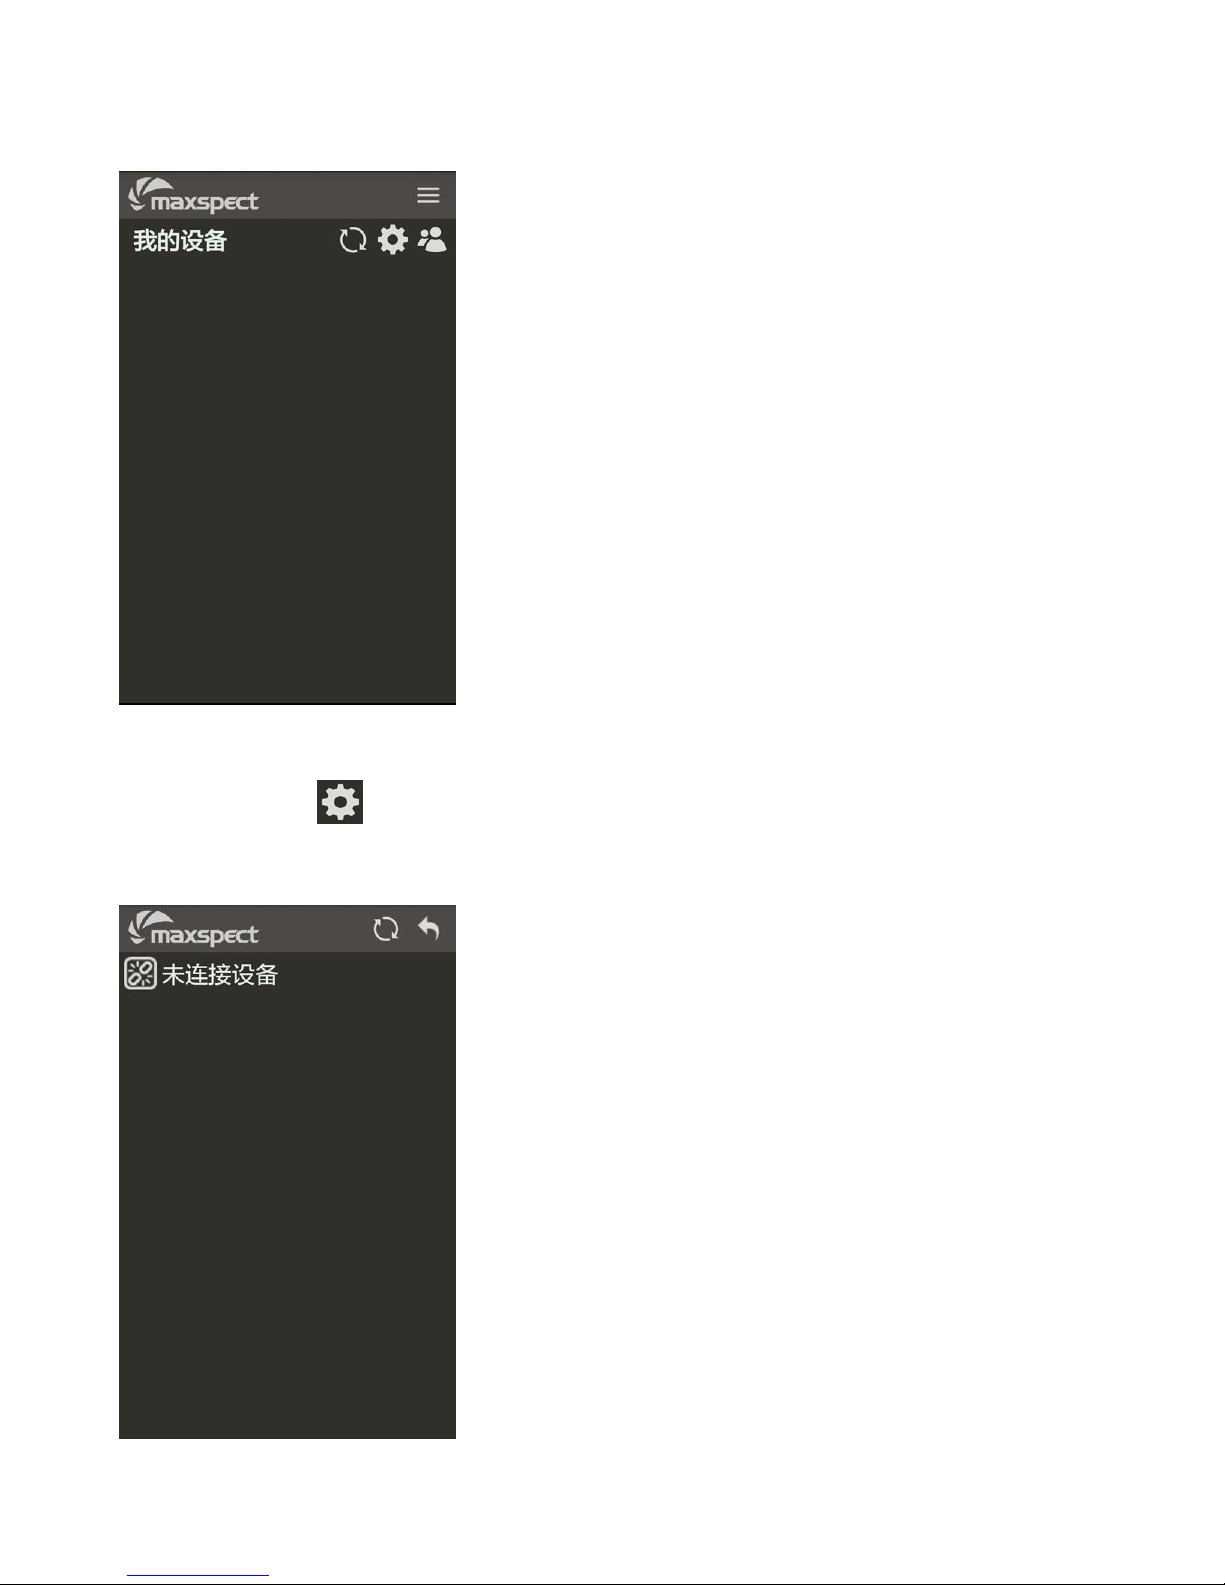
Touch the icon on the upper right corner to refresh the screen, the
ICV6 controller will begin searching for all nearby Maxspect devices, and list
them under the “Disconnected Devices” page, as shown below:
Note: The devices listed here are not connected to the ICV6 controller, it is
only showing all disconnected devices that the ICV6 controller can detect in the
nearby surrounding area.
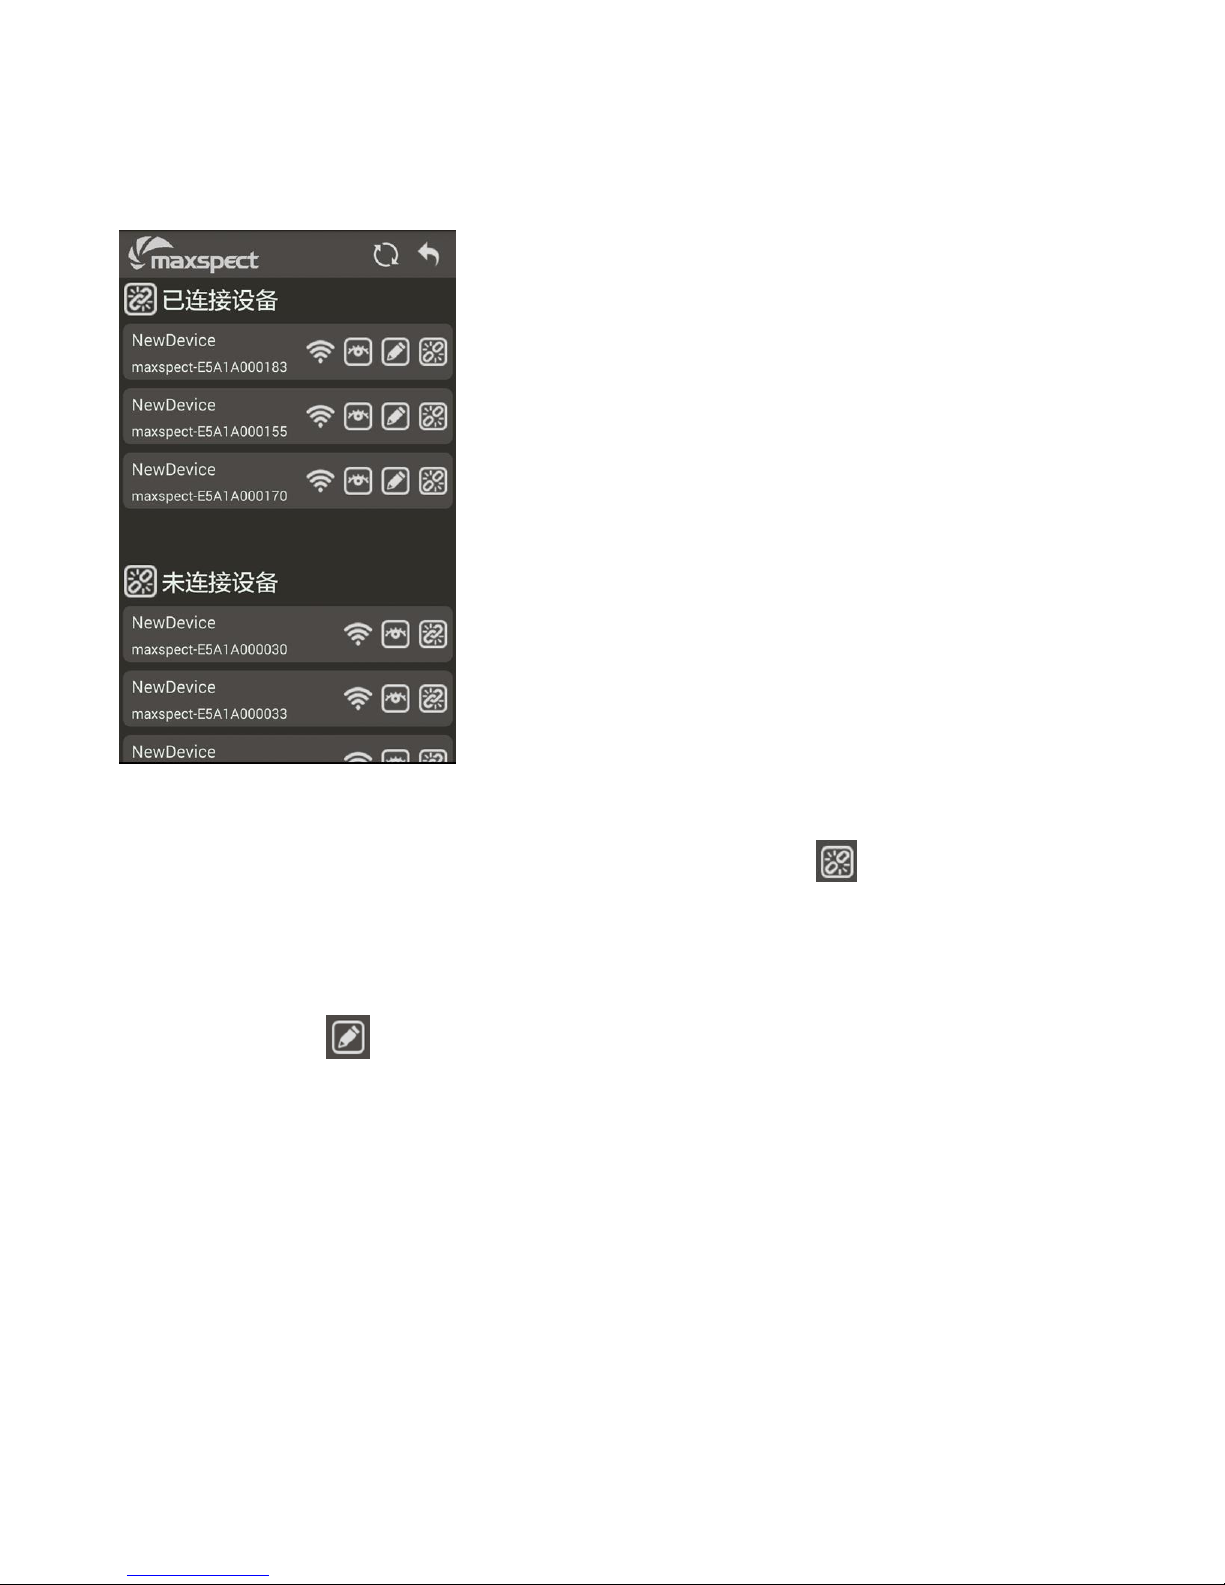
To identify a particular device listed in this page, touch the icon, and
the device will briefly enter an Identification Mode. For the Ethereal system, the
RGB Effect Light will begin to flash.
To connect a particular device listed in this page, touch the icon, and
this device will then be connected to the ICV6 controller and will be removed

from this “Disconnected Devices”list. Instead, it’ll be moved to the “Connected
Devices”list, as shown below:
To disconnect a connected device, touch the icon next to the
connected device.
Touch the icon next to the device to rename it, allowing easier
identification in the future, as shown below:

Once all devices have been connected, touch the icon on the upper
right corner to return to “My Devices”page. All connected devices will now be
listed in this page, as shown below:

All devices connected to the ICV6 controller is saved in the ICV6, there is
no need to connect the device to the ICV6 controller again the next time when
the ICV6 controller is turned on.
3. Assign connected devices to a group
In order to control your connected devices, they must be assigned a group.
One or more devices can be assigned to a group, however only the same
type of devices can be assigned to a particular group.
Devices assigned to the same group will follow the same settings and run
the same photoperiod profile. Therefore setting up multiple groups would allow
multiple devices running different settings and photoperiod profiles.
Touch the icon to create a group, the “Create Group”dialog will
appear, as shown below:

Assign the name of the group first, then touch the dim icon next to
the connected devices to assign a particular device to this group, the dimmed
icon will now appear as highlighted, as shown below:
Touch the icon to easily identify the device to be connecte. When
finished assigning devices to this group, touch the icon to finish and save
the settings for this group. Repeat the steps to create more groups as required.
Once group(s) have been created and devices assigned to them, they will
be listed in the “My Devices”page as shown below:

4. Add or remove devices from a group
To add or remove devices from a group, touch the icon next to a
particular group to bring up the dialog, then touch the highlighted icon to
remove the device. The icon of the removed device will now appear as dimmed.
5. Setting up your device (Ethereal System)
Touch the icon next to a group to enter the setup of that group.
The Ethereal has two modes of operation
a. Manual Mode
The default mode when you enter setup is Manual Mode page, as shown
below:

The intensity of each of the five channels can be adjusted in this page, by
sliding the control bar from 0 to 100%.
When finished, touch the to return to “My Devices” page.
b. Auto Mode
To enter Auto Mode, touch the icon and the mode selection dialog will
appear, as shown below:
Touch “Auto Mode” from the menu to enter the Auto Mode page, as shown
below:

Photoperiod profiles can be programmed under the Auto Mode. There is a
maximum of 24 Time-Points that can be programmed, where the intensity of
each of the five channels can be assigned.
For example, to program the Ethereal system to run the following
Photoperiod profile:
All channels off before 8:00am;
Channel A and B goes from 0 to 80% between 8:00am-9:00am;
All channels goes to 100% between 9:00am-12:00pm;
All channels stay at 100% between 12:00pm-7:00pm;
Channel C and D goes from 100% to 10% between 7:00pm-9:00pm;
All channels goes to 0% from 9:00pm-11:00pm.
To program the above photoperiod profile, six Time-Points would be

required corresponding to the five intensity settings, as shown below:
Add the first Time-Point by touching the icon. The default time for this
Time-Point will be 00:00 as shown below:
Touch the “00:00” to edit the time, as shown below:

Assign the time to “08:00”, since all channels are remained off at this time,
the intensity can stay at 0%, as shown below:
Touch the icon to add a second Time-Point (2), again touch the time
on this Time-Point to assign “09:00”, then change the intensity of channel A and

B to 80%, as shown below:
Touch the icon again to add another Time-Point (3), the time is set to
“12:00” and the intensity of all five channels is set to 100%, as shown below:
Repeat the steps for Time-Points (4-6), as shown below:

During the programming of the Photoperiod profile, touch the icon to
preview the intensity of all five channels assigned at the current Time-Point, to
ensure the brightness and color temperature is correct.
Once the Photoperiod profile has been programmed, touch the icon to
test the profile. The fixture will run the 24 hours Photoperiod profile in just 3
minutes, allowing a quick preview of the entire profile before saving it. During
the preview mode, the icon will be changed to red color, as shown below:

Once the Photoperiod profile has been programed and previewed, touch
the icon to confirm and save this profile. The fixture will begin to run this
profile accordingly.
Note: The Ethereal system will not run the Photoperiod profile if the profile
has not been confirmed and saved by touching the icon.
6. Setting up the RGB Effect Light
The color of the RGB Effect Light in the Ethereal system can be changed
according to your preference. The setting of the RGB Effect Light will not
affect either the Manual Mode or Auto Mode operation of the fixture.
To change the color of the RGB Effect Light, touch the icon and the
mode selection dialog will appear, as shown below:

Select the RGB Effect Light mode to enter the setup page, as shown below:
Adjust the color by touching and rotating the color plate, or provide the
(R)ed, (G)reen and (B)lue color value by sliding the bars beneath the color
plate.
Touching the icon will put the RGB Effect Light into demonstration
mode, where it will cycle between all colors continuously.
7. Synchronizing the clock between ICV6 and devices

When the ICV6 app is connected to the ICV6 controller, the controller will
automatically synchronize the clock between all connected devices, using the
time on the Android/iOS device that the ICV6 app is running on. This is crucial to
ensure all connected devices are synchronized with the controller and the
Photoperiod profiles will be running at an accurate time.
Therefore it is also crucial to ensure accuracy of the time on the
Android/iOS device the ICV6 app is running on, otherwise all operations on both
the ICV6 controller and its connected devices will be affected by the inaccurate
time.
This equipment has been tested and found to comply with the limits for a
Class B digital device, pursuant to part 15 of the FCC Rules. These limits are
designed to provide reasonable protection against harmful interference in a
residential installation. This equipment generates, uses and can radiate
radio frequency energy and, if not installed and used in accordance with
the instructions, may cause harmful interference to radio communications.
However, there is no guarantee that interference will not occur in a
particular installation. If this equipment does cause harmful interference to
radio or television reception, which can be determined by turning the
equipment off and on, the user is encouraged to try to correct the
interference by one or more of the following measures:

•Reorient or relocate the receiving antenna.
•Increase the separation between the equipment and receiver.
•Connect the equipment into an outlet on a circuit different from that to
which the receiver is connected.
•Consult the dealer or an experienced radio/TV technician for help.
Caution: Any changes or modifications to this device not explicitly approved
by manufacturer could void your authority to operate this equipment.
This device complies with part 15 of the FCC Rules. Operation is subject to
the following two conditions: (1) This device may not cause harmful
interference, and (2) this device must accept any interference received,
including interference that may cause undesired operation.
To comply with FCC RF exposure compliance requirements,this grant isapplica
ble to only mobile configurations. The antennas used for this transmittermust
be installed to provide a separation distance of at least 20 cm from allpersons
and must not be co-located or operating in conjunction with any otherantenna
or transmitter.
Table of contents