Maxwell RC12 User manual

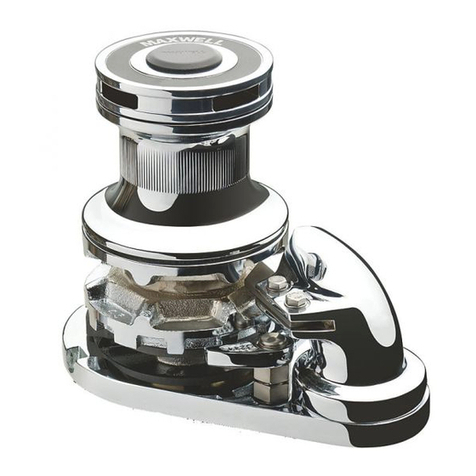
RC12 Vertical
Rope/Chain Windlass

Part No: P103133
23/01/12
Copyright Maxwell Marine International, 2008. All rights
reserved.
Maxwell Marine International reserves the right to make
engineering refinements on all products without notice.
Illustrations and specifications are not binding as to detail.

RC12 Windlass
Table of Contents
Preliminary Information.............................................................................................................. 2
Introduction............................................................................................................................... 2
Components............................................................................................................................. 2
Important Safety Information.................................................................................................... 3
Parts of theTopworks ............................................................................................................... 4
Parts of the Bottomworks......................................................................................................... 7
Ordering Spare Parts ............................................................................................................... 9
Rope and Chain Selection Guide........................................................................................... 11
Installation.................................................................................................................................. 12
General Requirements........................................................................................................... 12
Installation Instructions........................................................................................................... 13
Wiring Instructions.................................................................................................................. 17
Operation.................................................................................................................................... 22
Anchoring Tips ....................................................................................................................... 22
Lowering the Anchor............................................................................................................... 22
Raising the Anchor................................................................................................................. 23
Free falling the Anchor ........................................................................................................... 23
Raising the Anchor Manually.................................................................................................. 23
Using the Warping Drum........................................................................................................ 26
Maintenance............................................................................................................................... 27
Trouble Shooting Guide ........................................................................................................... 29
Reference Information .............................................................................................................. 30
Specifications ......................................................................................................................... 30
Dimensions............................................................................................................................. 31
Additional Resources
The following resources are included at the back of this manual:
Deck Cutout Details
Warranty Form
Contact Details (on back cover)
Note: For your nearest retailer, service agent or representative please refer to our website
www.maxwellmarine.com

2RC12 Windlass
Preliminary Information
Introduction
Congratulations on your purchase of a Maxwell windlass. Please read these instructions carefully
to enable you to correctly install and maintain the windlass for years of trouble-free operation.
Note
Failure to follow the correct installation, operation or maintenance instructions will jeopardise your
safety and could invalidate the warranty.
Components
In addition to this instruction manual, the following components may be included with the windlass:
•Windlass
•Remote up/down control panel
•Circuit breaker/isolator panel
•12V or 24V reversing solenoid
•Clutch (Bi –square)Handle
•Emergency retrieval handle
•Motor Bolt Kit
•Deck Cutout Details (At rear of manual)
•Small parts:
•Nuts
•Flat washer
•Spring washer

RC12 Windlass
Important Safety Information
•Make sure your windlass has been correctly specified before installation - Personal safety
may depend on it. The windlass must have a maximum pull capacity of at least three times
the combined weight of the anchor and rope/chain.
•For automatic operation to be possible, the anchor must be self launching.
•Correct fit of the chain to the chainwheel is essential. See "Rope and Chain Selection
Guide" on page 9.
•Keep hands, feet, loose clothing and hair well clear of the windlass and rope/chain during
operation.
•While raising the anchor, run the boat's engine above idle. This will minimise the power
drain on the batteries.
•Never operate the windlass from a remote station without having a clear view of the
windlass.
•Do NOT use the windlass as a mooring point. When anchoring or mooring, secure the line
directly to a bollard or deck cleat.
•Do NOT use the windlass to pull the boat forward when raising the anchor. Use the boat's
engine to drive the boat up to the anchor.
•Do NOT attempt to break free a fouled anchor with the windlass. Secure the line to a
bollard or cleat and use the boat's engine to break the anchor out.
•Always firmly tie down the anchor when under way or in heavy seas. Do not rely on the
windlass as a securing device.
•Always turn the circuit breaker/isolator switch off when the windlass is not in use and before
you leave the boat.
•Tie the end of the anchor rope/chain to a secure fixture in the rope/chain locker.
•Keep the anchor rope/chain in good condition, free from knots and twists. Inspect the rope
regularly for chafe. Where this has occurred, repair by cutting away the affected portion and
re-splice.
Tip: The rope can be swapped end-for-end to extend its life.
•Do NOT use the windlass to haul a person up a mast.

4RC12 Windlass
Windlass Parts
Fig 1: Windlass Parts

RC12 Windlass
Windlass parts
Item
Component description
Qty
Part No.
1
Cap
1
7191
2
O-ring
1
SP2790
3
Screw M8 x 25
1
SP0095
4
Retaining Washer
1
3267
5
Clutch Nut
1
7440
Clutch Nut Capstan
1
7441
6
Washer -Capstan only
1
7527
7
Capstan
1
7443
8
Clutch Cone
2
7439
9
Bellville Washer
2
5015
10
Cap screw -M5 x 16
3
SP0178
11
Chainwheel -upper -10mm- 3/8" CW
1
7448
Chainwheel -upper -12mm-1/2" CW
1
7452
Chainwheel -lower -10mm- 3/8" ACW
1
7448
Chainwheel -lower -12mm-1/2" ACW
1
7452
12
Bush
1
7544
13
Cap screw -M6 x 70
2
SP4509
14
Spring washer
2
SP0474
15
Stripper
1
7444
16
Chainwheel -lower-10mm-3/8" CW
1
7447
Chainwheel -lower-12mm-1/2" CW
1
7451
Chainwheel -upper-10mm-3/8" ACW
1
7447
Chainwheel -upper-12mm-1/2" ACW
1
7451
17
Retaining Clip
2
2311
18
Seal
1
SP2799
19
Bearing
1
SP0657
20
Spring CW
1
7037
Spring ACW
1
7436
21
Pressure Arm
1
7435
22
Deckplate CW
1
7430
Deckplate ACW
1
7431
23
Gasket
1
7515
24
Stud - 90TDC
5
5225
Stud - 190TDC
5
7482
25
Washer
5
3843
26
Spring Washer
9
SP0466
27
Nut - M10
5
SP0371
28
Spring
1
7458
29
Pawl
1
7456
30
Washer
1
SP0413

6RC12 Windlass
Item
Component description
Qty
Part No.
31
Cap screw -M8 x 25
1
SP0158
32
Plug
1
SP3519
33
Bush
1
SP3518
34
Screw -M10 x 35
4
SP3221
35
Pawl
1
7457
36
Bush
1
7480
37
O-ring
1
SP2785
38
Cap screw -M6 x 16
1
SP0170
39
Key
2
7465
40
Key - Capstan
1
3150
CW - clockwise
ACW - anticlockwise

RC12 Windlass
Bottomworks /Handle list
Fig 2: Bottomworks/handle parts

8RC12 Windlass
Bottomworks /Handle list
Item
Component description
Qty
Part No.
40
Key
1
3165
41
Shaft -LP-90TDC
1
7437
Shaft -Capstan -90TDC
1
7438
Shaft -LP-190TDC
1
7463
Shaft -Capstan - 190TDC
1
7464
42
Spacer tube - 90TDC
1
7433
Spacer tube - 190TDC
1
7434
43
Cap Screw -M10 x 35
4
SP3221
44
Spring washer
4
SP0466
45
Circlip
2
SP0846
46
Wormbox 75:1
1
P102180
Wormbox 100:1
1
P102181
47
Motor Bolt Kit _DC
1
P12487
Motor Bolt Kit _Hydraulic
1
P12488
48
Motor - 12V 1200W
1
P12073
Motor - 24V 1200W
1
P12074
Motor -Hydraulic
1
P14368
49
Bi-square handle
1
P103865
50
Emergency handle - LP CW
1
P103319
Emergency handle - LP ACW
1
P103323
51
Emergency handle -Capstan CW
1
P103320
Emergency handle -Capstan ACW
1
P103324
Some listed parts are sold as a kit only.
CW - clockwise
ACW - anticlockwise

RC12 Windlass
Ordering Spare Parts
When ordering spare parts, please refer to the parts list above and quote the following details.
Windlass Model
RC12 10mm - 3/8”
RC10 10mm -
3/8”
RC12 12/13mm –
1/2”
RC10 10mm -
3/8”
90TDC
190TDC
CW
ACW
Serial number
Power supply
12V
24V
Hyd
Part details
Part number Description Quantity
Refer back cover for web details.

10 RC12 Windlass
Rope and Chain Selection
THE MAXWELL WINDLASSES ARE DESIGNED FOR ROPE/CHAIN SYSTEMS USING: 16-
20mm (5/8”- 3/4”) rope, 10 - 13mm (3/8” – 1/2”) short link chain.
Your Windlass should have a rating of approximately 3 times total combined weight of the anchor
and chain.
The ground tackle should have been selected taking into account:
a) Boat size, displacement and windage.
b) Conditions of operation such as maximum depth of water, type of bottom and weather
conditions.
c) Holding power and size of anchor, taking special note of the manufacturers’
recommendations.
CORRECT FIT OF ROPE/CHAIN TO CHAINWHEEL IS ESSENTIAL FOR THE WINDLASS TO
OPERATE PROPERLY.
Selection of chainwheel:
16mm - 20mm (5/8”- 3/4”) rope / 10mm (3/8”) chain CW = P103317
16mm - 20mm (3/4”) rope / 12mm/13mm (1/2”) chain CW = P103318
16mm - 20mm (5/8”- 3/4”) rope / 10mm (3/8”) chain ACW = P103321
16mm - 20mm (3/4”) rope / 12mm/13mm (1/2”) chain ACW = P103322
THE WINDLASS SHOULD BE USED IN CONJUNCTION WITH A MAXWELL CHAIN
STOPPER, OR SNUBBER, OF THE APPROPRIATE SIZE.

RC12 Windlass
Installation
General Requirements
Foredeck layout
Make sure that the area of deck between the windlass and the bow roller is clear of obstructions.
The bow roller should have a central groove suitable for the chain size.
Use a chain guide if necessary to prevent the chain from running against the deckplate and
potentially causing damage to the windlass.
Provide a chain stopper, snubber or cleat to secure the anchor line when under way. Tie the
anchor line to a bollard or cleat when at anchor.
Anchor and rope/chain considerations
When purchasing an anchor, make sure it fits into the bow roller and is self-launching.
Use a swivel between the anchor and the chain to prevent the line from twisting as the anchor is
raised or lowered.
To prevent build up of rope/chain on deck causing possible damage, the bow roller must allow the
anchor to free fall immediately when the anchor is deployed.
Make sure that at least three links of chain are exposed when the anchor is docked.
The rope/chain must gravity feed into the locker.
NOTE: Make sure you securely fasten the end of the rope/chain to the boat.
Required clearances
Ideally the outlet for the rope/chain should be directly over the rope/chain locker. The rope/chain
should have at least 200mm (8”) clear fall from bottom of motor to rope/chain pile to allow the
rope/chain to straighten before passing through the windlass.
Position the windlass clear of pulpit, lifelines and bulwark so that there is room to swing the Clutch
Handle.
The rope/chain locker must be of such a size that the rope/chain will heap up and feed out
naturally without fouling the windlass motor.
Allow access for conveniently connecting the supply lines under deck after the windlass is bolted
in position.
It should be noted that the gearbox can be indexed at different positions in relation to the deck
plate. Be sure to select the most convenient position and allow for the best run for the rope/chain
to clear the motor.
Aligning the windlass
“UP” is the clockwise rotation when looking down on the windlass.
The windlass must be positioned to allow the rope/chain to have a clear run from the bow roller to
the chainwheel.
The deck plate should be mounted pointing in the direction of the incoming rope/chain. This
arrangement allows the rope/chain to have maximum engagement with the chainwheel.
The bow roller should have a vertical groove to suit the profile of the chain. This will align the
chain so that it enters the chainwheel without twisting.

12 RC12 Windlass
Installation Instructions
Before you start
Before installing the windlass, identify any bulkheads, wiring or piping under the deck. This may
determine where the windlass can be positioned. Ensure the deck is flat, if not; a plinth will be
required to ensure the windlass sits on a flat surface.
Deck thickness
It is imperative that the deck and under-deck pad (not supplied) are of sufficient thickness and
structural strength to support the loads imposed on or by the windlass.
An under-deck pad should spread the load as widely as possible.
Preventing electrolysis
For aluminium boats, it is essential that the deckplate be insulated from the deck with a non-
conductive gasket (not supplied), that the mounting studs pass through insulators (not supplied),
and that the under-deck fastenings are insulated from the deck with nylon washers (not supplied).
It is also important that the anchor and chain are insulated from the hull, including rubber lining the
rope/chain locker and insulating the fixing for the end of the rope/chain to the hull.
Without these precautions, severe electrolysis can occur.
Because the motor is of the isolated earth type, it is not necessary to separately earth the
windlass.
Locating the chain stopper
The chain stopper should be positioned and aligned in a convenient position between the windlass
and the bow roller, so that it clears the anchor stock. The chain should pass through the stopper
without being deflected.
Preparing windlass
Remove windlass from its packing case.Disassemble it in the following order :
1. Remove the cap from the top of the windlass
2. Undo and remove the retaining screw and retaining washer under the cap,
using a 5mm Allen key.
3. Undo and remove clutch nut
4. For Capstan models only - remove washer, drum and key
5. Remove upper clutch cone, key and Bellevile washer
6. Undo screw that retain chain stripper and remove it.
7. Remove chainwheel assembly (together with stripper ),Bellevile washer, lower
clutch cone, key and retaining clips
8. Undo bolts and remove the deckplate
Refer to drawing in this Manual and identify all parts. If any parts are damaged or missing, contact
your Maxwell distributor. Some smaller parts might not be assembled on the windlass by the
factory, but supplied in a plastic bag in the packing case.
Maxwell strongly recommends generous application of a high quality anti-corrosive paste or
coating to the mating sections of main shaft, drive key, flanges, screw threads and other surfaces
that are likely to seize after being in contact for a prolonged period of time.
Also ensure anti-corrosive coating is liberally applied to the inside wall of the spacer tube.

RC12 Windlass
Installation procedure
1. Use the Deck Cutout Details drawing as a guide for marking and cutting the holes.
Tip: On GRP boats, running the drill in reverse first will reduce chipping of the gel coat.
Using hole saws, cut the holes for the spacer tube and rope/chain pipe.
2. On GRP or wooden decks, seal the edges of the holes with epoxy to avoid ingress of
moisture.
3. Use of silicon sealant, to seal the windlass to the deck, is highly recommended. For
aluminium boats fit a non-conductive gasket to insulate the deckplate from the deck to
prevent electrolysis.
4. Bolt the deckplate to the deck using mounting studs , washers and nuts. Tighten the nuts
progressively and evenly. Do NOT use power tools. Make sure the installation is firm, but do
not over tighten the nuts.
5. Offer up, from below deck, the drive assembly sliding the mainshaft through the deckplate,
taking care not to damage the deck bearing.
6. After aligning them correctly, bolt the deckplate and spacer tube together, from above deck,
using the M10 hex head screws and spring washers. Tighten them evenly to 35-40 Nm (25-
30 ft lb).
7. Re-check that the position of the drive assembly is satisfactory and convenient for
connecting power supply lines to the motor. Also, make sure that the drive is not in the way
of rope/chain coming into the locker.
8. If a chain counter is used, its sensor should be fitted into the Ø15mm hole in the deckplate,
currently covered with a plastic plug. Make sure the deck is drilled below for the sensor
cable. See brochure supplied with chain counter for detailed assembly instructions.
9. Insert the two retaining clips into the upper groove in the mainshaft; apply some grease to
help keep them in position.
10. Apply anti-seize compound generously over the mainshaft and keyway. Insert key into the
keyway on the mainshaft.
11. Assemble the lower clutch cone making sure it sits nicely on the retaining clips.Apply lithium
based marine grease generously to the conical surface of the clutch cone, to assist with
free falling the anchor.
12. Put the Bellevile washer on top of the lower clutch cone and install the chainwheel assembly
13. Insert key on mainshaft and install upper clutch cone, after applying marine grease to its
conical surface
14. Insert key on mainshaft, assemble drum and washer (Capstan models only).
15. Assemble clutch nut .
16. Put retaining washer on top of the mainshaft and secure it with the screw .
17. Insert the cap into the clutch nut.
18. When tightening the cables to the motor, ensure the lower nut (A) is
secure against turning when tightening the upper nut (B).
This will prevent damage occurring within the motor.
Complete wiring as per diagram on page18.

14 RC12 Windlass
Fig 3: Motor Orientation

RC12 Windlass
Pressure arm and spring replacement
1. Using a 5mm hex key undo the capscrew on chaincover.
Be very careful when releasing the capscrew as the pressure of the
pressure arm spring may spring out.
2. Remove the spring and pressure arm.
3. Apply liberal amounts of grease on the spring and insert it into the
pressure arm.
4. Ensure the lower spring pin sits in the grove of the pressure arm
Groove
5. With the spring in the pressure arm, align the spring pin into the
groove located inside of the chaincover, and slide the pressure arm
in.
Groove
6. Looking from above, align the pressure arm with the hole for the
capscrew.
Hole and spring
alignment
7. While holding the pressure arm in this position, assemble the
capscrew.

16 RC12 Windlass
Installing on a sloping or curved deck
Ensure that the windlass has the correct vertical alignment with the bow roller.
If necessary, use a mounting pad as shown below.
Fig 4: Using a mounting pad on a curved deck
Important note to Boat Builders
Experience has shown that on long ocean deliveries as deck cargo, sulphur (from the ships
exhaust and condensation) settles and severely damages the chrome plating and stainless steel
of the windlass by breaking down the protective chrome oxide film.
We recommend, after completing installation, you spray the top works of the windlass with CRC
3097 “long life” and wrap the windlass with plastic film and tape.

RC12 Windlass
Wiring Instructions
Electrical component layout
Figure 5 - Electrical component layout
Solenoid pack
The solenoid pack should be located in a dry area (not in the rope/chain locker) close to the
windlass.
Circuit breaker/isolator panel
This unit provides limited protection for the motor and full protection for the power supply cables. It
also provides the means to isolate the system from the battery.
Position the circuit breaker/isolator no further than 1.8 m (6 ft) away from the battery in an
accessible and dry location.
This equipment or equivalent is mandatory to meet USCG requirements.
Remote control panel
The remote control panel should be mounted in a convenient location (such as the bridge, helm or
cockpit) so that the operator can see the windlass. Mount and seal the panel so that the terminals
project into a dry area.
Optional footswitches
For safe operation, the footswitches must be at least 500 mm (20") from the windlass.
The below-deck part of the footswitch must be in a dry environment and installed per instructions.
The arrows on the footswitches should be arranged to indicate the direction of operation.

18 RC12 Windlass
Wiring schematic
1 Battery
2 Breaker/Isolator
3 Manually resettable breaker
4 Solenoid Pack
5 Up Foot Switch
6 Down Foot Switch
7 Remote control panel
8 Motor
Series Wound Motor
Other manuals for RC12
1
Table of contents
Other Maxwell Marine Equipment manuals