Clarion M275 User manual


CLARION PRODUCT REGISTRATION INFORMATION
For USA and Canada only www.clarion.com
Dear Customer:
Congratulations on your purchase of aClarion mobile electronic products. We are confident that
you'll enjoy your Clarion experience.
There are many benefits to registering your product. We invite you to visit our website at www.
clarion.com to register your Clarion product.
We have made product registration simple with our easy to use website. The registration form
is short and easy to complete. Once you're registered, we can keep you informed of important
product information.
Register at www.clarion.com -it's easy to keep your Clarion product up to date.
Contents
1. FEATURES 2
2.
CONTROLS 3
MAIN UNIT 3
3.
NOMENCLATURE 4
Names of the Buttons and Their Functions 4
Display Items 5
LCD Screen 5
4.
PRECAUTIONS 6
5.
HANDLING COMPACT DiSCS 7
6.
DCP (Detachable Control Panel) 8
7.
OPERATIONS 9
Basic Operations 9
Radio Mode Operations ·12
CD/MP3IWMA Mode Operations 14
8.
OTHER OPERATIONS
20
9.
TROUBLESHOOTING
22
10. ERROR DISPLAYS
23
11.
SPECIFICATIONS
24
•Auxiliary Audio Input
•CD-R, CD-RW, WMA, &MP3 Compatible
•Rotary Volume Control &
HD
Display
[Q]DO~~
DIGITAL
AUDIO
mp3
ID3TAG
2M275
Be
sure
to
unfold
and
read
the
next
page.
Veuillez
depiier
et
VGUS
referer
a
la
page
suivante.
Assicurarsi di
aprire
e
leggere
la
pagina
successiva.
Cerciorese
de
desplegar
y
de
leer
fa
pagina
siguiente.

MAIN UNITILI
APPARECCHIO PRINCIPALE IUNIDAD PRINCIPAL
[AUX]
clarion
[CD
SLOT]
~=l
----[SRC]
[ROTARY]
[DIRECT] [ROM]
[SCN]
[~]
---+'--~H::J7H~":~~4~f7=d~~~4~~J~
[0]
-~~
~,~~~r~
[.1']
--~~I\\\
I;:;;;;;jt;;;;±:i'.;;;=±:t:;;.9~
[lSR]
...................................................
Note:
Be
sure
to
unfold
this
page
and
refer
to
the
front
diagrams
as
you
read
each
chapter.
Remarque:
Veuiliez
dsplier
certe
page
et
vous
referer
aux
scMmas
quana
VGUS
lisez
cnaque
cnapitre.
Nota:
Assicurarsi
di
aprire
questa
pagina
e
fare
riferimento
a
questi
diagrammi
quando
si
legge
ciascun
capitolo.
Nota:
Cuando
lea
los
capitulos
l
despliegue
esta
pagil1a
y
consulte
los
diagramas.
3M275

Note:
•
Be
sure
to
read
this chapter referring
to
the front diagrams of chapter "2. CONTROLS"
on
page 3(unfold).
Names of the Buttons and Their Functions
[RELEASE] button
•Press the [RELEASE] button to unlock the
detachable panel.
[~]
button
•Eject aCD when it is loaded
in
the unit.
[0]
button
•During Radio mode, switch the displayindication
in
the following order:
Main Display
~Clock
Display~
Main Display
...
•During
CD/AUX
mode, switch
the
display
indication (Main Display, Clock Display).
•During MP3IWMA
mode,switch
the display
indication
in
the following order:
Track No./Play Time
~
Folder No./Play Time
~
Track Name
~
Folder Name
~
Title
Tag
~
Album
Tag
~
Artist
Tag
~
Clock Display
~
Track No./Play Time
...
•Press and hold the button for 1second or longer
to enter the Adjustment mode.
[J'] button
• Use the button to enter to the Sound mode.
(Z-Enhancer, Bass, Treble, Balance, Fader).
•Press and hold for 1second or longer to turn
on or off the M-B EX mode.
[lSR] button
•Recall ISR radio station
in
memory.
•Press and hold for 2seconds or longer: Store
current station into ISR memory (Radio mode
only).
[DIRECT] buttons
•Store astation into memory or recall it directly
while
in
the Radio mode.
[SCN] button
•Perform scan play for 10 seconds of each track
while
in
the CD/MP3IWMA mode.
•Press and hold the button for 1second or longer
to perform all scan play while
in
the MP3IWMA
mode.
[RPT] button
•Repeat play while
in
the CD/MP3IWMA mode.
•Press and hold the button for 1second or longer
to perform all repeat playwhile
in
the MP3IWMA
mode.
4M275
[ROM] button
•Perform random playwhile
in
the CD/MP3IWMA
mode.
•Press and hold the button for 1second
or
longer to perform all random play while
in
the
MP3IWMA mode.
[UP], [ON] buttons
•Select the folder (MP3IWMA disc only).
[
.....
],
[~]
buttons
•Seekastation while
in
the Radio mode or select
atrack when listening to aCD. These buttons
are used to make various settings.
•Press and hold the button for 1second or longer
to enter the fast-forward or fast-backward
in
CD/MP3IWMA mode.
[
~
II]
button
•Perform preset scan while
in
the Radio mode.
Press and hold the button for 2seconds or
longer to perform auto store.
•Play or pause atrackwhile
in
the CD/MP3IWMA
mode.
•Perform second level adjustment or selection.
[SRC] button
•Press the button to turn on the power.
Press and hold the button for 1second or longer
to turn off the power.
•Switch the Operation mode among the Radio
mode, CD/MP3IWMA mode and AUX mode.
[BND] button
•Switch the band, or seek tuning or manual
tuning while
in
the Radio mode.
•Play the first track while
in
the CD/MP3IWMA
mode.
•Press and hold the button for 1second
or
longerto selectCD-DAor MP3IWMAon aMulti-
session disc.
[ROTARY] knob
•Adjustthe volume byturning the knob clockwise
or counterclockwise.
•Use the knob to perform various settings.

Names of the Buttons and Their Functions
[CD SLOT]
•CD insertion slot.
Display Items
LCD Screen
[AUX] input
•Auxiliary jack insertion.
Operation status indication
Main Display, Clock, etc. are displays
Preset channel
indication
(1
to 6)
I
:M-B EX (MAGNA BASS EX)
indication
:Z-Enhancer indication
mIl
:Enter indication
(II
STIli:
Stereo indication
MANU
:Manual indication
~
:All tracks indication
ROM
:Random indication
RPT :Repeat indication
SeN
:Scan indication
In
extreme cold, the screen movement may slow down and the screen may darken, but this is normal.
The screen will recover when it returns to normal temperature.
M275 5

When it is very cold
in
the boat and the unit is
used soon after switching on the heater, the
disc and the optical components may become
fogged and not operate properly. Wipe fogged
discs with asoft cloth. Fogged optical compo-
nents will naturally return to normal when the
unit is left for about one hour after which it will
operate normally.
This equipment has been tested and found to
comply with the limits for aClass 8digital device,
pursuant to Part 15 of the FCC Rules.
These limits are designed to provide reasonable
protection against harmful interference
in
aresi-
dential installation.
This equipment generates, uses, and can radiate
radio frequency energy and, if not installed and
used
in
accordance with the instructions, may
cause harmful interference to radio communica-
tions. However, there is no guarantee that inter-
ference will not occur
in
aparticular installation.
If this equipment does cause harmful interfer-
ence to radio or television reception, which can
be determined by turning the equipment off and
on, the user is encouraged to consult the dealer
or
an
experienced radiofTV technician for help.
2.
When the boat is underway
in
rough water the
sound may skip as aresult of intense vibra-
tions and shock.
3.
This unit uses aprecision mechanism. Even
in
the event that trouble arises, never open the
case, disassemble the unit, or lubricate the
rotating parts.
USE OF CONTROLS, ADJUSTMENTS,
OR
PERFORMANCE OF PROCEDURES
OTHER THAN THOSE SPECIFIED HEREIN,
MAY RESULT IN HAZARDOUS RADIATION
EXPOSURE.
THECOMPACTDISCPLAYERSHOULDNOT
BE ADJUSTED OR REPAIRED
BY
ANYONE
EXCEPT PROPERLY QUALIFIED SERVICE
PERSONNEL.
"t"i·
J
jl"k,·l·'t'li·
J
j'U-i#j;t
CHANGES OR MODIFICATIONS TO THIS
PRODUCTNOTAPPROVEDBYTHEMAN~
FACTURER
WILL
VOID THE WARRANTY
AND WILL VIOLATE FCC APPROVAL.
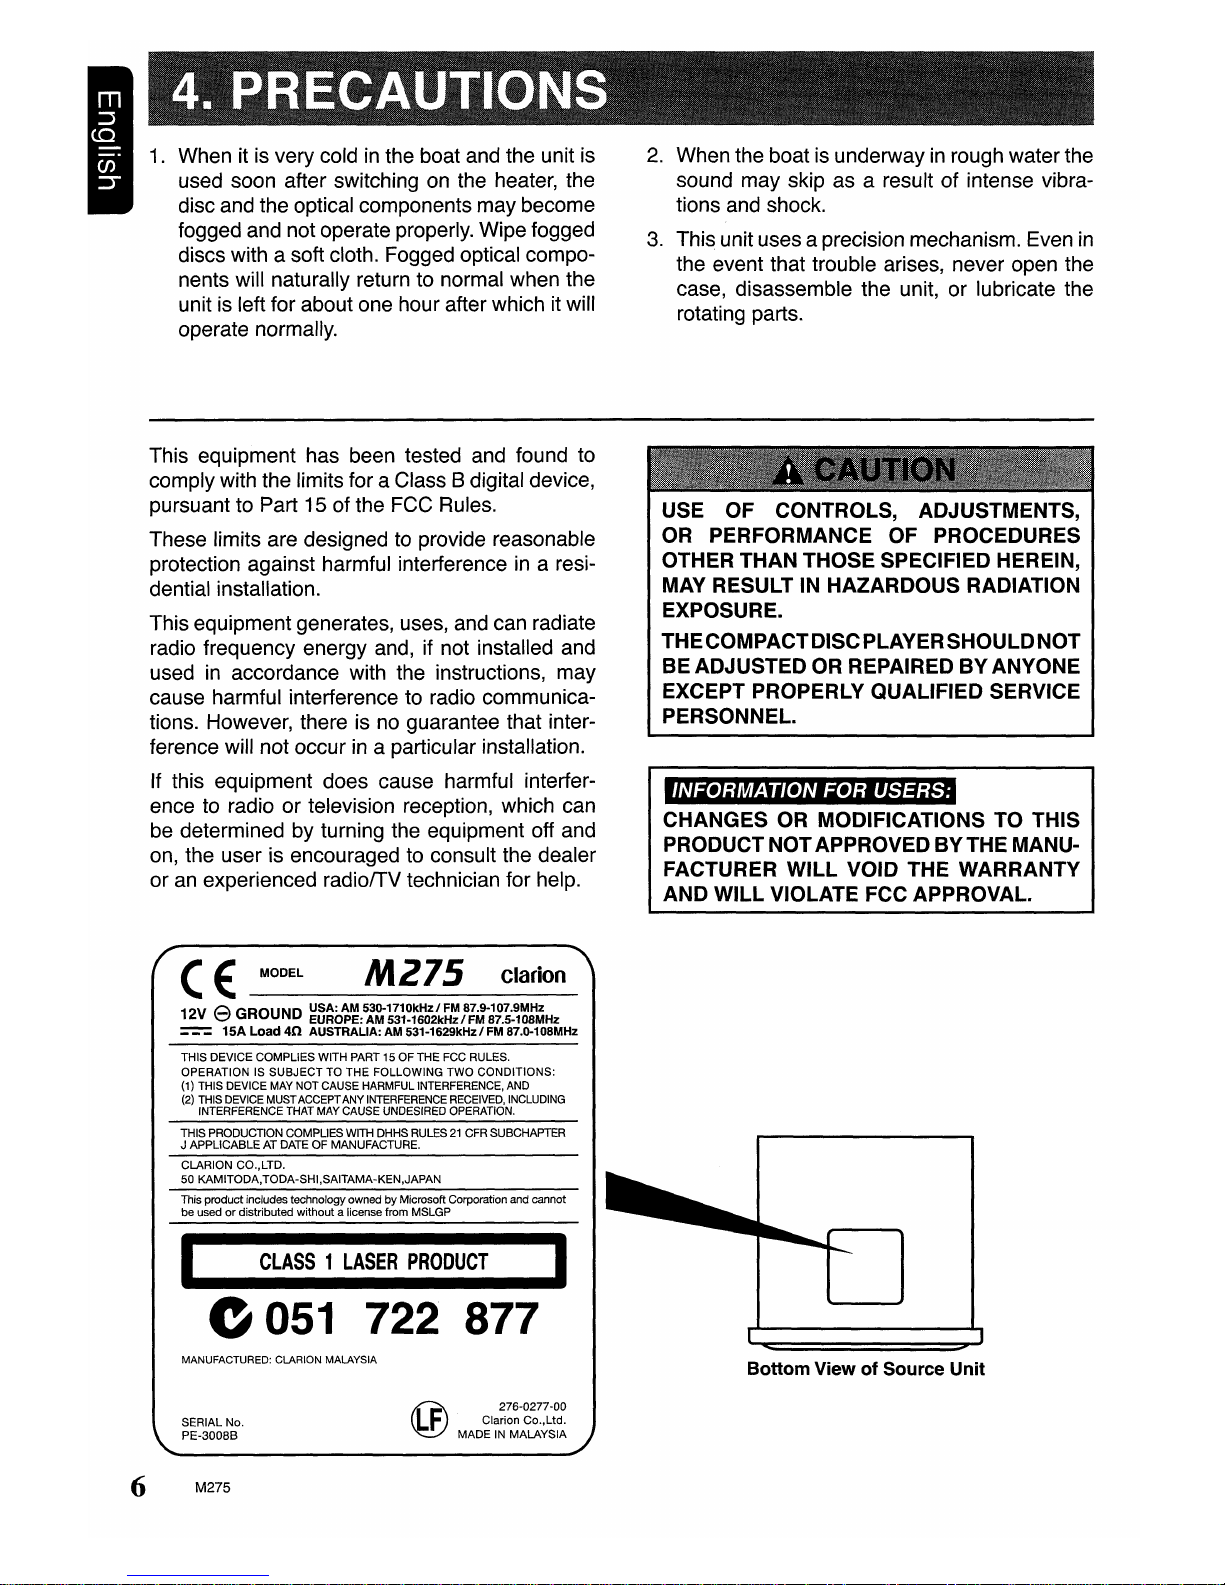
(E:
MODEL
M275
clarion
12V eGROUND
~8~O~:5:~1~~~~~;ik~~/8l~~~~~~~~~HZ
===
15A Load
40
AUSTRALIA: AM 531-1629kHz/FM 87.0-108MHz
THIS DEVICE COMPLIES WITH PART 15
OF
THE FCC RULES.
OPERATION
IS
SUBJECT
TO
THE
FOLLOWING
TWO
CONDITIONS:
(1)
THIS DEVICE MAY NOT CAUSE HARMFUL INTERFERENCE, AND
(2)
THIS DEVICE MUSTACCEPTANY INTERFERENCE RECEIVED, INCLUDING
INTERFERENCE THAT MAY CAUSE UNDESIRED OPERATION.
THIS PRODUCTION COMPLIES WITH DHHS RULES
21
CFR SUBCHAPTER
J
APPLICABLE
AT DATE
OF
MANUFACTURE.
CLARION CO.,LTD.
50
KAMITODA,TODA-SHI,SAITAMA-KEN,JAPAN
This productincludes technology owned
by
Microsoft Corporation and cannot
be
used
or
distributed
without
alicense from MSLGP
I
CLASS
1
LASER
PRODUCT
I
----------
0051
722 877
MANUFACTURED: CLARION MALAYSIA Bottom View
of
Source Unit
SERIAL No.
PE-3008B
6M275
(f)
276-0277
-00
F
Clarion
Co.,Ltd.
MADE
IN MALAYSIA

Do
notuse compact discsthat have large scratch-
es,
are misshapen, or cracked, etc. Use of such
discs will cause misoperation or damage.
Do
not use any solvents such as commercially
available cleaners, anti-static spray, or thinner to
clean compact discs.
No
Note on compact discs
Never stick labels on the surface of the compact
disc or mark the surface with apencil or pen.
Proper way to hold
the compact disc
Removing the disc
Always handle the compact disc by the edges.
Never touch the surface.
To
remove fingermarks and dust, use
"a
soft cloth,
and wipe
in
astraight line from the center of the
compact disc to the circumference.
This
unit
has
been
designed
specificall~
for
playback of compact discs bearing the
rdlD~ffi1
mark. No other discs can be played.
DIGITAL
AUDIO
To
remove the compact disc from its storage
case, press down on the center of the case and
lift the disc out, holding it carefully by the edges.
r
New discs may have some roughness around
the edges. The unit may not work or the sound
may skip if such discs are used. Use aball-point
pen, etc. to remove roughness from the edge of
the disc.
Roughness
Do
not expose compact discs to direct sunlight or
any heat source.
Note:
•Do not use commercially available CD protection sheets or discs equipped with stabilizers, etc. These may
get caught in the internal mechanism and damage the disc.
M275 7

The control panel can
be
detached to prevent
theft. When detaching the control panel, store it
in
the DCP (Detachable Control Panel) case to
prevent scratches.
We
recommend taking the DCP with you when
leaving the boat.
Removing
the
DCP
1.
Press the [SRC] button for 1second or longer
to switch off the power.
2.
Press
in
the [RELEASE] button.
*The DCP is unlocked
3.
Remove the
DCP.
Attaching
the
DCP
1.
Insert the right side of the DCP into the main
unit.
2.
Insertthe left side of the DCP
to
attach into the
main unit.
8M275
Storing
the
DCP
in
the
DCP case
Hold the
DCP,
in
the orientation as shown
in
the
figure below, and put it into the supplied DCP
case. (Ensure the DCP is
in
the correct orienta-
tion.)
DCP
DCP
case
•TheDCP can easily
be
damaged
by
impact.
After
removing it,
be
careful
not
to
drop
it
or
subject
it
to
strong
shocks.
•When
the
Releasebutton
is
pressed and
the
DCP
is
unlocked,
the
intense
vibration
and
stock
may
cause
it
to
fall. To prevent dam-
age
to
the
DCP,
always
store
it
in
its
case
after detaching it. (See
figure
above.)
•Theconnectorconnectingthemain
unit
and
the
DCP
is
an extremely
important
part. Be
careful
not
to
damage
it
by
pressing
on
it
with
fingernails, pens, screwdrivers, etc.
Main
Unit
Front
Note:
•If the DCP is dirty, wipe off the dirt with asoft, dry
cloth only.

Note: Be sure to read this chapter referring to the front diagrams
of
chapter "2. CONTROLS" on page 3(unfold).
Basic Operations
Be
sure
to
lower
the
volume
before
switch-
ing
off
the
unit
power
or
the
ignition
key. The
unit
remembers
its
last
volume
setting. If
you
switch
the
power
off
with
the
volume
up,
when
you
switch
the
power back on,
the
sud-
den loud
volume
may
hurt
your
hearing and
damage
the
unit.
Turning
on/off
the
power
Note:
•Be careful about using this unit for along time
without running the engine. If you drain the boat's
battery too much, you may not be able to start the
engine and this can reduce the service life of the
battery.
1.
Press the [SRC] button.
2.
The illumination and display on the unit light
up. The unit automatically remembers its last
Operation mode and will automatically switch
to display that mode.
3.
Press and hold the [SRC] button for 1second
or longer to turn off the power for the unit.
Selecting a
mode
1.
Press the [SRC] button to change the Opera-
tion mode.
2.
Each time you press the [SRC] button, the Op-
eration mode changes
in
the following order:
Radio
mode
-+ CD/MP3JWMA mode -+
AUX
mode
-+ Radio mode
...
Note:
•Ifthe CD mode is selected when no disc
is
inserted,
the display shows "NO DISC".
Switching
the
display
Press the [D] button to select the desired display.
Each time you press the [D] button, the display
switches
in
the following order:
•
Radi.o
mode
Main Display -+Clock Display-+ Main Display
...
•
CD
mode
Main Display (Track No., Play Time)-+
Clock
Display -+ Main Display...
•MP3IWMA mode
Main-1 Display (Track No., Play Time)-+
Main-2 Display (Folder No., Play Time) -+
Track-+ Folder -+Title -+ Album -+
Artist
-+
Clock Display -+ Main-1 Display...
•AUX mode
Main Display -+Clock Display -+Main Display
...
*Once selected, the preferred display becomes the
display default. When afunction adjustment such
as volume is made, the screen will momentarily
switch to that function's display, then revert back
to the preferred display several seconds after the
adjustment.
Adjusting
the
volume
Turning the [ROTARY] knob clockwise increases
the volume; turning it counterclockwise decreas-
es the volLime. "VOL XX" will be displayed where
"XX" is the volume level from 0(minimum) to
33
(maximum).
*The factory default setting for volume is
"VOL
13".
Sound
mode
adjustments
1. Press the [.1'] button to enterthe SoundAdjust-
ment mode.
2.
Press the [...... ,
~]
button to
select
the
"item name".
"Z-EHCR"
t
"BASS"
t
"TREBLE"
t
"BALANCE"
t
"FADER"
M275 9

Basic Operations
3.
Turning the [ROTARY] knob to adjust the
selected Sound mode.
Z-EHCR
Selection type :OFF
~
B-BOOST
~
IMPACT~
EXCITE
~OFF.
..
BASS
Adjustment
range:
-7 to +7
TREBLE
Adjustment
range:
-7 to +7
BALANCE:
Adjustment
range:
LEFT 12 to RIGHT 12
FADER :
Adjustment
range:
FRONT 12 to REAR 12
Notes:
•If no operation is performed for more than 10 sec-
onds, the Audio mode is cancelled and returns to
the previous mode.
•Bass and Treble can only be adjusted when the
"Z-EHCR" is off.
Setting
the
Z-Enhancer
This unit is provided with 3types of sound tone
effects stored
in
memory. Select the one you pre-
fer.
2-1. Press the [......,
~]
button and select "Z-
EHCR".
3-1. Turning the [ROTARY] knob to change to the
following sound tone effect.
"OFF"
t
"B-BOOST"
t
"IMPACT"
t
"EXCITE"
• OFF : no sound effect
•
B-BOOST:
b~
emphasized
(~;:r
indicator lights
in
the display)
•IMPACT :
b~
and treble emphasized
(~;r
indicator lights
in
the display)
•EXCITE :bass and treble emphasized mid
de-emphasized
((~)
indicator lights
in
the display)
Note:
•The factory default setting is "OFF".
Adjusting
the
bass
2-1. Press the [...... ,
~]
button and select
"BASS".
3-1. Turning the [ROTARY] knob clockwise em-
phasizes the bass; turning it counterclock-
wise attenuates the bass.
"BASS XX" will be displayed where "XX"
is
the value from -7 to +7.
Note:
•The factory default setting is "BASS 0".
Adjusting
the
treble
2-1. Press the [......,
~]
button and select
"TREBLE".
3-1. Turning the [ROTARY] knob clockwise em-
phasizes the bass; turning it counterclock-
wise attenuates the bass.
"TREB XX" will be displayed where "XX" is
the value from -7 to +7.
Note:
•The factory default setting is "TREB 0".
Adjusting
the
balance
2-1. Press the [...... ,
~
]button and select
"BALANCE".
3-1. Turning the [ROTARY] knob clockwise em-
phasizes the sound from the right speaker;
turning it counterclockwise emphasizes the
sound from the left speaker.
The display changes as follows:
"RIGHT XX" will be displayed where "XX" is
the value from 1to 12.
"LEFT XX" will be displayed where "XX" is
the value from 1to 12.
Notes:
•When Balance is
0,
"CENTER" will be displayed
instead.
•The factory default setting is "CENTER".
10 M275

Basic Operations
Adjusting
the
fader
2-1.
Press
the
[
~
,
~]
button and
select
"FADER".
3-1. Turning the [ROTARY] knob clockwise em-
phasizes the sound from the front speakers;
turning it counterclockwise emphasizes the
sound from the rear speakers.
The display change's as follows:
"FRONT XX" will be displayed where "XX" is
the value from 1to 12.
"REAR XX" will be displayed where "XX" is
the value from 1to 12.
Notes:
•When Fader is
0,
"CENTER" will
be
displayed
instead. '
•The factory default setting
is
"CENTER".
Adjusting
MAGNA BASS
EX
The
MAGNA
BASS EX does not adjust the low
sound area like the normal sound adjustment
function, but emphasizes the deep bass sound
area to provide you with adynamic sound.
1.
Press and hold the
[J']
button for 1second
or
longer to turn on the MAGNA BASS EX ef-
fect.
M$X
indicator lights in the display.
2.
Press and hold the
[J']
button for 1second
or longer to turn off the MAGNA BASS EX ef-
fect.
indicator goes off from the display.
Note:
•The factory default setting
is
"OFF".
AUX
function
This system has an external jack input in the front
panel where you can listen to sounds and music
from external devices connected to this unit.
1. Connectthe external music playertothe [AUX]
input.
2.
Press the [SRC] button and select the
AUX
mode to activate the
AUX
function.
Notes:
•Use only the 3.5mm stereo jack for the AUX jack
input.
•Volume
can
be
adjusted through the unit.
If
you
face difficulties of hearing sound even aftervolume
has been adjusted, please refer section "Selecting
AUX
IN
sensitivity"
on
page
20
for details.
Connect
external
music
player
via
3.5mm
stereo
jack
M275
11

Radio Mode Operations
Listening
to
the radio
1.
Press the [SRC] button and select the Radio
mode, then the radio will be on.
2.
To
select apreset band, press the [BND] but-
ton, and then select one of the preset bands
such as FM1, FM2, FM3 or AM.
Every time the [BND] button is pressed, the
band switches
in
the following order:
F1
~
F2
~
F3
~
AM
-+
F1
...
3.
Press the [...... ,
~
]button to tune
in
the
desired station.
Seek
tuning
1.
Press the [BND] button and select the desired
band (FM orAM).
*If "MANU" is lit
in
the display, press and hold
the [BND] button for 1second or longer.
"MANU"
in
the displaygoes off and seektuning
is now available.
2.
Press the [......
,~]
button to start automatic
station tuning.
When the
[~]
button is pressed, search will
be performing
in
the direction of higher fre-
quencies. When the [......]button is pressed,
search will be performed
in
the direction of
lower frequencies.
Manual
tuning
There are 2ways available: Quick tuning and
step tuning.
When you are
in
the step Tuning mode, the fre-
quency changes one step at atime.
In
the quick
Tuning mode, you can quickly tune the desired
frequency.
1.
Press the [BND] button and select the desired
band (FM or AM).
*If "MANU" is not lit
in
the display, press and hold
the [BND] button for 1second or longer.
"MANU" is lit
in
the display and manual tuning
is now available.
2.
Tune into a station.
•
Quick
tuning:
Press and hold the [...... ,
~]
button for 1sec-
ond or longer to begin station tuning.
•Step
tuning:
Press the [......,
~]
button to perform manual
tuning.
Preset memory function
Preset memory function can store up to 24 sta-
tions:
Six stations for each of FM1, FM2, FM3 and AM.
Manual memory function
1.
Press the [BND] button and to
sel~ct
aband
you want to store
in
the memory.
2.
Press the [......,
~]
button to tune into a
desired station.
3.
Press and hold one ofthe [DIRECT] buttons for
2seconds or longerto store the current station
into preset memory.
Auto
store
Auto store is afunction for storing up to 6stations
that are automatically tuned
in
sequentially.
If
6
receivable stations cannot be received, aprevi-
ously stored station remains un-overwritten at
the memory position.
1.
Press the [BND] button and select the desired
band (FM or AM).
2.
Press and hold the [
~
II] button for2seconds
or longer. The stations with good reception are
stored automatically to the preset channels.
"A-STORE" will be displayed.
Preset scan
Preset scan receives the stations stored
in
preset
memory
in
order. This function is useful when
searching for adesired station
in
memory.
1.
Press the
[~II]
button.
2.
When adesired station is tuned
in,
press the
[~II]
button again to continue receiving that
station.
"P-SCN" will be displayed and "SCN" indicator
lights
in
the display.
Note:
•Be carefuInot to press and hold the [
~
II] button
for 2seconds or longer, otherwise the auto store
function is engaged and the unit starts storing sta-
tions.
12 M275

Radio Mode Operations
Recalling apreset station
Atotal of 24 preset positions (6-FM1, 6-FM2,
6-FM3, 6-AM) exists to store individual radio
stations
in
memory. Pressing the correspond-
ing [DIRECT] button recalls the stored radio fre-
quency automatically.
1.
Press the [BND] button and select the desired
band (FM orAM).
2. Press the corresponding [DIRECT] button to
recall the stored station.
Instant station recall (lSR)
Instant station recall is aspecial radio preset that
instantly accesses afavorite radio station at a
touch of abutton. The ISR function even oper-
ates with the unit
in
other modes.
•ISR
memory
1.
Select the station that you wish to store
in
ISR
memory.
2. Press and hold the [lSR] button for 2seconds
or longer.
•Recalling astation with ISR
In
any mode, press the [lSR] button to turn
on
the
radio function and tune the selected radio sta-
tion. "ISR" appears
in
the display. Press the [lSR]
button again to return to the previous mode.
Area change
Use this function when you are using the boat
stereo anywhere outside the
U.
S.
Switchable frequency spacing
This boat ste'reo is initially set to tune
in
frequen-
cy intervals of 10kHz for
AM
and 200 kHz for
FM,
the standard calibrations
in
U.S. When using the
unit outside the U.S., use the following procedure
to switch the frequency range.
The table below lists the frequency specifications
for the U.S. and other countries.
Initial New New
Setting
Setting
Setting
(U.S. (Third (Europe
standard) Areal standard)
Australia
standard)
Frequency 10
kHz
9kHz 9kHz
Spacing
AM Frequency 530 to
531
to
531
to
Range 1710
kHz
1629
kHz
1602
kHz
Frequency 200
kHz
50
kHz
50
kHz
FM
Spacing
Frequency
87.9
to
87.0 to 87.5 to
Range
107.9
MHz
108
MHz
108
MHz
Switching
the
area change
•Inside U.S. standard (Initial Setting)
While pressing the
[.I']
button, press the [SCN]
button, then "U.S.
standard"
will be selected.
•Third Area/Australia standard (New Set-
ting)
While pressing the
[.I']
button, press the [RPT]
button, then "Third Area/Australia standard"
will be selected.
•Europe standard (New Setting)
While pressing the
[.I']
button, press the [ROM]
button, then "Europe standard" will be select-
ed.
M275 13

CD/MP3IWMA Mode Operations
MPEG-1 :
32,44.1,48
MPEG-2 :16, 22.05, 24
MPEG-2.5 :
8,
11.025, 12
MPEG-1 :32 -320
MPEG-2 :8-160
MPEG-2.5 :8-160
VBR
MPEG
1,
2and 2.5 - Layer 3
Sampling Rate
(kHz)
Bit-rate (kbps)
Decode Format
What
is
MP3?
MP3
is
an
audio compression method and clas-
sified into audio layer 3of MPEG standards. This
audio compression method has penetrated into
PC
users and become astandard format. This
MP3 features the original audio data compres-
sion to about 12 percent of its initial size with a
high quality sound. This means that about 10
music CDs can be recorded
on
aCD-R disc or
CD-RW disc to allow along listening time without
having to change CDs.
What
is
WMA?
WMA is the abbreviation of Windows Media Au-
dio,
an
audio file format developed by Microsoft
Corporation.
Notes:
•WMA file with DRM (Digital Rights Management)
will be skipped from being playback and jump to
the next track.
•Windows Media™, and the Windows® logo are
trademarks, or registered trademarks of Microsoft
Corporation in the United States and/or other
countries.
•
To
disable
DRM
(Digital Rights Management):
1.
When using Windows Media Player
9,
click
on
TOOL
~
OPTIONS
~
MUSIC RECORD
tab, then under Recording settings, unclickthe
check boxfor RECORD PROTECTED MUSIC.
Then, reconstruct files.
2.
When using Windows Media Player 10/11, click
on
TOOL
~
OPTIONS
~
RIP MUSIC tab, then
under Rip settings, unclick the check box for
COpy
PROTECT MUSIC. Then, reconstruct
files.
Note:
•Personally constructed WMAfiles are used at your
own responsibility.
•
Precautions
when
creating
MP3IWMA
disc
•Usable sampling rates and bit rates:
Sampling rate 48, 44.1, 32
(kHz)
Bit-rate (kbps) 32 -192
Folder Level Limit : 8 Level
Max. Folder Support :128
Max. Files Support :254
Folder Name :Max. 28 Characters
File Name :Max. 28 Characters
•File extensions
•Always add afile extension ".MP3" or ".WMA"
to MP3 or WMAfile by using single characters
letters.
If
you add afile extension other than
specified orforgetto add the file extension, the
file cannot be played.
•Logical
format
(File system)
1.
When writing MP3IWMAfile on aCD-R disc or
CD-RWdisc, please select "1509660 level 1, 2
or
JOLIET
or
Romeo" as the writing software
format. Normal play may not be possible if the
disc
is
recorded
on
another format.
2.
The folder name and file name can be dis-
played as the title during MP3IWMA play but
the title must be within 28 single byte alphabeti-
cal letters and numerals (including
an
exten-
sion) respectively.
3.
Do
not affix aname to afile inside afolder
having the same name.
•Folder
structure
1.
Adisc with afolder having more than 8hierar-
chicallevels will be impossible.
14 M275

Listening
to
a
disc
already loaded
in
the
unit
Press the [SRC] button to select the CD/MP31
WMA
mode. "CD/MP3" will be displayed.
When the unit enters CD/MP3IWMA mode, play
starts automatically.
Radio
~
CDIMP3IWMA
~
AUX
~
Radio
...
Note:
•The default display
is
Main
Display (Track
No.1
Play
Time).
•Do
not
try
to
put
your
hand
or
fingers
in
the
disc
insertion slot.Also neverinsertforeign
objects
into
the
slot.
•Do
not
insert
discs
where adhesivecomes
out
from
cellophane
tape
or
arental
CD
label,
or
discs
with markswherecellophane
tape
or
rental
CD
labels were removed. It
may be
impossible
to
extract these
discs
from
the
unit
and
they
may cause
the
unit
to
break down.
•This
unit
is
designed
for
play
of
12cmcom-
pact
disc
only. Do
not
attempt
to
use Scm
CD
singlesinthis unit,eitherwith
or
without
an adaptor, as damage
to
the
player and/or
disc
can occur. Such damage
will
not
be
covered
by
the
warranty on
this
product.
Backup eject
function
Pressing the [
~
]button ejects the disc even if
the power to the unit was not turned on. Remove
the disc after it is ejected.
Notes:
•
If
you
force a
CD
into before auto reloading, this
can
damage the
CD.
•
If
a
CD
(12
em)
is
left
in
the ejected position for
15
seconds,
the
CD
is
automatically reloaded (Auto
reload).
m
::J
•••
~!mmI!I]
•••
1
~.
~
~g
Set
to
CD
Set
to
MP3IWMA
Mixed with CD-DA Play
CO-
Play MP3IWMA
and
MP3IWMA
DA
type tracks
CD-DA type track Play
CO-
Play CD-DA
only
DA
MP3IWMAtype Play
MP31
Play MP3IWMA
track only WMA
5.
CD-DA/MP31WMAselection function can only
be performed in CD/MP3IWMA mode.
It
will
only activate after re-insert CD. For example,
current setting is CD-DA type. Press [BND]
button for more than 1second to set MP3IWMA
type. User has to eject CD and re-insert again
as to play MP3IWMAfiles.
6.
Types of recording that can be played are as
follows.
CD-DAlMP3IWMA selection on
multi-session
CD
1.
If amulti-session CD which contains CD-DA
and MP3IWMAfiles is being inserted, usercan
select either CD-DA or MP3IWMA files to be
played.
2.
Default setting for files to be played on multi-
session CD is CD-DAfiles.
3. Press the [BND] button for more than 1second
will toggle between selection of CD-DA and
MP3IWMAfiles to be played.
4.
When CD-DAtype is selected, displaywill show
"M-SESS" then "CD". When MP3IWMA type
is selected, display will show "M-SESS" then
"MP3".
CDIMP3IWMA Mode Operations
•Number
of
files
or
folders
1.
Up to 254 files can be recognized per folder.
Up to 254 files can be played.
2.
Tracks are played
in
the order that they were
recorded onto adisc. (Tracks might not always
be played in the order displayed on the PC.)
3. Some noise may occur depending on the type
of encoder software used while recording.
7. When aMixed mode CD is loaded and CD is
set, the track to be played first is MP3IWMA
file data and no sound is heard.
Note:
•
When
playing aCCCD (Copy Control
CD),
set the
setting
to
CD
type. When this
is
set
to
MP3IWMA
type,
the
CD
cannot
be
played normally
in
some
cases. M275 15

~
~
TITLE
DISPLAY
~
~
~
(..,
•.
'.T.·:,
..
",.:
..,,:.
GT1
Cli
i
..
,·.'
..
:
•.
\
(827
f
.•
,.·'
.•.
:.'.·.:'
...•...
1
GJ
J
J'
1£;1
L'.i>'
tLJ
t.';;:~·:'"f
loZl
(Track no., Play Time)
~
The arrangement is shown below.
•
CD-DAdisc
Main-1
Display
(Track No., Play Time)
~
Clock
Display
~
Main-1
Display
...
•MP3IWMA
disc
Main-1
Display
(Track No., Play Time)
~
Main-2
Display
(Folder No., Play Time)
~
Track
~
Folder
~
Title
Tag
~
Album
Tag
~
Artist
Tag
~
Clock
Display
~
Main-1 Display...
where Track, Folder, Title
Tag,
Album
Tag
and
Artist
Tag
are called Title Display.
Ejecting
the
CD
Press the [
~
]button, then the
CD
will be eject-
ed.
Notes:
•If there is no disc loaded, the indication
"NO
DISC"
appears in the display and return to Radio mode
after 4seconds.
•If the
CD
is
not
removed after ejecting, CD will
be automatically reloaded after 15
seconds
and
this will not automatically switch to
CD/MP3IWMA
mode.
Pausing play
1.
Press the
[~II]
button to pause current play-
back. "PAUSE" appears
in
the display.
2.
To
resume CD play, press the [~II] button
again.
CD/MP3IWMA Mode Operations
Loading a
CD
Insert aCD into the center of the CD SLOT with
the labeled side facing
up.
"LOADING" appears
in
the display, the CD plays automatically after
loading.
Notes:
•
When
the
unit
enters
the
CD/MP3IWMA
mode,
"FILEREAD"
will be displayed to
check
the disc
type and its contents.
•If the inserted disc is a
CD-DA
format, "CD" will be
displayed for awhile. However, if the inserted disc
is a
MP3IWMA
format, "MP3" will be displayed for
awhile.
MP3IWMA
indicatorwill be lit on according
to type
of
file detected.
aindicator will be lit on if MP3 file is detected.
,::::;;/
aindicator will be lit on if
WMA
file is detected.
~
Then, the first track will be played automati-
cally.
•If the
CD
is not inserted easily, there
may
be an-
other
CD
in the mechanism
or
the unit
may
require
service.
. .
rnJD§~
•DIscs notbeanng the
DIGITALAUDID
markcannot be played
by
this unit.
•Some
CDs
recorded in
CD-R/CD-RW
mode
may
not be usable.
Display selection
1.
You
can choose the display type for CD-DAor
MP3IWMAdisc by pressing the
[0]
button.
To
select the next type, press the
[0]
button
again.
Note:
•
Each
of
the
items
in
Title
Display
will
display
"TRACK", "FOLDER", "TITLE",
"ALBUM"
or
"ART-
1ST" respectively
for
2
seconds
before showing
related title information.
16 M275

CD/MP3IWMA Mode Operations
Title
display
1. There are 5types of display for the Title Dis-
play.
The arrangement
is
shown below.
After 2seconds
(Folder Title)
(Artist
Tag)
2.
If
aMP3IWMAfile does not support for
103
TAG
orthe file is encoded with
103
TAG
headerthat
does not consist of any
TAG
information, the
display will show "NO
TITLE".
Notes:
•The folder name will be displayed as "ROOT"which
the file allocates in the root folder.
•For MP3, it supports ID3 Tags V2.4/2.3/2.2/1.1/
1.0.
•The MP3 player decodes each file ID3 TAG ver 2
bydefault, if ID3 TAG ver 2is unavailable, ID3 TAG
ver 1will be decoded.
•UNICODE ID3 (Chinese, Japanese and etc) is not
supported. OnlyASCII characters can be displayed
in
Tags.
•If ID3 has Japanese or Chinese character,
"*"
will
be displayed as substitution.
Selecting a
track
•Track-up
1. Press the
[~]
button to move to the begin-
ning of the next track.
2.
Each time the
[~
]button is pressed, play-
back proceeds to another track
in
the advanc-
ing direction.
•Track-down
1. Press the [
~]
button to move the beginning
of the current track.
2.
Press the [~] button twice to move to the
beginning of the previous track.
Fast-forwardlfast-backward
•Fast-forward
Press and hold the
[~]
button for 1second or
longer.
•Fast-backward
Press and hold the
[~]
button for 1second or
longer.
*ForAudio CD mode pressing the [
.....
,
~]
button
for 1second or longer will move forward or back-
ward 5times faster than normal play, and pressing
it for 3seconds or longer will do the operation 30
times faster.
*For MP3IWMAmode pressing the [
.....
,~]
button
for 1second or longer will move forward or back-
ward 5times faster than normal play, and pressing
it for 3seconds or longer will do the operation 10
times faster.
MP3IWMA playing
order
When selected for play folder up down functions,
files and folders are accessed
in
the order
in
which they were written by the CD-ROM writer.
Because of this, the order
in
which they are ex-
pected to be played may not match the order
in
which they are actually played.
You
may be able
to set the order
in
which MP3IWMA are to be
played by writing them onto amedium such as
aCD-R with their file names beginning with play
sequence numbers such as "01" to "99", depend-
ing
on
your
CD
writer.
For example, amedium with the following folder/
file hierarchy
is
shown below.
M275 17

CD/MP3IWMA Mode Operations
Example of amedium's folder/file hierarchy
~;---~:
®
V§J-~
0J®
~@
0J®
1----1/8
--~
®
V§J-~CD
1----1/8
p.
0
level 1level 2level 3level 4
Root
V
Folder
~
File
Folder select
This function allows you to select afolder con-
taining MP3IWMAfiles and start playing from the
first track
in
the folder.
1.
Press the [ON] or the [UP] button.
Press the [ON] button to move the previous
folder. Press the [UP] button to move the next
folder.
o
Root
folder
*Press the [UP] button while in the final folder to
shift to the first folder.
*Folder without
an
MP3IWMAfile
is
not selectable.
*Folder name will be displayed for awhile.
2.
Press the [
....
,~]
button to select atrack.
Top
function
The top function resets the CD player to the first
track of the disc. Press the [BNO] button to play
the first track (Track
No.1)
on the disc.
*
In
case of MP3IWMA, the first trackof afolder being
played will be returned.
Other various play
functions
•Scan play
CO-OA:
This function allows you to locate and play the
first 10 seconds of all the tracks recorded on a
disc.
MP3IWMA:
This function allows you to locate and play the
first 10 seconds of all the tracks
in
the current
folder.
1.
Press the [SCN] button to perform scan play.
"TRK SCN" appears
in
the display while the
"SCN" indicator lights
in
the display.
*Scan play starts from the next track after the
track currently being played.
*Scan play will proceed to next folder after all
the
tracks
in
the
current
folder
have
been
scanned.
•All scan play
MP3IWMA:
This function allows you to locate and play the
first 10 seconds of the first track of all the folders
on
an
MP3IWMAdisc.
1.
Press and hold the [SCN] button for 1second
or longer to perform folder scan play.
"ALL
SCN" appears
in
the display while the
"mI"
and "SCN" indicators light
in
the dis-
play.
*All scan play starts from the first track of next
folder after the track currently being played.
18 M275

CD/MP3IWMA Mode Operations
•Repeat
play
CD-DA, MP3IWMA:
This function allows you to play the current track
repeatedly.
1.
Press the [RPT] button to perform repeat
play.
"TRK RPT" appears
in
the display while the
"RPT" indicator lights
in
the display.
•All repeat
play
MP3IWMA:
This function allows you to play all tracks
in
the
MP3IWMAfolder repeatedly.
1.
Press and hold the [RPT] button for 1second
or longer to perform folder repeat
play.
"ALL
RPT" appears
in
the display while the
"mJ"
and "RPT" indicators light
in
the dis-
play.
•Random
play
CD-DA:
This function allows you to play all tracks record-
ed
on
adisc
in
arandom order.
MP3IWMA:
This function allows you to play
all
tracks of cur-
rent folder
in
arandom order.
1.
Press the [ROM] button to perform random
play
..
"TRK ROM" appears
in
the display while the
"ROM" indicator lights
in
the display.
*Random play will proceed to next folder after
all
the tracks
in
the current folder have been
played.
•All random play
MP3IWMA:
This function allows you to play
all
the tracks of
all the folders recorded
on
an
MP3IWMA disc
in
arandom order.
1.
Press and hold the [ROM] button for 1second
or longer to perform folder random
play.
"All ROM" appears
in
the display while the
"mJ"
and "ROM" indicators light
in
the dis-
play.
•
To
cancel
play
1.
Press the operating button previously se-
lected.
M275 19

Adjustment Mode
1.
Press and hold the
[0]
button for more than 1
second to switch to the adjustment selection
display.
2.
Press the [
.....
,~]
button to select the "item
name".
"CLOCK"
~
"SCROLL"~"
AUX
SENS"
~
"TEL-SP"
~
"TEL-SW"
*
Some
of the items
will
have
mIl
indicator
light
on,
the
[
~
II
]button must
be
pressed
to
display the setting value.
3.
Turn the [ROTARY] knob to selectthe "desired
setting
value".
*After completing settings, press
the
[0] button
to
return
to
the
previous
mode.
•
Adjusting
clock
setting
2-1. Select "CLOCK".
3-1. Press the
[~II]
button
3-2. Press [
.....
,
~]
button to toggle HOUR
and MINUTE selection. the HOUR is selected
and blinking by default.
3-3. Turn the [ROTARY] knob clockwise to in-
creases hour/minute or counterclockwise to
decrease hour/minute.
3-4. Press the
[~II]
button to confirm the clock
setting. The display will show "MEMORY"
to indicate the setting has been stored and
return to "CLOCK".
Note:
-
If
you
remove the boat's battery for acheck or
repair,
the clock
will
be
reset,
so
user must set
it
again.
•Setting
the
method
for
title
scroll
Set auto scroll function for MP3IWMAtitle.
*
The
factory default setting
is
"ON".
2-1. Select "SCROLL".
3-1. Turn the [ROTARY] knob to select "ON" or
"OFF".
-ON:
To
scroll automatically.
-OFF:
To
scroll just 1time when the title was changed.
20 M275
•Selecting AUX
IN
sensitivity
Make the following settings to select the sensi-
tivity when sounds from external devices con-
nected·to this unit are difficult to hear even after
adjusting the volume.
*
The
factory default setting
is
"MID".
2-1. Select "AUX SENS".
3-1. Turn the [ROTARY] knob to select "LOW",
"MID" or "HIGH".
•Setting
the
car speaker
output
for
the
cellular
phone
*
The
factory default setting
is
"RIGHT".
*
To
output
the
telephone calls, set
the
cellular
phone
interrupt
to
ON.
2-1. Select "TEL-SP".
3-1. Turn the [ROTARY] knob to select "RIGHT"
or "LEFT".
Note:
-For telephone interrupt, AUX SENS
is
always
"MID".
-"RIGHT"
Telephone calls can be heard on the front right
speaker connected to this unit.
-"LEFT"
Telephone calls can be heard on the front left
speaker connected to this unit.
•Cellular phone
interrupt
setting
If you connect this unit and your cellular phone
with aseparately sold unit, you can listen to your
telephone calls on your boat speakers.
*
The
factory default setting
is
"OFF".
2-1. Select "TEL-SW".
3-1. Turn the [ROTARY] knob to select the set-
ting.
Each time you turn the [ROTARY] knob, the
setting changes
in
the following order:
OFF~ON
~MUTE.
-OFF:
This unit continues normal operation even when
the cellular phone is used.
-ON:
You
can listen to your telephone calls from the
speakers connected to this unit.
Other manuals for M275
1
Table of contents
Other Clarion Marine Equipment manuals

Clarion
Clarion M502 Repair manual

Clarion
Clarion CMS5 User manual

Clarion
Clarion M109 User manual

Clarion
Clarion M606 Repair manual

Clarion
Clarion CMD6 Instruction Manual

Clarion
Clarion M606 User manual

Clarion
Clarion CMS5 User manual

Clarion
Clarion M508 User manual

Clarion
Clarion CMD8 Repair manual

Clarion
Clarion M505 User manual

Clarion
Clarion M508 Repair manual

Clarion
Clarion CMD7 User manual

Clarion
Clarion GR10BT Repair manual

Clarion
Clarion CMD4 User manual

Clarion
Clarion CMD6 User manual

Clarion
Clarion XMD3 User manual

Clarion
Clarion M303 Repair manual

Clarion
Clarion CMM-30 User manual

Clarion
Clarion CMD5 User manual

Clarion
Clarion CMS5 User manual