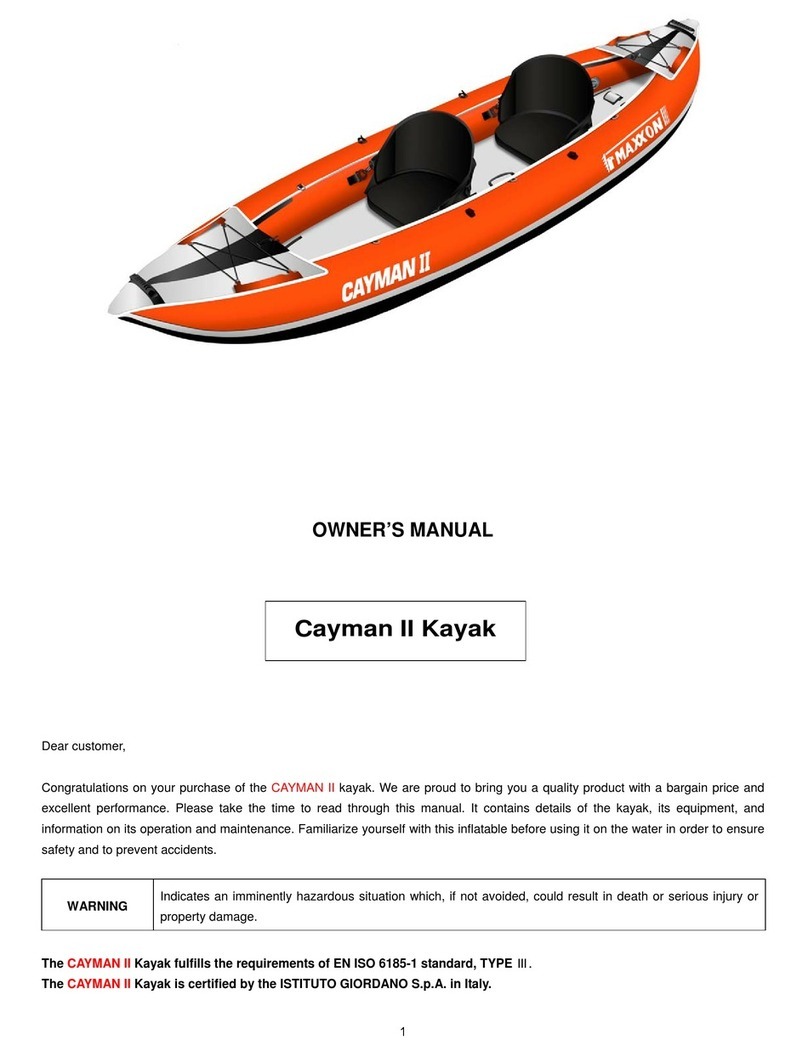
Maxxon Express II Kayak 2011 User manual

1
OWNER’S MANUAL
2011
Express II Kayak

2
Dear customer,
Congratulations on your purchase of the kayak. We are proud to bring you a quality product at an affordable price with excellent
performance. Please take the time to read through this manual. It contains details of the kayak, its equipment, and information on its
operation and maintenance. Familiarize yourself with this inflatable before using it on the water in order to ensure safety and to
prevent accidents.
WARNING Indicates an imminently hazardous situation which, if not avoided, could result in death or serious injury or
property damage.
The ExpressII kayak fulfils the requirements of EN ISO 6185-1 standard, TYPE Ⅲ.
There is a risk of serious injury or death from drowning. Paddle sports can be very dangerous and
physically demanding. The user of this product acknowledges, understands, and assumes the risks
involved in paddle sports. Observe the following safety standards and safe operating practices whenever
using this product.
• Always wear an approved personal flotation device.
• Wear kayak vests, which are not as low in the back as a marine PFD.
• Do not exceed maximum weight capacity. Regardless of the number of persons on board, the total
weight of persons and equipment must not exceed maximum weight capacity.
• Do not operate the kayak under the influence of drugs or alcohol.
• Wear a helmet when appropriate.
• Do not paddle alone.
• Children must be supervised by a responsible adult at all times.
• Dress appropriately for weather and marine conditions; cold water and cold weather can result in
hypothermia.
• Beware of offshore winds and currents as they can take you out to sea.
• Check weather forecasts and obtain local knowledge of the marine environment and weather conditions
prior to your voyage.
• Do not exceed your paddling ability; be aware of your limitations.
• Be aware of safe river water levels, tidal changes, currents, and obstacles in and above the water.
• Check your equipment prior to each use for signs of wear, leaks or failure.
• Tie a leash to your paddle when appropriate.
• Always inform someone of your paddling route, the time and place of your departure and your intended
time and place of arrival.
• Always carry identification.
• Do not paddle in flood conditions.
• Make sure you are able to exit the craft if necessary.
• Scout unfamiliar waters; portage where appropriate.
TECHNICAL SPECIFICATIONS
Model Length (cm/in) Width (cm/in) Weight (kg/lbs) Persons
Capacity Max. Load
Capacity (kg/lbs)
ExpressII 335 / 11’ 96 / 37.8” 16 / 35 2 200 / 440

3
DRAWING
1. Soft Handle
2. Seat D-Ring
3. Adjustable Seat
4. Paddle Holder
5. Zipper
6. Valve
7. Drain Valve
8. Detachable Skeg
9. Velcro
ASSEMBLY INSTRUCTIONS / INFLATION / DEFLATION
Inflate your kayak with a pump from MAXXON or any pump designed for inflatable boats, and other low pressure inflatables. These
types of pump will have a hose and adapters to fit the valves on this kayak. Choose a smooth and clean surface to unfold your
kayak.
1. Attach the skeg(before inflating the kayak) on the underside by folding the hull.
2. Side tube valve(s) and bottom floor valve – please see drawing to the right:
Unscrew the valve cap(1). Screw the valve insert(2) onto its base(3) and check
that the valve cap stays accessible. Insert the pump hose end piece and inflate it
until you will reach the required pressure. After inflation tighten the valve cap
(clockwise). A slight air-leak before screwing the valve cap is normal. Only the
valve cap can ensure final AIR TIGHTNESS. To release air from the side tubes
and bottom floor tube, unscrew the valve insert(2) from the valve base(3).
3. Please screw the valve insert(2) tightly again to prevent from air leaking.
4. Max. air pressure : the correct pressure for this item is :
0,1 bar / 1,45 psi(= 100 mBar ). Do not exceed it.
5. The inflation procedure and sequence :
please see drawing to the right:
(1) Inflate the bottom floor tube first.
(2) And inflate the side tubes last.
Any use of an air compressor may result in poor performance or damage to the kayak, and automatically
voids all warranties. If you leave your kayak exposed to the hot sun, check the pressure and deflate it slightly.
Otherwise the kayak may become over inflated and stretch the material. The ambient temperature affects the
tube’s internal pressure : a variation of 1°C/ 1.8°F causes a variation of the pressure in the tube of +/- 4 mBar
(0.06psi)

4
REMOVABLE SKEG
DRAIN VALVE
Your kayak has been designed with a drain system located on the
underside of the kayak in the rear. It consists of a valve base and
valve insert, for those of you who would like to use the kayak in calm
waters to maximize comfort and dryness, screw the valve insert onto
its base. Unscrew the valve insert from the valve base so that your
kayak is self-bailing, which is optimal for whitewater conditions.
Please keep the valve insert in other place like the small bag of the
seat separately to well drain.
ADJUSTABLE SEAT(S)
Your kayak is supplied with a (or several) adjustable seat(s), featuring
a comfortable high backrest. The seat is held in place by the velcro
strips on the underside and by webbing straps on the sides of the
backrest. Place the seat(s) into the kayak, matching the position of
the Velcro strips on the floor. Attach the webbing straps from the sides
of the backrest to the D-rings located inside the kayak, on the side
walls/chambers. Tighten the straps as needed for proper back
support. You can choose the seat position for one or two persons:
please see the drawing.
It is recommended to use the removable skeg in deep water (lake,
sea, ) where it will allow you to move forward in a straight line. Do not
use it in shallow water or white water: the skeg would deteriorate the
bottom of the kayak in shallow water and reduce the maneuverability
in white water. First partially deflate the kayak. The skeg cannot be
installed when the kayak is fully inflated. The curvature of the skeg
must be pointed towards the back end of the kayak.

5
MAINTENANCE
1. To deflate the kayak, remove the valve cap from the valves in the kayak floor and kayak body.
2. Clean and check the kayak as well as all the accessories. Make sure the kayak is completely dry before putting it away.
Make sure that no sand nor gravel remains inside the kayak nor between the hull and the inner chambers: this could result in
abrasion or even punctures while storing the kayak.
3. Fold the 2 sides into the middle, then roll it up from the opposite end of the valves (so remaining air can escape from the valves).
4. When storing your inflatable, keep it in a clean and dry place.
Whenever you take your kayak out of the water and deflate it, allow time for it to air out and dry. Neither the
skin/hull or the inside chambers will suffer from water damage, but stagnant water could cause mildew and
foul odor.
HOW TO REPAIR SMALL PUNCTURES
Check that the tube is fully deflated and lies flat.
1. Prepare a round patch no less than 3 inches or 7 centimeters in diameter.
2. Clean the patch and the area surrounding the leak with Alcohol.
3. To contain excess glue, use masking tape to tape off the area around the patch.
4. Apply 3 thin, even coats of repair kit adhesive to both the surface of the kayak and the patch. Wait 5 minutes between each coat.
5. After the 3rd coat, wait 10-15 minutes before applying the patch. Use a hand roller to apply the patch evenly. Pay special
attention to the edges.
6. Wait 24 hours before re-inflating.
• Perform all of your repairs in a well-ventilated area.
• Avoid inhaling glue vapors.
• Avoid contact with the skin or the eyes.
• Keep all repair materials (glue, solvents, etc) away from the reach of children.
• The repairs on the welds must not be glued. Only the manufacturer of the kayak can perform repairs on
the welds themselves.
WARRANTY
MAXXON warrants (legal warranty) to the original purchaser only, and from date of purchase, that the product is free from defects.
The warranty applies only when this product is used for normal recreational purposes. Check with your local MAXXON office for
details on the length of this warranty, which varies for different countries. The warranty does not cover any puncture, cut or abrasion
sustained in normal use or damage from unreasonable uses or improper storage. If any product is found to be defective, the owner
may return it to the store where it was purchased along the original sales receipt. After inspection of any product found defective,
MAXXON shall either repair or replace the defective part or item as deemed necessary by MAXXON. MAXXON shall not be held
liable for incidental and consequential damages. There are no warranties which extend beyond the description of the face hereof.
This warranty is in lieu of all other warranties. This warranty gives you specific legal rights and you may also have other rights,
which may vary, from country to country.
The main limitations to the application of this warranty are the following;
• The item must not be modified and/or fitted with a motor in excess of that allowed by the manufacturer or used in any activities
outside normal recreational use (such as races, rental, or commercial usage).
• Used in excess of the manufacturers recommended maximum load capacity.
• Pressure recommendations, assembly / disassembly and handling procedures must be strictly observed.
• The maintenance and the storage procedures must not be neglected.
• This warranty does not cover parts and accessories not supplied or recommended by the manufacturer or defects resulting from
the installation of such equipment on their products.
ALL REPAIRS COVERED BY WARRANTY MUST BE PERFORMED BY MAXXON.
This product is designed in accordance with standards for a specific use. Any modifications, transformations
or use of a motor horse power higher than that indicated by the manufacturer could result in serious risks
for the user and will void the warranty.

6
EVERGOING PRODUCTS
1819 Central Ave. S, Unit #33
Kent, WA 98032
Telephone : 1-888-727-0166
E-mail : sales@evergoing.us
www.maxxon.us
Table of contents
Other Maxxon Boat manuals
Popular Boat manuals by other brands

Pelican
Pelican KJ12 manual

Sea Eagle Boats
Sea Eagle Boats Fishing Explorer 350fx Instruction & owner's manual

Osprey
Osprey Nordic Tug 37 Owners’ Notes

Pro-Line Boats
Pro-Line Boats 2010 23 Express owner's manual

Jeanneau
Jeanneau SUN ODYSSEY 42 DS owner's manual

International Marine
International Marine West Wight Potter 19 user manual

Bayliner
Bayliner 160 Bowrider owner's manual

Sea Ray
Sea Ray 210 Select Ex owner's manual

Yamaha
Yamaha XA1200Ltd WaveRunner Owner's/operator's manual

MONTGOMERY BOATS
MONTGOMERY BOATS 340 SPORT YACHT owner's manual

Lake Powell
Lake Powell 54 ESCAPE instruction manual

XO boats
XO boats XO 240 RS CABIN user manual