to the trailer or roof rack. This line will assure that, even if the straps are lost, the boat cannot be completely
lost.
Care and Cleaning:
When sailing in salt water, thoroughly rinse the entire boat with fresh water, including sails and spars.1.
Always allow sails to dry before stowing. Sailcloth, like most fabrics, will mildew if stored wet.2.
Store the daggerboard and rudder in a cool place, excessive heat can cause warping and blistering.3.
There are many high quality marine cleansing products on the market. Avoid any cleaner which includes
abrasives. For daily cleaning, we recommend non-toxic, biodegradable soaps such as Lemon Joy dish detergent.
4.
For more serious stains, we recommend Starbright Boat Cleaner. This is a more chemically active cleaner and
should only be used after soap and water has been tried.
5.
Very serious stains can be removed from gelcoat using lacquer thinner. Lacquer thinner will dissolve stickers, so
be careful where you use it. Left on the surface it will eventually dissolve gelcoat as well so, be sure to
thoroughly rinse with water afterwards. The use of lacquer thinner should be supervised by an adult.
6.
Wet sanding is required only if the bottom is scratched. Your McLaughlin Optimist arrives with a race ready
finish. Cleansing the bottom with soap and water to remove dirt and oil is the best pre-race preparation.
7.
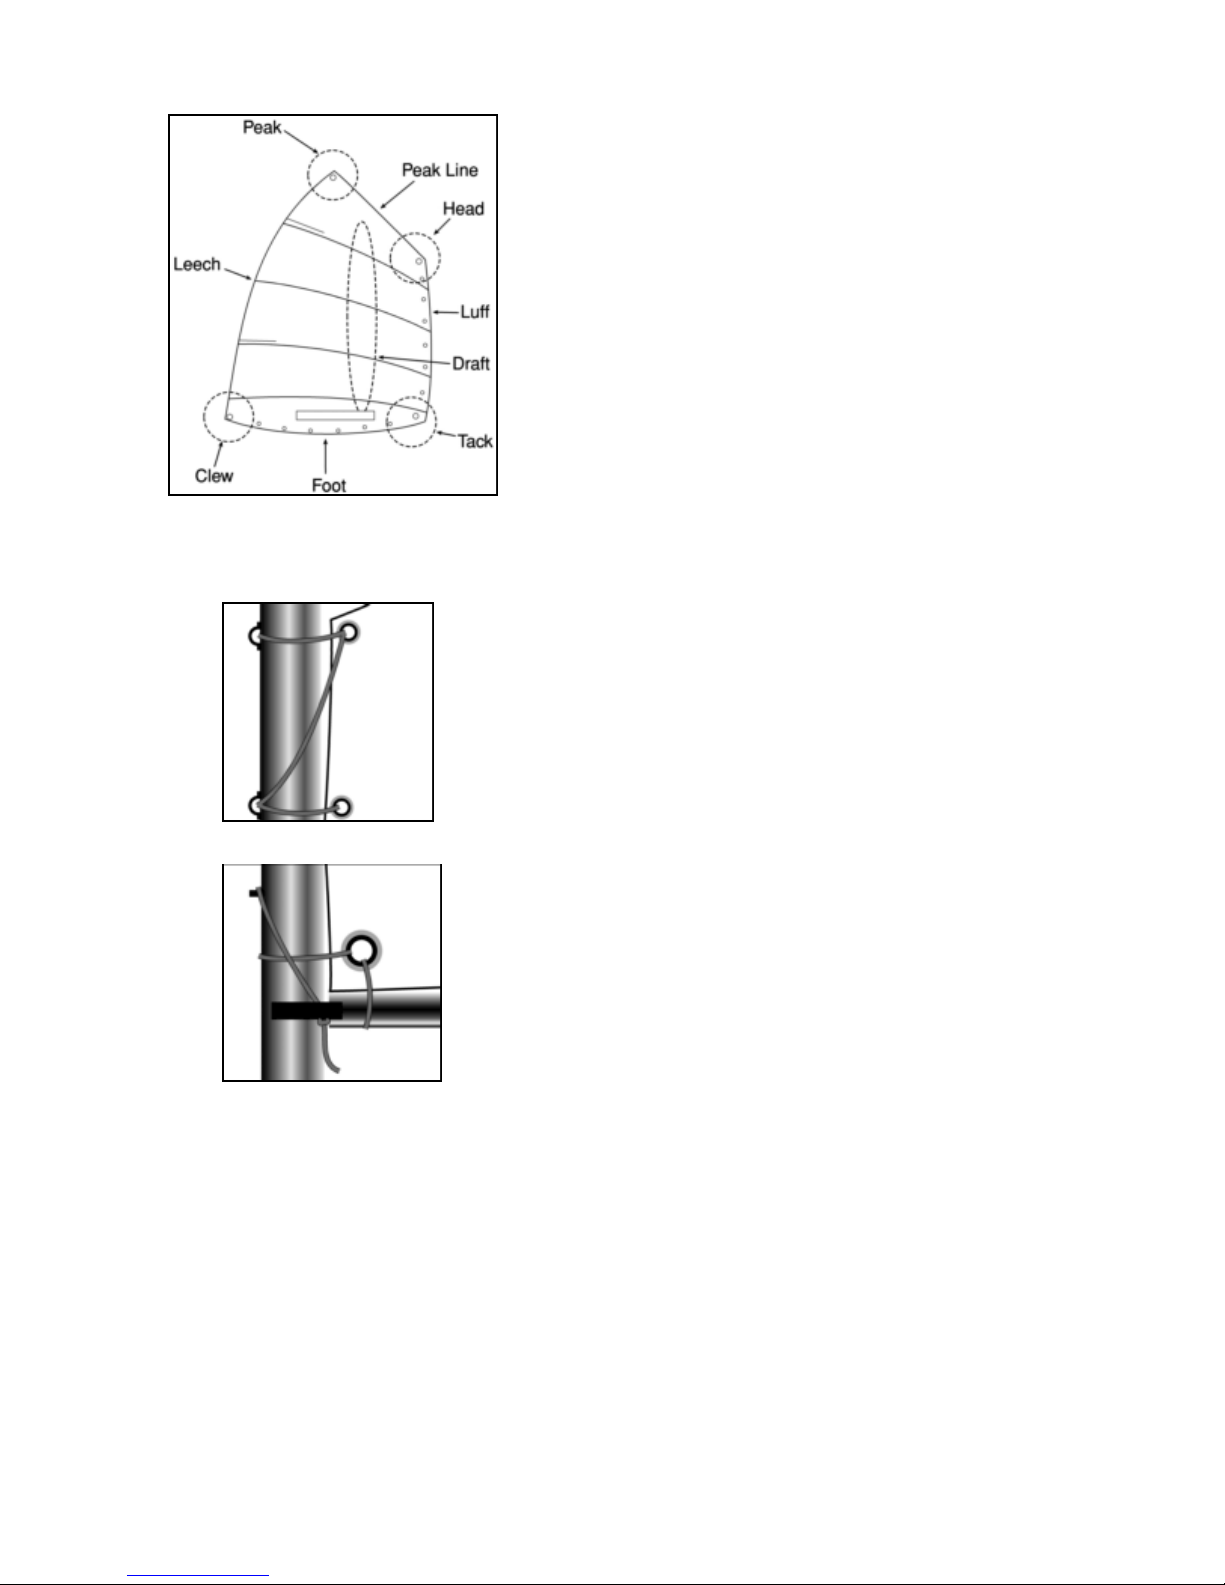
Basic Tuning
Mainsheet- Mainsheet controls boom position, it is a balance between pointing and speed. Upwind, the sail should be
trimmed to the leeward comer of the transom for most conditions, further in for heavy air, further out for light. It is
usually better to give up maximum pointing for increased speed.
Luff Telltales- In light wind, out of tacks or while footing for speed, steer so that the luff telltales are flying straight
back. In medium wind with flat water or light chop, steer so that the windward telltale is partially stalled, and the leeward
telltale is flying straight back. In heavy wind (when you can no longer hike the boat perfectly flat), steer so that the
windward and leeward telltales are somewhat stalled. A luff should only be carried when feathering in very heavy winds.
Before carrying a luff, you should consider raising your centerboard slightly to depower the boat.
Leach Telltales- Because of the limited control the vang offers on an Optimist, the leach telltale is mostly an indicator
of mainsheet trim. Generally, it should be steaming straight back with the curvature of the leach. If it is stalling to
windward, you are under trimmed. (The luff telltales will almost always be a better indicator of this) If the leach telltale is
stalled far to leeward, you are either carrying too much vang or are over trimmed, either way the leach is stalled.
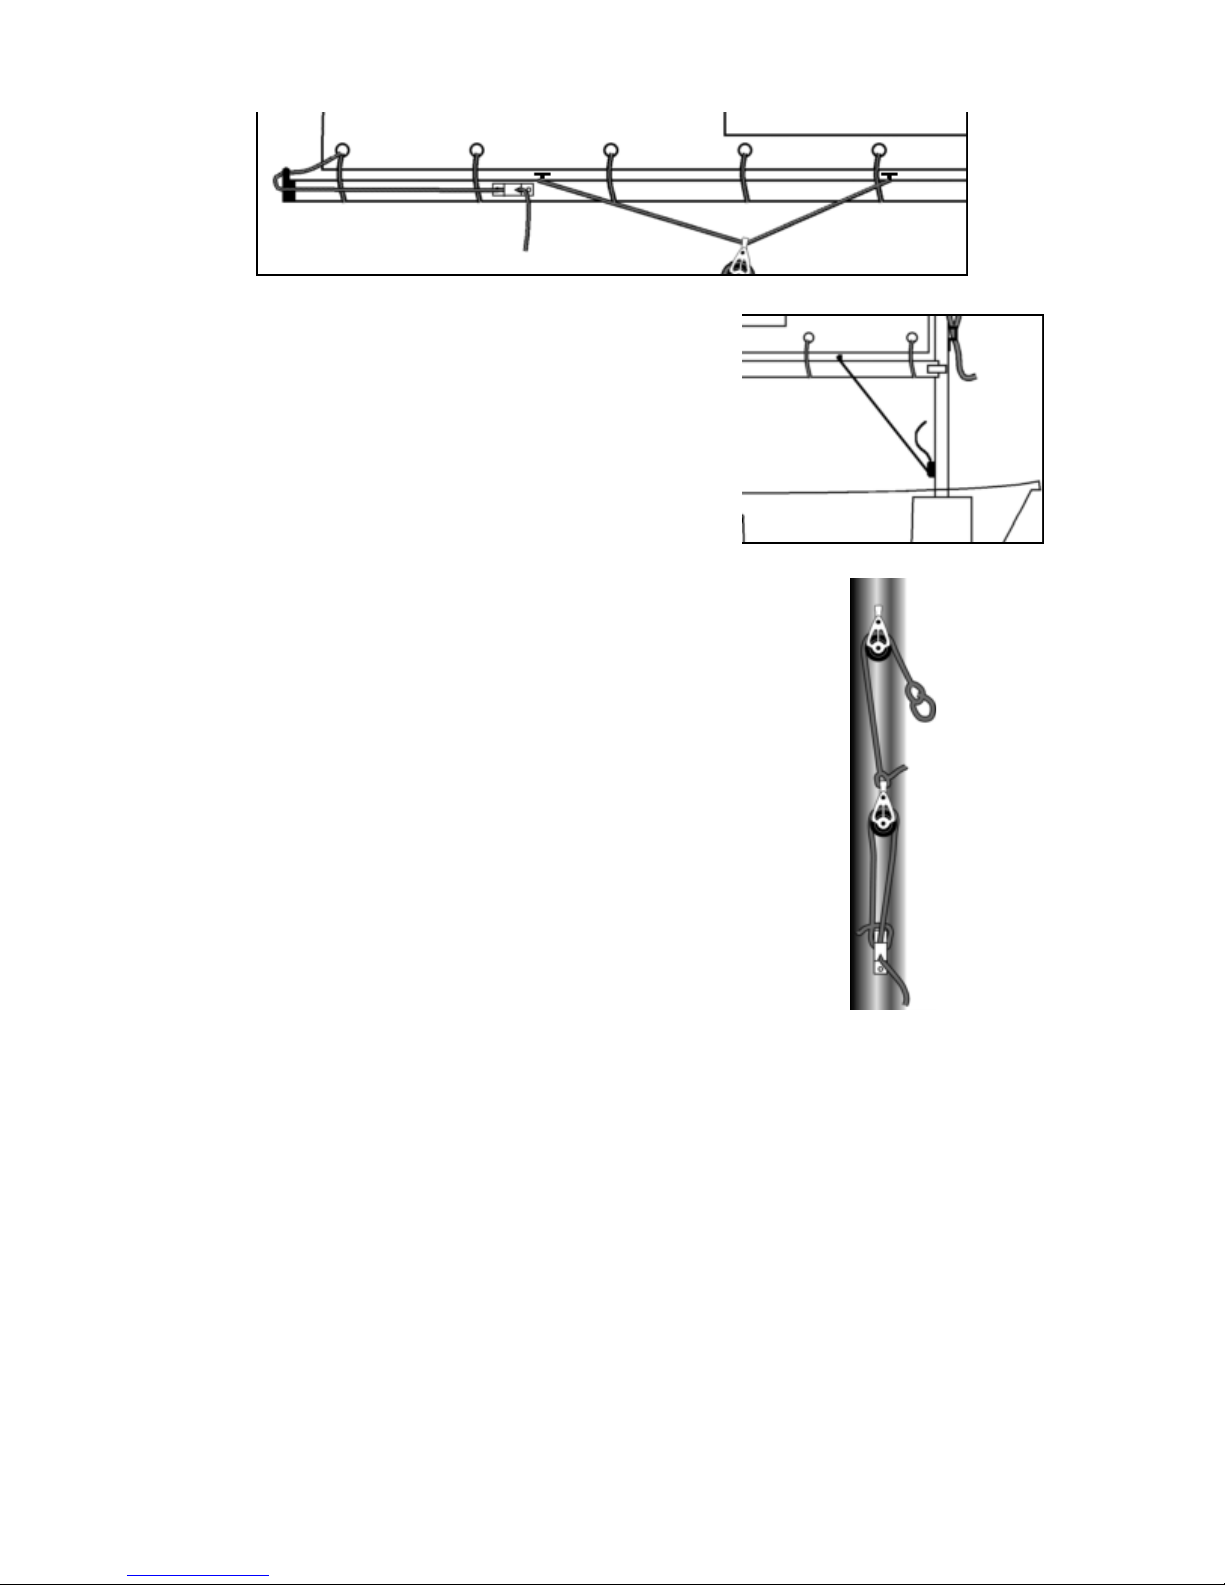
Boom Preventer - The boom preventer controls the luff tension in conjunction with the vang and sprit. In medium
winds the luff should have "neutral" tension under pressure, no horizontal wrinkles or vertical wrinkles. In light winds, one
or two twists should be added to produce very slight scallops under pressure. In heavy winds, twists should be let off to
produce a vertical wrinkle in the luff, however, that wrinkle should disappear under pressure.
Vang - The vang controls the luff tension upwind and leech tension off the wind.
>5 knots :Use the Mainsheet to trim for your upwind boom position, then cleat the vang at that spot. If the wind is puffy,
trim for the median wind speed but, leave a small slack in the vang. This will give you added leach control upwind
8 to 12 knots : Trim until the boom is centerline and 5 to 8 inches off the transom, then cleat the vang. In puffy
conditions, trim for the median wind speed or slightly less.
15+ knots : Trim until the boom is 0-3 inches from the transom, then cleat the vang. If the leach is stalling, ease the vang
slightly or loosen the clue tie.
Outhaul- In medium air, the outhaul should be trimmed with pronounced scallops along the foot. The clue should be 3-6
cm from the end of the boom. In heavy air the outhaul should be tightened so that the scallops are removed. However, it
should never be so tight that a hard crease in the foot is induced. In light air it should be eased to a maximum of about 7 or