MayPole MP7429 User manual

DDDDDDDDDDDww
w.maypole.ltd.uk
MAMMMMMMMMM
pole.ltd.uk
www.maypole.ltd.uk
1
INSTRUCTION MANUAL
Please keep these instructions safe for future reference
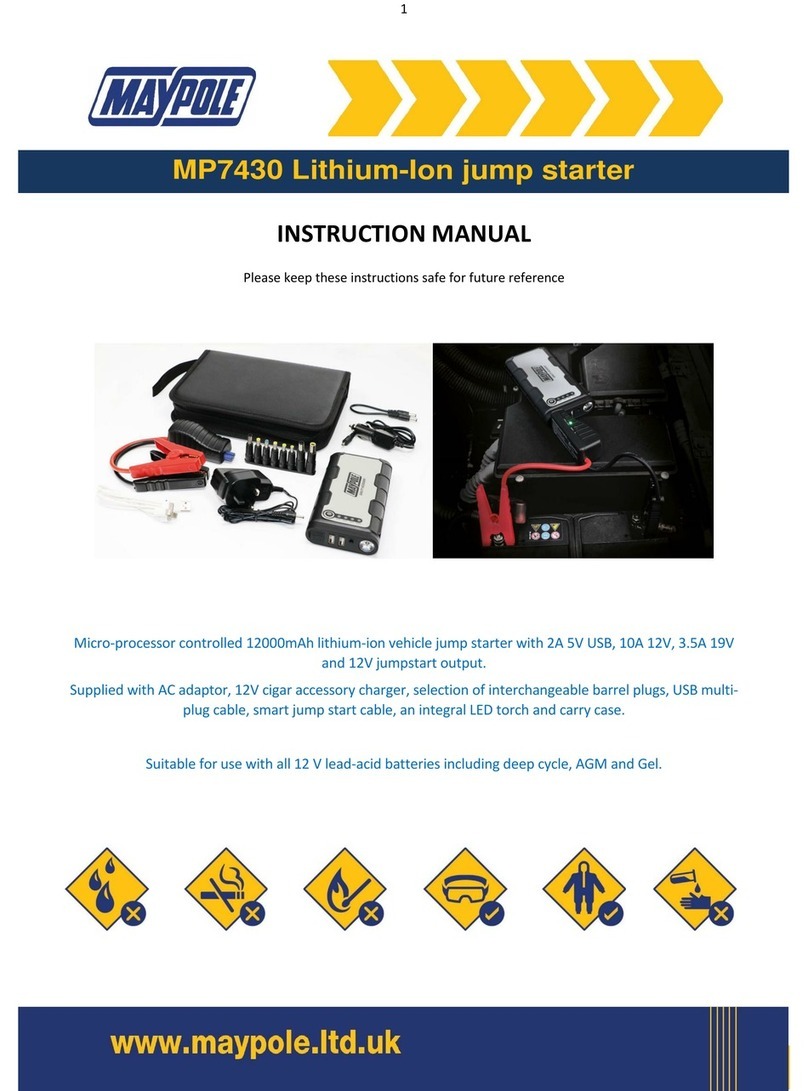
Micro-processor controlled 6000mAh lithium-ion vehicle jump starter with 2A USB and 12V jump start
output.
Supplied with multi plug connection lead, integral LED torch, smart jump start cable, 12V cigar accessory plug
charger and carry case.
Suitable for use with all 12 V lead-acid batteries including deep cycle, AGM and Gel.
MP7429 Lithium-Ion jump starter

DDDDDDDDDDDww
w.maypole.ltd.uk
MAMMMMMMMMM
pole.ltd.uk
www.maypole.ltd.uk
2
RISK OF FIRE OR EXPLOSION
•
Explosive gases may escape from the battery during the use of this product. This is normal, but please follow
the following guidelines:
•
Do not use near flames or sparks –do not smoke in the area.
•
Ensure adequate ventilation during use.
•
Keep the area completely clear of combustible materials.
•
Never connect the smart jump cable output clamps together.
•
Do not allow battery to overheat.
•
Store in a dry area and take care to not expose to rain or moisture during use.
•
The jump starter is intended for use with 12V Lead-Acid, AGM & GEL batteries. Do not use with non-
rechargeable batteries.
WARNING –GENERAL SAFETY
•
Never connect to a battery suspected to be frozen.
•
This product should not be used for any purposes other than those listed –any other use will invalidate
warranty.
•
Ensure that cables are regularly inspected and kept in good condition.
•
Do not store the device in locations that are likely to exceed 70˚C, for prolonged storage 15˚C is ideal.
•
Never use the product if the device or its accessories are found to be worn or damaged.
•
This product contains no user-serviceable parts - never attempt to disassemble.
•
During operation, locate the unit as far away from the vehicle primary battery as the cables will permit.
•
This device contains a Lithium Ion battery. Do not allow battery to overheat. Do not crush, pierce or incinerate.
•
Position the unit such that it cannot inadvertatly become stepped on, tripped over or damaged.
•
Never place the device directly above the battery unto which it is connected; gases from the battery will
corrode and damage the product.
•
Always follow battery manufacturer’s instructions for charging - electrical discharge from batteries can be
dangerous
•
Battery electrolyte is acidic and likely to cause burns. The use of safety goggles and gloves when working with
lead acid batteries is strongly advised.
•
Remove metal items such as rings, necklaces and watches while working with batteries.
•
This appliance is not for use by a person (including children) with reduced physical, sensory or medical
capabilities or lack of experience or knowledge.
PREPARATION OF THE BATTERY
Refer to the vehicle manufacturer’s handbook for battery maintenance, connection and charging guidelines.
3
1
2

DDDDDDDDDDDww
w.maypole.ltd.uk
MAMMMMMMMMM
pole.ltd.uk
www.maypole.ltd.uk
3
PRODUCT LAYOUT
CHARGING THE DEVICE
Depressing the ON/OFF switch on the side of the unit will result in the blue LED segments on the face of the device to
illuminate. The number of illuminated segments signifies the current level of charge within the device:
During the charge cycle, the blue LED segments that correspond to the current level of charge will illuminate, i.e. two
solid blue segments represents 50% completed charge. When charging is complete, all LED segments will switch off.
4
5

DDDDDDDDDDDww
w.maypole.ltd.uk
MAMMMMMMMMM
pole.ltd.uk
www.maypole.ltd.uk
4
The device can be charged in two ways:
•
Using the cigar accessory car adaptor –First connect the accessory cable provided to the vehicle accessory socket,
then connect the other end to the 15V 1A input indicated within the diagram on page 4.
•
Via USB –Connect the USB cable to a type 1 USB 5VDC source, such as a computer or mobile phone charger, then
connect the other end to the USB 5V input port indicated within the diagram on page 4.
JUMP STARTING VEHICLES
ALWAYS CONSULT YOUR VEHICLE MANUFACTURERS HANDBOOK TO CONFIRM CORRECT JUMP-STARTING ROUTINE!
Note: The battery within the device must be at a minimum of 75% for the jump start function to operate. Ensure all
non-essential loads (fan, lights, radio etc.) are switched off prior to commencing the jump starting procedure.
•
Connect the smart jump cable to the device.
•
Connect the red (+ve) clamp to the designated +12VDC connection point or positive post of the battery, then
connect the black (-ve) clamp to the vehicle chassis or negative battery post.
Upon initial connection, the device will analyze the condition and voltage of the vehicle battery unto which it is
connected to determine if a jump start would be successful. The ability of the device to successfully start a vehicle is
heavily dependent upon the condition of the primary vehicle battery; if the vehicle battery is very old, has been
discharged for an extended period of time or otherwise damaged jump starting may not be successful.
6

DDDDDDDDDDDww
w.maypole.ltd.uk
MAMMMMMMMMM
pole.ltd.uk
www.maypole.ltd.uk
5
Once battery condition and voltage checks are satisfied, the green ‘correct’ LED will illuminate on the side of the
smart cable, as shown below. The vehicle is now ready to be jump started; crank the engine within 30 seconds of
connection.
Upon successful starting the red and green LEDs will flash; the jump cable can now be disconnected. Remove the black
(-ve) clamp first, followed by the red (+ve) clamp. Leave the vehicle engine running for a period after disconnection to
allow battery to be recharged.
SMART CABLE STATUS LEDS AND FAULT CONDITIONS
Warning tone emitted with blinking green LED: The vehicle battery voltage is below the minimum required threshold
of 6VDC in order for the device to successfully start the vehicle.
Warning tone emitted with steady red LED: Correct connection polarity has not been observed. Remove clamps and
reconnect ensuring the red (+ve) clamp is connected to the designated +12VDC connection point or positive post of the
battery and the black (-ve) clamp is connected to the vehicle chassis or negative battery post.
No LED illuminated, no warning tone: The device cannot detect a connection to a vehicle. Remove and replace both
clips, rotating them slightly once clamped so as to remove any dirt or oxidization and thus ensuring a good contact.
CHARGING DEVICES VIA USB
A wide selection of portable devices like mobile telephones, tablets and portable media devices can be charged via this
device.
Connect the device you wish to be charged to the USB output socket using an appropriate cable and depress the ON/OFF
button on the side of the unit. The blue battery status indicator LEDs on the face of the product will illuminate and
charging will commence automatically.
8
7

DDDDDDDDDDDww
w.maypole.ltd.uk
MAMMMMMMMMM
pole.ltd.uk
www.maypole.ltd.uk
6
FLASHLIGHT
This product features a LED flashlight which is activated by pressing and holding the ON/OFF switch on the side of the
unit for three seconds. The flashlight can be deactivated by pressing and holding the same button for a further 3
seconds
TECHNICAL SPECIFICATIONS
Product dimensions (mm) 139 x 75 x 15
Weight (g) 200
Battery capacity (mAh) 6000
Output 5V⎓2A; 12V jump start
Input 15V⎓1A; 5V⎓2A
Time required for full charge Approximately 2 hours
Starting current 150A
Peak current 300A
Operating temperature -20˚C ~ 60˚C
FREQUENTLY ASKED QUESTIONS
Q. How do I turn off the product?
A. The device will automatically switch off once charging is complete or no USB devices are connected.
Q. How long does it take to fully cahrge the battery within the unit?
A. Approximately two hours if charged via a 15V 1A supply or 5V 2A supply.
Q. How many times can the product fully charge a mobile phone before the internal battery requires recharge?
A. This is heavilly dependant on the specific mobile phone being charged; as an example, an iPhone 4 can be fully
charged three times.
Q. How long will the product require to fully charge a mobile phone?
A. Approximatly one hour.
Q. How many times can the product jump start a vehilce before the internal battery requires recharge?
A. This is heavilly dependant upon the condition of the vehicle battery and its state of charge prior to jump
starting; the device could successfully jump start a vehicle two or three times before a recharge is required.
Q. What is the anticipated life-span of the product?
A. Approximately 3-5 years under normal conditions and use.
Q. Once fully charged, how long with the internal battery retain its charge before a recharge is necessary?
A. It is recommended the product is charged once every three months if not used.
Q. What vehicle types can I jump start using this device?
A. The unit can be used on most petrol engine vehicles with an engine size up to three liters.
Q. How should this unit be disposed of at the end of its useful life?
A. The unit contains hazardous constituents that should be disposed of at local authority registered waste
recycling center or a battery collection point.
9
10
12

DDDDDDDDDDDww
w.maypole.ltd.uk
MAMMMMMMMMM
pole.ltd.uk
www.maypole.ltd.uk
7
DECLARATION
We declare that this product conforms to standards EN50498:2010, EN55015:2013, EN61547:2009, EN55022:2010,
EN55024:2010+A1:2015, EN61000-3-2:2014, EN61000-3-3:2013 and ROHS Directive 2011/65/EU
Technical Manager
Maypole Ltd January 2018
sales@maypoleltd.co.uk www.maypoleltd.co.uk
11
Table of contents
Other MayPole Remote Starter manuals