manuals.online logo
Brands
  1. Home
  2. •
  3. Brands
  4. •
  5. Maytag
  6. •
  7. Dryer
  8. •
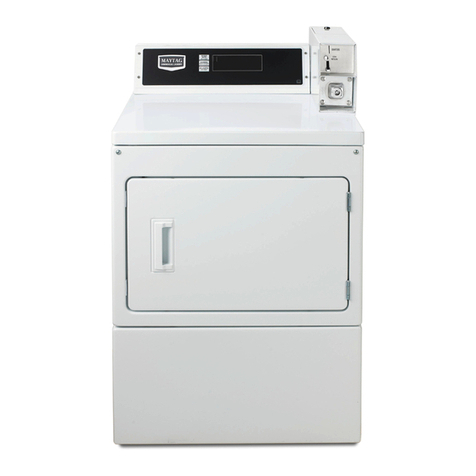
  9. Maytag 3LMEDC315FW User manual

Maytag 3LMEDC315FW User manual

Other manuals for 3LMEDC315FW

1

This manual suits for next models

6

Other Maytag Dryer manuals

Maytag MEDC400VW - Centennial Electric Dryer User manual

Maytag

Maytag MEDC400VW - Centennial Electric Dryer User manual

Maytag MEDB766FW User manual

Maytag

Maytag MEDB766FW User manual

Maytag D-8 User manual

Maytag

Maytag D-8 User manual

Maytag MED5707TQ1 User manual

Maytag

Maytag MED5707TQ1 User manual

Maytag MDG50PCC User manual

Maytag

Maytag MDG50PCC User manual

Maytag MGDB850WQ1 User manual

Maytag

Maytag MGDB850WQ1 User manual

Maytag Centennial MEDC500 User manual

Maytag

Maytag Centennial MEDC500 User manual

Maytag W10099060 User manual

Maytag

Maytag W10099060 User manual

Maytag NEPTUNE MD98 User manual

Maytag

Maytag NEPTUNE MD98 User manual

Maytag W10097007A-SP Owner's manual

Maytag

Maytag W10097007A-SP Owner's manual

Maytag MDG30PCC User manual

Maytag

Maytag MDG30PCC User manual

Maytag MEDE900VJ - Performance 7.5 cu. Ft. Steam Electric... User manual

Maytag

Maytag MEDE900VJ - Performance 7.5 cu. Ft. Steam Electric... User manual

Maytag 4KMEDC315FW0 User manual

Maytag

Maytag 4KMEDC315FW0 User manual

Maytag PHASE 7.2 User manual

Maytag

Maytag PHASE 7.2 User manual

Maytag HY-1 User manual

Maytag

Maytag HY-1 User manual

Maytag W10240878A User manual

Maytag

Maytag W10240878A User manual

Maytag MGDE500VF0 User manual

Maytag

Maytag MGDE500VF0 User manual

Maytag YMEDB725CG0 User manual

Maytag

Maytag YMEDB725CG0 User manual

Maytag MDE22PD User manual

Maytag

Maytag MDE22PD User manual

Maytag MDE9700A Manual

Maytag

Maytag MDE9700A Manual

Maytag YMED9000YW3 User manual

Maytag

Maytag YMED9000YW3 User manual

Maytag W10057352A User manual

Maytag

Maytag W10057352A User manual

Maytag W10596022B User manual

Maytag

Maytag W10596022B User manual

Maytag MED6300TQ - 29" Front-Load Electric Dryer User manual

Maytag

Maytag MED6300TQ - 29" Front-Load Electric Dryer User manual

Popular Dryer manuals by other brands

Whirlpool WED9270XL2 parts list

Whirlpool

Whirlpool WED9270XL2 parts list

Kleenmaid KED2000 Repair instructions

Kleenmaid

Kleenmaid KED2000 Repair instructions

SPI Supplies SPI-DRY Operation manual

SPI Supplies

SPI Supplies SPI-DRY Operation manual

Amana NGD5800DW Use & care guide

Amana

Amana NGD5800DW Use & care guide

Bosch WTG86402GB Installation and operating instructions

Bosch

Bosch WTG86402GB Installation and operating instructions

ffuuss eos user manual

ffuuss

ffuuss eos user manual

KitchenAid 53-3498 installation instructions

KitchenAid

KitchenAid 53-3498 installation instructions

Schulthess Spirit topLine TW 8340 operating instructions

Schulthess

Schulthess Spirit topLine TW 8340 operating instructions

Whirlpool LGR4624BW0 parts list

Whirlpool

Whirlpool LGR4624BW0 parts list

World Dryer AirMax D M5-972A manual

World Dryer

World Dryer AirMax D M5-972A manual

Alliance Laundry Systems ADEE9BSS user guide

Alliance Laundry Systems

Alliance Laundry Systems ADEE9BSS user guide

Miele PDR 910 EL Operating and installation instructions

Miele

Miele PDR 910 EL Operating and installation instructions

Amana NGD5800TQ0 parts list

Amana

Amana NGD5800TQ0 parts list

Bosch WTA79200GB Installation and operating instructions

Bosch

Bosch WTA79200GB Installation and operating instructions

AEG TR838P4OB user manual

AEG

AEG TR838P4OB user manual

Asko T760 user guide

Asko

Asko T760 user guide

Electrolux EW2H328R2 user manual

Electrolux

Electrolux EW2H328R2 user manual

Dawlance Spinner DS 6000 C owner's manual

Dawlance

Dawlance Spinner DS 6000 C owner's manual

manuals.online logo
manuals.online logoBrands
  • About & Mission
  • Contact us
  • Privacy Policy
  • Terms and Conditions

Copyright 2025 Manuals.Online. All Rights Reserved.

W10849529B
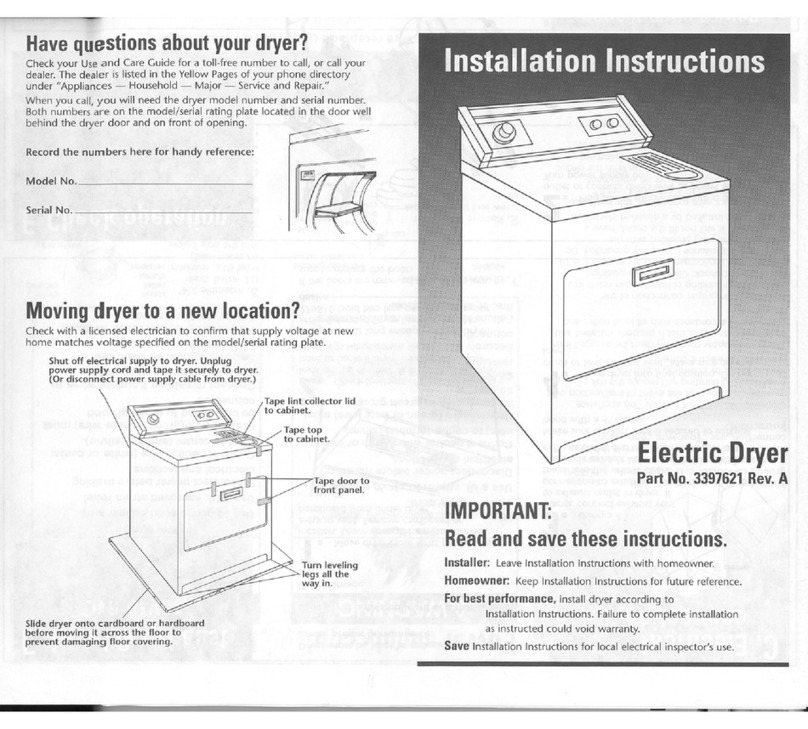
ELECTRIC OR GAS DRYER USE AND CARE GUIDE
GUIDE D’UTILISATION ET D’ENTRETIEN
SÈCHE-LINGE ÉLECTRIQUE OU À GAZ
SECADORA A GAS O ELÉCTRICA
MANUAL DE USO Y CUIDADO
GUIDA ALL’USO E ALLA MANUTENZIONE
DELL’ASCIUGATRICE ELETTRICA O A GAS
ELEKTRO- ODER GASTROCKNER – BEDIENUNGS- UND PFLEGEANLEITUNG
Table of Contents
Table des matières
DRYER SAFETY .......................................................................... 2
SPECIFICATIONS........................................................................ 4
CHECK YOUR VENT SYSTEM FOR GOOD AIR FLOW............ 4
USE AUTOMATIC DRY CYCLES FOR
BETTER FABRIC CARE AND ENERGY SAVINGS..................... 4
SÉCURITÉ DU SÈCHE-LINGE .................................................. 13
CARACTERISTIQUES................................................................ 15
VÉRIFICATION D’UNE CIRCULATION D’AIR
ADÉQUATE POUR LE SYSTÈME D’ÉVACUATION ................. 16
UTILISATION DES PROGRAMMES AUTOMATIQUES
POUR UN MEILLEUR SOIN DU TISSU ET DAVANTAGE
D’ÉCONOMIES D’ÉNERGIE...................................................... 16
Índice
SEGURIDAD DE LA SECADORA .............................................. 25
ESPECIFICACIONES ................................................................. 27
REVISE QUE EL SISTEMA DE VENTILACIÓN
TENGA UN BUEN FLUJO DE AIRE .......................................... 28
USE LOS CICLOS SECADO AUTOMÁTICO PARA
UN MEJOR CUIDADO DE LAS TELAS Y AHORRO
DE ENERGÍA............................................................................... 28
4KMEDC215
4KMEDC315
4KMEDC415
4KMEDC425
3LMEDC315
3LMEDC415
CONTROL PANEL & FEATURES................................................ 5
CYCLE GUIDE............................................................................. 6
USING YOUR DRYER ................................................................. 7
DRYER CARE .............................................................................. 9
TROUBLESHOOTING............................................................... 11
TABLEAU DE COMMANDE ET CARACTÉRISTIQUES............ 17
GUIDE DE PROGRAMMES ....................................................... 18
UTILISATION DU SÈCHE-LINGE .............................................. 19
ENTRETIEN DU SÈCHE-LINGE ................................................ 21
DÉPANNAGE. ............................................................................. 23
PANEL DE CONTROL Y CARACTERÍSTICAS ......................... 29
GUÍA DE CICLOS....................................................................... 30
USO DE SU SECADORA ........................................................... 31
CUIDADO DE LA SECADORA................................................... 33
SOLUCIÓN DE PROBLEMAS.................................................... 35
Sommario
SICUREZZA DELL’ASCIUGATRICE......................................... 37
SPECIFICHE.............................................................................. 39
CONTROLLO DEL SISTEMA DI SFIATO
PER IL CORRETTO FLUSSO DELL’ARIA................................ 39
USO DEI CICLI DI ASCIUGATURA AUTOMATICA PER
UNA MIGLIORE CURA DEI TESSUTI E PER RISPARMIARE
ENERGIA ................................................................................... 39
PANNELLO COMANDI E FUNZIONI........................................ 40
GUIDA AI CICLI......................................................................... 41
USO DELL’ASCIUGATRICE...................................................... 42
MANUTENZIONE DELL’ASCIUGATRICE ................................ 44
RISOLUZIONE DEI PROBLEMI................................................ 46
Inhaltsverzeichnis
SICHERHEITSHINWEISE ......................................................... 48
TECHNISCHE DATEN............................................................... 50
ÜBERPRÜFEN DES ABLUFTSYSTEMS AUF GUTE
LUFTZIRKULATION .................................................................. 51
AUTOMATISCHE TROCKENPROGRAMME FÜR
TEXTILSCHONENDES TROCKNEN UND ENERGIESPAREN
... 51
BEDIENFELD UND FUNKTIONEN........................................... 52
PROGRAMMLEITFADEN.......................................................... 53
VERWENDEN DES TROCKNERS ............................................ 54
PFLEGE DES TROCKNERS ..................................................... 56
STÖRUNGSBEHEBUNG........................................................... 58
2
DRYER SAFETY
CAUTION – RISK OF FIRE/FLAMMABLE MATERIALS
This is an additional safety alert symbol that alerts you to the risk of re.
3
FOR YOUR SAFETY
1. DO NOT USE OR STORE PETROL OR OTHER FLAMMABLE MATERIALS IN THIS APPLIANCE OR
NEAR THIS APPLIANCE.
2. DO NOT SPRAY AEROSOLS IN THE VICINITY OF THIS APPLIANCE WHILE IT IS IN OPERATION.
3. DO NOT MODIFY THIS APPLIANCE.
n

Remove all objects from pockets, such as lighters and
matches, before placing items in the dryer.
n
Before the dryer is removed from service or discarded,
remove the doors to the drying compartment.
n
Do not reach into the dryer if the drum is moving.
A door switch is tted for your safety.
n
Do not install or store the dryer where it will be exposed
to the weather.
n
Do not tamper with controls.
n
Do not continue to use this appliance if it appears
to be faulty.
n
Do not repair or replace any part of the dryer or attempt
any maintenance unless specically recommended in this
Use and Care Guide. Repairs and servicing should only
be carried out by competent service personnel.
n
Do not use fabric softeners or products to eliminate static
unless recommended by the manufacturer of the fabric
softener or product. Follow their instructions.
n
Clean dryer lint screen before or after each load.
Do not operate dryer without lint screen in place.
n
Keep area around the exhaust and inlet openings and
adjacent surrounding areas free from the accumulation
of lint, dust, and dirt.
n
The interior of the dryer and exhaust vent should be
cleaned periodically by qualied service personnel.
n
See Installation Instructions for earthing instructions.
n
Do not dry unwashed items in this dryer.
n
The nal part of a tumble dryer cycle occurs without heat
(cool down cycle) to ensure that the items are left at a
temperature that ensures the items will not be damaged.
n
Items such as foam rubber (latex foam), shower caps,
waterproof textiles, rubber backed articles, and clothes
or pillows tted with foam rubber pads must only be dried
on a clothesline.
n
If the supply cord is damaged, it must be replaced by the
manufacturer or its service agent or a similarly qualied
person in order to avoid a hazard.
WARNING:
Never stop a tumble dryer cycle before the
end of the drying cycle unless all items are quickly removed
and spread out so that the heat is dissipated.
IMPORTANT SAFETY INSTRUCTIONS
WARNING:
To reduce the risk of re, electric shock, or injury to persons when using the dryer, follow basic
precautions, including the following:
SAVE THESE INSTRUCTIONS
n
Read all instructions before using the dryer.
n
Keep a minimum clearance of 100 mm (4 in.)
between the rear of the dryer and any wall.
n
The operation of this appliance may affect the operation
of other types of appliances which take their air supply
for safe combustion from the same room. There has to
be adequate ventilation to replace exhausted air and
thus avoid the back-ow of gases into the room from
appliances burning other fuels, including open res,
when operating the tumble dryer. If in doubt, consult
the appliance manufacturers.
n
Do not obstruct the air supply to the dryer (see
Installation Instructions for minimum clearances).
n
Do not place items exposed to cooking oils in your dryer.
Oil-affected items can ignite spontaneously, especially
when exposed to heat sources such as in a tumble dryer.
The items become warm causing an oxidation reaction in
the oil. Oxidation creates heat. If the heat cannot escape,
the items can become hot enough to catch re. Piling,
stacking, or storing oil-affected items can prevent heat
from escaping and so create a re hazard.
n
If it is unavoidable to dry in the dryer items that have
been soiled with substances such as cooking oil,
acetone, alcohol, petrol, kerosene, spot removers,
turpentine, waxes and wax removers, or that have been
contaminated by hair care products, they should be
washed in hot water with an extra amount of detergent
before being dried in the dryer. These items may give off
vapours that could ignite or explode. Such washing will
reduce, but not eliminate, the hazard.
n
This appliance is not intended for use by persons
(including children under 8 years of age) with reduced
physical, sensory, or mental capabilities, or lack of
experience and knowledge, unless they have been
given supervision or instructions concerning use of
the appliance by persons responsible for their safety.
n
Cleaning and user maintenance by children must
be supervised.
n
Children should be supervised to ensure that they
do not play with the appliance.
n
Children less than 3 years of age should be kept away
from the appliance unless continuously supervised.
n
The dryer should not be used if industrial chemicals have
been used for cleaning.
4
IMPORTANT SAFETY INSTRUCTIONS
precautions, including the following:
WARNING:
Read all instructions before using the dryer.
Keep a minimum clearance of 100 mm (4 in.) between the
rear of the dryer and any wall.
The operation of this appliance may affect the operation of
other types of appliances which take their air supply for safe
combustion from the same room. There has to be adequate
ventilation to replace exhausted air and thus avoid the
back-ow of gases into the room from appliances burning
other fuels, including open res, when operating the tumble
dryer. If in doubt, consult the appliance manufacturers.
Do not obstruct the air supply to the dryer (see Installation
Instructions for minimum clearances).
Do not place items exposed to cooking oils in your dryer.
Oil-affected items can ignite spontaneously, especially when
exposed to heat sources such as in a tumble dryer. The
items become warm causing an oxidation reaction in the oil.
Oxidation creates heat. If the heat cannot escape, the items
can become hot enough to catch re. Piling, stacking or
storing oil-affected items can prevent heat from escaping
and so create a re hazard.
If it is unavoidable to dry in the dryer items that have been
soiled with substances such as cooking oil, acetone, alcohol,
petrol, kerosene, spot removers, turpentine, waxes and wax
removers, or that have been contaminated by hair care
products, should be washed in hot water with an extra
amount of detergent before being dried in the dryer. These
items may give off vapours that could ignite or explode. Such
washing will reduce, but not eliminate, the hazard.
This appliance is not intended for use by persons (including
children) with reduced physical, sensory or mental
capabilities, or lack of experience and knowledge, unless
they have been given supervision or instructions concerning
use of the appliance by persons responsible for their safety.
Children should be supervised to ensure that they do not
play with the appliance.
The dryer should not be used if industrial chemicals have
been used for cleaning.
Before the dryer is removed from service or discarded,
remove the doors to the drying compartment.
Do not reach into the dryer if the drum is moving. A door
switch is tted for your safety.
Do not install or store the dryer where it will be exposed
to the weather.
Do not tamper with controls.
Do not continue to use this appliance if it appears to be
faulty.
Do not repair or replace any part of the dryer or attempt
any maintenance unless specically recommended in this
Use and Care Guide. Repairs and servicing should only
be carried out by competent service personnel.
Do not use fabric softeners or products to eliminate static
unless recommended by the manufacturer of the fabric
softener or product. Follow their instructions.
Clean dryer lint screen before or after each load. Do not
operate dryer without lint screen in place.
Keep area around the exhaust and inlet openings and
adjacent surrounding areas free from the accumulation of
lint, dust, and dirt.
The interior of the dryer and exhaust vent should be
cleaned periodically by qualied service personnel.
See Installation Instructions for earthing instructions.
Do not dry unwashed items in this dryer.
Items such as foam rubber (latex foam), shower caps,
waterproof textiles, rubber backed articles and clothes or
pillows tted with foam rubber pads must only be dried
on a clothesline.
SAVE THESE INSTRUCTIONS
WARNING: Never stop a tumble dryer cycle before the
end of the drying cycle unless all items are quickly removed
and spread out so that the heat is dissipated.
To reduce the risk of re, electric shock, or injury to persons when using the dryer, follow basic
The nal part of a tumble dryer cycle occurs without heat
(cool down cycle) to ensure that the items are left at a
temperature that ensures the items will not be damaged.
If the supply cord is damaged, it must be replaced by the
manufacturer or its service agent or a similarly qualied
person in order to avoid a hazard.
4
CHECK YOUR VENT SYSEM FOR GOOD AIR FLOW
Good air ow
Along with heat, dryers require good air ow to efciently
dry laundry. Proper venting will reduce your drying times
and improve your energy savings. See Installation
Instructions.
The venting system attached to the dryer plays a big role
in good air ow.
Service calls caused by improper venting are not covered
by the warranty and will be paid by the customer, regardless
of who installed the dryer.
To maintain good air ow:
Good Better
USE AUTOMATIC DRY CYCLES FOR BETTER FABRIC CARE AND ENERGY SAVINGS
Use the Automatic Dry cycles to provide the most energy savings and enhanced fabric care from the dryer. During Automatic Dry
cycles, drying air temperature or moisture level are sensed in the load. This sensing occurs throughout the drying cycle and the
dryer shuts off when the load reaches the selected dryness. The Energy Preferred cycle will provide optimal energy savings.
With Timed Dry, the dryer runs the amount of time set and sometimes results in shrinkage, wrinkling, and static due to over-drying.
Use Timed Dry for the occasional damp load that needs a little more drying time or when using the drying rack.
n Clean your lint screen before each load.
n Replace plastic or foil vent material with 102 mm (4")
diameter heavy, rigid vent material.
n
4"
102 mm
Use the shortest length of vent possible.
n Use no more than four 90° elbows in a vent system;
each bend and curve reduces air ow.
n Remove lint and debris from the exhaust hood.
n Remove lint from the entire length of the vent system at
least every 2 years. When cleaning is complete, be sure
to follow the Installation Instructions supplied with your
dryer for nal product check.
n Clear away items from the front of the dryer.
SPECIFICATIONS
These units are sold in multiple regions with different
requirements for measuring capacity. Below are a few
of the valid forms of measure posted on this product:
Dry Linen Capacity: A weight measure that reects
a maximum load size that can be loaded into the dryer.
IEC Capacity: The capacity measure that represents
the maximum capacity of dry linens and textiles which
the manufacturer declares can be treated in a specic cycle.
Models 3LMEDC315FW
3LMEDC415FW
4KMEDC215FW
4KMEDC315FW
4KMEDC415FW
4KMEDC425FW
Rated Voltage 220–240 V 2N~ 220–240 V 2N~
Rated Frequency 50 Hz 60 Hz
Rated Current 20 Amps 20 Amps
Dry Linen Capacity
(Maximum) 15 kg (33 lb) 15 kg (33 lb)
IEC Capacity 7 kg (15 lb) 7 kg (15 lb)
Height 1067 mm (42") 1067 mm (42")
Width 737 mm (29") 737 mm (29")
Depth 706 mm (2713⁄16") 706 mm (2713⁄16")
5
CONTROL PANEL & FEATURES
WRINKLE CONTROL FEATURE (on some models)
When you are unable to remove a load of clothes from the
dryer as soon as it stops, wrinkles can form. The Wrinkle
Control feature periodically tumbles, rearranges, and uffs
the load to help keep wrinkles from forming.
n Get 40minutes of heat-free, periodic tumbling at the end
of a cycle. Turn the Wrinkle Control knob to on or off at
any time before the cycle has ended.
DRYER CYCLE KNOB
Use your Dryer Cycle Knob to select available cycles on
your dryer. Turn the knob to select a cycle for your laundry
load. See “Cycle Guide” for detailed descriptions of cycles.
TIMED DRY
Will run the dryer for the specied time on the control.
On models with a selectable temperature knob, you may
choose a setting based on the fabrics in your load. Drying
time and temperature will depend on your dryer model.
AUTOMATIC DRY
Senses moisture in the load or air temperature and shuts
off when the load reaches the selected dryness level.
Gives the best drying in the shortest time. Drying time will
vary based on fabric type, load size, and dryness setting.
1
2
3TEMPERATURE
Select a drying temperature based on the fabrics in your
load. If you are unsure of the temperature to select for a
load, select the lower setting rather than the higher setting.
START/STOP
The Cycle Signal produces an audible sound when the
drying cycle is nished. Promptly removing clothes at the
end of the cycle reduces wrinkling.
Turn the Start/Stop knob to select the desired setting
(On or Off). Press the Start/Stop knob to start the dryer.
NOTE: When the Wrinkle Control setting is selected,
the tone will sound every 5 minutes until the clothes
are removed or the Wrinkle Control setting ends.
2 31
4
4
Not all features and options are available on all models.
Appearance may vary.
2 4
6
Not all cycles and settings are available on all models.
Choose Energy Preferred cycle for optimal energy savings.
CYCLE GUIDE – AUTOMATIC DRY CYCLES
CYCLE GUIDE – TIMED DRY CYCLES
Not all cycles and settings are available on all models.
TIMED DRY – Will run the dryer for the specied time on the control.
NOTE: If loads do not seem as dry as you would like, select More Dry next time you dry a similar load. If loads seem drier than you
like, select Less Dry next time you dry a similar load.
Setting the Drying Temperature
If your dryer has multiple heat settings:
A High temperature setting may be used for drying
heavyweight items such as towels and work clothes.
A Low to Medium temperature setting may be used for drying
medium-weight items such as sheets, blouses, dresses,
underwear, permanent press fabrics, and some knits.
Use the No Heat setting for foam, rubber, plastic,
or heat-sensitive fabrics.
Line-dry bonded or laminated fabrics.
NOTE: If you have questions about drying temperatures
for various loads, refer to the care label directions.
Items to Dry: Cycle: Temperature: Available
Options: Cycle Details:
Jeans, heavy work
clothes, towels More Dry High Wrinkle Control/
Wrinkle Prevent
Temperature
Cycle Signal
Automatic cycles give the best drying in the
shortest time. Drying time varies based on
fabric type, load size, and dryness setting.
Select a drying temperature based on the
fabrics in your load. If you are unsure of the
temperature to select for a load, select the
lower setting rather than the higher setting.
Work clothes,
medium-weight
fabrics, sheets
Energy
Preferred Medium Wrinkle Control/
Wrinkle Prevent
Temperature
Cycle Signal
Casual, shirts, pants,
lightweight items,
synthetics, delicates,
athletic wear
Delicate or
Less Dry Low Wrinkle Control/
Wrinkle Prevent
Temperature
Cycle Signal
Items to Dry: Cycle: Temperature: Available
Options: Cycle Details:
Large or heavy items
such as thick towels
or robes
Heavy Dry Any Temperature Choose High to dry large or heavy loads.
Any load Damp Dry/
Freshen Up Any Temperature Dries items to a damp level or for items that
do not require an entire drying cycle.
Rubber, plastic,
heat-sensitive fabrics Air Fluff/
Air Dry No Heat Temperature No-heat drying.
7
USING YOUR DRYER
1. Clean the lint screen
Clean the lint screen before each load. Pull the lint screen out
of its holder. Roll lint off the screen with your ngers. Do not rinse
or wash screen to remove lint. Push the lint screen rmly back
into place.
For additional cleaning information, see “Dryer Care.”
2. Load the dryer
Place laundry in the dryer. Close the door.
NOTE: Your model may have a different door than the one
shown. Some models have drop-down doors.
Do not tightly pack the dryer; clothes should be able to tumble
freely.
WARNING: To reduce the risk of fire, electric shock, or injury to
persons, read the IMPORTANT SAFETY INSTRUCTIONS before
operating this dryer.
Before using your dryer, wipe the dryer drum with a damp cloth
to remove dust from storing and shipping.
8
5. Press START/STOP to begin cycle
Press and hold the Start/Stop knob to begin the cycle.
To end the cycle early, turn the Start/Stop knob to OFF.
Promptly remove garments after cycle has completed to reduce
wrinkling. Use the Wrinkle Control feature to avoid wrinkling
when you are unable to remove a load from the dryer as soon
as it stops.
4. Set cycle settings and options
Select cycle settings and options by turning the knob to the
desired position.
NOTE: Not all options and settings are available with all cycles.
Temperature
Turn the Temperature knob to change the drying temperature
setting. See “Setting the Drying Temperature.”
Wrinkle Control feature (on some models)
Get 40 minutes of heat-free, periodic tumbling at the end
of a cycle. Turn the Wrinkle Control knob to select NO
to turn off at any time before the cycle has ended.
3. Select the desired cycle
Select the desired cycle for your load. See the “Cycle Guide”
for more information about each cycle.
AUTOMATIC DRY Cycles
You can select a different dryness level, depending on your
load, by turning the knob to dryness level.
Selecting More Dry, Energy Preferred, or Less Dry
automatically adjusts the dryness level at which the dryer will
shut off. Once a dry level is set, it cannot be changed without
stopping the cycle.
Automatic Dry cycles give the best drying in the shortest time.
Drying time varies based on fabric type, load size, and dryness
setting.
NOTE: More Dry removes more load moisture. Choose Energy
Preferred for optimal energy savings. Less Dry removes less
moisture and is used for loads you may want to put on a
hanger to complete drying.
9
DRYER CARE
Keep dryer area clear and free from items that would
block the air ow for proper dryer operation. This includes
clearing piles of laundry in front of the dryer.
Cleaning the lint screen
Every load cleaning
The lint screen is located in the dryer. A screen blocked by
lint can increase drying time.
To clean:
1. Pull the lint screen out of its holder. Roll lint off the
screen with your ngers. Do not rinse or wash screen
to remove lint. Wet lint is hard to remove.
2. Push the lint screen rmly back into place.
IMPORTANT:
n Do not run the dryer with the lint screen loose,
damaged, blocked, or missing. Doing so can cause
overheating and damage to both the dryer and fabrics.
n If lint falls off the screen into the dryer during removal,
check the exhaust hood and remove the lint. See
“Venting Requirements” in the Installation Instructions.
n Clean space where lint
screen is located, as needed.
Using a vacuum, gently
remove any lint that has
accumulated outside of
the lint screen.
As-needed cleaning
Laundry detergent and fabric softener residue can build
up on the lint screen. This buildup can cause longer drying
times for your clothes or cause the dryer to stop before
your load is completely dry. The screen is probably
clogged if lint falls off while the screen is in the dryer.
Clean the lint screen with a nylon brush every 6 months,
or more frequently, if it becomes clogged due to a residue
buildup.
To wash:
1. Roll lint off the screen with your ngers.
2. Wet both sides of lint screen with hot water.
3. Wet a nylon brush with hot water and liquid detergent.
Scrub lint screen with the brush to remove residue
buildup.
4. Rinse screen with hot water.
5. Thoroughly dry lint screen with a clean towel.
Reinstall screen in dryer.
Cleaning the dryer interior
To clean dryer drum
1. Apply a liquid, nonammable household cleaner to the
stained area of the drum and rub with a soft cloth until
stain is removed.
2. Wipe drum thoroughly with a damp cloth.
3. Tumble a load of clean cloths or towels to dry the drum.
NOTE: Garments that contain loose dyes, such as denim
blue jeans or brightly colored cotton items, may discolor the
dryer interior. These stains are not harmful to your dryer and
will not stain future loads of clothes. Dry these items inside
out to avoid drum staining.
Removing accumulated lint
From inside the dryer cabinet
Lint should be removed every 2 years, or more often,
depending on dryer usage. Cleaning should be done
by a qualied servicer.
From the exhaust vent
Lint should be removed every 2 years, or more often,
depending on dryer usage.
Cleaning the dryer location
10
Vacation, storage, and moving care
Non-Use or Storage Care
Operate your dryer only when you are at home. If you will
be on vacation or not using your dryer for an extended
period of time, you should:
1. Unplug dryer or disconnect power.
2. (For gas dryers only): Close shut-off valve to gas
supply line.
3. Clean lint screen. See “Cleaning the lint screen.”
Moving Care
For power supply cord-connected dryers:
1. Unplug the power supply cord.
2. Make sure leveling legs are secure in dryer base.
3. Use tape to secure dryer door.
For direct-wired dryers:
1. Turn off power at fuse or breaker box.
2. Disconnect wiring.
3. Make sure leveling legs are secure in dryer base.
4. Use tape to secure dryer door.
For gas dryers:
1. Unplug or disconnect power to dryer.
2. Close shut-off valve in gas supply line.
3. Disconnect gas supply line pipe and remove ttings
attached to dryer pipe.
4. Cap the open fuel supply line.
5. Make sure leveling legs are secure in dryer base.
6. Use tape to secure dryer door.
Reinstalling the Dryer
Follow the Installation Instructions to locate, level,
and connect the dryer.
Changing the drum light
(on some models)
1. Unplug dryer or disconnect power.
2. Open the dryer door. Locate the light bulb cover
on the back wall of the dryer. Using a Phillips-head
screwdriver, remove the screw located in the lower
right-hand corner of the cover. Remove the cover.
3. Turn bulb counterclockwise. Replace the bulb with
a 10-watt appliance bulb only. Replace the cover and
secure with the screw.
4. Plug into a grounded outlet or reconnect power.