8Dolphin Service Kit |User Instructions
5.2 More Menu Options - Application Features
Power Supply Settings
Use this option to define the power supply settings
by selecting them and clicking Apply.
This option is available when the application is
ON and OFF.
Note: While selecting the power supply settings make sure to click the correct settings that are
relevant to the specific model.
Manual Navigation
You can use the Manual Navigation to manually maneuver your Dolphin into
specific areas and corners of your pool, by dragging the handle in the desired
directions. In this way, you can quickly and efficiently clean hard-to-reach spots.
You can also switch to Tilt mode for a more playful and realistic experience, and
maneuver your Dolphin by tilting the smartphone in various angles.
This option is only available when the application is ON.
Weekly Timer
You can use the MyDolphin™ app to set the weekly timer on your Dolphin
robotic pool cleaner. This unique planning system enables you to create a
personalized cleaning schedule for your Dolphin (per day and hour). You can set
it for one week ahead.
This option is available when the application is ON and OFF.
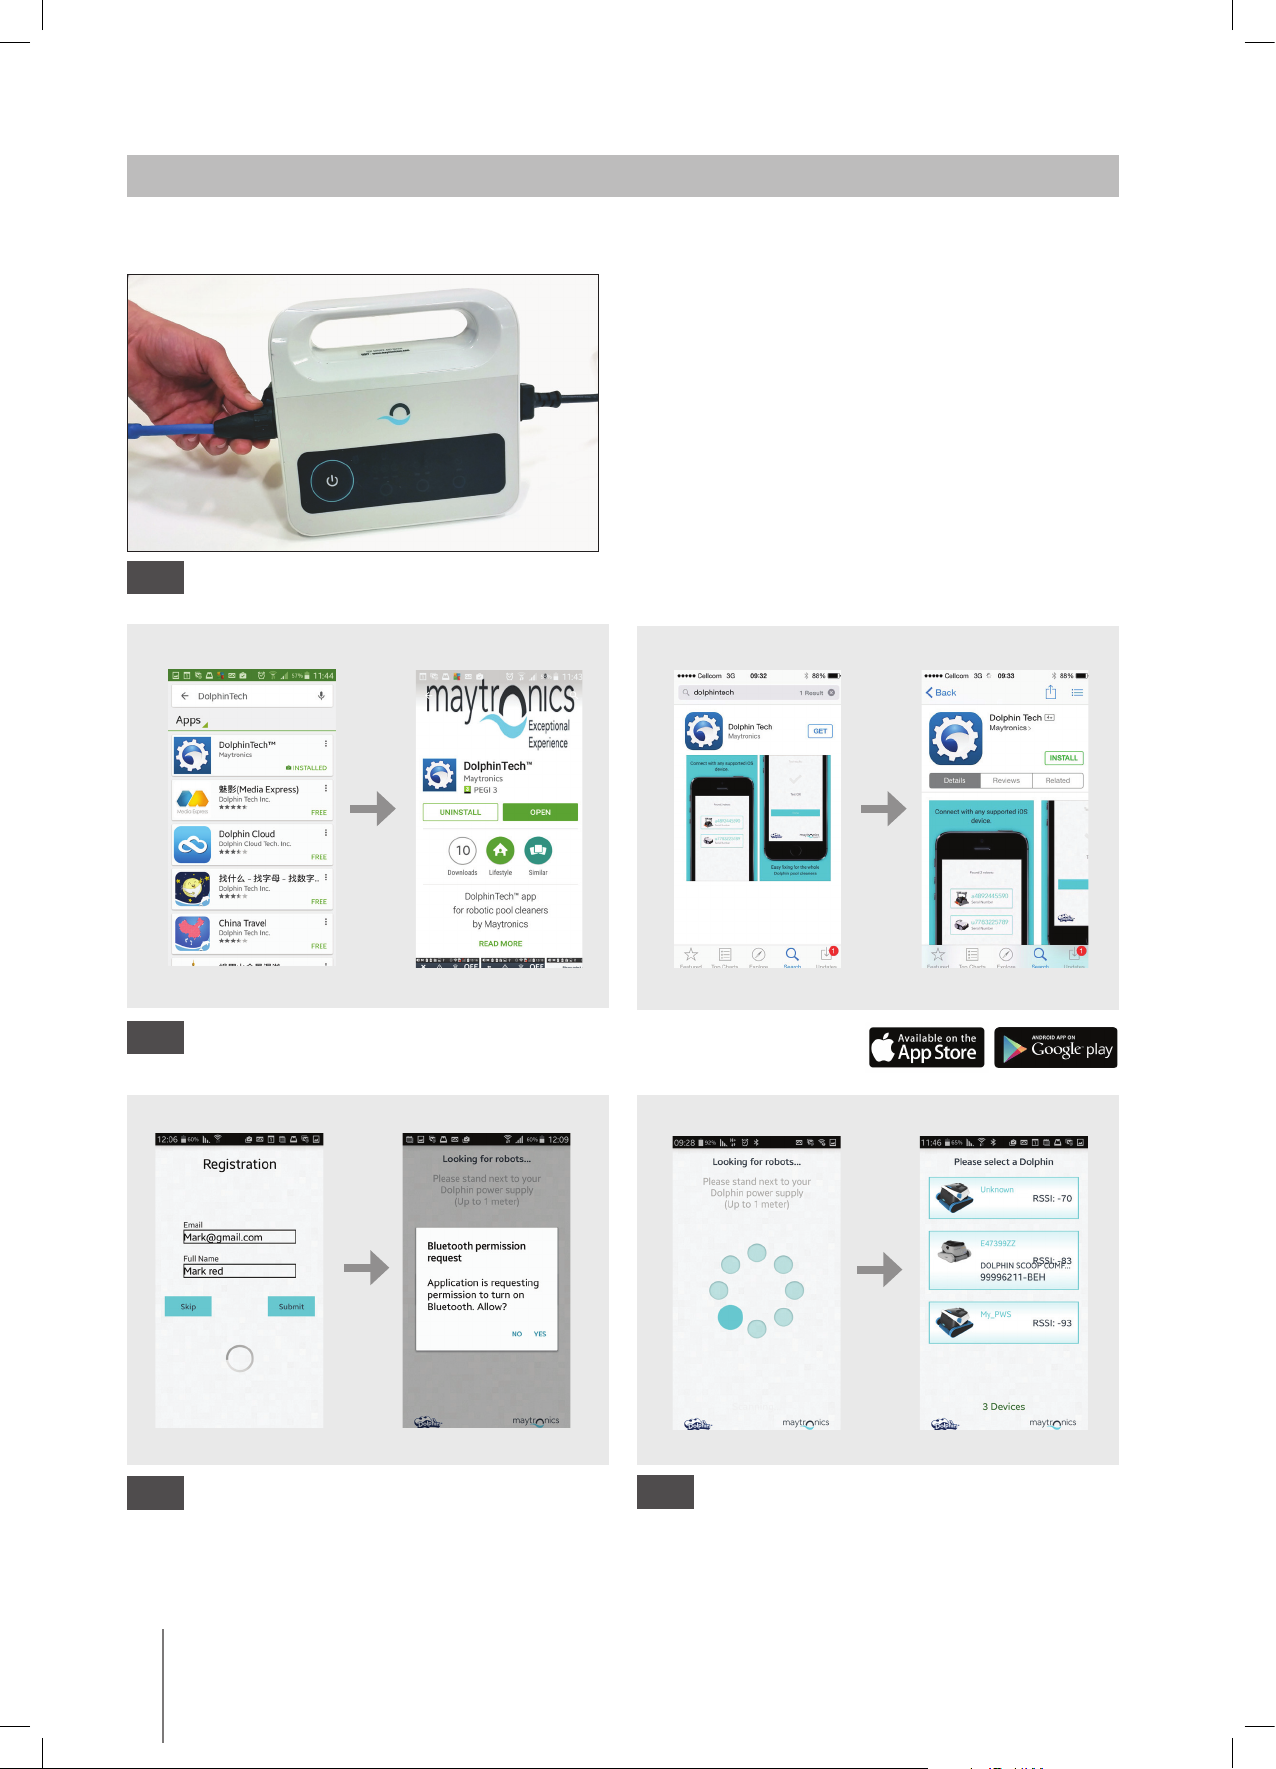
5. USING THE MORE BUTTON
Click the More button to access additional menu options.
Note: the options dier depending on whether the application is ON or OFF.
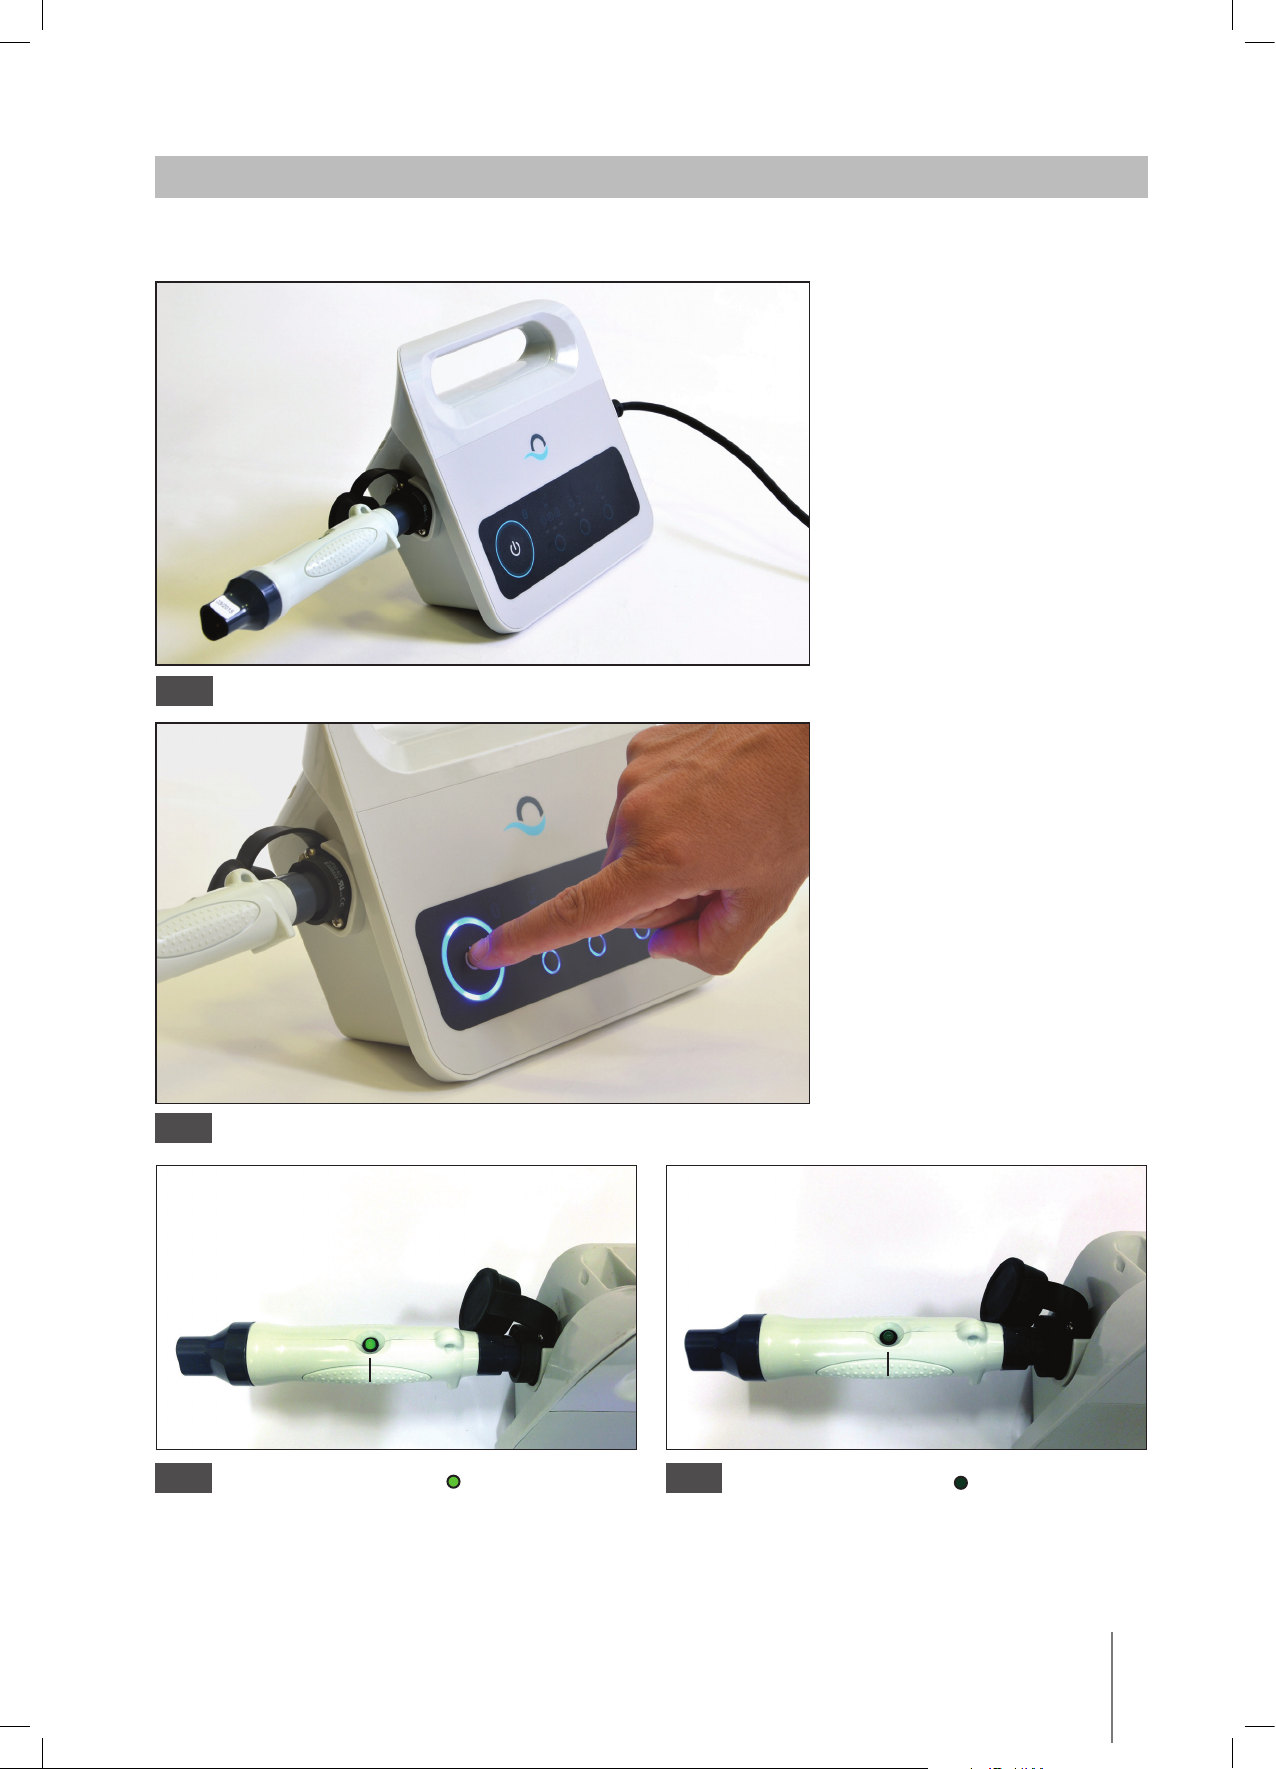
5.1 Initial Operation
5.1.1