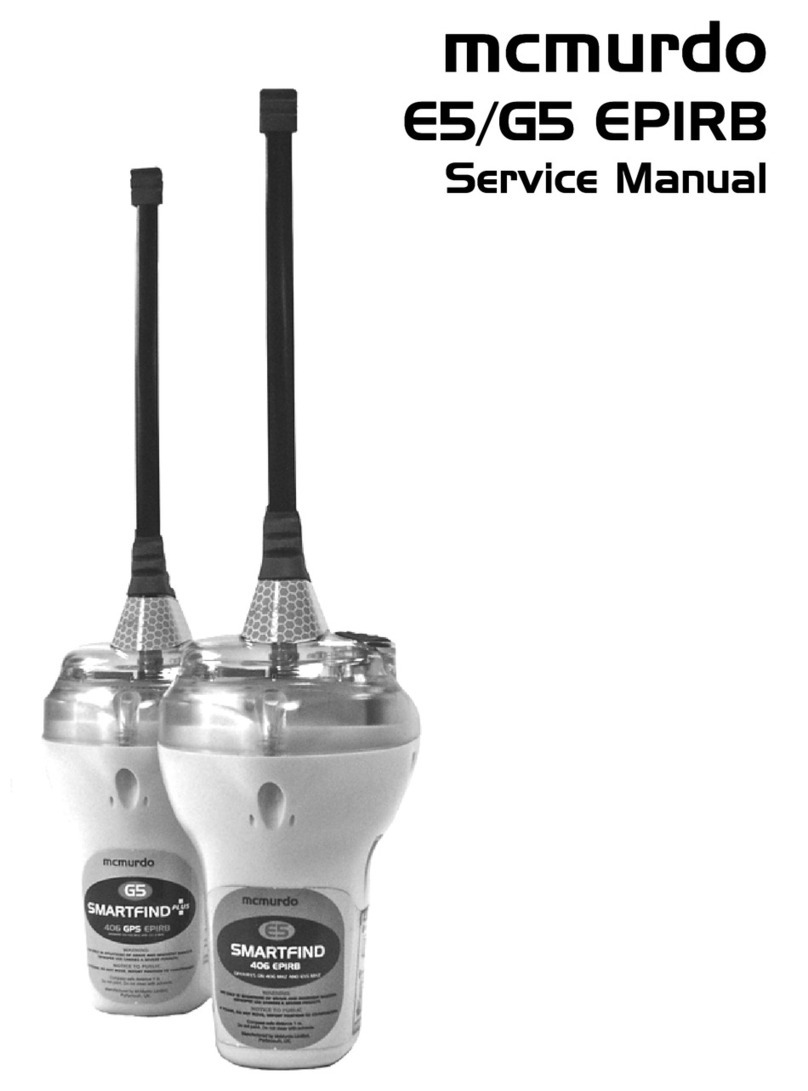
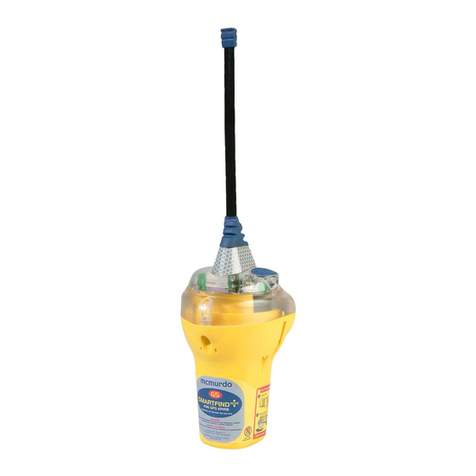
mcmurdo Fastfind Plus User manual

Fastfind & Fastfind Plus
Personal Locator Beacon
Owner’s manual

WARNING
Use only in situations of grave and imminent
danger
Register PLB with NOAA SARSAT (refer to details
on Page 2 following) before use
McMurdo Limited reserves the right to change this specification at any time
without notice, and hereby specifically disclaims liability for any consequences
of such action.

Contents
Recommendations and Safety Notices.......................................1
Registration and licensing...........................................................2
Quick Checklist ...........................................................................3
Introduction .................................................................................4
Preparation for Use.....................................................................4
Operation ....................................................................................5
Self-test .............................................................................................5
Emergency operation ........................................................................7
Switching off......................................................................................8
Using the PLB in an emergency .................................................9
How does it work?.....................................................................10
PLB Registration .......................................................................11
COSPAS-SARSAT Satellite System.........................................12
Indicators...................................................................................14
Fastfind (non-GPS version).............................................................14
Fastfind Plus (integral GPS version) ...............................................15
False Alarms and Complete Deactivation.................................17
Service and Maintenance .........................................................18
Before use.......................................................................................18
After use..........................................................................................18
Inadvertent Activation......................................................................18
Battery Packs ............................................................................18
Spare Parts .....................................................................................19
Service ............................................................................................19
Verification ......................................................................................19
Specification..............................................................................20
McMurdo Limited Product Warranty .........................................22
IMPORTANT
Please take time to read this manual carefully and
to understand its contents fully, so that you can
maintain your PLB and operate it correctly in case
of an emergency


Page 1
Recommendations and Safety Notices
This Fastfind or Fastfind Plus Personal Locator Beacon (PLB) is an
emergency radio beacon for use only in situations of grave and imminent
danger.
False alarms cause expensive disruption to search and rescue services,
and may endanger lives. Deliberate misuse of the PLB can result in a
severe penalty.
Make sure you read this manual and understand how to activate/de-
activate your PLB, and how to change the battery packs. Ensure that the
PEPIRB is registered with NOAA SARSAT office in Suitland, MD. Failure
to register may lead to prosecution.
The PLB and battery pack contain no user-serviceable parts. Do not
dismantle the PLB or the battery pack. Battery packs contain lithium
batteries. Do not incinerate, puncture, deform, or short-circuit. Dispose of
spent battery packs safely and in accordance with local waste disposal
regulations.
The PLB is a radio transmitter, and as such emits radio frequency
radiation when activated. This radiation is classified as harmless because
of the levels and duty cycles; however it is advisable not to handle the
antenna while the unit is transmitting.

Page 2
Registration and licensing
Each PLB is programmed with a unique digital identity before reaching
the customer. This 15 digit hexadecimal number appears on the
programming information label located on the back of the PLB (visible
when the battery pack is removed), and is pre-printed on the registration
card included in the PLB pack. This is the identity which is transmitted to
the satellite system when the PLB is activated.
The registration form must be completed, signed, and forwarded to the
NOAA SARSAT office in Suitland MD by fax or mail as soon as possible.
The registration forms are pre-printed with the correct mailing address
and fax number. Registration will also be available on-line (anticipated
date: August 1 2003) at http://www.sarsat.noaa.gov,or forms may be
downloaded now for completion off-line. Use the PLB form in both
cases.
Emergency Contact
It is VITAL that the Emergency Contact information is accurate,
particularly regarding the telephone number, as this will be used to
validate an alert. Only if the beacon registration and approximate location
details can be confirmed will AFRCC (the Air Force Rescue Coordination
Center) launch an immediate rescue, otherwise there will be a delay
whilst further alerts from the same source are received and verified.
You will be sent a sticker which must be attached to the PLB. The most
convenient place for this is on the front of the unit clear of the recess for
opening the cover.
Registration address:
NOAA SARSAT Beacon Registration
E/SP3, RM 3320, FB-4
5200 Auth Road
Suitland MD 20746-4304
FAX: 301-568-8649
Helpline: 301-457-5678 or toll-free: 1-888-212-SAVE (7283).

Page 3
Quick Checklist
Do:
•Test the PLB before taking it on a trip
•Ensure that the PLB is registered with NOAA
SARSAT
•Make sure that you know how to activate and
position the PLB in an emergency
•Check the battery expiry date
Don’t:
•Activate the PLB unless there is a genuine
emergency
•Tamper with the red cover or antenna
•Test the PLB more than once per month (on
average)

Page 4
Introduction
Congratulations on your discerning purchase of this Fastfind 406MHz
PLB. This beacon has been designed to ensure your peace of mind by
providing you with many years trouble-free service. If you have any
problems or require further help and advice, please do not hesitate to
contact your retailer, distributor or McMurdo directly.
The Fastfind and Fastfind Plus PLBs are Personal Locator Beacons. In an
emergency, activating the beacon causes an alarm to be transmitted to
the rescue services through the COSPAS-SARSAT satellite array. This
alarm enables the user’s location to be established; the PLB also
transmits a local homing signal to direct the rescue mission.
The Fastfind PLB uses the satellite system to establish the position of the
emergency; the Fastfind Plus incorporates a GPS (Global Positioning
System) module which pinpoints the user’s position directly and sends
this information to the satellite for onward transmission.
Preparation for Use
List of contents
PLB
Belt bag
Lanyard
User manual (this document)
Open the box and check the contents. Test the PLB in accordance with
the instructions in the next section of this manual.
Belt bag
The belt bag is for carrying the PLB hands-free. Fit the bag to the belt.
Attach the lanyard to the PLB by removing the battery securing screw, as
described on Page 15. Clip the lanyard to the D-ring inside the bag, then
place the PLB in the bag and close the self-sealing cover. To remove the
PLB, pull open the cover and extract the PLB.

Page 5
Operation
Self-test
The PLB should be tested before setting out, but testing should be limited
to about 12 times per year to minimise the total power taken from the
battery.
Self-test should only be carried out in the first five minutes of any hour.
Open the flip-top lid. Do NOT pull off the red anti-tamper cover.
Self-test uses the OFF/Test button, located under the flexible handle of
the red anti-tamper cover on the right side as shown above.
Slide a finger under the flexible handle of the anti-tamper cover to
operate the switch. Press the switch and HOLD IT DOWN until the self-
test sequence is completed. This will take about 8 seconds. While the
button is held down and the self -test sequence is in progress the red
indicator light marked “ON” (above the switch) will illuminate.
Emergency ON
button
Self-test/OFF
button
PLB control panel
(Fastfind shown)
Green lamp
Red lamp

Page 6
Self-test
On successful completion of the self-test sequence, the green light on the
left will flash 3 times and the buzzer will sound 3 times. The PLB will
switch itself off after completing a self-test, even if the OFF button is still
held down. Release the button and close the flip-top lid.
If the self-test fails, repeat it. If the problem persists, check the battery
expiry date. Do not use the PLB; return it to a dealer.

Page 7
Emergency operation
Important: DO NOT pull off the red anti-tamper cover unless you are
activating the PLB in an emergency. Make sure the PLB is firmly
anchored to lifejacket, clothing, or person (eg with a strap) before
activating.
Raise the flip-up lid to expose the red anti-tamper cover. Once opened,
the flip-up lid can be pulled off the PLB and discarded if necessary. Grasp
the handle part of the red anti-tamper cover, and pull sharply away from
the PLB body. This uncovers the START/ON button. The antenna will
spring into an upright position as soon as the anti-tamper cover is
removed.
Locate and press the large START/ON button located in the centre of the
PLB switch panel. THE START/ON BUTTON MUST BE HELD DOWN
FOR ABOUT 1 SECOND.
The indicator lights will show the status of the PLB. When the indicator
lights are flashing, the PLB is transmitting. A full table of the status
indications is given in the section “Indicators”. The PLB will continue to
transmit for a minimum of 24 hours.
Important: Transmissions do not start until the PLB has been active for 2
minutes. This is to allow time to switch the unit off in the event of
accidental activation, preventing a false alert being sent to the search and
rescue services. During this period the red indicator light comes on
continuously on both the Fastfind and Fastfind Plus models.
Pulling anti-tamper cover from PLB Antenna erected

Page 8
Switching off
To switch off the PLB after it has been activated in an emergency (eg
when rescue has been effected), press the OFF button and hold it down
until the indicator lights go off and the buzzer stops sounding.
A five second delay is built in to the operation of the OFF switch to
prevent inadvertent de-activation during an emergency situation. After
operating the OFF button, confirm that both indicator lights are
extinguished and that the buzzer has stopped.
PLB antenna erected

Page 9
Using the PLB in an emergency
Do:
•Keep PLB flat with antenna vertical
•Try to place PLB where it has a clear view of
the sky
Don’t:
•Obscure or hold the antenna
•Place PLB next to large metal objects
•Submerge antenna
Ideal position for PEPIRB in open area

Page 10
How does it work?
Once you activate the PLB, the PLB transmits a continuous series of
radio signals on 406 MHz. Providing the PLB’s batteries are in good
condition, the signal should continue for a minimum of 24 hours. These
signals can be detected by aircraft within range and by orbiting and
geostationary satellites. The Commerce Department’s National Oceanic
and Atmospheric Administration (NOAA) operates a series of satellites in
low-earth and geostationary orbits to detect and locate aviators, mariners
and land-based users in distress. The satellites, along with a network of
ground stations and the U.S. Mission Control Center (MCC) in Suitland,
MD, are part of the International Cospas-Sarsat Program whose mission
is to relay distress signals to the international search and rescue
community.
The PLB transmits radio signals to a constellation of Cospas-Sarsat
satellites. Ground stations track these satellites and process the distress
signals to obtain a location (by using Doppler location techniques) of the
distress. The processed information is then forwarded to an MCC where
it is combined with other location and registration information and passed
to the Air Force Rescue Coordination Center (AFRCC) who alert the
appropriate SAR authorities. Successive satellite passes refine and
confirm this information. Alternatively, some beacons operating at the 406
MHz frequency can use the GPS system to obtain a very accurate
position to within 200 feet. This position is then transmitted as part of the
distress signal.
GPS systems do require a clear view of the sky in order to work
effectively. Positions where the sky area is obscured significantly, such
as under a tree canopy or in a steep-sided canyon, may result in the GPS
system failing to acquire its position correctly. Under such conditions the
GPS system “fails safe”; it does not transmit an inaccurate position, but
instead sends information to indicate that no position is available.
Position information is then dependent on the orbiting satellite system,
with its 3 miles accuracy. However, the homing signal from the 121.5
MHz transmitter is detectable from the air and in some cases from the
ground and may be of great value in refining the position of the beacon.
The Cospas-Sarsat program is operated in the United States by NOAA,
the U.S. Coast Guard, U.S. Air Force and NASA. Since the inception of
the system in 1982, over 14,000 lives have been saved world-wide and
nearly 4,500 persons have been rescued just in the United States.
The network of orbiting satellites can detect signals over the entire
surface of the earth; in addition, there are four geostationary satellites that
appear fixed in position and which detect signals over enormous areas
(approximately one-third of the surface of the earth, but excluding Polar
regions).

Page 11
If an aircraft hears an activated beacon, it will immediately make a report
to the Federal Aviation Administration who will pass this information to the
Air Force Rescue Coordination Center (AFRCC). Detection of the beacon
by aircraft or satellites is highly dependent on the beacon placement and
antenna position. Once activated, the beacon should be placed in a clear
area with as clear a view of the sky as possible, and with the antenna fully
extended and as vertical as possible.
A beacon should not be switched off once activated for a distress
situation until the SAR agency directs this.
PLB Registration
It is ESSENTIAL that you register your PLB with NOAA SARSAT at
Suitland, MD, as described on Page 2.
Registration helps reduce the number of false alarms and hoax calls, and
so makes the rescue service more efficient.
On receipt of a PLB alert, the SAR organization (ie AFRCC) will firstly try
to check that the registered owner of the PLB has not accidentally
activated the beacon. They will then try to confirm the approximate
location before launching a rescue mission. This is another good reason
for ensuring that somebody at your home knows where you are going. For
the same reason, you should not lend your PLB to anybody unless you
know what they are planning to do with it - you (or your named contact)
will be the person contacted if an alert is generated.

Page 12
COSPAS-SARSAT Satellite System
This diagram shows the path the distress signal takes from the PLB
through the satellite and ground station to the Search and Rescue
organization, as was described on Page 10.
The orbiting satellites circle the entire Earth; the illustration shows the
satellite “footprint” (the area each satellite sees as it passes).
System graphic and GOES images ©NOAA, LEOSAR satellite courtesy of
COSPAS-SARSAT

Page 13
The images below show the coverage areas of the geostationary NOAA
satellites over North America. GOES-W can see the entire continent,
although the East coast is marginal; only Alaska and Hawaii are invisible
to GOES-E. Consequently, coverage overlaps over virtually all the
continental US and there is always one satellite which can see any place.
This means that a GPS-fitted PLB will have its distress position known
almost instantaneously - provided that the GPS system can determine
the position, as described on Page 10.
GOES-W
GOES-E

Page 14
Indicators
Fastfind (non-GPS version)
PLB SELF-TEST
Event Self-test button pressed and held Self-test completed and passed
Red Light On while self-test sequence in
progress
(approx 8 seconds)
Off
Green
Light
Off Flashes 3 times
Buzzer Off Sounds 3 times
EMERGENCY OPERATION
First 2 minutes After 2 minutes
Event Start/On button pressed 121.5MHz homing transmitter
on.
406 MHz burst transmission
Red Light On continuously for first 2
minutes
Flashes every 2.5 seconds
except during a 406 MHz
burst transmission
Off
Green
Light
Off Off Long flash for 2 seconds every 50
seconds, then off.
Buzzer Sounds approx every 2.5 seconds
DIAGNOSTIC INDICATIONS SPECIAL
MODES
Event Self-test button
pressed and
held
Self-test
completed
During operation Protocol
Programming
Red Light Off Flashes 3
times
Does not flash Flashes every
2.5 seconds
Flashes
continually.
Green
Light
Off Off Long flash for 2 seconds
every 50 seconds, then
off.
Does not flash -
Buzzer Off Off - - -
Meaning No power to PLB Self-test
failure
No 121.5MHz signal No 406 MHz
signal
Programming
mode.
Action
to be
taken
Check battery
pack is secure.
Replace battery
pack. Return unit
to dealer if
problem persists.
Do not use.
Return unit to
dealer.
None.
Unit is still broadcasting
406MHz signal.
None.
Unit is still
broadcasting
121.5MHz
signal.
Programming
can only be
carried out by an
authorised
dealer using
special
equipment.

Page 15
Fastfind Plus (integral GPS version)
PLB SELF-TEST
Event Self-test button pressed and held Self-test completed and passed
Red Light On while self-test sequence in progress (approx 8 seconds) Off
Green Light Off Flashes 3 times
Buzzer Off Sounds 3 times
EMERGENCY OPERATION
First 2
minutes
After 2 minutes
Event Start/On
button
pressed
121.5MHz
homing
transmitter
on.
406 MHz
burst
transmission
406 MHz
burst
transmission
with GPS data
less than 20
minutes old
406 MHz burst
transmission with GPS data
more than 20 minutes old
Red Light On
continuously
for first 2
minutes
Flashes
every 2.5
seconds
Long flash for
2 seconds
every 50
seconds.
Then flashes
every 2.5
seconds.
Long flash for
2 seconds
every 50
seconds.
Then flashes
every 2.5
seconds.
Long flash for 2 seconds
every 50 seconds.
Then flashes every 2.5
seconds.
Green Light Off Off Off On for 2
seconds every
50 seconds.
Then flashes
every 2.5
seconds.
Comes on in
time with red
light.
On for 2 seconds every 50
seconds (approx), then off.
Buzzer Sounds approx every 2.5 seconds

Page 16
DIAGNOSTIC INDICATIONS SPECIAL
MODES
Event Self-test
button
pressed and
held
Self-test
completed
During operation Protocol
Programming
Red Light Off Flashes 3
times
Only flashes
for 2 seconds
every 50
seconds
Flashes every
2.5 seconds,
but no long (2
second) flash
- Flashes
continually.
Green
Light
Off Off - - Does not flash -
Buzzer Off Off - - - -
Meaning No power to
PLB
Self-test
failure
No 121.5MHz
signal
No 406 MHz
signal
GPS has not
been able to
acquire a fix
since switch-
on
Programming
mode.
Action
to be
taken
Check battery
pack is
secure.
Replace
battery pack.
Return unit to
dealer if
problem
persists.
Do not use.
Return unit
to dealer.
None.
Unit is still
broadcasting
406MHz
signal.
None.
Unit is still
broadcasting
121.5MHz
signal.
If possible,
make sure
GPS view of
the sky is not
impaired.
Flashing red
light shows
status of
121.5 & 406
MHz
transmissions.
Programming
can only be
carried out by
an authorised
dealer using
special
equipment.
Other manuals for Fastfind Plus
1
This manual suits for next models
1
Table of contents
Other mcmurdo Security Sensor manuals
Popular Security Sensor manuals by other brands

PCB Piezotronics
PCB Piezotronics 482C24-SU Installation and operating manual

GeoMax
GeoMax EZiSYSTEM i Series user manual

Berkeley Varitronics Systems
Berkeley Varitronics Systems Yorkie Quick start user guide

LEGRAND
LEGRAND Tynetec ZXT805 manual

Procon
Procon LD200 installation guide

Honeywell
Honeywell SiXGB installation instructions