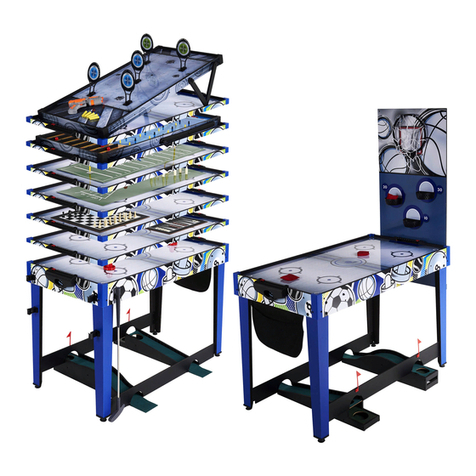
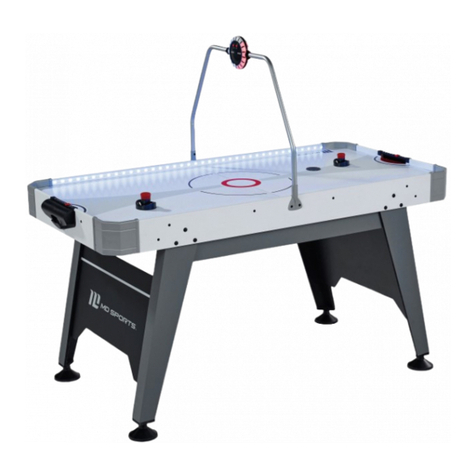
MD SPORTS 18407 User manual

ASSEMBLYINSTRUCTIONS
INSTRUCClONESDEARMADO
Please contact us before returning the product to the store.
Toll Free: 877-852-8164
Pot favor p6ngase en contacto con nosotros antes de
devolver el producto a la fienda.
Nemero telef6nico gratis 877-852-8164
MODEL/MODELO: 18407

This product is covered by a limited warranty that is effective for 90 days
from the date of purchase. The warranty covers any defects in parts and
workmanship.
This Limited Warranty gives you specific legal rights and you may also have
other rights which very from one stare (province) to another.
If, during the limited warranty period, a part is found to be defective or
breaks, we will offer replacement part at no cost to you, the customer. The
only exceptions to the warranty include main frames, tabletops, playing
surfaces, batteries or tools.
The above warranty will not apply in cases of damages due to improper
usage, alteration, misuse, abuse, accidental damage or neglect.
l__Since you build all tables upside down, please inspect table tops
and playing surfaces right away before putting together.
"PLEASE SAVE THESE INSTRUCTIONS
AND PURCHASE RECEIPT!"
A PURCHASE RECEIPT (or other proof of purchase date) will be required
before any warranty service is initiated. All requests for warranty service can
be submitted by email, in writing or by contacting our Consumer service
Department at:
TOLL FREE: 877-852-8164
WEBSITE" www.medalsports.com.tw
*Please do not carl our 800 NUMBER as well as emafl us. This will result in
duplicate orders and charges will occur.
*Please note that all damaged table tops need to be returned to the store.
We do not replace any tabletops or playing surfaces.
PLEASE CONTACT US BEFORE RETURNING THE
PRODUCT TO THE STORE. THANK YOU VERY MUCH!

Please Keep Your Instructions! Your Model number is necessary should you need to contact
us. Please read through this instruction manual book to familiarize yourself with all parts and
assembly steps. Kindly refer to the parts identifier below and be sure that all parts have been
included.
Although we are dedicated to giving our customers the best product possible, a question may
arise or parts may be missing. If you are missing parts, or, if you have any questions, please
contact our fast and friendly service centre on: 877-852-8764
Phillips Screwdriver- Not Included
Standard (Flat Head Screwdriver)- Not Included
Allen Wrench - Included
Electric Screwdrivers may be helpful during
assembly; however, please set a low torque
and use extreme caution.
Power Tools
- Set Low
High Torque
over tightene
1 - Please read the instructions carefully, and follow all assembly, operation or safety instructions
properly in order to avoid damage or injury. For the assembly, at least two adults are required.
2 - Some figures or drawings may not look exactly like your product. Please read and understand
the text before beginning each assembly step.
1 - This product is intended for INDOOR use only.
2 - Please Do Not sit, climb or lean on the game table.
3 - Please Do Not drag the table when moving it in order to avoid the damaged on the legs.
4 - Please only use spray furniture polish to clean the exterior surfaces on the game table.
5 - This is not a child's toy, adult supervision is required for children playing this game.
WARNING" Adult Assembly Required.
WARNING"
CHOKING HAZARD - - This item contains small parts or /and small balls
Not suitable for children under 3 years.
2

iMPORTANT SAFETY iNSTRUCTiONS
Read all instructions
1. Read all instructions-All the safety and operating instructions should be read carefully before this hockey game is
played.
2. Caution-This is not a toy and is intended for use by or under the supervision of adults. Adults should review safety
guidelines with children to avoid possible risk of electric shock or other injuries.
3. Power sources-This hockey game should be operated only from 110-120VA.C., 60 cycle current as indicated on
the identification label. If you are not sure of the type of power supply to your home, consult your appliance dealer
or local power company.
4. Power cord protection-Power cord should be routed so that it is not likely to be walked on or pinched by items
placed upon or against it. Pay particular attention to cords at plugs, convenience receptacles, and the point of
exit from the game.
5. Overloading-Do not overload wall outlets and extension cords as this can result in a risk of fire or electric shock.
6. Object and liquid entry-Never push objects of any kind into this game through openings as they may touch
dangerous voltage points or short-out parts which could result in a fire or electric shock. Never spill liquid of any
kind on the game.
7. Ventilation-Openings in the game are provided for the exhaust air to create a cushion effect. The openings on the
air blower are for the intake air. Keep clear of the air blower when it is on. Do not put hand or other objects near
the intake openings. To ensure reliable operation of the game and protect it from overheating these openings must
not be blocked or covered.
8. Damage requiring service-Unplug the game from the wall outlet.
Do not attempt to service the blower yourself as opening or removing covers may expose you to dangerous
voltage or other hazards. Refer servicing to qualified service personnel under the following conditions.
A. When the power supply cord or plug is damaged.
B. If liquid has spilled, or objects have fallen into the blower.
C. When the air blower exhibits a distinct change in performance e.g. abnormal noise, this indicates a need for
service.
9. Grounding or Polarization-This game is equipped with a polarized alternating current line plug (a plug having one
blade wider than the other). This plug will fit into the power outlet only one way. This is a safety feature. If you are
unable to insert the plug fully into the outlet, try reversing the plug. If the plug should still fail to fit, contact your
electrician to replace your obsolete outlet. Do not defeat the safety purpose of the polarized plug.
10. CAUTION-ELECTRICALLY OPERATED PRODUCT-Not recommended for children under 8 years of age. As with
all electrical products, precautions should be observed during handling and use to reduce the risk of electric
shock.
11. We recommend that the game be periodically examined for conditions that may result in the risk of fire, electrical
shock, or injury to persons. In the event such conditions exist, the game should not be used until properly
repaired.
12. RISK OF FIRE, ELECTRIC SHOCK, OR INJURY TO PERSONS
WARNING-When using electric appliances, basic precautions should always be followed, including the following:
A) Read all the instructions before using the appliances.
B) To reduce the risk of injury, close supervision is necessary when an appliance is used near children.
C) Do not contact moving parts.
D) Only use attachment recommended or sold by the manufacturer.
E) Do not use outdoors.
F) For a cord-connected appliance, the following shall be included:
-To disconnect, turn all controls to the off position, then remove plug from outlet.
-Do not unplug by pulling on cord. To unplug, grasp the plug, not the cord.
-Unplug from outlet when not in use and before servicing or cleaning.
-Do not operate any appliance with a damaged cord or plug, or after the appliance malfunctions or is dropped or
damaged in any manner. Return appliance to the nearest authorized service facility for examination, repair, or
electrical or mechanical adjustment.
13. To reduce the risk of electric shock, this appliance has a polarized plug (one blade is wider than the other).This
plug will fit in a polarized outlet only one way. Ifthe plug does not fit fully in the outlet, reverse the plug. If it still
does not fit, contact a qualified electrician to install the proper outlet. Do not change the plug in any way.
SAVE THESE INSTRUCTIONS
WARNING: To Reduce The Risk Of Fire Or Electric Shock, Do Not Use This Fan With Any Solid-State Speed
Control Device.
3
18407 PARTS LiST
Main Cabinet
1 Piece Side Apron
2 Pieces End Apron - A
1 Piece
U
End Apron - B
1 Piece
...y
Leg - A
4 Pieces
Leg - B
4 Pieces
Table Tennis Paddle
2 Pieces
Pusher
2 Pieces
.d
Leg Panel
4 Pieces Table Tennis Surface - A
2 Pieces Table Tennis Surface - B
1 Piece
J
Table Tennis Net
1 Piece
©
Table Tennis Ball
2 Pieces
Pre-installed
Blower
1 set EVA Pad
12 Pieces Table Tennis Post
2 Pieces
C>
Puck
2 Pieces Felt Pad
2 Pieces Goal Box
2 Pieces
Pre-installed
J
Puck Catcher
with Long Sensor Wire
1 Piece
Apron Corner
4 Pieces
J
5/16" x 1-1/4" Bolt
12 Pieces
%
5/16" Washer
22 Pieces
U
5/16" x 7/8" Bolt
10 Pieces
4 x 15mm
Washer Head Screw
20 Pieces
3 x 15mm
Washer Head Screw
40 Pieces
Leg Leveler
4 Pieces
Allen Key
1 Piece
4 x 12mm
Washer Head Screw
28 Pieces
©
Goal Cover
2 Pieces
4 x 15mm
Flat Head Screw
2 Pieces
<b
1/4" Nut
4 Pieces
Pre-installed
Control Box
1 Piece L Bracket
4 Pieces
U Bracket
4 Pieces
Plastic Dowel
6 Pieces
Pre-installed
Scorer Display
2 Pieces
Pre-installed
Time Display
1 Piece
_ Pre-installed
Scorer Wire
1 Piece
_ Pre-installed
Time Wire
1 Piece
4

Pre-installed
f
Puck Catcher
with Short Sensor Wire
1 Piece
1/4" Washer
4 Pieces
Pre-installed
Battery Box
1 Piece
Pre-installed
Square Nut and Screw
4 Sets
Pre-installed
Top Corner
4 Pieces
Pre-installed
T - Nut
12 Pieces
Wrench
1 Piece
U
1/4" x 1-1/4" Bolt
4 Pieces
WARNING:
1) Require 4pcs AA Batteries (Not included).
2) Do not mix old and new batteries.
3) Do not mix alkaline, standard (carbon zinc), or rechangeable (nickel-cadmium) batteries.
ASSEMBLY iNSTRUCTiONS
1. Find a clean, level place to begin the assembly of your Air Hockey table. The table will be assembled upside down
and then turned over on its legs once the assembly completed. This game table is heavy, and tuning it over will
require at least four strong adults.
2. Remove all the parts from the box and verify that you have all of the listed parts as shown on the parts list below.
Carefully cut or tear the four corners of the box so that the bottom of the box can be used as your work surface.
3. Attach the Side Apron (#2) to the Main Cabinet (#1) using five Bolts (#24) and five Washers (#23) per Side Apron.
See FiG. 1.
5

4. Attach the Goal Box (#19) to the End Aprons (#3 and #4) using two Screws (#27) per Goal Box. See FIG.2.
5. Attach the Apron Corner (#21) to the End Aprons (#3 and #4) using six Screws (#27) per side. See FIG.2.
6. Attach the End Apron with Apron Corners (FIG .2 assembled) to the Main Cabinet (#1) using two U Bracket (#30),
two Bolts (#45), two Washers (#46), two Nuts (#29) and eight Screws (#25) per End ApronSee FIG.3A.
7. Attach the L Bracket (#34) to the Main Cabinet (#1) using one Screw (#25) per L Bracket. See FIG.3B.
8. Attach the Apron Corner (#21) to the Side Apron (#2) using three Screws (#27) per Apron Corner. See FIG.3.
/Y
\i /
\/
!
\ ,,
@/
/
6

9. Attach the Leg Panel (#7) to the Leg - A (#5) using four Screws (#26) per Leg Panel. See FIG.4.
©
\\
®
10. Attach the Leg - B (#6) to the Leg Panel (#7) using six Screws (#26) per Leg - B. See FIG.5.
/
/
@
7

11. Attach the Leg (pre-assembly) to the Main Cabinet (#1) using three Bolts (#22) and three Washers (#23)
See FIG.&
12. Screw the Leg Leveler (#31) into the Leg. See FIG.&
13. Attach the Goal Cover (#32) to the opening of End Apron. See FIG.6.
14. Attach the Control Box (#33) to the End Apron -B (#4) using two Screws (#28). See FIG.6.
15. Plug the Sensor Wire, Scorer Wire, Time Wire and Battery Box Wire to the Control Box (#33). See FIG.6A
I
\,@
Sensor Wire
Battery Box Wire
Scorer Wire
Time Wire
8

16. Lift the table assembly from the floor with at least four strong adults, turn it over, and set the table assembly on
its legs in the location where you play. Go back and make sure that all connections are tight.
CAUTION: Four strong adults are recommended to turn the table over as shown.
1. Lift the table off the ground.
2. Turn the table over.
3. Place it on all four feet at the same time on the ground.
CABINET DO NOT DO NOT LEAN THE
HOLD TABLE HOLD THE TABLE ON ITS LEGS!
LEGS
17. Tear off the backside paper of the EVA Pad (#14) and stick them at the bottom of the Table Tennis Surface (#8 and
#9). See FIG.7.
18. Insert the Plastic Dowel (#35) into the holes on the Table Tennis Surface. See FIG.7A. And assemble the Table
Tennis Surface - A (#8) and Table Tennis Surface - B (#9) together.
9

19. Place the Table Tennis Surface (#8 and #9) onto the hockey surface and insert the Net Posts (#15) and Net (#10).
See FIG.8.
20. Tear off the backside paper of the Felt Pad (#18) and stick them at the bottom of the Pushers
(#16). See FIG.8.
NOW YOU ARE READY TO PLAY!
10

ELECTRONIC SCORER OPERATION
1. Plug in the power cord and switch power to "ON". "Time" displayed will be "15:00" accompanied with a "fifteen
minute" warning.
2. Press the "MINUTES" button to set up playing time.
3. Press "START/RESET" to begin game play. The time display will count down after the music stops.
4. When the "HOME" player scores, "HOME" indicator will show 1 point.
5. When the "VISITOR" player scores, "VISITOR" indicator will show 1 point.
6. Score only counts when goal made after cheering sound is finished.
7. Once game is started, the "Minutes" button cannot be adjusted. This only option is to reset the time to the
starting time.
NOTE: THIS WILL RESET THE SCORES TO ZERO
8. The scorer will turn off automatically when idle for 5 minutes.
9. Press "MINUTES" or" START/RESET" to turn on the scorer again after the stoppage period.
This device complies with the part 15 of the FCC rules. Operation is subject to the following
two conditions :
(1) This device may not cause harmful interference, and
(2) This device must accept any interference received, including interference that may
cause undesired operation.
11

Inlay E|ectronic Scorer Trouble Shooting Guides
NO Conditions Trouble Shooting Soh'ent
i. Pls check the "power switch of Battery Box" if it is tamed on. Turn on the power switch of Battery Box.
No sound on Control 2. Pls check the "power switch of Control Box" if it is turned on. Tum on the power switch of Control Box.
A Box and no nnmbers 3. Pls check the "battery box wire" if it is plugged into the Control Plug or Re-plug the battery box wire into the Control Box. Pls check if
displayed on Scorers Box and connected well batteries are installed in the Battery Box.
Result: If it's tailed as above 3 steps, and then... Replace a new Control Box and Battery Box.
i. Pls check the button-"SOUND ON OFF" on the Control Box if Re-press the button-"SOUND ON OFF" on the Control Box.
B No sound on Control it is tamed on.
Box If this fails to resoh'e the problem, Replace a new Control Box.
1. Pls check the "Time Display Wire and Scorer Display Wire" if" Re-plug the Time Display Wire and Scorer Display Wire into the Control
both are plugged into the Control Box well Box.
Interchange the Time Display Wire and Scorer Display Wire, and plug into
the Control Box, it will come out the conditions as following a.b:
2. No nmnbers displayed on "Timer" but on 1 or 2 pes Scorers. a) If'numbers are displayed: Replace a new Time Display and Time
Display Wire.
b) If no nnmbers on Timer: Replace a new Control Box.
No numbers displayed
C Interchange both of two Scorer Display Wires and plug into the Control
on Timer. Scorers 3. No numbers displayed on "i pc Scorer" but on Timer and 1pc Box:
Scorer. a) If numbers are displayed: Replace a new Scorer Display Wire.
b) If no numbers on Scorer: Replace a new Control Box.
Interchange the Time Display Wire and Scorer Display Wire, and plug into
the Control Box.
4. No nmnbers displayed on "2 pcs Scorers" but on Timer. a) If nmnbers are displayed: Replace new Scorer Display and Scorer
Display Wire.
b) If no numbers on Scorers: Replace a new Control Box.
i. Pls check if the "Time Display Wire" and "Scorer Display Wire" Replug the Time Display Wire and Scorer Display Wire
are connected well into the Control Box. and connect them to the Control Box.
Take out both of Scorer Display and interchange to re-install:
a) If nnmbers are displayed: Replace a new Scorer Display Wire.
2. Incomplete numbers on "lpc Scorer" only. b) If it still is not working: Replace a new Scorer Display and Scorer
Display Wire.
3. Incomplete nnmbesr on "2pcs Scorers" with the same character
or different numbers.
Incomplete Numbers
D displayed on
Scorers.Timer
4. Incomplete numbers on Timer only.
5. Incomplete nnmbers on all of the Scorer Displays and Time
Display with the same character.
6. Incompete numbers on "2pes Scorer Display & Time Display".
As same as the image below-
i. Pls check the button-"START" on the Control Box if it is turned
Oll.
2. Pls check the "Puck Catcher Wire with Sensor-1 & 2" if both are
connected with the Control Box well.
E No counting on Scorers Interchange the Puck Catcher Wire with Sensor-1 & 2, and then plug into
the Control Box, it will come out conditions as following a.b:
3. "1 pc Scorer": Failed to keep the score, a) If scorer keep score: Replace a new Puck Catcher Wire with Sensor.
b) If it's unworkable: Replace a new Control Box.
4. "2 pcs Scorers": Failed to keep the score. Replace a new Control Box.
Unworkable button on Pls check the "Electronic Scorer Operation Guides" on the Refer to the Electronic Scorer Operation Guides and re-operate.
Fthe Control Box Assembly Instruction. If still, inoperable, please replace a new Control Box.
Replace new Scorer Displays, Scorer Display Wire and Control Box.
Replace a new Time Display and Time Display Wire.
Replace a new Control Box.
Please re-check the Scorer Display Wire and Time Display Wire if they are
plugged in the correct socket on the Control box.
N
I
Re-press the button-"START" on the Control Box.
Re-plug the Puck Catcher Wire with Sensor-1 & 2 on the Control Box and
connected well.
12

Este producto esta cubierto por una garantia efectiva de 90 dfas apartir de la
fecha de su compra. La garanfia cubre cualquier defecto en las partes yen la
obra del trabajo.
Esta garantia limitada le da a usted derechos legales espedficos,usted tambi6n
puede tener otros derechos que vadan de un estado (provincia) a otro/a.
Durante el peri6do limite de la grantia, si una parte defectuosa o quiebrada es encon-
trada, nosotros ofreceremos una reparaci6n o un reemplazo de la parte sin ningt3n costo
para ud, nuestro cliente. La Onica excepci6n que la garantia no fuera aplicada seria los
da_os causado por un uso inapropiado, alteraci6n, uso equivocado, abuso, da_o acci=
dentado o negligencia.
_Ya que usted construye todas las mesas al reves, por favor
inspeccione las partes superiores de mesa y superficies de juego enseguida
antes de poner juntos.
"POR FAVOR GUARDE ESTAS INSTRUCCIONES
YRECIBO DE LA COMPRA !"
El REClBO DE LA COMPRA (o cualquier otra prueba de la fecha de su compra)
serfa requerida antes que cualquier servicio de garantia fuera iniciada. Cualquier
requerimiento para el servicio de la garantfa puede ser presentado por email,
escdto o contactando a nuestro Dept. de Servicio del Consumidor en :
N_mero telef6nico gratis: 877-852-8164
WEBSITE: www.medalsports.com.tw
*Por favor no Ilames nuestro NUMERO 800 asi como envienos por correo elec-
trSnico. Esto pasara en dos 6rdenes duplicados y ocurrirb gastos.
*Por favor note que todas las partes superiores de la mesa daSada tienen que
ser devueltas a la tienda. No sustituimos ninguna parte superior de mesa o
superficie de juego.
POR FAVOR PONGASS EN CONTACTO CON NOSOTROS
ANTES DE DEVOLVER EL PRODUCTO ALA
TIENDA.MUCHAS GRAClAS!
13

iPor favor guarde las instrucciones. Esnecesario el nOmero de modelo para contactarse con
nosotros. Porfavor I_alasinstrucdones para poder familiarze con laspiezasy los pasospara
ensamblar. Corrobore que todas las piezas que aparecen en el "ldentificador de Partes" se
encuentren en el paquete.
A pesar de que nos dedicamos a dar los mejores productos posibles para nuestros clientes,
pueden ocurrir problemas o faltar piezas.Sile faltan piezas6 si tiene alguna inquietud, por
favor cont_ctenos Io antes posible a nuestro cordial centro de atenci6n: 877-852-8764
Destomillador Phillips - No incluido
Destornillador de Cabeza Plana - No incluido
Llave Allen - Incluido
Los destornilladores el6ctricos pueden ser
de gran ayuda durante el ensamblado; sin
embargo, por favor ajuste el par de giro
bajo y sea extremadamente precavido
Herramientas electricas
-Bajo par
Alto par
mas estrictas
1. Por favor lea las instrucciones con cuidado y siga todo durante el montaje, la operaci6n o
instrucciones de seguridad correctamente para evitar el da_o o la herida. Para el montaje,
por Io menos se requieren dos adultos.
2. AIgunas figuras o dibujos podrian parecer no esten exactamente como su producto. Por
favor lea y entienda el texto antes de iniciar cada paso del montaje.
1. Este producto est& destinado para el uso INTERIOR solamente.
2. Por favor No sientes, subas o inclines la mesa de juego.
3. Por favor No arrastres la mesa cuando est_ en movimiento para evitar el daSo sobre las
piernas.
4. Por favor use s61o la cera espray de muebles para limpiar las superficies exteriores sobre
la mesa de juego.
5. Esto no es un juguete de niSos, se requieren la supervisi6n adulta para niSos cuando est_
jugando este juego
ADVERTENCIA: Las tareas de montaje debe realizarlas un adulto.
ADVERTENCIA:
PELIGRO DE ASFIXIO - - Este artfculo contiene piezas peque_as y /o peque_as bolas.
No apto para menores de 3 aSos
!4

IMPORTANTES INSTRUCCIONES DE SEGURIDAD
Lea todas las instrucciones
1. Lea todas las instrucciones -Todas tas instrucciones de seguridad y operaci6n deberian set leido con cuidado antes de que
este juego de hockey sea jugado.
2. Advertencia - Esto no es un juguete y que esta intencionado por et uso o bajo ta supervisi6n de adultos. Los adultos deberian
repasar tas directrices de seguridad con nifios para evitar et riesgo de posibte choque etectrico u otras heridas.
3. Fuente de potencia - Este juego de hockey deberia set operado solamente de 110-120V A.C., 60 cictos de corriente como
indicado sobre ta etiqueta de identificaci6n. Si usted no esta seguro sobre et tipo de suministro de energia de su casa,
consulte con su distribuidor de aparato o la empresa de energia local.
4. Protecci6n det cable etetrico- Et cable etectrico deberia set encaminado de modo que no sea probablemente andado encima o
pettizcado pot articulos cotocados encima o contra etlo. Preste atenci6n especial sobre los cables en enchufes, receptaculos
convenientes y et punto de salida del juego.
5. La sobrecarga - No sobrecargues las salidas de pared y cuerdas de extensi6n como esto puede causar un riesgo de fuego o
choque electrico.
6. El objeto y ta entrada de tiquido - Nunca empujes los objetos de cualquier ctase a este juego por aperturas como etlos puedan
tocar puntos de voltaje petigrosos o corto - partes externas podrian causar un fuego o choque etectrico. Nunca derrame
cualquier ctase de tiquido sobre et juego.
7. Ventitaci6n- Las aperturas en et juego son proporcionadas para et escape de aire para crear un efecto de cojin. Las aperturas
sobre et soplador de aire son para ta entrada de aire. Guarde libre del soplador de aire cuando esta conectado. No pongas la
mano u otros objetos cerca de tas aperturas de entrada. Para asegurar una operaci6n confiable det juego y protejalo de
recalentarse estas aperturas que no deben set bloqueados o cubiertos.
8. Et servicio de requisito de dafio - Desconecte et juego de ta salida de pared.
No intentes de atender el soplador por usted mismo como la apertura o ta etiminaci6n de cubiertas puedan exponerte al voltaje
petigroso u otros peligros. Mande a la persona calificada de servicios bajo tas siguientes condiciones:
A. Cuando ta cuerda de suministro de energia o et enchufe estan dafiados.
B. Si se ha derramado et tiquido o se han caido los objetos en et soplador.
C. Cuando et soplador de aire exponga un cambio distinto det funcionamiento, por ejemplo ruido anormal, se indica una
necesidad det servicio.
9. Conectando con tierra o ta Polarizaci6n - Este juego esta equipado con un enchufe de tinea de corriente alterna polarizada (
un enchufe que tiene una hoja mas amplia que et otro). Este enchufe encajara a la salida de potencia por un s61o camino.
Esto es una caracteristica de seguridad. Si usted esta incapaz de insertar totalmente et enchufe en ta satida, trate de examinar
et enchufe. Si et enchufe todavia falta en encajar, ponerse en contacto con su etectricista para sustituir la salida anticuada. No
derrotes et objetivo de seguridad det enchufe polarizado.
10. Advertencia -PRODUCTO OPERADO ELECTRICAMENTE - No recomendado para nifios bajos de 8 afios de edad. Como
con todos los productos etectricos, las precauciones deberian set observadas durante et manejo y et empleo para reducir et
riesgo de choque etectrico.
11. Recomendamos que el juego de vez en cuando sea examinado de las condiciones que puedan causar el riesgo de fuego,
etectrochoque, o herida a personas. En et caso de que mientras existan tales condiciones, et juego no deberia set usado
hasta correctamente reparado.
12. RIESGOS DE FUEGO, ELECTROCHOQUE, O HERIDAA PERSONAS
ADVERTENCIA- Cuando esta usando aparatos etectricos, siempre deberian set seguidas las precauciones basicas, incluy-
endo los siguientes:
A) Lea todas tas instrucciones antes de usar los aparatos.
B) Para reducir et riesgo de herida, la supervisi6n cercana es necesaria cuando et aparato esta usado cerca de nifios.
C) No p6ngas en contacto con partes m6vites.
D) S6to use et accesorio recomendado o vendido por et fabricante.
E) No uses al aire tibre.
F) Para un aparato de cuerda - conectada, set& inctuida los siguientes:
- Para desconectar, gire todos los mandos a la posici6n OFF, luego quite et enchufe de la salida.
- No desconectes a travas det tiro de la cuerda. Para desconectar, agarre et enchufe, no ta cuerda.
- Desconecte desde la salida cuando no este en uso y antes de revisar o timpiar.
- Que no operes et aparato cuando ta cuerda o enchufe este dafiado, o luego de malfuncionamiento det aparato o fue caido
o dafiado de cualquier modo. Vuetve et aparato al servicio autorizado mas cercano para examen, reparaci6n o ajuste etectrico
o mecanico.
13. Para reducir et riesgo de choque etectrico, este aparato tiene un enchufe polarizado (una hoja es mas amplia que la otra).
Este enchufe encajara en una salida polarizada por s61o un camino. Si et enchufe no cabe totalmente en ta salida, examine et
enchufe. Si esto todavia no se cabe, p6ngase en contacto con un etectricista calificado para instalar la salida apropiada. No
cambies et enchufe de ning_n modo.
SALVE ESTAS INSTRUCCIONES
ADVERTENCIA: Para reducir el riesgo de fuego ochoque el_ctrico, no uses este abanico con cualquier
dispositivo de control s61ido - velocidad estatal.
Para Uso Domestico $61o_
15

18407 L|STA DE PARTIES
Gabinete Principal
1 Pieza
Pierna - B
4 Piezas
Paleta de Mesa de Tenis
2 Piezas
Camello
2 Piezas
Delantal Lateral
2 Piezas Delantal FinaI-A
1 Pieza
U
Delantal FinaI-B
1 Pieza
.d
Panel de Pierna
4 Piezas
©
Pelota de Mesa de Tenis
2 Piezas
Superficie de Mesa
de Tenis-A
2 Piezas
Pre-instalado
Soplador
1 Juego
Superficie de Mesa
de Tenis-B
1 Pieza
Almohadilla EVA
12 Piezas
Puck
2 Piezas Almohadilla de Fieltro
2 Piezas Caja de Gol
2 Piezas
...y
Pierna - A
4 Piezas
J
Red de Mesa de Tenis
1 Pieza
Poste de Mesa de Tenis
2 Piezas
Pre-instalado
J
Receptor de Puck con
Cable de Sensor Largo
1 Pieza
Delantal de Rincon
4 Piezas
JTornillo
5/16" x 1-1/4"
12 Piezas
Arandela
5/16"
22 Piezas Tornillo-Plata 5/16" x 7/8"
10 Piezas
Tornillo de Cabeza Arandela
4 x 15mm
20 Piezas
Tornillo de Cabeza Arandela
3 x 15mm
40 Piezas
Tornillo de Cabeza Arandel_
4 x 12mm
28 Piezas
Tornillo de Cabeza Plana
4 x 15mm
2 Piezas
Tuerca
5/16"
4 Piezas
©Pre-instalado
Corchete U
4 Piezas
Nivelador de Pierna
4 Piezas
Llave Allen
1 Pieza
Cubierta de Gol
2 Piezas
Pre-instalado
Exposici6n de Marcador
2 Piezas
Caja de Control
1 Pieza Corchete L
4 Piezas
_ Pre-instalado
Pre-instalado
Exposicion de Tiempo
1 Pieza Cable de Marcador
1 Pieza
Pasador Plastico
6 Piezas
_ Pre-instalado
Cable de Tiempo
1 Pieza
16

Pre-instalado
f
Receptor de Puck con
Cable de Sensor Corto
1 Pieza
Arandela
1/4"
4 Piezas
Pre-instalado
Caja de Bateria
1 Pieza
Pre-instalado
Tuerca Cuadrada y Tornillo
4 Juegos
Pre-instalado
Rinc6n Superior
4 Piezas
Pre-instalado
T-Tuerca
12 Piezas
Llave
1 Pieza
U
Tornillo
1/4" x 1-1/4"
4 Piezas
PRECAUClO
1) 4 pilas AA no incluidas.
2) No mezde pilas nuevas con viejas.
3) No mezde pilas alcalinas, est_indar (carbono zinc), o recargables (niquel cadmio).
|NSTRUCC|ON DE NIONTAJE
1. Abra la caja de su nueva mesa de Air Hockey cerca de donde usted jugar& Seleccione un piso despejado y piano.
Este juego requiere de al menos dos adultos para ser armado.
2. Saque el contenido de la caja y verifique que usted tiene todas las partes como se muestra en el identificador de
partes. Le sugerimos que usted use la parte inferior de la caja como un _rea de trabajo limpia y plana para
proteger el juego. Corte cuidadosamente los lados de la caja para que pueda usar la parte inferior como su
superficie de trabajo.
3. Adjunte el Delantal Lateral (#2) al Gabinete Principal (#1) usando cinco Tornillos (#24) y cinco Arandelas (23) por
Delantal Lateral. Vea la FIG. 1.
17

4. Adjunte la Caja Gol (#19) a los Delantales Final (#3 & #4) usando dos Tornillos (#27) por Caja de Gol. Yea la
FIG.2.
5. Adjunte el Delantal de Rinc6n (#21) a los Delantales Final (#3 & #4) usando seis Tornillos (#27) por cada lado.
Vea la FIG.2.
6. Adjunte el Delantal Final con Delantales de Rinc6n (FIG.2. montada) al Gabinete Principal (#1) usando dos
Corchete U (#30), dos TorniNos (#45), dos Arandelas (#46), dos Tuercas (#29) y ocho Tornillos (#25) pot
Delantal Final. Yea la FIG.3A
7. Adjunte el Corchete L (#34) al Gabinete Principal (#1) usando uno TorniNo (#25) por Corchete L. Vea la FiG. 3B.
8. Adjunte el Delantal de Rinc6n (#21) al Delantal Lateral (#2) usando tres Tornillos (#27) pot Delantal de Rinc6n.
Vea la FIG. 3.
\i /
I
,I
18

9. Adjunte el Panel de Pierna (#7) a la Pierna - A (#5) usando cuatro Tornillos (#26) por Panel de Pierna. Vea la
FIG.4.
©
\\
®
10. Adjunte la Pierna - B (#6) al Panel de Pierna (#7) usando seis Tornillos (#26) por Pierna-B. Vea la FK3. 5.
I
/
I
I
/
J@
19
Table of contents
Languages:
Other MD SPORTS Board Game manuals

MD SPORTS
MD SPORTS AH060Y20007 User manual

MD SPORTS
MD SPORTS SOC058_047B User manual

MD SPORTS
MD SPORTS 1654831 User manual

MD SPORTS
MD SPORTS SOC056 108B User manual

MD SPORTS
MD SPORTS AH048Y20001 User manual

MD SPORTS
MD SPORTS AC108Y19010 User manual

MD SPORTS
MD SPORTS AC196Y21002 User manual

MD SPORTS
MD SPORTS BG119Y22008 User manual

MD SPORTS
MD SPORTS SOC056 217B User manual

MD SPORTS
MD SPORTS CB048Y20018 User manual