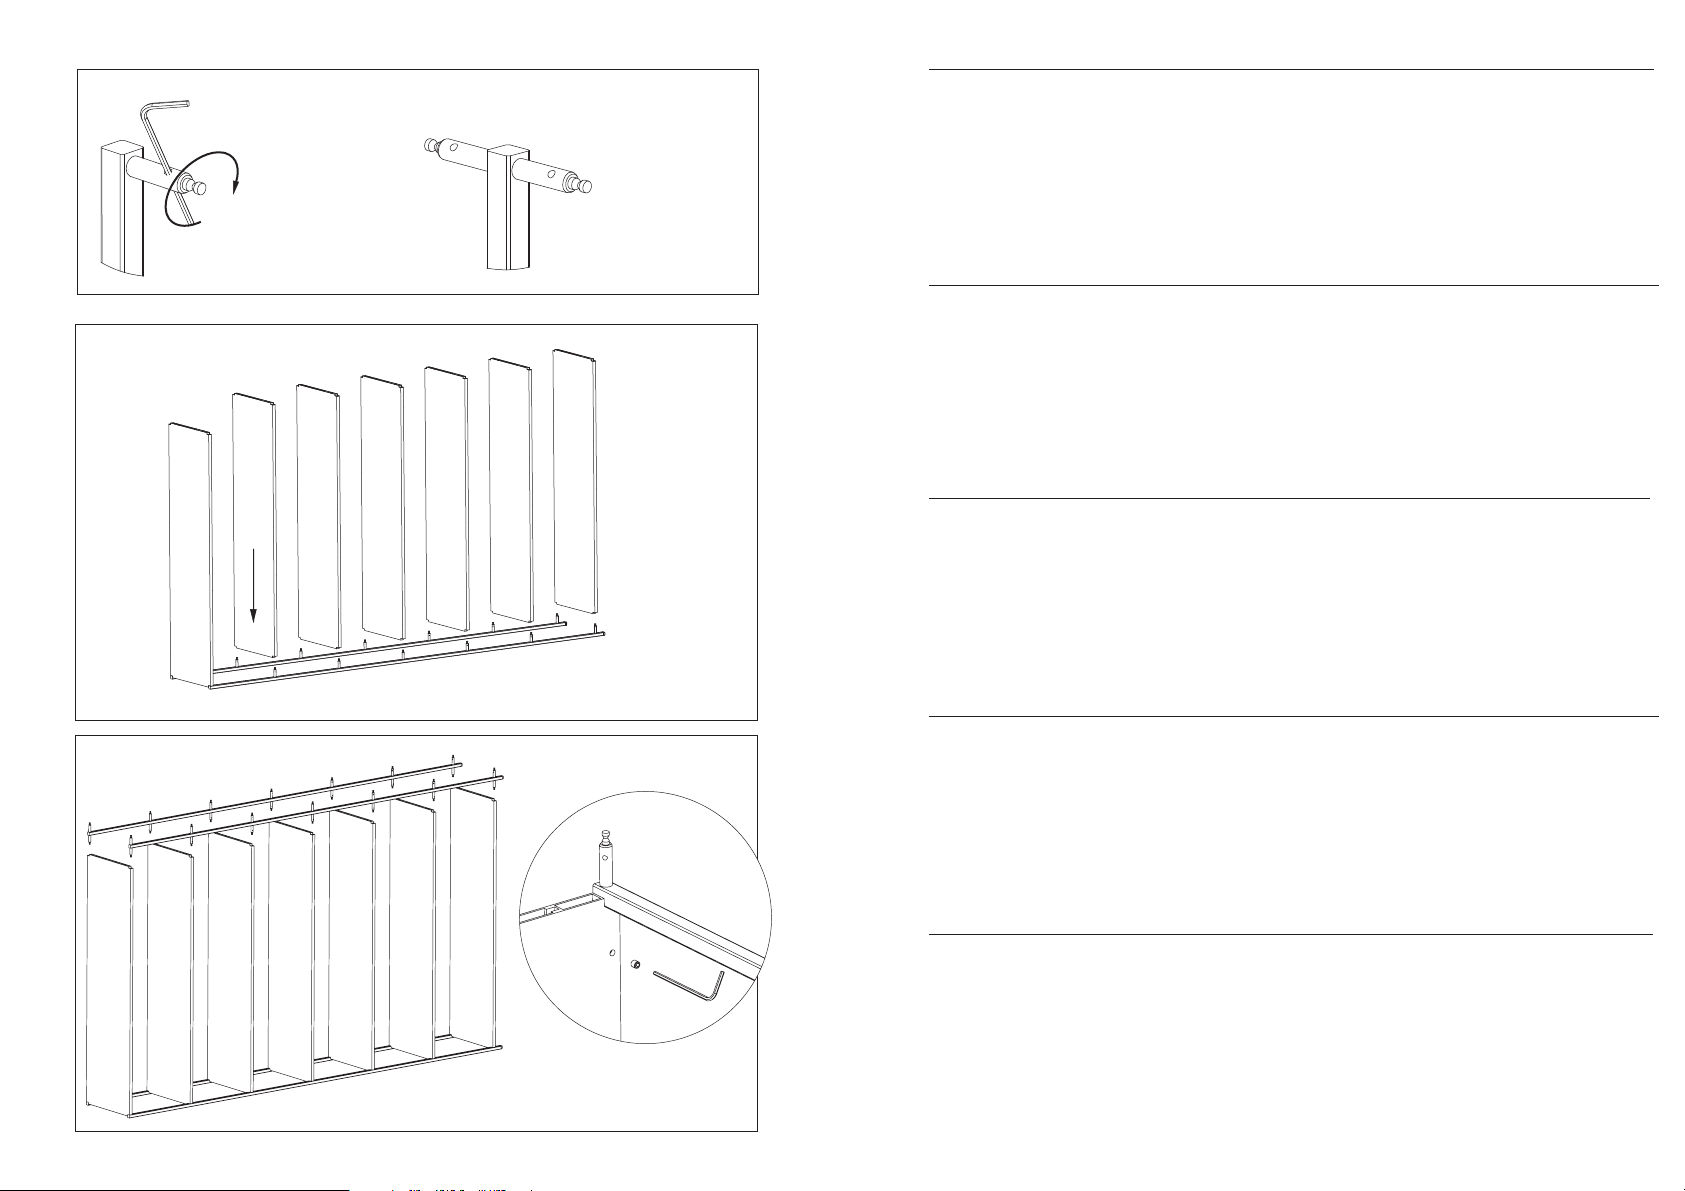
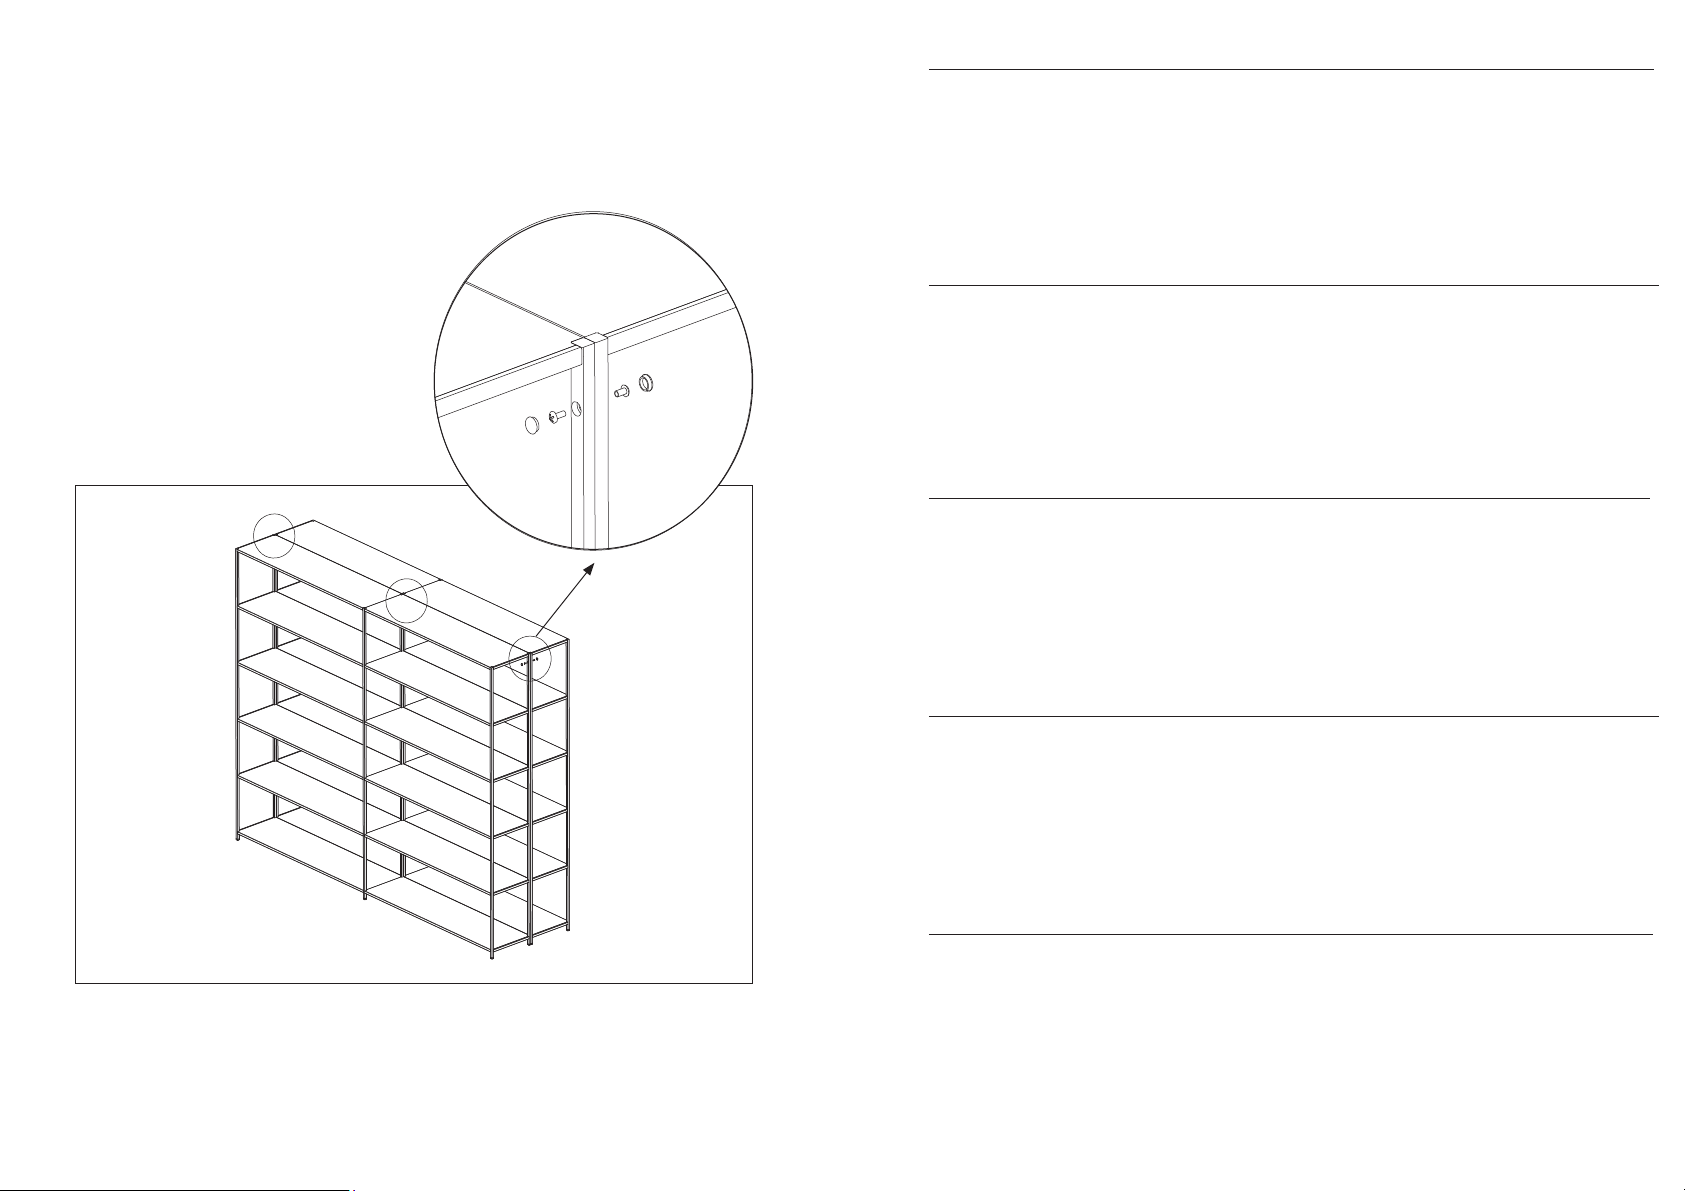
Composizione Kit di montaggio
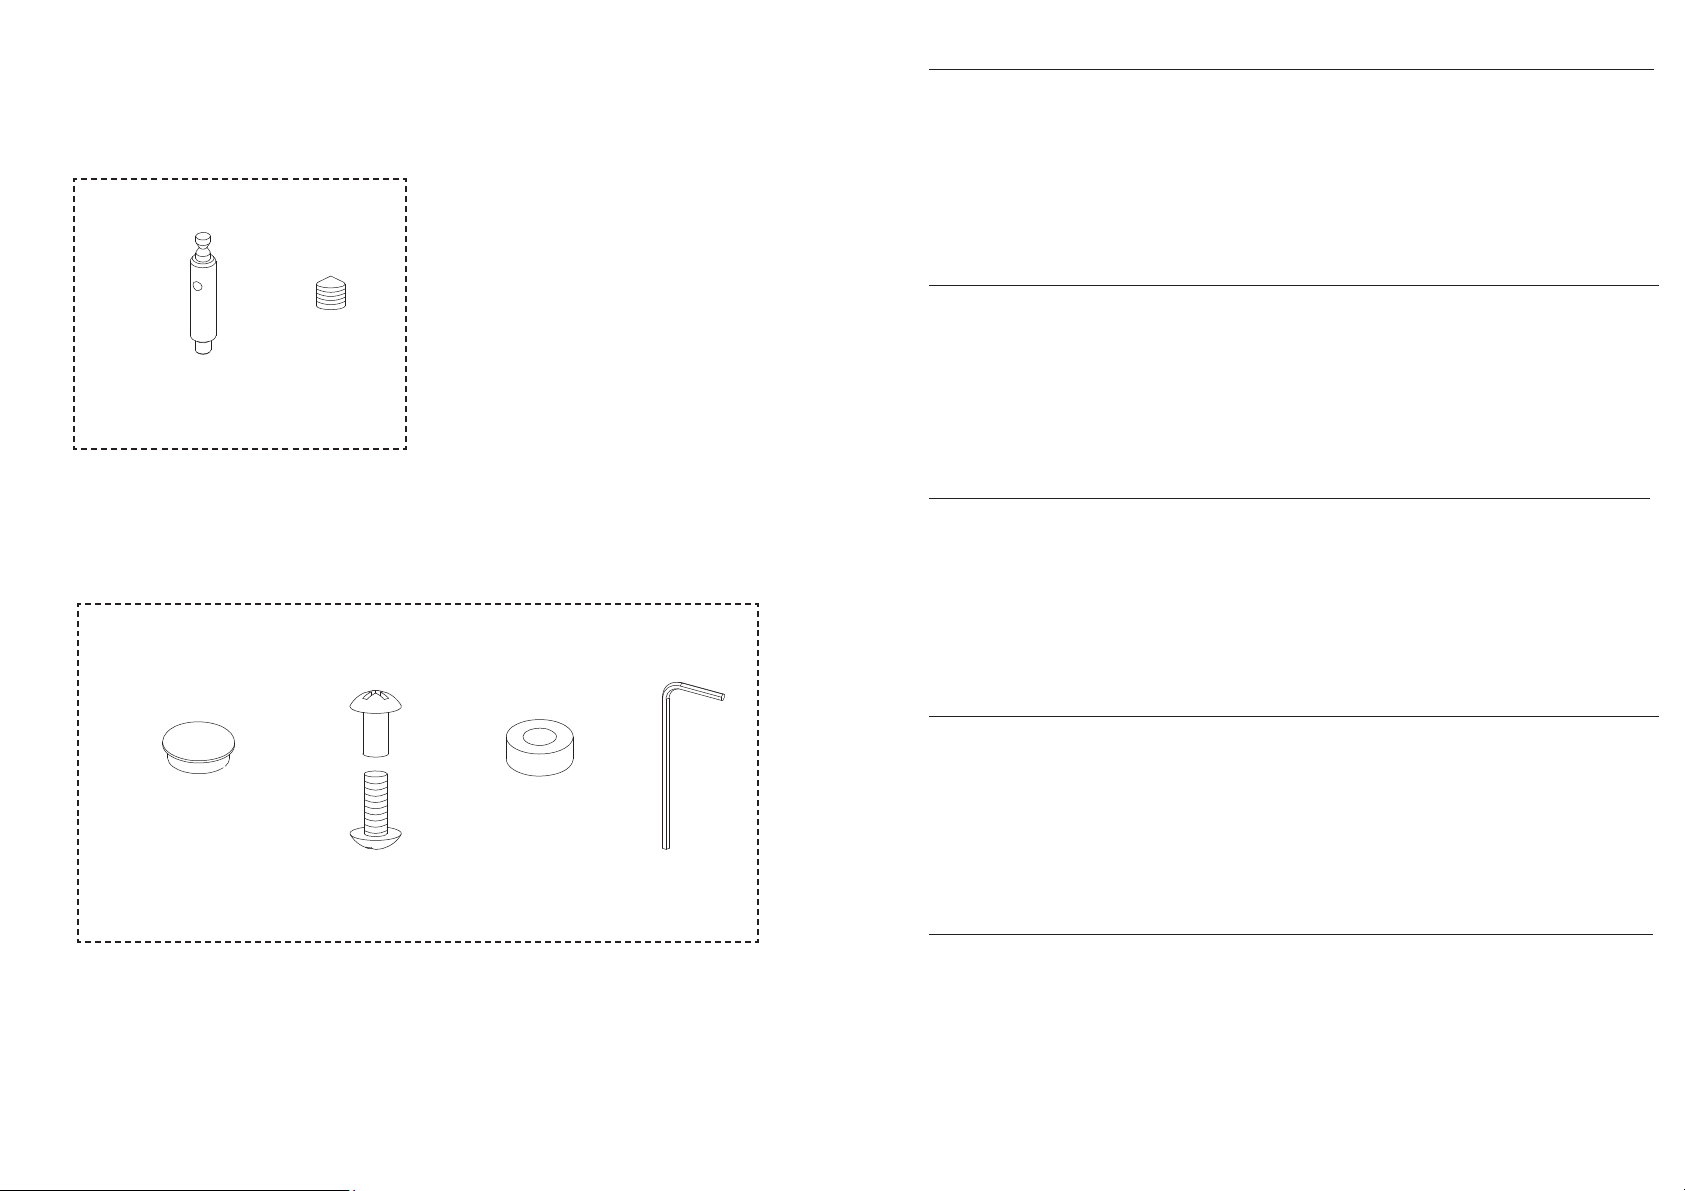
Kit di montaggio (1): - Tiranti (D)
- Grani di fissaggio (E)
Kit di montaggio (2): - Tappini copriforo (F)
- Viti di giunzione per centro-
stanza (G)
- Distanziali in plastica (H)
- Chiave a brugola (I)
Kit di montaggio (1)
Assembly kit (1)
Inhalt Montagekit (1)
Kit de montage (1)
Kit de montaje (1)
Kit di montaggio (2)
Assembly kit (2)
Inhalt Montagekit (2)
Kit de montage (2)
Kit de montaje (2)
Contents of assembly kits
Assembly kit (1): - Tie rods (D)
- Grub screws (E)
Assembly kit (2): - Hole caps (F)
-Coupling screws for
installation as a room divider
(G)
- Plastic spacers (H)
- Allen wrench (I)
Inhalt Montagekit
Montagekit (1): - Einschraubdübel (D)
- Gewindestifte (E)
Montagekit (2): - Lochabdeckungen (F)
- Verbindungsschrauben für
Montage Zimmermitte (G)
- AbstandsstückeausKunststoff
(H)
- Inbusschlüssel (I)
Contenu Kit de montage
Kit de montage (1): - Goujons (D)
- Vis sans tête bout cône (E)
Kit de montage (2): - Caches (F)
-Vis de jonction pour montage
au centre de la pièce (G)
- Entretoises en plastique (H)
- Clé Allen (I)
Composición Kit de montaje
Kit de montaje (1): - Tirantes (D)
- Pasadores de fijación (E)
Kit de montaje (2): - Tapones para cubrir orificios
(F)
-Tornillos de unión para centro-
habitación (G)
- Distanciadores de plástico (H)
- Llave Allen (I)
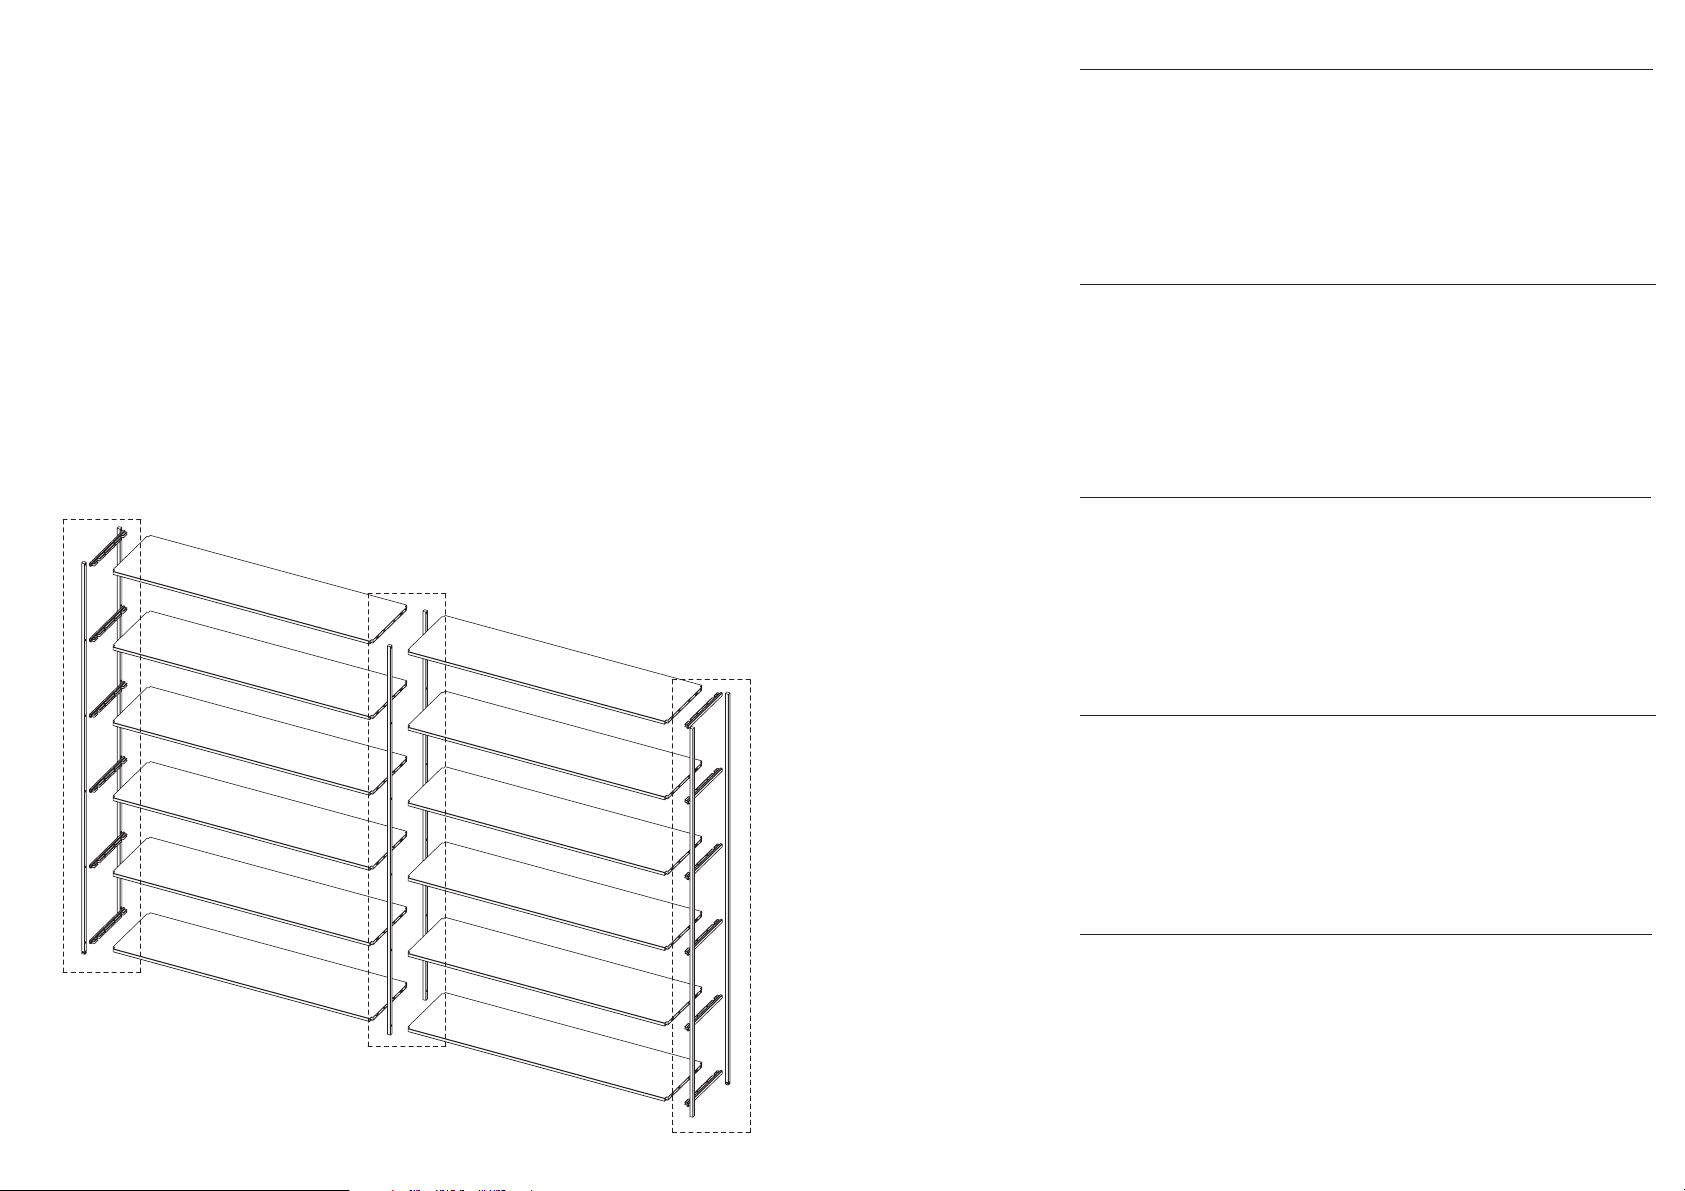
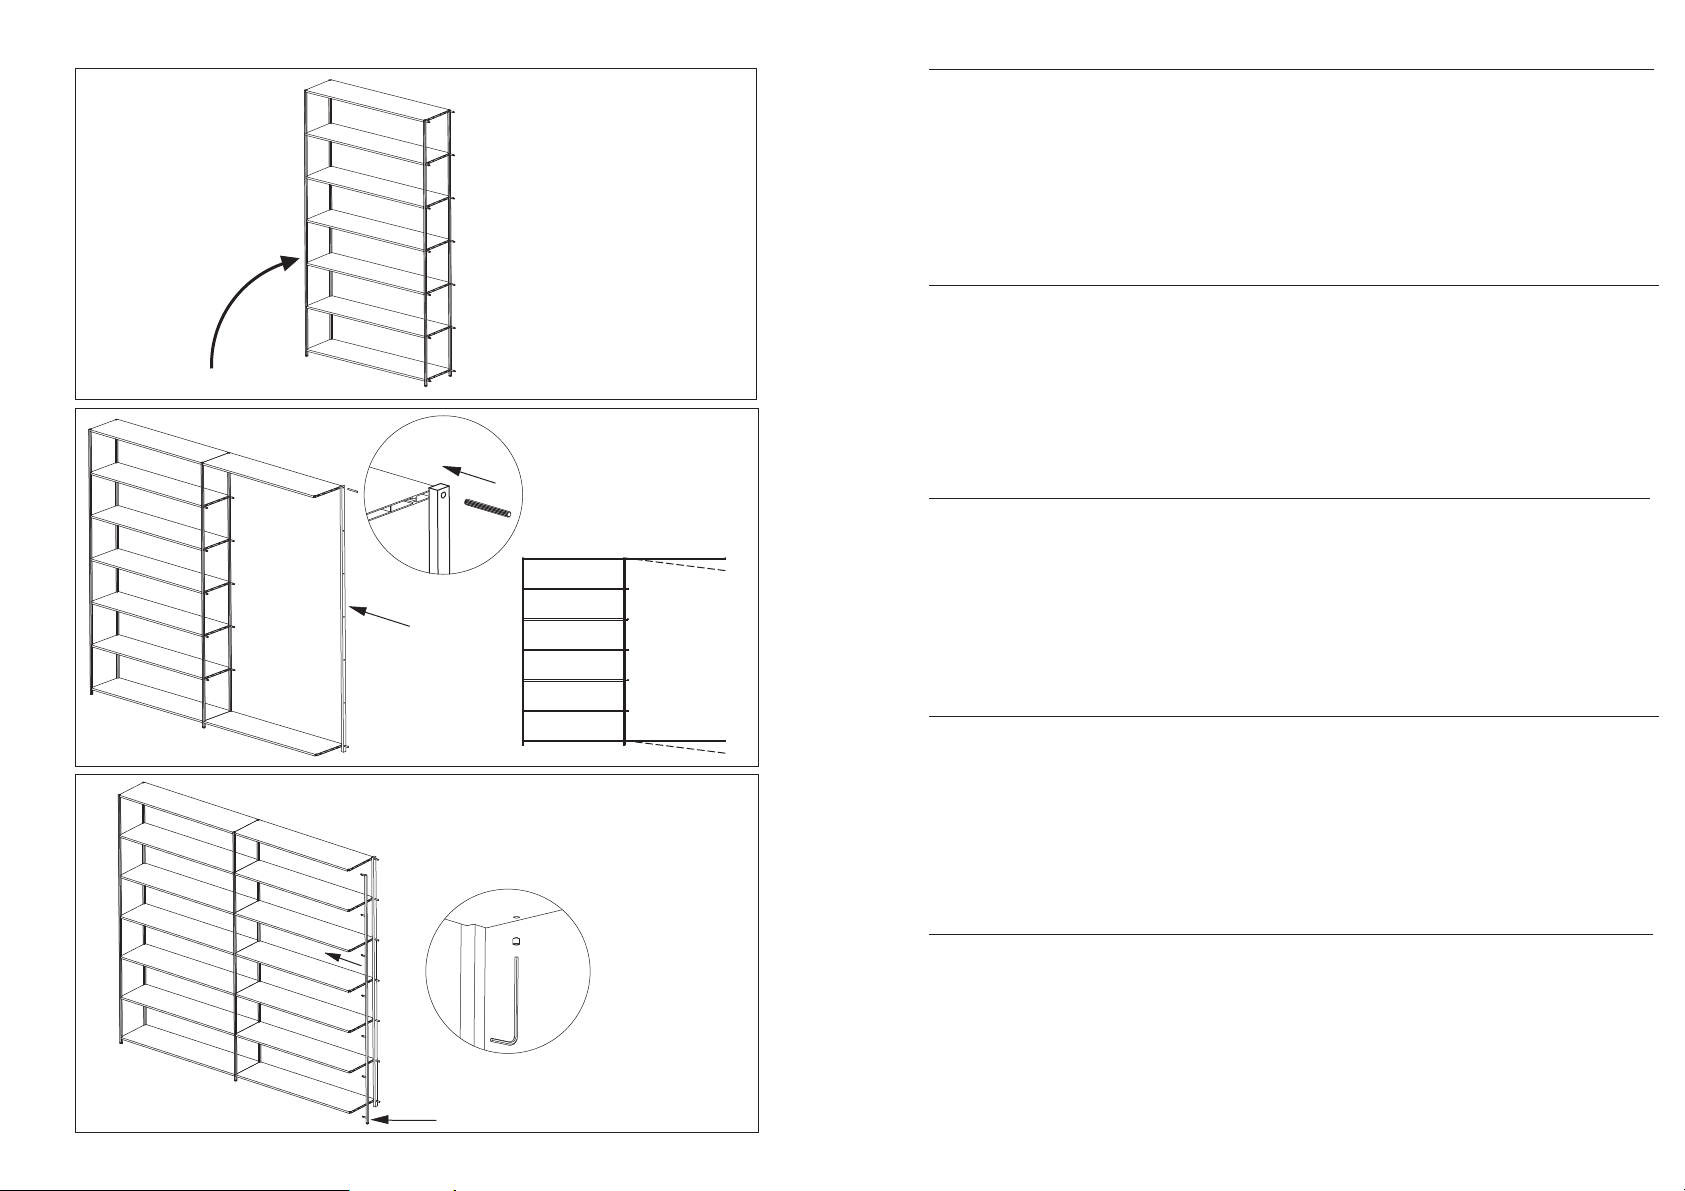
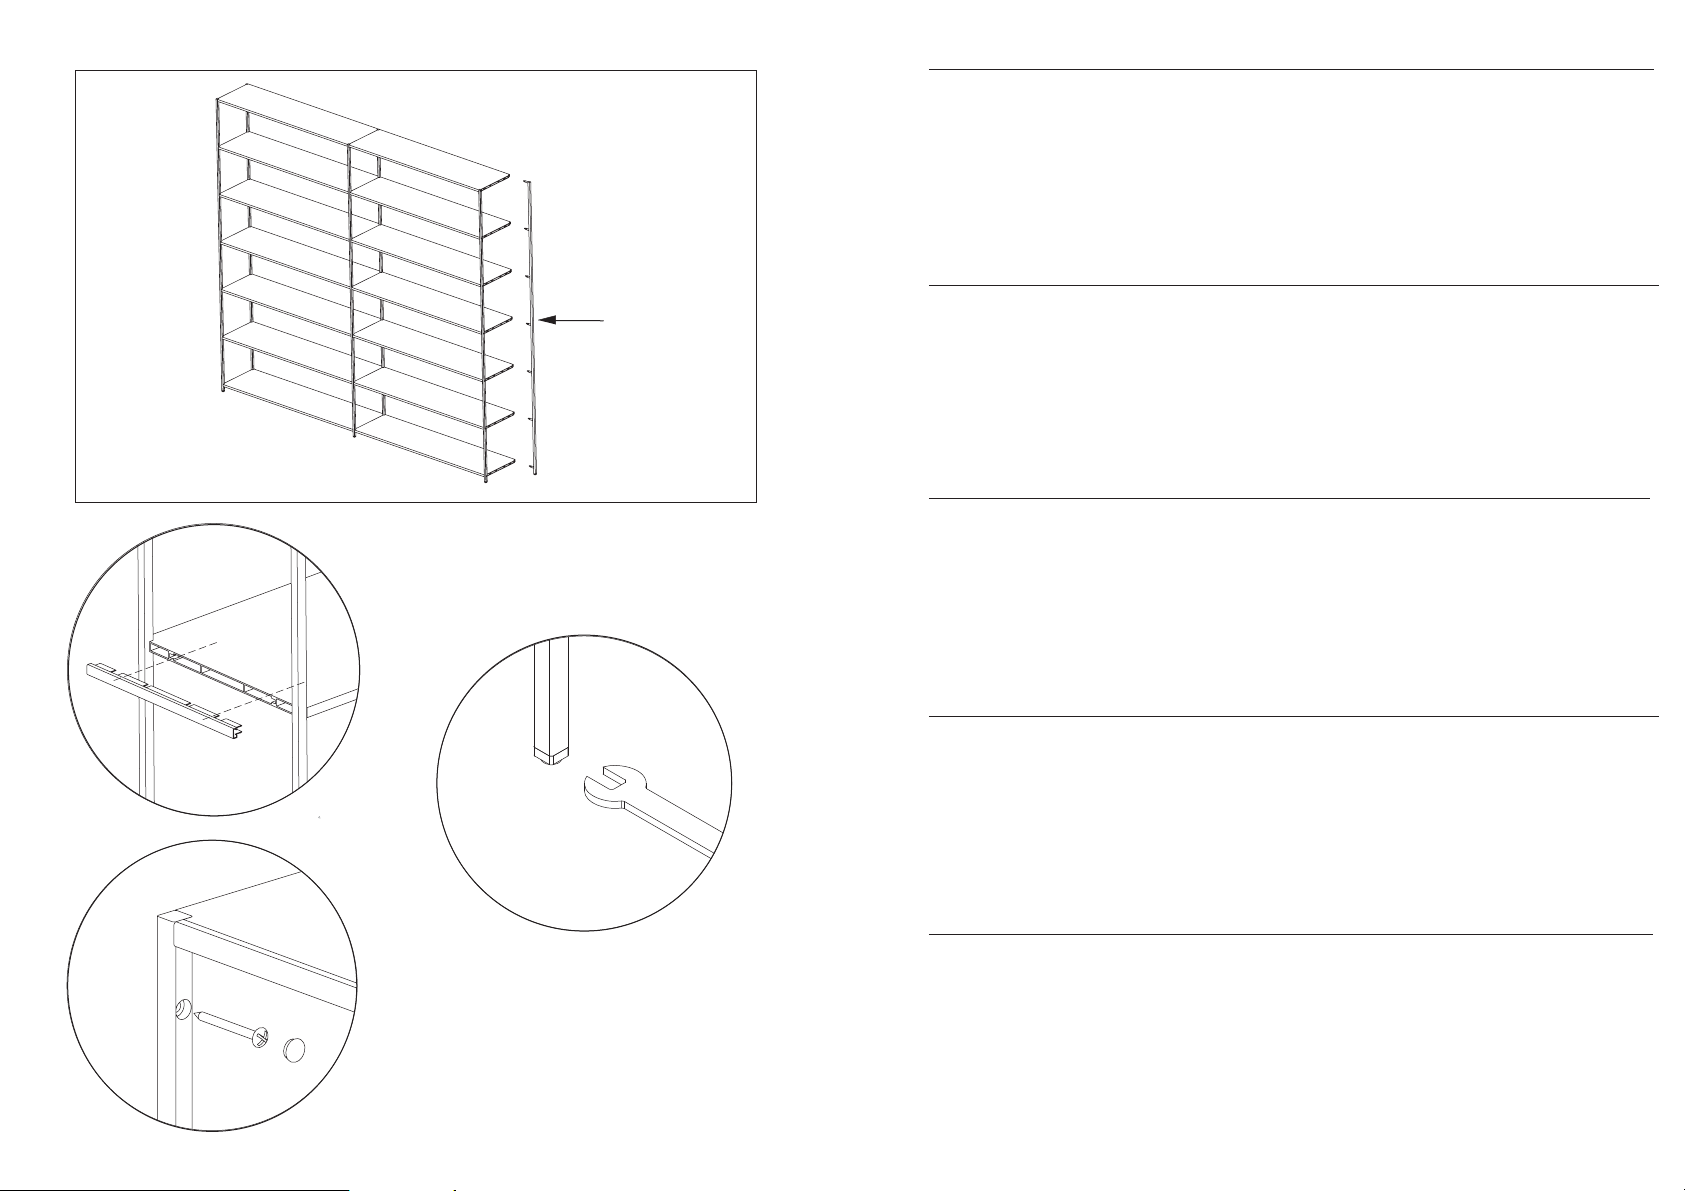
Composizione dei colli :
(Scatola) MENSOLA (A): 1x Kit di montaggio (1) + 1x Mensola 60/90/120
(Tubo) MONTANTI TERMINALI (B): 1x Kit di montaggio (2) + 2x Montanti terminali
a muro (solo per H298/H261,5/H225/H181/H137) + 2x Montanti terminali
frontali + Tappi di chiusura + Dima di montaggio con spine in legno (solo
per H298/H261,5/H225/H181/H137)
(Tubo) MONTANTI INTERMEDI (C): 1x Kit di montaggio (2) + 1x Montante intermedio
a muro (solo per H298/H261,5/H225/H181/H137) + 1x Montante intermedio
frontale
Contents of packages:
(Box) SHELF (A): 1x Assembly kit (1) + 1x Shelf 60/90/120
(Tube) END FRAMES (B):1x Assembly kit (2) + 2xWall end frames (for H298/H261.5/
H225/H181/H137 only) + 2x Front end frames + End caps + Assembly
template with wooden pegs (for H298/H261.5/H225/H181/H137 only)
(Tube) INTERMEDIATE FRAMES (C): 1x Assembly kit (2) + 1x Wall intermediate
frames (for H298/H261.5/H225/H181/H137 only) + 1x Front intermediate
frame
Inhalt der Verpackungseinheiten:
(Schachtel) ABLAGE (A): 1x Montagekit (1) + 1x Einlegeboden 60/90/120
(Hülse) SEITENSTÄNDER (B): 1x Montagekit (2) + 2x Seitenständer wandseitig (nur
bei H298/H261,5/H225/H181/H137) + 2x Seitenständer vorderseitig +
Abdeckkappen + Montageschablone mit Holzstiften (nur bei H298/H261,5/
H225/H181/H137)
(Hülse) MITTELSTÄNDER (C): 1x Montagekit (2) + 1x Mittelständer wandseitig
(nur bei H298/H261,5/H225/H181/H137) + 1x Mittelständer vorderseitig
Contenu des colis:
(Carton) ETAGERE (A): 1x Kit de montage (1) + 1x Etagère 60/90/120
(Tube) MONTANTS TERMINAUX (B): 1x Kit de montage (2) + 2x Montants terminaux
muraux (uniquement pour H298/H261,5/H225/H181/H137) + 2x Montants
terminaux avant + Bouchons de fermeture + Gabarit de montage avec
goujons en bois (uniquement pour H298/H261,5/H225/H181/H137)
(Tube) MONTANTS INTERMEDIAIRES (C): 1x Kit de montage (2) + 1x Montant
intermédiaire mural (uniquement pour H298/H261,5/H225/H181/H137) + 1x
Montant intermédiaire avant
Composición de los bultos:
(Caja) ESTANTE (A): 1x Kit de montaje (1) + 1x Estante 60/90/120
(Tubo) MONTANTES LATERALES (B): 1x Kit de montaje (2) + 2x Montantes
laterales anclaje a la pared (sólo para H298/H261,5/H225/H181/H137) +
2x Montantes laterales frontales + Tapas de cierre + Plantilla de montaje
con pasadores de madera (sólo para H298/H261,5/H225/H181/H137)
(Tubo) MONTANTES INTERMEDIOS (C): 1x Kit de montaje (2) + 1x Montante
intermedio anclaje a la pared (sólo para H298/H261,5/H225/H181/H137)
+ 1x Montante intermedio frontal
MINIMA 42 ITALIANO
ENGLISH
DEUTSCH
FRANÇAIS
ESPAÑOL
7
6
ITALIANO
ENGLISH
DEUTSCH
FRANÇAIS
ESPAÑOL
FG
HI
X 4
X 2
X 2
X 1
DE
X 4
X 4