MedGuard T87 Installation instructions
User Instruction for the Raised Toilet Seat Frame With
Comfort Seat
T87
Ref: T87May2010
Form No: Cef 0035
1.Introduction
This Raised Toilet Seat Frame supports clients to give them confidence as they sit and rise – it offers support and
lessening of strain. The height is adjustable to cater for varying patients requirements. The easy clip on/off seat
makes it easy to fit/remove and the partial cutaway provides easy access for personal cleansing. This product is
suitable for intensive cleaning.
Product Dimensions
Toilet seat height (from-to) 470mm-620mm
Width between arms 520mm
Toilet seat depth 393mm
Seat to top of arms 191mm
Seat to top of back 400mm
Footprint 520mm x 482mm
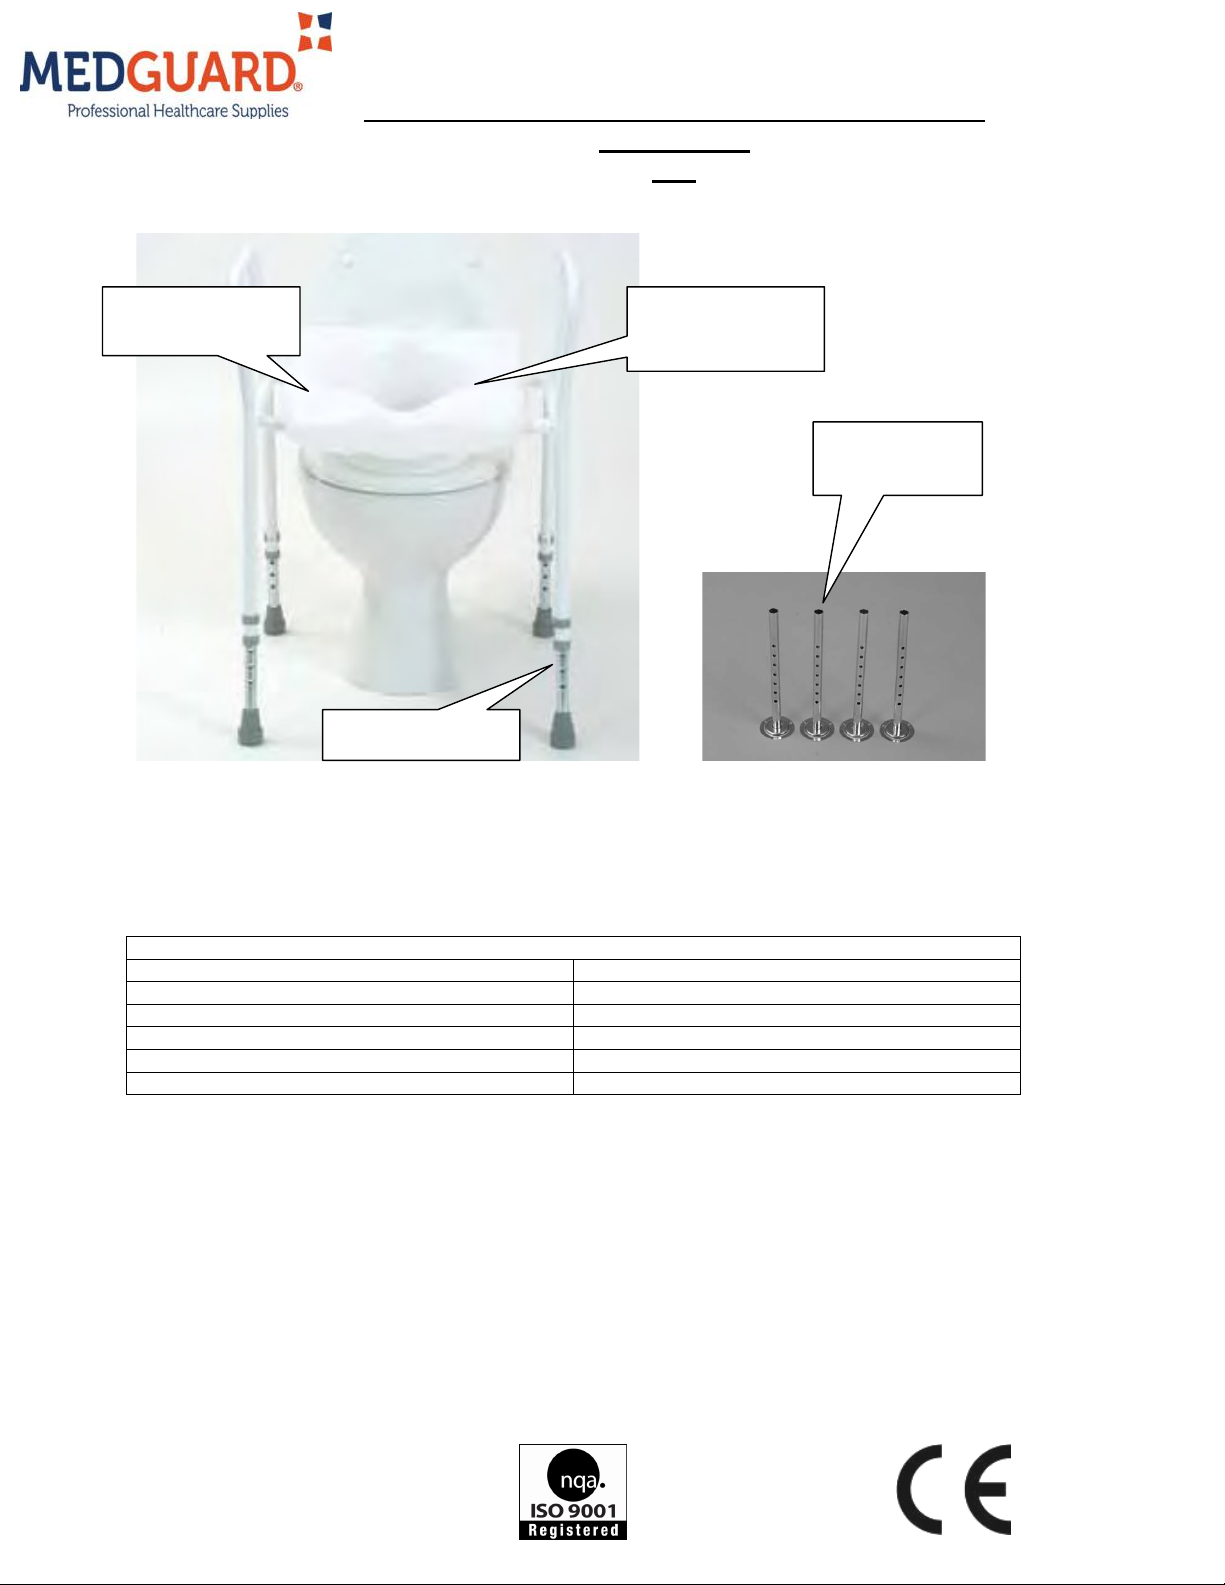
2. Contents of the Box
•Raised Toilet Seat Frame (T87)
•Comfort Seat (72087)
•Extended Legs & Pin Clips
•User Instructions (this leaflet)
3. Assembly Instructions
•Carefully unpack and examine the product to ensure it is complete.
•Before use check for any signs of damage e.g. cracked weld, flaking of paint, bent tube. If any signs
occur please contact your supplier to exchange and refrain from using the product. DO NOT ATTEMPT
TO USE IF PRODUCT IS DAMAGED.
Raised Toilet Seat
Frame T87
Extendable Legs
Comfort Seat
(72087)
SPARE –
Floor
Fixing Feet
(T174)
User Instruction for the Raised Toilet Seat Frame With
Comfort Seat
T87
Ref: T87May2010
Form No: Cef 0035
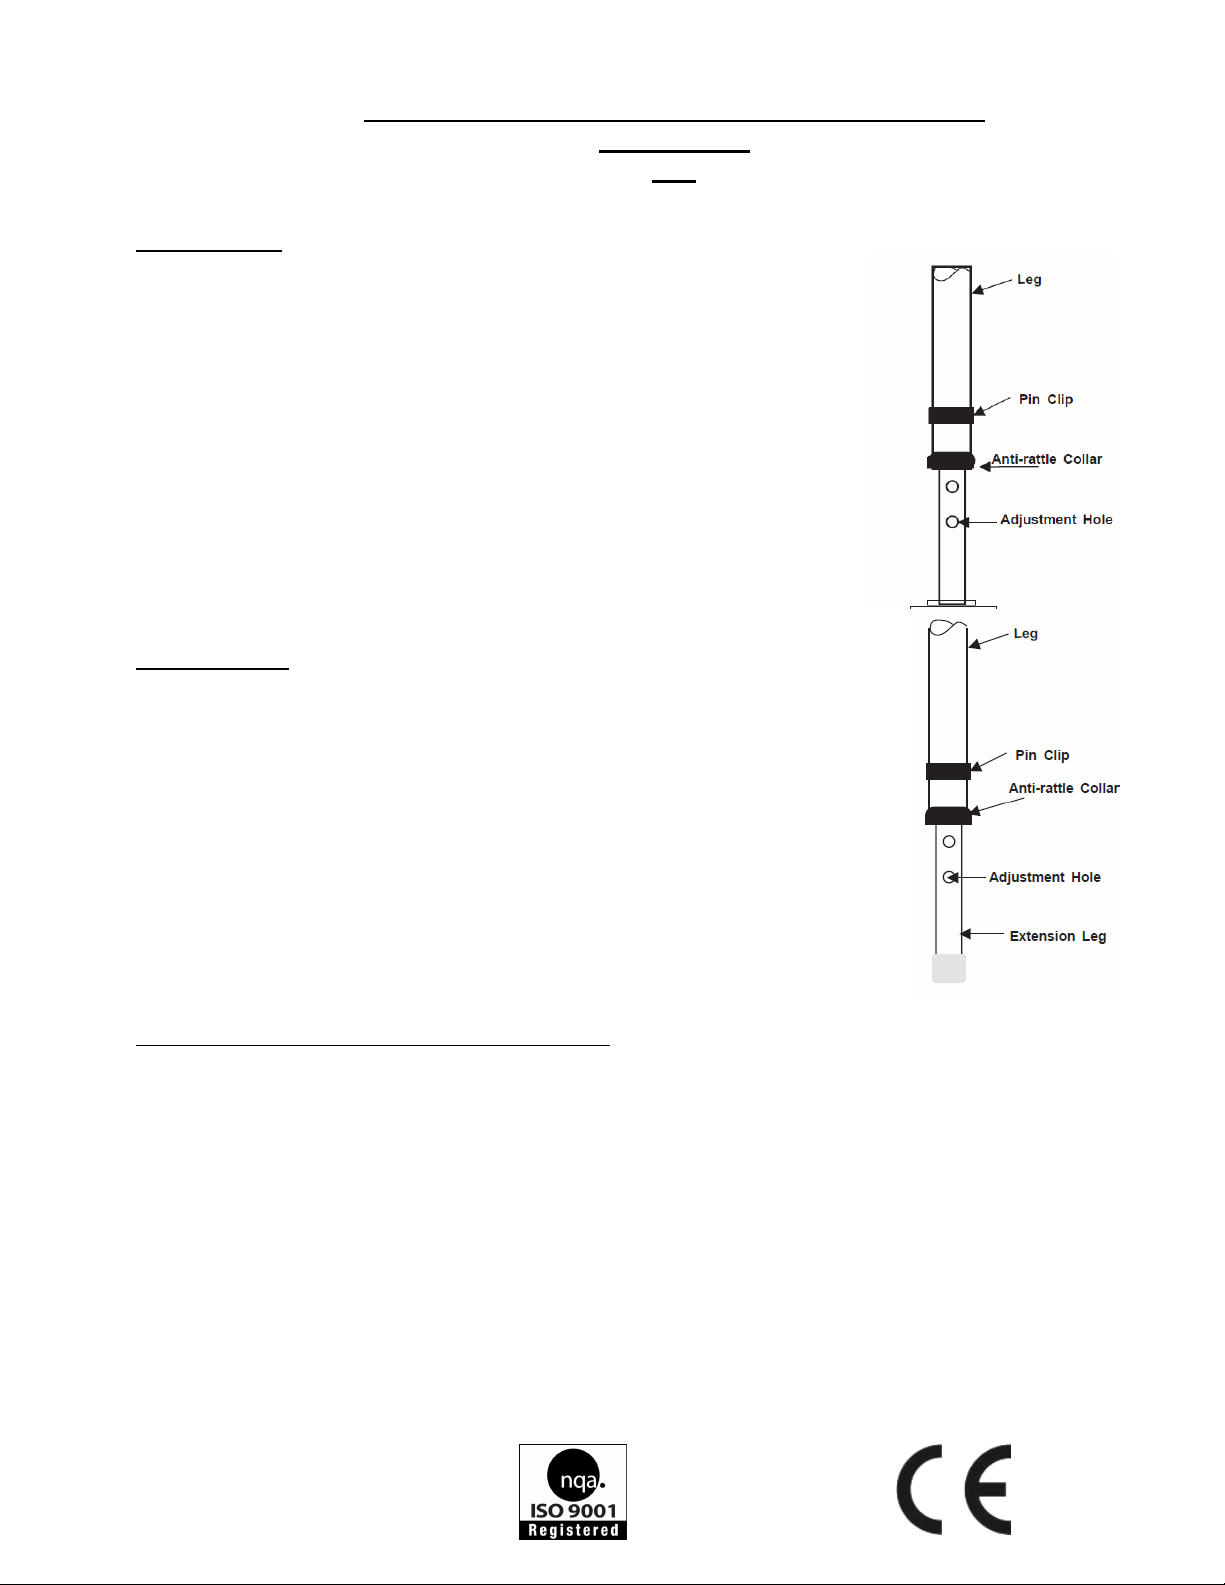
Floor Fixing Feet:
•Referring to the diagram above, remove the pin clips from each of the 4 legs
and remove the extension legs completely.
•Fit the 4 Floor Fixing Feet to the product and replace the pin clips - ensure the
Fixing feet are set at the same height.
•Position the product exactly where required, and ensuring it is not moved,
mark out the 3 hole positions for each of the Floor Fixing Feet.
•Remove the product and using a drill bit of the type and size appropriate to
the underlying floor material and whether plastic inserts are required. Drill
each hole to the depth necessary dependent upon the use of plastic inserts
and type of screws to be used. - If in doubt seek advice from professionals
•Remove any debris, and if required fit plastic inserts ensuring they are flush to
the surface.
•Using screws of the appropriate type and size, secure the product to the floor
ensuring screws are fitted to all of the 12 holes in the Floor Fixing Feet.
4. Correct Use
Adjustable Height:
•Remove the pin clips from the legs.
•Select the desired height of the frame by gently sliding out each extension leg from
the frame - NOTE this is a telescopic action.
•When desired height is obtained refit the pin clips into the appropriate hole
ensuring pin clips goes through each leg and its extension leg and that all legs are
set to the same height.
•The frame is now ready for use.
5. Cleaning
•Use mild detergent with warm water to wipe down framework on at least a weekly
basis more frequently if required.
•Do not use an abrasive cleaner as this will damage the frame and nullify your
warranty.
•Pay particular attention to the hinges and abutments.
Use of power/jet washing & industrial washing machines:
•If either of the above is used to clean equipment care must be taken since high-pressure water can be
penetrative.
•Care should be taken that frames are not placed too close to high-pressure water jets.
•After cleaning ensure any residual water is removed from the framework as it could cause permanent
rusting of the frame (leave frames open in a warm environment for several hours to ensure all internal
moisture evaporates).
•We cannot offer advice on industrial washing machines with regards to specific machine settings, as
these will be dependant on the manufacturer’s instructions.
6. Maintenance Requirements
The product should be checked on a regular basis for damage or wear and tear – this includes flaking or cracking
paint. Any undue signs of damage should be noted and reported to the supplier in the first instance. Should
damage be evident, then the user should refrain from using the product until advice has been sought from the
supplier.
7. Warning

User Instruction for the Raised Toilet Seat Frame With
Comfort Seat
T87
Ref: T87May2010
Form No: Cef 0035
•This product is intended for users of a maximum of 125kg/25stone in weight.
•We recommend a full risk assessment should be carried out before use.
It is advised that when fitting Floor Fixing Feet careful consideration be given to:
•Where the product is to be precisely located (once fitted it will be difficult to move).
•The underlying floor material to which the fixing feet are to be attached (e.g. concrete or floorboards), and
the most appropriate fastening method.
•The possible location of under floor pipes or cables.
•If in doubt seek advice from professionals.
8. Warranty
This product carries a 12 month warranty from the date of purchase against manufacturing defects. Misuse or
damage is not covered. This warranty does not affect your statutory rights. As manufacturers we cannot specify
expected product life as this is based on the level of usage.
9. Disposal Instructions
•Appropriate hygiene standards should be applied before disposal to reduce the risk of infection.
•Materials used are essentially non hazardous and can be disposed of appropriately.
10. Contact Details
We have attempted to cover most eventualities, however if you have any specific queries, please contact:
Cefndy Healthcare
Cefndy Road
Rhyl
Denbighshire
LL18 2HG
Tel: 0044 1745 343877 (Quality Assurance Dept)
E-mail: cefndyengineering@denbighshire.gov.uk
This manual suits for next models
1
Table of contents
Popular Toilet manuals by other brands

Swiss Madison
Swiss Madison Cascade SM-1T129 installation instructions

Clou
Clou Hammock CL/04.01061.01 installation instructions

Bradley
Bradley Express SS Series installation instructions

Geberit
Geberit AquaClean 4000 quick guide

Franke
Franke CMPX592 Installation and operating instructions

FV
FV E149 installation instructions


SFA
SFA SaniCompact Star installation instructions

IFO
IFO Spira Art 6245 Operating and maintenance instruction

TECE
TECE TECEone operating instructions

Swiss Madison
Swiss Madison Sublime II SM-2T257 installation instructions

Toto
Toto CT970CEMFG installation manual

Spectrum
Spectrum Pfister Halifax VTP-E10HLW Quick installation guide