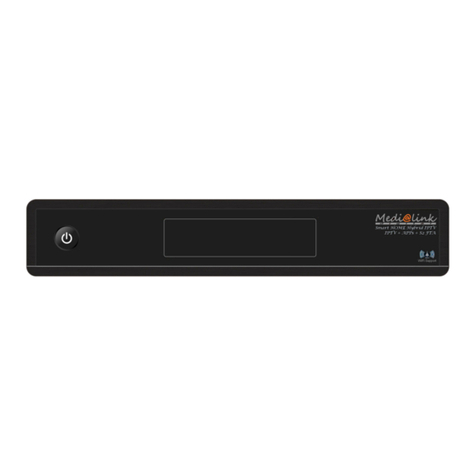
Medi@link Black Panther 1 Card Premium User manual

- 1 -
IMPORTANT NOTICE
Please read this user’s manual carefully to be able to safely install, use and maintain the product at maximum performance. Keep
this user’s manual next to your product for future reference. The information in this user’s manual is subject to change without
notice.
Warnings, Cautions and Notes
Throughout the whole manual, pay special attention to the following marks that indicate hazardous situations.
•
Warning
Indicates a hazardous situation which could result in serious injury.
•
Caution
Indicates a situation which could damage the equipment or other apparatus.
•Note
Indicates additional information to make the user aware of possible problems and information of any
importance to help understand, use and maintain the installation.
MEANING OF SYMBOLS
To reduce the risk of electric shock, do not remove cover (or back).
No user serviceable parts inside.
Refer servicing to qualified service personnel.
This symbol indicates dangerous voltage inside the product that presents a risk of electric shock or personal injury.
This symbol indicates important instructions accompanying the product.
SAFETY WARNING
This product has been manufactured to comply with international safety standards. Please read the following safety
precautions carefully.
Safety Instructions and Precautions
1.
MAINS SUPPLY
100-250V A.C., 50/60Hz
Operate this product only from the type of power supply indicated on the marking label. If you are not sure of
the type of power supplied to your home, consult your local power company.
Disconnect the product from the mains before you start any maintenance or installation procedures.
2. OVERLOADING
Do not overload a wall outlet, extension cord or adapter as this may result in electric fire or shock.
3. LIQUID
The product should not be exposed to liquid of any kind. In addition, no objects filled with liquid should be placed on
the apparatus.
4. CLEANING
Disconnect the product from the wall outlet before cleaning.
Use a light damp cloth (no solvents) to dust the product.
5. VENTILATION

- 2 -
The slots on top of the product must be left uncovered to allow proper airflow into the unit.
Do not stand the product on soft furnishings or carpets.
Do not stack electronic equipments on top of the product.
6. ATTACHMENTS
Do not use any unsupported attachments as these may be hazardous or cause damage to the product.
7. CONNECTION TO THE CABLE TV SIGNAL
Connect all components before plugging any power cords into the wall outlet.
Always turn off the product, TV and other components before you connect or disconnect any cables.
8. CONNECTION TO THE TV
Disconnect the product from the mains before connecting or disconnecting the cable from the TV. Failure to do
so can damage the TV.
9. LOCATION
Place the product indoors to avoid exposing it to lightning, rain or sun.
Do not place it near a radiator or heat register.
We recommend that the product has 10cm clearance from any other appliances susceptible to electromagnetic
influences, such as a TV or a VCR.
Do not block the openings with any object, and do not place the product on a bed, sofa, rug, or other similar
surface.
If you place the product on a rack or a bookcase, ensure that there is adequate ventilation and that you have
followed the manufacturer’s instructions for mounting.
Do not place the product on an unstable cart, stand, tripod, bracket, or table where it can fall. Afalling product
can cause serious injury to a child or adult, and serious damage to the appliance.
10. LIGHTNING, STORM or NOT IN USE
Unplug the product from the wall outlet and disconnect the antenna during a thunderstorm or when left
unattended and unused for long periods of time. This will prevent damage to the unit due to lightning and power-
surges.
11. EXTRANEOUS OBJECTS
Do not insert anything through the openings in the unit, where they can touch dangerous voltage points or
damage parts.
12. REPLACEMENT of PARTS
When replacement of parts is required, be sure the service technician uses replacement parts specified by the
manufacturer or those that have the same characteristics as the original part. Unauthorized substitution may
result in additional damage to the unit.
WARNING
1. To avoid damage of the power cord or plug;
Do not modify or process the power cord or plug arbitrarily.
Do not bend or twist the power cord.
Make sure to disconnect the power cord holding the plug.
Keep heating appliances as far as possible from the power cord in order to prevent the cover vinyl from melting.
The mains plug, as a disconnection device, shall remain readily accessible by the user.
2. To avoid electrical shock;
Do not open the main body.
Do not insert metal or inflammable objects inside the product.
Do not touch the power plug with wet hands.
Disconnect the power cord in case of lightning.
3. To avoid damage of product;
Do not use the product whenit is out oforder. If you continue to use the product when defective, serious damage
can be caused to it. Make sure to contact your local product distributor if the product is out of order.
Do not insert metal or alien substance into the slots for the modules or Smartcards. It may cause damage to the
product and reduce its life span.
4. Standby Mode;
It is recommended to leave the product in Standby mode during long periods when not being used e.g. Over
night.

- 3 -
CONTENTS
1. Getting Started
1.1 Package Contents
1.2 Front Panel
1.3 Rear Panel
1.4 Remote Control Unit (RCU)
1.5 Connecting TV
1.6 Connecting Audio System
1.7 Powering On
2. Installation
2.1 Antenna Setting
2.2 Satellite List
2.3 Transponder List
2.4 Motor Setting
2.5 Limit Setup
3. Setting
3.1 Channel Manager
3.1.1 Move
3.1.2 Lock
3.1.3 Delete
3.1.4 Delete All
3.1.5 Sort
3.1.6 Rename
3.1.7 Find
3.2 Favorite Editor
3.2.1 Favorite List
3.2.2 Add
3.2.3 Move
3.2.4 Delete
3.3 Network
3.4 Software Upgrade
3.4.1 USB Upgrade
3.4.2 Network Transfer
3.5 User Settings
3.6 Audio/Video
3.7 Date/Time
3.8 Timer List
3.9 Parental Lock
3.10Version
3.11Factory Reset
3.12Smart RCU(Remote Control Unit)
4. Media Center
4.1 Multimedia Apps (Applications)
4.1.1 YouTube
4.1.2 Vimeo
4.1.3 Dailymotion
4.1.4 Online
4.1.5 Internet Radio
4.1.6 Adult
4.1.7 News
4.1.8 Web Albums
4.1.9 Google Maps
4.1.10 Weather
4.1.11 Game Download
4.1.12 DLNA
4.1.12.1 DMP
4.1.12.2 DMR
4.2 User IPTV/M3U Setting
4.3 Multimedia Player

- 4 -
4.3.1 Movie
4.3.2 ISO Image
4.3.3 Music
4.3.4 Photo
4.3.5 Game
4.3.6 EBook
4.3.7 Record Manager
4.3.8 Disk Manager
4.4 Multimedia Setup
4.5 Streaming Buffer size
4.6 PVR Setup
4.7 FTP Client
4.8 Game
5. IPTV
6. Specification
1. Getting Started
1.1 Package Contents
Before using your product, please check all package contents before using your product.
Remote Control Unit
Batteries
User’s Manual
RCA Cable
Remote Control User's ManualBattery RCACable
1.2 Front Panel
1. Standby
2. Channel Up/Down
3. Volume Up/Down
4. OK
5. Menu
6. Display
7. USB
Switchs between operation and standby modes
Moves the TV/RADIO channel up or down
Adjusts the TV/RADIO volume up or down
Confirms your choice
Display the main menu
Shows channel information, either TV or Radio
Connects to an USB cable
8. Smart Card Reader
One (1) slot for a smart card

- 5 -
1.3 Rear Panel
1. LNB IN
Connects to the satellite antenna cable
2. LNB OUT
3. USB
Connects to another digital satellite receiver
Connects to an USB cable
4. ETHERNET
Connects to the network with an Ethernet cable
5. HDMI
Connects to the TV using an HDMI cable
6. S/PDIF
Outputs the digital audio signals
7. AUDIO L/R
Connects to the TV using a RCA cable
8. VIDEO(CVBS)
Connects to the TV using a RCA cable
9. TV SCART
Connects to the TV using a SCART cable
10. RS-232C
Connects to the PC to upgrade the software programme of the product
11. POWER
Turns On/Off
1.4 Remote Control Unit (RCU)

- 6 -
1) (MUTE) : Mutes or un-mutes the audio temporarily.
2) (POWER ON) : Switches between operation and standby modes.
3) NUMERIC(0~9) Key : To select channels and input of channel numbers or characters.
4) RECALL : Displays the history channel lists
5) INFO : Displays the channel and program information.
6) MENU : Displays the main menu.
7) EPG : Displays the Electronic Program Guide.
8) FAV : Displays the favorite channel group list.
9) EXIT : Returns to the previous menu.
10) UP : Navigates the cursor on the menu.
11) LEFT : Navigates the cursor on the menu.
12) RIGHT : Navigates the cursor on the menu.
13) DOWN : Navigates the cursor on the menu.
14) OK/LIST : Selects a menu or confirms the selected operation.
15) VOL + /VOL - : Adjusts the audio volume.
16) PAGE+/PAGE- : Moves up or down pages on the menu and TV/Radio List.
17) APPS : Displays the multimedia APPS list.
18) SAT : Displays the satellite list with their services list.
19) (TV/RADIO) : Switches between TV and Radio modes.
20) USB : Enters the Record Manager menu.
21) SUB.T(RED) : Displays the subtitle language list.
22) TXT(GREEN) : Displays the Teletext data.
23) TIMER(YELLOW) : Displays the Timer Setting menu for reservation.
24) AUDIO(BLUE) : Displays the audio list.
25) PLAY/PAUSE : Plays at normal speed or pause.
26) STOP : Stops the recording or playback program.
27) FR : Rewinds at high speed. Each time you press this button the rewind speed
is increased.
28) FF : Forwards at high speed. Each time you press this button the fast forward
speed is increased.
29) PLAY/SLOW : Plays at program in slow motion.
30) REC : Starts recording.
31) SR : Goes to the previous chapter.
32) SF : Goes to the next chapter.
33) A.B : Repeats the playback between the desired locations.
34) REPEAT : Sets the repeatness of directory or files.
35) IPTV : Displays the IPTV list.
36) OPT : Adjusts options.
37) V.F : Changes the video format.
38) SEEK : Goes to the next or previous chapter.
1.5 Connecting TV
(1) Connecting with HDMI cable
The HDMI connection is recommended for Digital TV. In case the TV has a HDMI input connector, a special all digital
interface that provides the highest picture quality,connect the product to the TV with the HDMI cable..
(2) Connecting with RCA Cinch cable
Plug one end of the cable into the VIDEO (yellow) socket on the product, and plug the other end into the matching
socket on TV set.Plug one ends of the cable in to the AUDIO L (white) and AUDIO R (red) sockets on the product,
and the other ends into the matching sockets on the product or audio-video receiver.
(3) Connecting with SCART cable
The SCART cable connection is recommended for Analog TV. Connect the product to the TV with the SCART.
1.6 Connecting Audio System

- 7 -
If you have external audio system like home theater, you can enjoy better and powerful audio as below
- Dolby digital (optical) : Use S/PDIF optical cable into Dolby digital decoder
- Stereo : Use 2-RCA cable for Audio L/R
.
1.7 Powering On
(1) Connect the power cord of the product to a wall outlet.
(2) Make sure that the Power switch at the rear panel is switched to ON..
(3) Power on by pressing the POWER button of the remote control unit or the POWER button at the front panel of the product.
2. Installation
The default password is “0000”
This chapter includes the first time setup of the Antenna Setting, Satellite List, Transponder List, Motor Setting and Limit Setup.

- 8 -
2.1 Antenna Setting
Antenna Setting enables you to enter the values such as Satellite, LNB Type, LNB Frequency, Transponder, 22kHz Tone, LNB Power
and DiSEqC Mode of each item and start channel search.
(1) Satellite: Select the required satellite using the OK or ▼▲ button and press the OK button.
(2) LNB Type: Select the required LNB Type using the OK or ▼▲ button and press the OK button.
(3) LNB Frequency: Select the required LNB frequency using the OK or ▼▲ button and press the OK button.
(4) Transponder: Select the required satellite using the OK or ▼▲button and press the OK button.
(5) 22KHz: Select On/Off/Auto using the OK or ▼▲ button and press the OK button.
(6) LNB Power: Select On/Off using the OK or ▼▲ button and press the OK button.
(7) DiSEqC Mode: Select the required DiSEqC input using the OK or ▼▲button and press the OK button.
(8) Press the Blue button to start scan method.
Network Search: Select On/Off using the ▼▲ button

- 9 -
Channel Type: Select All/FTA/TV/Radio using the ▼▲ button.
Scan Type: Select Auto Scan/Blind Scan/Manual Scan using ▼▲ button.
(9) Press the OK button to start channel search.
(10) Please wait while the search continues. If you want to stop the search, press the Exit button.
(11) When channel search is complete, the results will appear. Select Yes and press the OK button to save the results.
Note: If you cannot find the required LNB frequency from the list, enter the frequency using the NUMERIC (0-9) buttons
manually and press the OK button.
When using universal LNB, select Universal (9750/10600). The 22kHz tone value will be disabled.
2.2 Satellite List
Satellite List enables you to check antenna setting of each satellite, and perform Add, Edit, and Delete functions for satellites.
(1) Info: Change the values of antenna setting for the selected satellite
(2) Add: Add a new satellite
(3) Edit: Change the selected satellite name, position or longitude
(4) Delete: Delete the selected satellite(s)
(5) Scan: Start channel search for the selected satellite(s)
Note: Deleting satellite(s) will cause deleting all the channels belonged to the selected satellite(s).
2.3 Transponder List
Transponder List enables you to check antenna setting and satellite of each transponder, and perform Add, Edit, and Delete functions
for transponders.
(1) Info: Change the values of antenna setting for the selected transponder
(2) SAT: Make a list of all the transponders according to the selected satellite
(3) Add: Add a new transponder
(4) Edit: Change frequency, symbol rate or polarisation

- 10 -
(5) Delete: Delete the selected transponder(s)
(6) Scan: Start channel search for the selected transponder(s)
2.4 Motor Setting
Motor Setting enables you to setup motor setting if you have DiSEqC motor installed with your antenna.
(1) Satellite: Select a satellite to setup
(2) Transponder: Select TP frequency you want to search
(3) Motor Setting: Select Disable/USALS/ DiSEqC 1.2
2.5 Limit Setup
(1) Limit Setup: Select Set East Limit/Set West Limit/Disable Limit using the OK or ▼▲ button and press the OK button
(2) Continuing Move: Press the ▼▲ button to move motor in each direction. Motor moves continuously until stop it by pressing
the OK button.
(3) Move Step: Press the ▼▲ button to move motor in each direction. Motor moves only one step to locate satellite in a precise
position
3. Setting
This chapter includes the first time setup of Network, Software Upgrade, User Settings, A/V, Date/Time, Timer List, Parental Lock,
Version, Factory Reset and Smart RCU which will show you how to start the initial installation.

- 11 -
3.1 Channel Manager
Channel manger enables you to edit (lock, move, delete, delete all, sort, rename and find) channels in all channel lists.
3.1.1 Move
(1) Select a channel to move using ◀▶ button and press the OK button.
(2) Locate cursor to the point you want to put and press the Green button.
3.1.2 Lock
The default password is “0000”

- 12 -
(1) Select a channel to lock/unlock using ◀▶ button and press the Red button.
(2) Enter the password using the NUMERIC (0-9) buttons manually.
3.1.3 Delete
The default password is “0000”
(1) Select a channel to delete using ◀▶ button and press the Yellow button.
(2) A pop-up will appear. Select YES and press the OK button.
3.1.4 Delete All
The default password is “0000”
(1) Select a channel to skip using ▲▼ button and press the Blue button.
3.1.5 Sort

- 13 -
(1) Press F1 button to sort the channels.
(2) Select the preferences FTA/Scramble/A to Z/ Z to A/TP Frequency using ◀▶ button and press the OK button.
3.1.6 Rename
(1) Select a channel to rename and press F2 button.
(2) A Pop-up will appear. Enter the name of the channel you wish to rename.
3.1.7 Find
(1) Press F3 button to find a channel.
(2) A Pop-up will appear and enter the name of the channel you wish to find.
3.2 Favorite Editor
Favorite editor enables you to edit (add, move, delete) channels in favorite lists.

- 14 -
3.2.1 Favorite List
(1) Press the Blue button to display favorite groups.
(2) Select a channel to put into the favorite group list using ◀▶ button and press the OK button.
3.2.2 Add
(1) Select a channel to move using ◀▶ button and press the OK button.
(2) Press the Red button to add the selected channel into the selected group.
3.2.3 Move
(1) Select a channel to move using ◀▶ button and press the OK button.
(2) Locate cursor to the point you want to put and press the Green button.

- 15 -
3.2.4 Delete
(1) Select a channel to delete using ◀▶ button and press the OK button.
(2) Press the Yellow button to delete the selected channel.
3.3 Network
Network enables you to configure the wired or wireless connection.
(1) Link Type: Press the OK or ▼▲ button. Select Wire Network/Wi-Fi Network using ◀▶ button and press the OK button.
(2) Config: Press the OK or ▼▲button.
(a) Usually the IP address is automatically assigned by the router (DHCP)
(b) If you need to assign a static IP address to your product, please enter the IP address, Netmask, Gateway and DNS
Server.
(1) Ping Test: Press the OK or ▼▲ button. You can check the speed and performance of your Internet connection.

- 16 -
3.4 Software Upgrade
Software upgrade helps you to upgrade the latest software version via USB or FTP.
3.4.1. USB Upgrade
(1) Put USB memory into USB port.
(2) Select the software file which you want to upgrade in USB memory and press the OK button.
Note:
Please never pull out the USB memory or turn off the product while upgrading.
3.4.2. Network Transfer
(1) URL: Input the URL address.
(2) User Name: Input user name.
(3) Password: Input password
(4) Select File: Press the OK or ▼▲ button. Enter the address that the latest software locates using the NUMERIC (0-9)
buttons manually and press the OK button.
(5) Download Start: Press start to upgrade software.
3.5 User Settings
User settings allow you to select the main, subtitle and audio languages from the given language option and adjust OSD Transparency,
Hard Hearing, and limit info banner time.

- 17 -
(1) OSD Language: Press the OK or▼▲button to display OSD language list. Select the language that you want by pressing ◀▶
button and press the OK button.
(2) OSD Transparency: Select the OSD transparency level that you want and press the OK button.
(3) 1st/2nd Preferred Subtitle: Press the OK or ▼▲ button to display the 1st and 2nd Subtitle language lists. Select the language
that you want by pressing ◀▶ button and press the OK button.
(4) Hard Hearing: Select On/Off using the OK or ◀▶ button and press the OK button.
(5) 1st/2nd Preferred Audio: Press the OK or ▼▲ button to display the 1st and 2nd Audio language lists. Select the language that
you want by pressing ◀▶button and press the OK button.
(6) Info banner time limit: Select the banner time that you want by pressing ◀▶button and press the OK button.
(7) Standby Mode: Select either Advance or Power Save that you want by pressing ◀▶button and press the OK button.
(8) Weather Widget : Select ON/OFF using the OK or ◀▶ button and press the OK button. If you select ON, then weather
information will be showed on the screen.
(9) VFD Brightness : User can control VFD Brightness of the Front panel.
3.6 Audio/Video
Audio/Video allows you to adjust the output of the audio or video.
(1) Contrast: Press the OK or ▲▼ button to adjust contrast between 0 and 24 and press the OK button.
(2) Brightness: Press the OK or ▲▼button to adjust brightness between 0 and 24 and press the OK button.
(3) Saturation: Press the OK or ▲▼ button to adjust saturation between 0 and 24 and press the OK button.
(4) HUE: Press the OK or ▲▼ button to adjust hue between 0 and 30 and press the OK button.
(5) Sharpness : Press the OK or ◀▶button to adjust saturation between 0 and 24 and press the OK button.
(6) SPDIF: Select Bitsream/Mute/PCM by pressing by pressing the OK or ◀▶button and press the OK button.
(7) Aspect Ratio: Select 16:9/Full Screen/4:3 LB/4:3 PS by pressing by pressing the OK or ◀▶button and press the OK button.
(8) Video Output: Select RGB/CVBS by pressing by pressing the OK or ◀▶button and press the OK button.
(9) TV Type: Select PAL/NTSC/Auto Detect by pressing by pressing the OK or ◀▶button and press the OK button.
(10) Video Resolution: Select Auto Detect/576i_25/576p_50/720p_50/1080i_25/1080p_50 by pressing by pressing the OK or

- 18 -
◀▶button and press the OK button.
3.7 Date/Time
Date/Time allows you to set your current time according to your location.
(1) Mode: Select Auto/Manual by pressing by pressing the OK or ◀▶button and press the OK button.
(2) Date: Input directly Year/Month/Date using the NUMERIC (0-9) buttons manually and press the OK button.
(3) Time: Input directly Hour/Minute/Second using the NUMERIC (0-9) buttons manually and press the OK button.
(4) Time Zone: Select GMT time zone by pressing by pressing the OK or ◀▶button and press the OK button.
(5) Daylight Saving: Select On/Off by pressing by pressing the OK or ◀▶button and press the OK button.
3.8 Timer List
Timer list enables you to reserve new programmes you wish to watch, and modify/delete programmes reserved. You can also set the
time you want to turn/off the product.
Press the Yellow button to display Timer Edit.

- 19 -
(1) Date: Press the ▲▼ button. Input directly Year/Month/Date using the NUMERIC (0-9) buttons manually and press the OK
button.
(2) Program Name: Press the ▲▼button. Select the channel you want using ◀▶button and press the OK button.
(3) Start Time: Press the ▲▼button. Set starting time using the NUMERIC (0-9) buttons manually and press the OK button.
(4) Mode: Press the ▲▼ button. Select preferences (Once/Daily/Weekly/Monthly) using ◀▶button and press the OK
button.
(5) Type: Press the ▲▼button. Select preferences (Recorder/Channel/Standby/On)using ◀▶button and press the OK
button.
(6) Keep Standby : Select On/Off using the OK or ◀▶ button and press the OK button.
3.9 Parental Lock
Parental lock enables you to set system lock, parental rating and change Pin Code.
The default password is “0000”

- 20 -
(1) System Lock: Press the OK or ▼▲ button. Select On/Off and press the OK button.
(2) Channel Lock: Press the OK or ▼▲ button. Select On/Off and press the OK button.
(3) Parental Rating: Press the OK or ▼▲ button. Set parental rates using ▲▼ button and press the OK button.
(4) Change Pin Code: Press the OK or ▼▲button. Enter your new Pin Code using the NUMERIC (0-9) buttons manually and
press the OK button.
3.10 Version
This option helps you to know the current hardware, software and firmware version and build date.
3.11 Factory Reset
Factory reset functions only when you want to return the product to the condition of factory default. All settings and channels will be
deleted. The default password is “0000”
Table of contents
Other Medi@link Receiver manuals
