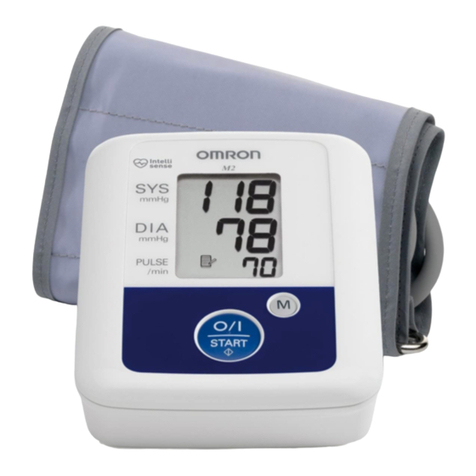
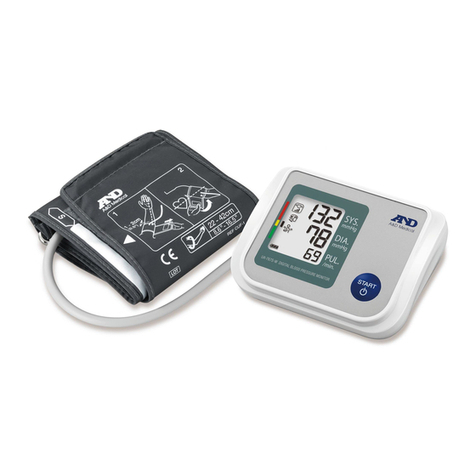
MediGenix MGX-1209 User manual

User Manual
MGX-1209
1 2
0197
EC REP
EC REP
MediGenix Upper Arm Automatic
Digital Blood Pressure Monitor
Safety Notice
Document No. DBP-1404-002Z
Version: V.Z.
Date of Issue: 2018.02.25
The product is in compliance with the requirements of
MDD93/42/EEC
“0197” is the identification number of the Notified Body
Contents
Safety Notice 02
Unit Illustration 04
Important Testing Guidelines 07
Quick Start 08
Battery Installation 09
Memory Groups 09
Time/Date Setting 10
Applying the Arm Cuff 11
Testing 12
Irregular Heartbeat Indicator 14
Memory Check and Memory Deletion 15
Troubleshooting 16
Blood Pressure Information 17
Blood Pressure Q&A 19
Maintenance 20
Specifications 22
Warranty 24
Warning Signs and Symbols Used
Caution
Mandatory
Prohibited
Type B Equipment
Consult Instructions for Use
Serial Number
SN
Discard the unit according to local recycling requirements
0197 The unit conforms to the requirements of the EC Directive
MDD (93/42/EEC) on medical devices
Manufacturer
Authorised Representative in the European Community
ever better
Please consult your doctor for specific information about your blood pressure.
European Authorized Representative: Shanghai International
Holding Corp. GmbH (Hamburg) Eiffestrasse 80, 20537 Hamburg,
GERMANY
Manufactured for Syringa UK Ltd
Unit G Daux Road, Billingshurst, RH14 9SR United Kingdom
By Hangzhou Sejoy Electronics & Instruments Co Ltd, Building 2,
No 202 Zhenzhong Rd, West Lake Economy & Technology Zone,
310030 Hangzhou, P.R.C.
Thank you for purchasing the MediGenix MGX-1209 Automatic Blood Pressure
Monitor. The monitor unit has been manufactured using reliable circuitry and
durable materials. Used properly, this blood pressure monitor will provide years
of satisfactory service.
The MediGenix BP Monitor is intended for non-invasive measuring of an adult’s
systolic and diastolic blood pressure and pulse using the oscillometric method.
The unit is designed for home or clinic use. Measurement position is on an adult’s
upper arm only. All values are shown on one LCD display.
Please read this User Manual before using the unit and retain it for future
reference. Avoid risk and damage by following all warning precautions.
ESH European Society of Hypertension
ESH Clinically Validated by the European Society of Hypertension

ME M
SYS
DIA
mmHg
mmHg
PUL
/min
STOP
START
3
5
4
6
Air Plug
ME M
SYS
DIA
mm Hg
mm Hg
PUL
/min
S TOP
ST
ART
1~2cm (0 .4~0.8 inch)
2 2 ~ 4 2 c m
(8 . 6 ~ 1 6 . 5 in c h)
Ma i n A r t er y
L E F T A R M
I N D E X
1~ 2cm (0 .4~0.8 inch)
22~42cm
(8.6~16.5 i nch)
Main Artery
L E F T A R M
IN D E X
Safety Notice Unit Illustration
Unit Illustration
Unit Illustration
Individuals with serious circulation problems may experience discomfort.
Consult your doctor prior to use.
Contact your doctor if test results regularly indicate abnormal readings.
Do not attempt to self-treat these symptoms without consulting your doctor
first.
The device is designed for its intended use only. Do not misuse in any way.
Caution Monitor Unit LCD
Systolic Blood Pressure
Diastolic Blood Pressure
Pulse Rate
Air Jack
“START/STOP” Button
“MEMORY” Button
Battery Cover
Contents
1. Monitor Unit 2. User Manual
User Manual
MediGenix Upper Arm Automatic
Digital Blood Pressure Monitor
MGX-1209
Battery Precautions
Do not mix old and new batteries simultaneously.
Replace batteries when “Low Battery Indicator”
Arm Cuff
Display
The device is not intended for infants or individuals who cannot express
themselves.
Do not disassemble or attempt to repair.
Do not use mobile phones or other devices near the BP Monitor which generate
strong electrical or electromagnetic fields, as they may cause incorrect readings
due to being a source of interference.
3. Arm Cuff 4. Storage Case
appears on screen.
Ensure battery polarity is correct.
Do not mix battery types. Long-life alkaline batteries are recommended.
Remove batteries from the device when not in operation for more than 3 months.
Dispose of the batteries correctly observing local laws and regulatons.
Arm Cuff
Air Tube
ever better
Groups
mmHg
kPa
M
D
No
AVG
(
( )
)
Low Battery Indicator
WHO Blood Pressure
Classification Indicator
Last 3 Results Average
Irregular Heartbeat Indicator
Time
Date
Systolic
Blood
Pressure
Diastolic
Blood
Pressure
Pulse Rate

Note: if the unit is left on and is not used for 3 minutes,
it will automatically save all information and switch off.
7
9
8
10
1-2cm ''(0.4-0.8 )
ME M
SYS
DIA
mmHg
mmHg
PUL
/min
STO P
ST ART
Important Testing Guidelines Quick Start
Unit Operation
Unit Operation
1. Avoid eating, exercising or bathing 30 minutes before testing.
2. Relax in a calm environment for 5 minutes before testing.
3. Do not stand whilst testing. Sit in a relaxed position with your arm resting in
your lap or on a table in front of you.
4. Do not talk or move during measurement.
5. Do not test near strong electromagnetic interference such as microwave ovens
or mobile phones.
6. Wait for at least 3 minutes before retesting.
7. Try to measure your blood pressure at the same time each day. First thing in
the morning before you get up is best as you are relaxed and the conditions
are the same each day. This will provide consistent results which can be
compared to establish a trend.
8. Test comparisons should only be made when readings are made on the same
arm, in the same position and at the same time of the day.
9. This blood pressure monitor is not recommended for people with severe
arrhythmia.
Battery Installation
1. Install batteries (see Figure A).
2. Insert the cuff air plug into the left side of the monitor unit (see Figure B).
Figure A Figure B
Figure C
3. Remove clothing from your arm area.
4. Rest for at least 3 minutes before testing and do not eat or drink anything.
5. Sit down in a calm environment, preferably at a table, with your arm resting
on a firm surface and both your feet flat on the floor (see Figure C).
6. Apply the cuff to your left arm with the tube situated as in Figure D below.
Figure D Figure E
7. Press the “START/STOP” button to start testing.
The bottom of the cuff should be positioned approximately 1-2cm (0.4-0.8”)
above the elbow joint (see Figure E).
Slide battery cover off as indicated by the arrow on the cover. Install 4 new AA
alkaline batteries observing the correct polarity.
Close the battery cover.
Hold down the “START/MEM” buttons together for 4 seconds to activate
System Settings. A Memory Group icon will flash.
Push the “MEM” button to switch between group 1 and group 2.
System Settings
M
D
Push “START/MEM” buttons again to initiate time and date set up.
Push “MEM” to adjust values and “START/STOP” when satisfied to save the
setting.
The next value will start flashing automatically. Repeat the process until all
the settings are saved.
1. Select Memory Group:
2. Time and Date Setting:

mmHg
M
D
mmHg k P a
M
D
N o
1211
13
1-2cm ''(0.4-0.8 )
ME M
SYS
DIA
mmHg
mm Hg
PUL
/min
STO P
ST ART
mmHg
M
D
Note: Refer to page 17 for detailed information on blood pressure.
mmHg
M
D
Unit Operation Unit Operation
Applying the Arm Cuff
1. Firmly insert the air plug into the opening located on the left side of the
monitor unit.
2. With the sticky velcro section facing outwards, insert the end of the cuff
underneath the metal ring of the cuff.
3. Fasten the cuff about 1-2cm (0.4-0.8”) above the elbow joint. For best
results, apply the cuff to the bare arm. Keep it level with the heart while
testing.
Testing
1. Power On:
Press and hold “START/STOP” button until a beep sounds. The LCD screen
will appear for one second as the unit performs a quick diagnosis. A long
tone indicates the unit is ready for testing.
Unit Operation
Unit Operation 14
Note: The unit will not function if residual air from previous testing is
present in the cuff. The LCD will flash until the pressure is stabilized.
2. Pressurization:
Initial pressure is first pumped to 190mmHg. If the current user’s syst
olic
blood pressure is over 190mmHg, the unit will automatically re-inflate to
the proper level.
3. Testing:
After cuff inflation, air will slowly subside as indicated by the corresponding
cuff pressure value. A flashing will appear simultaneously on screen
signaling heart beat detection.
Note: Relax and do not move or speak during testing.
4. Result Display:
Three short beeps sound when the testing is complete. The screen will display
measurements for systolic and diastolic blood pressure and the pulse per
Power Off
Safety Precaution: If the arm cuff pressure becomes too extreme whilst
testing, simply press the “START/STOP” button to turn the unit off. The cuff
pressure will rapidly deflate once the unit is off.
minute. An indicator representing the current measurement will appear next
to the corresponding WHO Classification.
The “START/STOP” button can be pressed to turn the unit off in any mode. The
unit will switch itself off if it has not been operating in any mode for about 3
minutes.
Indicator
Irregular Heartbeat Indicator:
If the monitor detects an irregular heart rhythm twice or more during the
measuring process, the Irregular Heartbeat Symbol will appear on
screen together with the measurement results.
Irregular heartbeat rhythm is defined as rhythm that is either 25% slower
or faster than the average rhythm detected whilst measuring systolic
and diastolic blood pressure.
Consult your doctor if the Irregular Heartbeat Indicator appears.
5. Storing Test Results:
Test results are automatically stored by date within the previously
configured memory group. If the number of tests surpasses 60 memories
per group, the most recent test results will show first thus eliminating the
oldest readings.

16
18
15
17
Example: fluctuations within a day (35 year old male)
mmHg
200
150
100
50
6 12 18 24
Upper curve: systolic blood pressure
Lower curve: diastolic blood pressure
Time of day
180
160
140
130
120
Unit Operation Unit Operation
Memory Deletion
When in memory check mode, press “START/STOP” for about 3 seconds to
delete all history results. The LCD screen will display “---” with beeping sounds.
Press the “START/STOP” button to turn the unit off. Memory cannot be recovered
Low Battery Indicator
4 short warning beeps sound when the battery life is depleted and unable to
inflate the cuff for testing. The appears simultaneously for approximately
5 seconds prior to switching off. Replace the batteries at this time. No memory
loss will occur throughout this process.
Troubleshooting
Problem Possible Cause Solution
Blood pressure
results are not
within the typical
range.
Cuff is too tight or not
properly positioned on the
arm.
Inaccurate test results due to
body movement or monitor
movement.
Firmly reposition the cuff
approximately 1-2cm (½”) above
the elbow joint (see page 11).
Sit in a relaxed position with
both feet flat on the floor and
your left arm resting in your lap
or on a table in front of you.
Do not speak or move during
testing.
Ensure the monitor is not
bumped or moved during testing.
“ ” is displayed.
Cuff fails to inflate properly.
Improper operation.
Pressurization is over
300mmHg.
Ensure air tube is properly
fastened to the cuff and the
monitor unit.
Read User Manual carefully
and re-test properly.
Read User Manual carefully
and re-test properly.
Blood Pressure InformationBlood Pressure Information
Blood Pressure
Blood pressure is the force of blood pushing against the walls of the arteries. It is
typically measured in millimeters of mercury (mmHg). 120/80 is considered
normal.
Systolic blood pressure is the maximum force exerted against blood vessel walls
each time the heart beats and is the higher of the two readings (120). Diastolic
blood pressure is the force exerted against blood vessel walls when the heart
relaxes between beats and is the lower of the two readings (80).
Blood pressure frequently changes throughout the course of a day. Excitement or
stress can cause blood pressure to rise whilst drinking alcohol or bathing can
lower blood pressure. Certain hormones like adrenaline, which one’s body
releases when stressed, can cause blood vessels to constrict thus leading to a rise
in blood pressure.
If one’s blood pressure is too high it means the heart is working harder than it
should. Like any muscle, if the heart is continuously working too hard it will grow
thicker. The thickening of the heart muscle reduces the capacity of the heart
chambers and so lowers the amount of blood the heart can pump out in a single
beat. This means the heart has to beat faster to meet the oxygen supplies one’s
body is demanding and in so doing, perpetuates a dangerous cycle which can
ultimately end in congestive heart failure.
Health Reminder
Hypertension is a dangerous condition that can lead to mulitple health
problems including, but not limited to, heart failure, kidney failure and cerebral
hemorrhaging. By maintaining a healthy, active lifestyle; by monitoring your
blood pressure and having regular doctor visits; hypertension can be more
effectively controlled especially when diagnosed in the early stages.
Systolic (mmHg)
Diastolic (mmHg)80 85 90 100 110
Optimal
Normal
High Normal
Mild Hypertension
Moderate Hypertension
Severe Hypertension
mmHg
M
D
M
D
N o
Memory Check
With power off, press and hold the “MEM” button to turn the unit on. The LCD
will display the last measurement memory as NO:1 reading. Older test results in
the memory can be viewed by pressing the “MEM” button repeatedly.
once it has been deleted.
Last 3 Tests Average
With the power off, press the MEM button to activate the screen display. After
the unit has performed a self-diagnosis, the screen will display the average of the
last 3 test results of the last user group.
The WHO Blood Pressure Classification Indicator is based on established
guidelines from the World Health Organisation.
Severe Hypertension
Moderate Hypertension
Mild Hypertension
High Normal
Normal
Optimal
mmHg
M
D
Normal
Do not be alarmed if an abnormal
reading occurs. A better indication
of one’s true blood pressure can be
obtained by testing at the same
time of the day for 3 days in a row -
ideally first thing in the morning
before getting out of bed.

2019
SYS
PUL
DI A
m
m
min
/
m
m
H
H
g
g
ME M
S T O P
S T A R T
2221
Blood Pressure Q & A
Q: What is the difference between measuring blood pressure at home versus
measuring blood pressure at the clinic or doctor?
A: Readings taken in a clinical environment may be higher than usual due to
the patient feeling anxious. This is known as White Coat Hypertension.
Therefore readings taken at home at the same time each day are seen to
give a more accurate account.
Note: Abnormal test results may be caused by:
1. Improper cuff placement - ensure the cuff is snugly fitted and is
not too tight nor too loose. The bottom of the cuff should be
approximately 1-2cm (½”) above the elbow joint.
2. Improper body position - ensure your body is kept in an upright
position with your arm relaxed.
3. Feeling anxious or nervous - take 2 or 3 deep breaths and relax.
Wait a few minutes and retest.
4. Moving or talking during measurement - do not move or talk
during measurement. Breathe normally and relax.
Q: What causes different readings?
A: Blood pressure varies throughout the course of the day. Many factors may
affect a person’s blood pressure including diet, stress, cuff placement, levels
of hydration.
Q: Which arm should I apply the cuff to? What is the difference?
A: Testing on the left arm may provide more accurate results as it is closest to
the heart however either arm can be used. Ensure that when results are
compared that the same arm has been used. Do not mix left and right arm
results.
Q: What is the best time of day for testing?
A: Generally when you wake up in the morning before you get out of bed but
otherwise any time of the day when you feel relaxed and stress free.
Maintenance
1. Avoid dropping, slamming or throwing the unit.
2. Avoid extreme temperatures. Do not expose the unit directly to sunshine.
3. Use a soft cloth and mild detergent to gently wipe the unit clean.
Use a damp cloth to wipe away excess detergent or dirt.
Do not let liquid get into the unit.
Specifications*
Maintenance
4. Cleaning the cuff: Do not soak the cuff in water! Apply a small amount of
rubbing alcohol to a soft cloth to clean the cuff’s surface. Use a damp cloth
(water-based) to wipe clean afterwards. Allow the cuff to dry naturally at
5. Do not use petrol, thinners or similar solvents.
6. Remove batteries when not in operation for an extended period of time.
7. Do not disassemble the unit.
8. Expected service life: approximately 3 years at 30 tests per day.
Product Description Arm-Type Fully Automatic Digital Blood Pressure Monitor
MGX-1209
Model
Display LCD Digital Display Size: 62.7 x 46.4mm (2.47” x 1.83”)
Measurement Range
Measurement Method Oscillometric Method
Measurement
Accuracy
Pressure
Pulse
0mmHg - 300mmHg
30 - 180 beats per minute
Pressure
Pulse
±3mmHg
±5%
Pressurization
Memory
Functions
Power Source
Battery Life
Unit Weight
Unit Dimensions
Cuff Circumference
Operating
Environment
Storage
Environment
Classification
Humidity
Temperature
Temperature
Humidity
5˚C - 40˚C (41˚F - 104˚F)
-10˚C - 55˚C (14˚F - 131˚F)
≤85%RH
<95%RH
Internal Powered Equipment, Type B , Cuff is the Applied Part
*Specifications are subject to change without notice
Automatic Pressurization
2 x 60 Memories
4 AA batteries provided
Approximately 2 months at 3 tests per day
Approximately 240g (excluding batteries)
Approximately 134 x 99 x 66mm (5.28” x 3.90“ x 2.60”) (LxWxH)
Approximately 135 x 485mm (WxL)
Fits arm circumference 22 - 42cm (8.6 - 16.5 inch)
room temperature.
Irregular Heartbeat Detection
WHO Classification Indicator
Last 3 Results Average
Low Battery Detection
Automatic Power Off
SYS
PUL
DI A
m
m
min
/
m
m
H
H
g
g
MEM
S T O P
S T A R T
SYS
PUL
DI A
m
m
min
/
m
m
H
H
g
g
ME M
S T O P
S T A R T
SYS
PUL
DI A
m
m
min
/
m
m
H
H
g
g
ME M
S T OP
S T A R T

2423
The MediGenix MGX-1209 Automatic Digital Blood Pressure Monitor complies with
the European regulations and bears the CE mark “CE 0197”. This blood pressure
monitor also complies with mainly the following standards including, but not limited,
to:
Safety standard:
EN 60601-1 Medical Electrical Equipment Part 1: General requirements for Safety EMC
Standard;
EN 60601-1-2 Medical Electrical Equipment Part 1-2: General requirements for Safety -
Collateral Standard: Electromagnetic Compatibility - Requirements and tests
performance standards;
EN 1060-1 Noninvasive Sphygmomanometers - General requirements;
EN 1060-3 Noninvasive Sphygmomanometers - Supplementary requirements for
electromechanical blood pressure measuring systems;
EN 1060-4 Noninvasive Sphygmomanometers - Test procedures to determine the
overall system accuracy of automated noninvasive sphygmomanometers.
ESH International Protocol 2010 clinically validated for BP-1209
Correct disposal of this product (Waste electrical & Electronic Equipment)
This marking shown on the product indicates that it should not be disposed of with
other household waste at the end of its life. To prevent potential harm to the environ-
ment or human health, please separate this product from other types of wastes and
recycle it responsibly. When disposing of this type of product, contact your local
-
mentally safe recycling centre. This product should not be mixed with other commer-
cial wastes for disposal. This product is free of hazardous materials.
Specifications Warranty
The MediGenix MGX-1209 Automatic Digital Blood Pressure Monitor is covered
by a 1 year product warranty from date of purchase. If the unit does not function
properly due to defective components or poor workmanship, we will repair or
replace it free of charge.
The warranty does not cover damages to the unit due to improper handling or
accidental damage.
Please contact www.medigenix.co.uk for customer service and have your sales
receipt to hand to validate your warranty.
Table of contents
