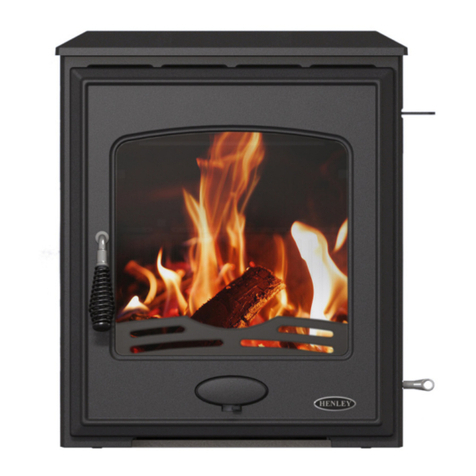
Meg Stoves Meg 5.0 User manual

Manual Version 1.7, Issued: 18/02/2014
Instructions and Installation Guide for Meg 5.0 Stove / Sirius 600 Inset
This document is to be left with the householder after installation.
All Meg stoves exceed the safety and performance requirements of European Standards.
Independently tested by SGS (Notified Laboratory No: 0608) in 2012.
Intermittent wood burning roomheater for installation with a single dedicated chimney.
Meg 5.0 / Sirius 600
Fuel
Wood (Beech)
Test Standard
NEN EN 13229:2001 & NEN EN 13229-A2:2004
Test Cycle
1.20kg over 0.80hrs
Settings
Air Slide at 50%
Flue Draught Pa
12.2
Efficiency %
76.30%
Recommended Rating kW
4.9
Mean Flue Gas Temp Rise °K
276
Minimum air entry requirement
2500mm²
Minimum Clearance to combustibles
See table below
Weight
60kg
Flue outlet size
125mm
Emissions as if O2 = 13%
NOx mg/mᶟ
91
CO %
0.19
CxHy mg/mᶟ
148
Gas flow g/sec
5.1
Smoke Emission g/hr
0.7
This stove must be installed and commissioned by a fully qualified registered engineer, or the building inspector must be informed. For more details contact your local
authority.
This document, when completed by the installer, constitutes part of a ‘Hearth Notice’ for purposes of Building Law. It must be left with the householder and placed
where it can easily be found.
Installed at Location: .................................................................................................... By:........................................................................................................................
I definitively assert that this installation is safe, has been lit and demonstrated to the householder, conforms with current building regulations and with these
instructions.
Signed:............................................................................................................................. Date:.......................................................................................................................
Flue Draught measured on commissioning: .....................................................................
Fuel used on commissioning:.............................................................................................
Installers; Please return the transit skids to the retailer so they can be returned to the manufacturer for re-use.
The Clean Air Act 1993 and Smoke Control Areas
Under the Clean Air Act local authorities may declare the whole or part of the district of the authority to be a smoke control area. It is an offence to emit smoke from a chimney of a building, from a furnace or from any
fixed boiler if located in a designated smoke control area. It is also an offence to acquire an "unauthorised fuel" for use within a smoke control area unless it is used in an "exempt" appliance ("exempted" from the
controls which generally apply in the smoke control area).
The Secretary of State for Environment, Food and Rural Affairs has powers under the Act to authorise smokeless fuels or exempt appliances for use in smoke control areas in England. In Scotland and Wales this power
rests with Ministers in the devolved administrations for those countries. Separate legislation, the Clean Air (Northern Ireland) Order 1981, applies in Northern Ireland. Therefore it is a requirement that fuels burnt or
obtained for use in smoke control areas have been "authorised" in Regulations and that appliances used to burn solid fuel in those areas (other than "authorised" fuels) have been exempted by an Order made and
signed by the Secretary of State or Minister in the devolved administrations.
Further information on the requirements of the Clean Air Act can be found here: http://smokecontrol.defra.gov.uk/
Your local authority is responsible for implementing the Clean Air Act 1993 including designation and supervision of smoke control areas and you can contact them for details of Clean Air Act requirements
The Meg 5.0 / Sirius 600 Inset has been recommended as suitable for use in smoke control areas when burning wood.

Important Points
This stove is a wood burner, only use wood and specifically wood recommended by the manufacturer (see “Operation” section for details of recommended wood).
This stove is not an incinerator and should not be used to burn anything other than the manufacturers recommended fuel. Liquid fuels should never be used in any
Meg stove.
This stove becomes extremely hot and can produce poisonous gases. A fire guard should be used if children or the infirm are present. The installer is required to
exactly follow these instructions and to completely comply with all relevant local, national and international standards.
This stove does not contain asbestos but care should be taken to avoid disturbing asbestos when installing in older settings.
Avoid placing any items (e.g.: paintings, photographs, ornaments) on the wall or near to the stove as the heat emitted can cause damage over time.
This stove is rated at <c5kW when burning fuel of 1kg or under and as such does not require an external air vent. Be aware that over fuelling the stove can result in an
output of >c5kW so please follow the manufacturer’s advice regarding levels of fuel. If it is likely that the user will over fire the stove we recommend that a
permanently open vent is fitted directly to outside air, as per building regulation requirements, with a recommended opening of no less than 36cm².
Do not place an extractor fan or cooker hood in the same room as your stove, these devices can remove air that the stove requires to function correctly.
Fit a Carbon Monoxide alarm near to the stove
Your Chimney
Once warm, your chimney makes the gas inside it rise, pulling fresh air into the stove to make it work. Your chimney must:
Generate a draught in use of at least 12 Pa (0.05ins wg) and not in excess of 25 Pa.
Be capable of withstanding the temperatures generated.
Be absolutely incapable of leaking fumes into the dwelling –this will commonly be achieved by it:
Being at least 5m high.
Terminating at least 1m above any roof ridge.
Having an internal cross-section not less than 0.018m² (e.g.: 150mm dia) and never more than 0.14m² (e.g.: 375 x 375mm).
Being free from even the slightest crack or source of leakage.
Having no bends sharper than 45°.
Being entirely free of obstructions and swept by a qualified chimney sweep.
Being connected to only this stove.
Being of thick masonry or otherwise adequately insulated.
Conforming to local building regulations.
Special rules apply where the flue passes through timber, thatch or other vulnerable materials –take specialist advice.
Operation
The specialist heat resistant paint used on your stove will cure the first time the stove is fired up; this process takes around 45 minutes. During the curing process the
paint may emit vapour and produce an odour, keep the room well ventilated to avoid any build up of fumes. Do not touch the surface of the stove during the first fire
up.
Burn only seasoned timber with a moisture content of less than 20%. A recommended source is Certainly Wood Kiln Dried Logs. Burning damp wood can lead to a
reduction in efficiency, excessive fumes and a build up of tar and dirt inside the stove that will be particularly evident in the window. A moisture meter is available
from your retailer.
Your stove will become very hot during operation, use a glove or the tool provided to open the door and adjust the top air vent control. Always open the door slowly
to reduce fume emission and prevent hot fuel falling out. The door should remain closed once the fire is established and only opened to refuel and remove residue, in
order to prevent fume spillage.
The top vent on your stove can be slid from left to right to control the amount of air that is drawn in; when the valve is slid fully to the right it is open and fully to the
left is closed.
To light the fire use a firelighter and kindling, leave the door slightly open whilst fire establishes and then add larger logs (see diagram below for optimum
recommended size log). Close the door and keep the top air vent fully open. Once fire is fully established close down the air vent to control the burn rate, for
optimum performance it is recommended to keep the top vent at least half open.
Kiln dried beech logs of around 1.2kg are
recommended for optimum performance.

Do not over fill the fire box, it is better to add smaller amounts of wood more often. Over filling the stove, or running it for prolonged periods of time with the air vent
fully open, can result in over-firing, which entails an excessive build up of heat which can permanently damage your stove.
It is recommended that you add kiln dried beech logs weighing around 1.2kg at approximately 45 minute intervals to achieve optimum efficiency and minimal emissions
as per this stoves test results. Do not overfill your stove; never add more than two logs at a time. Failure to adhere to these recommendations can cause excessive
smoke contrary to regulations.
A bed of ash in your stove will aid combustion but ash levels should not be allowed to build up to more than 10mm. Never remove hot ash from your stove, allow it to
cool down and remove excess ash with a suitable brush and pan. Hot ashes should not be disposed of in plastic bins or sacks.
If there is insufficient burning material in the firebed to light a new fuel charge, excessive smoke emission can occur. Refuelling must be carried out onto a sufficient
quantity of glowing embers and ash that the new fuel charge will ignite in a reasonable period. If there are too few embers in the fire bed, add suitable kindling to
prevent excessive smoke.
Operation with the air controls or appliance dampers open can cause excess smoke. The appliance must not be operated with air controls, appliance dampers or door
left open except as directed in the instructions.
Be aware that weather conditions such as wind and rain can affect the performance of the stove, the effects can vary depending on your chimney / flue but as an example
the fire will often be smokier and take longer to establish on damp and rainy days. Draw of less than 12 Pa can result in difficulties establishing a fire; draw of in excess of
25 Pa can lead to poor fuel economy and noise caused by air being drawn through the stove too rapidly.
If your stove emits smoke into the room continuously you should immediately ventilate the room and close the top valve completely and allow the stove to go out. Once
this is done contact your installer or stove retailer to assess the situation. Do not re-light the stove until the problem has been resolved. Follow the same procedure in
the event of any other malfunction (e.g. overheating).
In the event of a chimney fire (roaring sound + dense smoke and sparks from the chimney) shut the top air vent and stove door, evacuate the premises and call the fire
brigade.
Maintenance
Regular cleaning and maintenance will help prolong the life of many of the replaceable components in your stove. Before carrying out any cleaning or maintenance tasks
ensure that the stove is totally cold. The stove internals should be removed in the following order:
Front bar
Base vermiculite (x2)
Left and right side vermiculite (hold top vermiculite in place when removing side pieces)
Top Vermiculite
Baffle plate
The stove window is made from a high quality transparent ceramic and should remain clean as long as the correct dry logs are burned. If any soot does build up it can
often be wiped away using a sheet of newspaper, in the event of more severe stains use a proprietary stove glass cleaner to remove. Ensure that the window is
completely dry before lighting the stove again.
Check on a monthly basis that the flue is clear and unblocked and that the door seals are sound.
The trim of your stove can be cleaned when cool with a slightly damp cloth, if touch up painting is required special stove paint is available. Never spray an aerosol near
the stove when it is hot.
It is recommended that you have your chimney swept on an annual basis.
Before a long period of non-use, potentially during the warmer months, empty all fuel and ash and leave the top air vent fully open to reduce condensation.
Your stove generates very high temperatures and eventually the internal components will require replacement, when the time comes use only parts provided or
recommended by the manufacturer.
Troubleshooting
Window blackening: this can be caused by burning damp, unseasoned wood and also by running the stove at too low a temperature. Always burn dry logs and open up
the top air vent for approximately 20 minutes to eliminate the problem. Insufficient draw from the flue can also cause window blackening, particularly if the flue has too
much downdraft, is too short, needs lining or has too many bends. If this is the case it is best to contact a flue specialist for advice.
Poor Heat Output: A stove can heat a typical room of about 12m² volume for each kW of output, so a 5kW stove can heat up to (12 x 5) 63m², a room of about 5m
square. The actual size depends on the insulation and air-change rate of the room. To attempt to heat a larger room will result in excessive fuel consumption and
damaging overheating.
Smoke In Room: Check all seals, ensure chimney / flue is unobstructed, be certain that chimney draught is at least 12Pa (your installer should have checked and signed
this off). Windy conditions can also sometimes cause smoking and poor performance

Installation
Key Installation Requirements
We recommend that this stove is fitted in a tiled or stone frame, or a suite. It is possible to install the stove directly in the wall using high temperature render
and plaster, however even this can show hairline cracks due to the high temperatures that can be generated above the stove.
There should be no gaps behind or to the side of the stove in order to prevent chimney debris collecting.
If there is a gap behind the stove it should be filled with vermiculite granules topped with mortar. The fire should have an absolutely airtight seal against the
fireplace. When fitting this stove with a trim, a gap will be required between the flange and back panel to allow the trim to be attached, please see the
relevant trim instructions for further guidance.
A non-combustible base should be created for the stove to sit upon.
The appliance should be installed on floors with an adequate load-bearing capacity. If an existing construction does not meet this pre-requisite, suitable
measures (e.g. load distributing plate) should be taken to achieve it.
Fixing Stove in Place
A clearance of at least 600mm in width is required to fit the stove; it is designed
to fit under most lintels.
The flue collar is secured in place by two M6 nuts that can be accessed from the
inside of the stove. The collar should be removed before the stove is positioned
and then re-attached (for details of how to remove stove internals to access flue
collar see the “Maintenance” section on previous page).
It is the responsibility of the installer to confirm if a flue liner is required, see the
“Your Chimney” section on previous page for more details.
Some suggested methods of installation are detailed below:
In specifically designed suites:
With specifically designed tile sets:
With specifically designed frames:
Key Points for this installation:
The slips must be backfilled
A choice of trims, either bevelled or square
profiled, can be used.
Key Points for this installation:
The wall must be structurally sound.
All surrounding plasterwork must be sound.
It is recommended that the wall above the stove is
rendered and plastered using products with a high
temperature resistance. Even if this precaution is
taken it should be noted that over firing the stove can
still result in hairline cracks appearing due to the
excessive temperatures generated.
High temperature adhesive should be used and
applied to the whole tile, ask your retailer for a
suitable product.
Key points for this installation:
The wall must be structurally sound.
All surrounding plasterwork must be sound.
A specifically designed bracket is included with the
frame and must be chased into the wall to a depth of
10mm such that the bottom of the slip is 160mm
below the bottom of the stove (excluding the trim). It
is the responsibility of the fitter to ensure that
adequate fixings are used such that the bracket is
securely fixed to the wall and can take the weight of
the whole frame.
Suitable high temperature adhesive must be used and
must be applied to the whole rear surface of each slip
of the frame.
Designed and hand built in England
Meg Stoves
Station Works
Hooton Road
Hooton
CH66 7NF
www.megstoves.com
+44(0)151 328 0191
The Meg stove designs are registered at the UK patent office and protected by Copyright © and UK Design Right. Certain parts are UK Patent Applied For. This document issued 18/02/2014. We are always striving to improve
these products and may change their specification without notice.
This manual suits for next models
1
Popular Wood Stove manuals by other brands

RAIS
RAIS attika NEXO 100 GAS installation guide

WoodPro
WoodPro WS-TS-1500 owner's manual
Contura
Contura C 586W installation instructions
Palazzetti
Palazzetti EVA GENERAL INFORMATION - WARNINGS - INSTALLATION - MAINTENANCE

Lopi
Lopi 1250 Republic owner's manual
Panadero
Panadero CAPRI 3V Usage and maintenance instructions
