manuals.online logo
Brands
  1. Home
  2. •
  3. Brands
  4. •
  5. Mega
  6. •
  7. Jack
  8. •
  9. Mega TJ-6 A Troubleshooting guide

Mega TJ-6 A Troubleshooting guide

MELCHOR GABILONDO, S.A.
Polígono Industrial Eitua,6 / 48240 Bérriz (Vizcaya) ESPAÑA / Tel.94 622 50 90 / Intl: 34-94 622 50 90
Telefax: 94 622 52 78 / Intl.: 34-94 622 52 78 / Teléfono Ventas: 94 622 50 30
Telefax Ventas: 94 682 73 50 / E-MAIL: [email protected] / [email protected]
INSTRUCCIONES DE USO Y MANTENIMIENTO
OPERATION AND MAINTENANCE INSTRUCTIONS
UTILISATION ET ENTRETIEN
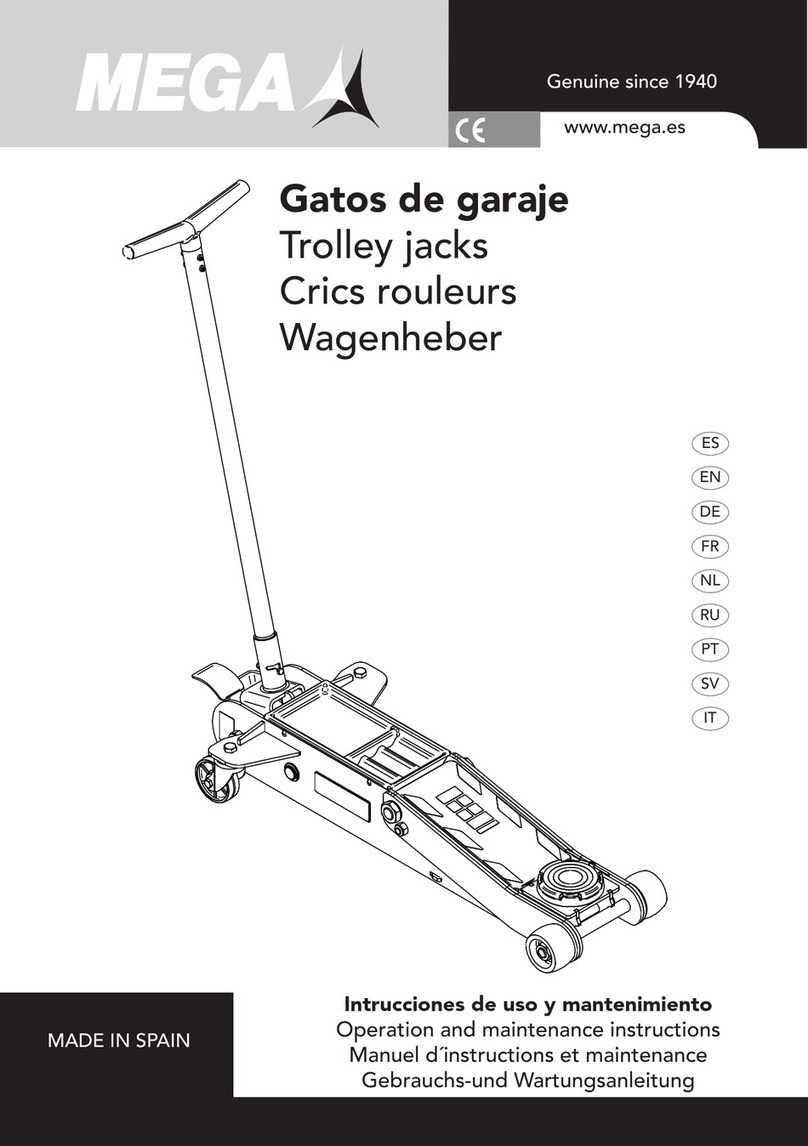
Gatos de garaje

Trolley jacks

Crics rouleurs
TJ6A.03. sep-06
TJ-6 A / TJ-10 A / TJ-12 A
1º
2º
Ilus.
MODEL MODEL
Nº NOMBRE/DESCRIPTION
DESIGNATION
TJ-6 A
6 t
TJ-10 A
10 t
TJ-12 A
12 t Nº NOMBRE/DESCRIPTION
DESIGNATION
TJ-6 A
6 t
TJ-10 A
10 t
TJ-12 A
12 t
REF. REF.
1 Tapa/Cover/Capot TJM-6/1239 TJM-10/1239 TJM-12/1239 42 Anillo/Ring/Bague MG-20/1361 MG-25/1361 MG-25/1361
2 Plato/Saddle/Assiette TJ-6/C17 TJM-6/C17 TJM-6/C17 43 Aro//Ring/ Bague MG-20/1102 MG-25/1102 MG-25/1102
3 Pta.plato/S.carrier/Chape TJM-6/C38 TJM-6/C38 TJM-6/C38 44 O-Ring MG-20/1131 MG-25/1131 MG-25/1131
4 Tornillo/Screw/Vis GN-20/1934 GN-20/1934 GN-20/1934 45 Pistón/Main piston/Piston TJM-6/1105 TJM-12/1105 TJM-12/1105
5 - - - - 46 O-Ring MG-20/1134 MG-25/1134 MG-25/1134
6 Arandela/Washer/Rondel. FC-10/1649 TJM-1,5M/2216 - 47 Aro/Ring/Bague MG-20/1164 MG-25/1164 MG-25/1164
7 Circlip/Ret.ring/Circlip MI-10/1377 MI-10/1377 MI-10/1377 48
Tapón/Filler plug/Bouchon
ME-12001/1139
ME
-12001/1139
ME
-12001/1139
8 Eje/Axle/Axe TJM-6/1192 TJM-10/1192 TJ-12/1192 49 Botella/Hy.unit./Ens.hydr. TJM-6/C12 TJM-12/C12 TJM-12/C12
9 Circlip/Ret.ring/Circlip MB-34-B/1343 MB-34-B/1343 MB-34-B/1343 50 - ---
10 Eje/Axle/Axe TJM-6/1190 TJM-10/1190 TJM-12/1190 51 - ---
11 Casquillo/Bushing/Douille TJM-6/1404 TJM-12/1404 TJM-12/1404 52 - ---
12 Rueda/Wheel/Roue TJM-6/1213 TJM-12/1213 TJM-12/1213 53 O-Ring MG-3/1134 MG-3/1134 MG-3/1134
13 Arandela/Washer/Rondel. FC-10/1649 MB-39-B/1552 MB-39-B/1552 54 Tuerca/Nut/Ecrou TJ-6/C42 TJ-6/C42 TJ-6/C42
14 Arandela/Washer/Rondel. TJM-3/1335 TJM-12/1335 TJM-12/1335 55 Muelle/Spring/Ressort TJ-2/1527 TJ-2/1527 TJ-2/1527
15 Tuerca/Nut/ Ecrou TJM-3/1540 TJM-12/1540 TJM-12/1540 56 O-Ring ME-1501/1132 ME-1501/1132 ME-1501/1132
16 Tuerca/Nut/Ecrou NC-5/1666 NC-5/1666 NC-5/1666 57 Eje/Axle/Axe TJ-3/1125 TJ-3/1125 TJ-3/1125
17 Casquillo/Bushing/Douille TJM-2/1417 W-222/1311 W-222/1311 58 Circlip/Ret. Ring/Circlip MB-39-B/1454 MB-39-B/1454 MB-39-B/1454
18 Tirante/Arm link/Bretelle TJM-6/1200 TJM-10/1200 TJM-12/1200 59 Eje/Axle/Axe TJM-6/1261 TJ-10/1261 TJ-10/1261
19 Tornillo/Screw/Vis TJM-6/1204 TJM-12/1204 TJM-12/1204 60 Tornillo/Screw/Vis CSA-5-A/1383 CSA-5-A/1383 CSA-5-A/1383
20 Circlip/Ret.ring/Circlip MB-32-B/1377 MB-32-B/1377 MB-32-B/1377 61 Arandela/Washer/Rondel. CSA-12-A/2067 CSA-12-A/2067 CSA-12-A/2067
21 Eje/Axle/Axe TJM-6/1575 TJM-12/1575 TJM-12/1575 62 Casquillo/Bushing/Douille TJM-3/2147 TJM-10/2147 TJM-12/2147
22 Tuerca/Nut/Ecrou TJM-3/1540 TJM-12/1540 TJM-12/1540 63 Balancín/Relea.rod /Patte TJ-2/1516 TJ-2/1516 TJ-2/1516
23 - - - - 64 Tuerca/Nut/Ecrou ME-1002/1114 ME-1002/1114 ME-1002/1114
24 Eje/Axle/Axe TJM-6/1191 TJM-12/1191 TJM-12/1191 65 Tuerca/Nut/Ecrou MB-22-B/1471 MB-22-B/1471 MB-22-B/1471
25 Circlip/Ret.ring/Circlip MB-24-B/1377 MB-24-B/1377 MB-24-B/1377 66 Pedal/Foot pedal/Pédale TJM-6/C13 TJM-10/C13 TJM-10/C13
26 Eje/Axle/Axe TJM-6/1189 MB-37-B/1189 TJM-12/1189 67 Muelle/Spring/Ressort TJM-6/1241 MB-21-B/1240 MB-21-B/1240
27 Casquillo/Bushing/Douille TJM-6/1207 TJM-10/1207 TJM-12/1207 68 Circlip/Ret.ring/Circlip MB-33-B/1451 MB-33-B/1451 MB-33-B/1451
28 Eje/Axle/Axe TJM-12/1386 TJM-12/1386 TJM-12/1386 69 Eje/Axle/Axe MB-33-B/1450 MB-33-B/1450 MB-33-B/1450
29 Muelle/Spring/Ressort MK-30/1240 MB-26-B/1240 MB-26-B/1240 70 Arandela/Washer/Rondel. TJ-2/1205 TJ-2/1205 TJ-2/1205
30 Eje/Axle/Axe TJM-6/1455 - - 71.2 Pistón/P.piston/Piston c. TJ-3A/1110 TJ-3A/1110 TJ-3A/1110
31 Tuerca/Nut/Ecrou NC-5/1666 NC-5/1666 NC-5/1666 72.2 Collarín/Seal/Coupelle TJE-2/1133 TJE-2/1133 TJE-2/1133
32 Eje/Axle/Axe TJM-6/1278 TJM-12/1278 TJM-12/1278 73.2 Bomba/Pumpcy./Cyl.cde. TJE-2/1109 TJE-2/1109 TJE-2/1109
33 Rueda/Wheel/Roue TJM-6/1214 TJM-6/1214 TJM-6/1214 74 Arandela/Washer/Rondel. TJ-2/1120 TJ-2/1120 TJ-2/1120
34 Tuerca/Nut/Ecrou MB-22-B/1398 MB-22-B/1398 MB-22-B/1398 75
T.Válvulas/Val
ves/Clapets TJ-6/C10 TJ-10/C10 TJ-12/C10
35 Placa/Plate/Plaque TJM-6/1281 TJM-10/1281 TJM-12/1281 76 Arandela/Washer/Rondel. TJ-2/1120 TJ-2/1120 TJ-2/1120
36 Refuerzo/Reinforc./Renf. TJM-6/1554 TJM-10/1554 TJM-12/1554 77 Muelle/Spring/Ressort TJ-2/1374 TJ-2/1374 TJ-2/1374
37 S.rueda/Wheel s./S.roue TJM-6/1233 TJM-10/1233 TJM-12/1233 78 Arandela/Washer/Rondel. TR-2/1630 TR-2/1630 TR-2/1630
38 Bastidor/Frame/Chassis TJM-6/1237 TJM-10/1237 TJM-12/1237 79 Palanca/Handle/Levier TJ-3/C21 TJ-3/C21 TJ-3/C21
39 Brazo/Arm/Basculeur TJM-6/C3 TJM-10/C3 TJM-12/C3 80 Empuñadura/Grip/Poignée BM-04/1452 BM-04/1452 BM-04/1452
40 Eje/Axle/Axe TJM-12/1263 TJM-12/1263 TJM-12/1263 81 J.Rep./Repair Kit/Kit rép. RTJ-6J
44/46/47/4853/
56/72.2/74/76
RTJ-10J
44/46/47/48/56/
72.2/74/76
RTJ-10J
44/46/47/48/53/
56/72.2/74/76
41 Abrazadera/Clamp/Attach MB-26-A/1256 MB-26-A/1256 MB-26-A/1256 OIL V. aceite/Oil-Huile vol.775 cm31.150 cm31.150 cm3
Cto.Hidráulico/ Hy.unit./Ens.hydr. TJ-6A / C2 TJ-12A/ C2 TJ-12A/ C2
81
TJ6A.03. sep-06
E
1 CONSIGNAS DE SEGURIDAD
1.1 La carga a elevar no debe ser nunca superior a la fuerza nominal del gato.
1.2 El recorrido máximo del gato, que está indicado en la etiqueta, no debe ser nunca sobrepasado.
1.3 Asegure el vehículo o elemento a elevar contra cualquier tipo de deslizamiento, utilizando calzos en caso necesario.
1.4 El gato debe apoyarse en una superficie firme regular y horizontal. No utilice nunca el gato en posición inclinada.
1.5 El gato debe ser utilizado de forma que sea posible su maniobra sin que el usuario se vea obligado a introducir parte alguna de su cuerpo
debajo del vehículo. No se debe trabajar nunca debajo de un vehículo o de una carga elevada sin haberla sustentado antes con soportes
mecánicos u otros medios adecuados.
1.6 Está prohibido elevar personas con este aparato. Asimismo durante su uso no puede haber personas dentro del vehículo.
1.7 El operador debe vigilar el dispositivo de elevación y la carga durante todos los movimientos.
1.8 Antes de utilizar el gato, asegúrese de que no hay personas dentro del vehículo a elevar, así como de que está debidamente frenado.
19 Consulte el manual de instrucciones del vehículo para posicionar correctamente el platillo de elevación del gato.
1.10 La carga a elevar debe estar siempre centrada sobre el platillo de elevación. Toda carga descentrada puede crear riesgos.
1.11 Durante la elevación y el descenso es necesario tomar todo tipo de medidas para evitar el desplazamiento de la carga del vehículo.
1.12 El gato es un dispositivo de elevación y por lo tanto no debe ser utilizado para trasladar el vehículo o la carga elevada.
1.13 El incumplimiento de estas consignas esenciales de seguridad puede ocasionar daños al usuario, al gato o al elemento a elevar.
1.14 Como medida de seguridad contra sobrecargas, el gato está provisto de una válvula de sobrepresión que ha sido tarada en fábrica. Esta
válvula no debe ser en ningún caso manipulada.
2 USO Y FUNCIONAMIENTO
2.1 Introduzca la palanca en su alojamiento de acuerdo con el dibujo ( ilus. 1).
2.2 Antes de utilizar el gato, es necesario purgar el circuito hidráulico para eliminar el aire del sistema de válvulas. Para ello, gire la palanca en el
sentido de las agujas del reloj. Manténgala en esa posición y bombee varias veces. Suelte luego la palanca, que retornará
automáticamente a su posición inicial (principio “ Hombre muerto “) con lo que el gato está listo para efectuar la elevación.
2.3 Para facilitar su aproximación rápida a la carga, nuestros gatos están provistos de un pedal de bombeo.
2.4 Para descender la carga, gire lentamente la palanca en sentido de las agujas del reloj. Para evitar descensos bruscos, el gato está provisto
de un sistema que regula y controla automáticamente el descenso (L.C.S).
2.5 Una vez utilizado el gato, manténgalo almacenado con el pistón y la bomba recogidos.
3 MANTENIMIENTO
3.1 Engrase periódicamente los ejes y las partes móviles del gato.
3.2 Mantenga siempre el gato limpio y protegido de ambientes agresivos.
3.3 Verifique el nivel de aceite con el pistón totalmente recogido y repóngalo en caso necesario, según el volumen indicado en la tabla.
IMPORTANTE: Un exceso de aceite puede impedir el funcionamiento del gato.
3.4 Utilice aceite de uso hidráulico, tipo HL o HM, con un grado ISO de viscosidad cinemática de 30 cSt a 40ºC o de una viscosidad Engler de 3
a 50ºC. MUY IMPORTANTE: No utilice nunca líquido de frenos.
3.5 Para pedidos de piezas de recambio, indique la referencia de la pieza según el dibujo. Disponemos de un juego de repuestos que contiene
exclusivamente los retenes y las juntas del gato.
4 REPARACION.
Tanto el mantenimiento como la reparación de este gato deben ser llevados a cabo por personal cualificado que, por su formación y
experiencia, sea conocedor de los sistemas hidráulicos utilizados en estos aparatos.
GB
1 SAFETY INSTRUCTIONS
1.1 The load to be lifted should never exceed the rated capacity of the jack.
1.2 Never operate the jack beyond its maximum stroke indicated on the label.
1.3 Park the vehicle or load to be lifted on a flat firm surface and place wedges under the wheels to stop movement.
1.4 Position the jack on a solid, even and horizontal surface, never use the jack on a slope.
1.5 The jack should be positioned so as to avoid the user from having to operate it under the vehicle. Every vehicle lifted by a jack should always
have a secondary safety support, such as mechanical stands.
1.6 Never lift a person with this jack. Ensure that all persons are out of the vehicle before jacking.
1.7 It is necessary that the operator can watch the lifting device and the load during all movements.
1.8 Before using the jack, make sure that the vehicle is free of passengers, handbrake engaged and the engine is off.
1.9 Consult the vehicle handbook for jacking points.
1.10 In the absence of jacking points the trolley jacks should be positioned under the centre of the load. Failure to position it correctly may cause
the load to be unbalanced, resulting in possible equipment/load damage and operator injury.
1.11 It is imperative that all possible precautions are taken to avoid unexpected movement of the vehicle load when it is being lifted.
1.12 The jack is a lifting device only and should never be used to move the vehicle or load.
1.13 If these basic rules are not followed, injury to the user, the jack or the load being lifted may result.
1.14 As an additional safety feature the jack is equipped with a valve to prevent the unit from being overloaded.This unit is factory set and must
not be tampered with.
2 USE AND OPERATION
2.1 Insert the handle into the socket as shown in the illustration (illus. 1).
2.2 Before using the jack, it is necessary to purge air from the valve system.This is carried out by turning the handle clockwise and, whilst held in
this position, pumping the jack several times.Release the handle and it will automatically return back to the initial position ( “Deadman”
principle ).The jack is now ready to be used.
2.3 These jacks are fitted with a foot pedal that gives a faster approach to the load.
2.4 To lower the load, turn the handle slowly clockwise. Our jacks are fitted with a safety device that only permits the load to be lowered smoothly
by automatically controlling the speed at a rate dependant upon the size of the load ( L.C.S.).
2.5 After use, make sure the lifting beam is fully retracted.
3 MAINTENANCE
3.1 Lubricate all moving parts at regular intervals.
3.2 Always keep the jack clean and protected from aggressive conditions.
3.3 If you have to replace the oil, the correct volume is indicated in the parts list. Make sure the piston is fully retracted.
IMPORTANT: An excess of oil will render the jack inoperative.
3.4 Use only hydraulic oil, type HL or HM, with an ISO grade cinematic viscosity of 30 cSt at 40ºC or an Engler viscosity of 3 at 50 º C.
VERY IMPORTANT: Never use brake fluid.
3.5 When ordering spare parts, please make note of the part reference as shown in the exploded view drawing provided. A repair kit is available
containing all the common spare parts.
4 REPAIR
Both maintenance and repair must only be carried out by qualified and approved personnel.
F
1 CONSIGNES DE SECURITE
1.1 La charge à soulever ne doit pas dépasser la force nominale du cric.
1.2 Toujours tenir compte du fait que la course maximale du cric, mentionnée sur l’étiquette, ne doit jamais être dépassée.
1.3 Assurer le véhicule ou l’élément à soulever contre tout risque de glissement. Utiliser des cales si nécessaire.
1.4 Le cric doit être placé sur une surface solide, régulière et horizontale. Ne pas utiliser le cric en position inclinée.
l.5 Le cric doit être positionné de manière à permettre sa manoeuvre sans que l’opérateur soit amené à engager une partie quelconque de son
corps sous le véhicule. Ne jamais travailler sous la charge levée sans que celle-ci soit soutenue par des chandelles ou tout autre support
stable.
1.6 Il est interdit de lever des personnes sur cet appareil ainsi que dans le véhicule qui est levé.
1.7 Il est nécessaire que l’opérateur puisse surveiller le dispositif de levage et la charge lors de tous les mouvements.
1.8 Avant utilisation du cric, vérifier que personne ne se trouve dans le véhicule à soulever et que le frein à main est engagé.
1.9 Positionner l’assiette de levage du cric à l’un des points de prise préconisés par le constructeur du véhicule à soulever.
1.10 Centrer correctement l’assiette de levage du cric sous le point de prise de la charge.
Le non respect de cette consigne peut présenter des risques.
1.11 Pendant la montée ou la descente, prendre toutes les mesures nécessaires pour éviter le déplacement de la charge du véhicule à soulever.
1.12 Le cric est un appareil de levage, ne jamais l’utiliser pour déplacer le véhicule ou la charge à soulever.
1.13 Le non respect de ces règles essentielles de sécurité peut créer des risques pour l’utilisateur, le cric ou la charge à soulever.
1.14 Comme dispositif de sécurité contre les surcharges, le cric est muni d’un limiteur de pression réglé en usine. Ne pas modifier son réglage.
2 UTILISATION ET FONCTIONNEMENT
2.1 Introduire le levier du cric dans son logement selon l’illustration (illus.1).
2.2 Avant d’utiliser le cric, purger le circuit hydraulique pour éliminer l’air dans le système.
Tourner le levier dans le sens des aiguilles d’une montre et, en le maintenant dans cette position, l’actionner plusieurs fois de haut en bas.
Ensuite , lâcher le levier qui reprendra ainsi sa position initiale (principe “Homme mort”). Le cric est prêt à fonctionner.
2.3 Tous nos crics sont munis d’une pédale permettant une mise en contact rapide de l’assiette de levage avec le point de prise de la charge.
2.4 Pour descendre la charge, tourner lentement le levier dans le sens des aiguilles d’une montre.
Pour réduire la vitesse de descente, nos crics sont munis d’un dispositif qui limite et ajuste la vitesse de descente (L.C.S.).
2.5 Après utilisation du cric, le stocker avec le basculeur en position rentrée.
3 MAINTENANCE
3.1 Lubrifier périodiquement les axes et les parties mobiles.
3.2 Toujours conserver le cric propre et à l’abri des milieux agressifs.
3.3 Vérifier le niveau d’huile avec le piston totalement rentré et faire l’appoint si nécessaire; le niveau correct est indiqué dans le tableau de
références.
IMPORTANT: Un excès d’huile dans le réservoir peut empêcher le cric de fonctionner.
3.4 Utiliser de l’huile hydraulique type HL ou HM d’une classe ISO de viscosité cinématique 30 cSt à 40º C ou d’une viscosité Engler de 3 à 50º
C.
TRES IMPORTANT: Ne jamais utiliser de liquide de freins .
3.5 Pour la commande de pièces de rechange, indiquer la référence de la pièce selon la vue éclatée . Nous pouvons fournir aussi un kit de
réparation contenant les pièces de rechange courantes.
4 REPARATION
La réparation et l’entretien des crics doivent être effectués par des personnes qualifiées qui, de par leur formation et leur expérience, ont une
très bonne connaissance des systèmes hydrauliques utilisés dans ces appareils.
Declaración CE de conformidad
CE Declaration of conformity
Déclaration CE de conformité
Melchor Gabilondo, S.A. declara por la presente que
hereby declares that
déclare par la présente que :
Gatos de garaje

Trolley jacks

Crics rouleurs
Referencias/References: TJ
-
6 A /
TJ
-
10 A / TJ
-
12 A
8/09/06
E
Han sido fabricados de conformidad con las disposiciones de la Directiva del Consejo 14 de junio de 1.989, relativa a la
aproximación de las legislaciones de los Estados miembros sobre máquinas (Directiva 89/392/CEE modific
ada y sustituida por la
98/37/CE de 22 de junio de 1.998) con referencia especial al anexo 1 de la Directiva sobre exigencias esenciales de seguridad y
salud en relación con el diseño y fabricación de máquinas. GB
Have been manufactured in conformity with
the provisions contained in the Directive of the Council of June 14th,1.989 on mutual
approximation of the laws of the Member States on the safety of machines (89/392/EEC as amended and replaced by the Directive
98/37/EC of June 22nd,1.998) with special r
eference to Annex 1 of the Directive on essential safety and health requirements in
relation to the construction and manufacture of machines. F
Ont été construits en conformité avec les dispositions de la Directive du Conseil du 14 juin 1989 concernant le
rapprochement des
législations des Etats membres relatives aux machines (89/392/CEE modifiée et remplacée par la Directive 98/37/CE du 22 juin 98
) avec référence particulière à l'annexe 1 de la Directive concernant les exigences essentielles de sécurité
et de santé relatives à la
conception et à la construction des machines.
Miguel Gabilondo
Presidente

This manual suits for next models

2

Other Mega Jack manuals

Mega FMG-300 Troubleshooting guide

Mega

Mega FMG-300 Troubleshooting guide

Mega FMG-300 Manual

Mega

Mega FMG-300 Manual

Mega BR2 Troubleshooting guide

Mega

Mega BR2 Troubleshooting guide

Mega GT2X User manual

Mega

Mega GT2X User manual

Mega GT2 Troubleshooting guide

Mega

Mega GT2 Troubleshooting guide

Mega TRS300 Troubleshooting guide

Mega

Mega TRS300 Troubleshooting guide

Mega MGH-20 Troubleshooting guide

Mega

Mega MGH-20 Troubleshooting guide

Mega N10-3 Troubleshooting guide

Mega

Mega N10-3 Troubleshooting guide

Mega FMG-300A Troubleshooting guide

Mega

Mega FMG-300A Troubleshooting guide

Mega BRA20 Manual

Mega

Mega BRA20 Manual

Mega N10-3 Troubleshooting guide

Mega

Mega N10-3 Troubleshooting guide

Mega T1,5H Troubleshooting guide

Mega

Mega T1,5H Troubleshooting guide

Popular Jack manuals by other brands

Harbor Freight Tools Pittsburgh 56736 owner's manual

Harbor Freight Tools

Harbor Freight Tools Pittsburgh 56736 owner's manual

AFF 202HD owner's manual

AFF

AFF 202HD owner's manual

Sunex Tools 6622A owner's manual

Sunex Tools

Sunex Tools 6622A owner's manual

Clarke STRONG-ARM CBJ2 Operating & maintenance instructions

Clarke

Clarke STRONG-ARM CBJ2 Operating & maintenance instructions

Pro-Lift F2000A owner's manual

Pro-Lift

Pro-Lift F2000A owner's manual

Cormach SCM 230 Use and maintenance manual

Cormach

Cormach SCM 230 Use and maintenance manual

Eagle Toe Lift Jack K-S Series Operation manual

Eagle

Eagle Toe Lift Jack K-S Series Operation manual

SGS TJ3LP owner's manual

SGS

SGS TJ3LP owner's manual

Performance Tool W1626 owner's manual

Performance Tool

Performance Tool W1626 owner's manual

Ranger Products RTJ-1 Installation and operation manual

Ranger Products

Ranger Products RTJ-1 Installation and operation manual

FISCHER 63298 Owner's manual & safety instructions

FISCHER

FISCHER 63298 Owner's manual & safety instructions

JH 5 G plus Maintenance, Assembly, Repair

JH

JH 5 G plus Maintenance, Assembly, Repair

GMV 9100 Installation

GMV

GMV 9100 Installation

Sealey AS3000.V3 instructions

Sealey

Sealey AS3000.V3 instructions

EINHELL BT-HJ 2000 Directions for use

EINHELL

EINHELL BT-HJ 2000 Directions for use

Jackco 66300C Owner's manual & safety instructions

Jackco

Jackco 66300C Owner's manual & safety instructions

Omega 32035 Operating instructions & parts manual

Omega

Omega 32035 Operating instructions & parts manual

RODCRAFT ATJ50-3 Operator's manual

RODCRAFT

RODCRAFT ATJ50-3 Operator's manual

manuals.online logo
manuals.online logoBrands
  • About & Mission
  • Contact us
  • Privacy Policy
  • Terms and Conditions

Copyright 2025 Manuals.Online. All Rights Reserved.