MegaControls NT50 Series User manual

Issue Date November 1, 2023
NT50 Series
RS-485 Modbus RTU Room Thermostats with LCD for Fan Coil Units
can support up to 32 NT50 Series
Modbus RTU devices. The BMGE
gateway spontaneously detects the
presence of slaves that go online in
its NET 1 and NET 2 networks.
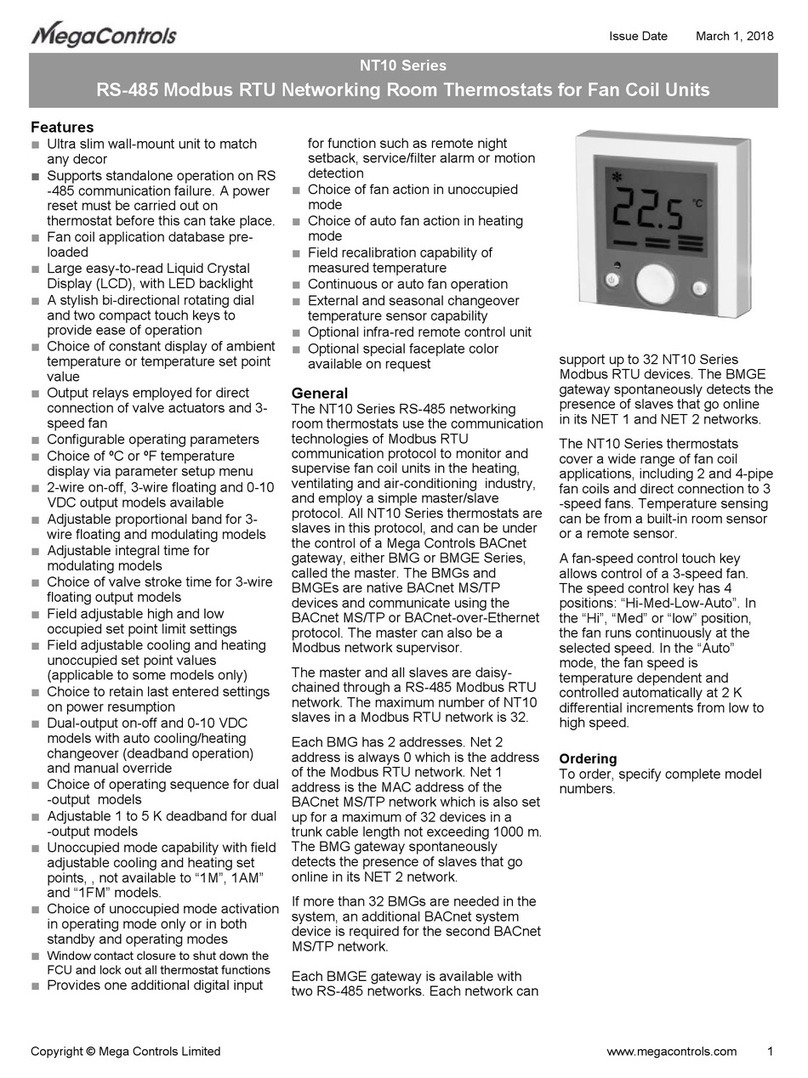
The NT50 Series thermostats cover
a wide range of fan coil applications,
including 2 and 4-pipe fan coils and
direct connection to 3-speed fans.
Temperature sensing can be from a
built-in room sensor or a remote
sensor.
A fan-speed control touch key
allows control of a 3-speed fan. The
speed control key has 4 positions:
“Hi-Med-Low-Auto”. In the “Hi”,
“Med” or “low” position, the fan runs
continuously at the selected speed.
In the “Auto” mode, the fan speed is
temperature dependent and
controlled automatically at 2 K
differential increments from low to
high speed.
Mounting
The thermostats can be flush
mounted or secured to a standard
European 75 x 75 x 47 mm (strongly
recommended) electrical box. See
Fig. 2: Mounting Details. Two
mounting screws are included.
Ordering
To order, specify complete model
numbers.
www.megacontrols.com 1
Copyright © Mega Controls Limited
Features
■Ultra slim wall-mount unit to match
any décor
■Supports Modbus RTU protocol
■Supports standalone operation on RS
-485 communication failure
■Fan coil application database pre-
loaded
■Large easy-to-read Liquid Crystal
Display (LCD), with LED backlight
■A stylish bi-directional rotating dial
and two compact touch keys to
provide ease of operation
■Choice of constant display of ambient
temperature or temperature set point
value
■Output relays employed for direct
connection of valve actuators and 3-
speed fan
■Configurable operating parameters
■Choice of ºC or ºF temperature
display via parameter setup menu
■2-wire on-off, 3-wire floating and 0(2)-
10 VDC output models available
■Adjustable proportional band and
integral time for 3-wire floating and 0
(2)-10 VDC output models
■Choice of valve stroke time for 3-wire
floating output models
■Field adjustable high and low
occupied set point limit settings
■Field adjustable cooling and heating
unoccupied set point values
(applicable to some models only)
■Choice to retain last entered settings
on power resumption
■Dual-output on-off and 0-10 VDC
models with auto cooling/heating
changeover (deadband operation)
and manual override
■Choice of operating sequence for dual
-output models
■Adjustable 1 to 5 K deadband for dual
-output models
■Unoccupied mode capability with field
adjustable cooling and heating set
points, not available to “1M”, 1AM”
and “1FM” models.
■Choice of unoccupied mode activation
in operating mode only or in both
standby and operating modes
■Provides one additional digital input
for function such as remote night
setback, service/filter alarm or motion
detection
■Choice of fan action in unoccupied
mode
■Choice of auto fan action in heating
mode
■Field recalibration capability of
measured temperature
■Continuous or auto fan operation
■External and seasonal changeover
temperature sensor capability
■Optional infra-red remote control unit
■Optional special faceplate color
available on request
General
The NT50 Series RS-485 networking
room thermostats use the
communication technologies of Modbus
RTU protocol to monitor and supervise
fan coil units in the heating, ventilating
and air-conditioning industry, and
employ a simple master/slave protocol.
All NT50 Series thermostats are slaves
in this protocol, and can be under the
control of a Mega Controls BACnet
gateway, of either BMG or BMGE
Series, called the master. The BMGs
and BMGEs are native BACnet devices
and communicate using the BACnet
MS/TP or BACnet-over-Ethernet
protocol.
Net 2 port of the BMG master and all
slaves are daisy-chained through a RS-
485 Modbus RTU network. The
maximum number of NT50 slaves in a
Modbus RTU network is 32.
Each BMG has 2 addresses. Net 2
address is always 0 which is the
address of the Modbus RTU network.
Net 1 address is the MAC address of
the BACnet MS/TP network which is
also set up for a maximum of 32
devices in a trunk cable length not
exceeding 1000 m. The BMG gateway
spontaneously detects the presence of
slaves that go online in its NET 2
network.
If more than 32 BMGs are needed in the
system, an additional BACnet system
device is required for the second
BACnet MS/TP network.
Each BMGE gateway is available with
two RS-485 networks. Each network

Specifications
Product model numbers See Fig.1: NT50 Series Model Number Selection Guide
Power requirements 110-230 V, +10% and -15%, 50/60 Hz
Operating temperature differential
(for 2-wire on-off models) Fixed at 1 K for both cooling and heating modes
0-10 VDC output impedance Minimum 10,000 Ω
Temperature display range 5-35ºCin 0.5 K increments: accuracy ±1 K (41-95ºF in 0.5 R increments, accuracy ±1 R)
Temperature setpoint range 5-35ºCin 0.5 K increments, initial factory setting at 22ºC (41-95ºF in 0.5 R increments)
Offset adjustment of temperature
indication (field recalibration) +2, +1, 0, -1 and -2 K (+2, +1, 0, -1 and -2 R) throughout the range, factory setting 0
Deadband of dual-output models Adjustable 1 to 5 K(2 to 10 R) between cooling Mode and heating Mode, factory set at 3 K(6 R)
Valve stroke time for 3-wire floating
models Accumulatively 10 to 240 s maximum in one direction in steps of 10 s, factory setting 180 s
Proportional band for PI control Adjustable 1 to 10 K (1-10 R) in 1 K (1 R) increments, factory setting 5 K (5 R)
Integral time for PI control Adjustable 0 to 30 minutes in 1 minute increments, factory setting 15 minutes. Setting = 0
means integral time being turned off.
Auto fan temperature differential At 2 K (2 R) increments. At >0 K, fan is on low speed in cooling mode and fan status in heating
mode depends on choice of auto fan action.
Sensing element NTC thermistor, 10 kΩ@25ºC; accuracy ±0.5 K@25ºC
Unoccupied mode Input signal from external voltage-free contact
Always runs at “Low” fan when in operation
Unoccupied temperature set point
range (not applicable to “1M” models) Field adjustable 5-35ºC (41-95ºF) in 1 K (1 R) increments separately for cooling and heating;
Factory settings: 16ºC (61ºF) for heating and 26ºC (79ºF) for cooling
Binary input 1 binary input for external voltage-free contacts
Digital outputs For direct connection of valve actuators (110-230 VAC)
1 relay output for 2-pipe models
2 relay outputs for 4-pipe models
For direct connection to 3-speed fans (110-230 VAC)
3 relay outputs
RS-485 communication speed Baud rate fixed at 19,200 bps
Device MAC addressing 01-32 via parameter setup menu, factory default setting 255 (displays as FF on thermostat
screen)
Proprietary Modbus RTU network
guideline Maximum 32 devices and maximum 1,000 m cable length
Enclosure Material: Self-extinguishing, molded ABS
Finish: Off white housing and dark grey faceplate
Electrical ratings Valve output relays 110-230 V, 3 A resistive, 1 A inductive, 50/60 Hz
Fan output relays
For on-off and floating models 110-230 V, 3 A resistive, 1 A inductive, 50/60 Hz
For 0-10 VDC models 110-230 V, 5 A resistive, 2 A inductive, 50/60 Hz
Total rating 110 -230 V, 5 A maximum, 50/60 Hz
Ambient/storage temperature limits 0 to 55ºC/-30 to 50ºC, 10 to 90% RH non-condensing
Connectors Non-removable line-voltage terminal blocks and removable low-voltage wire plugs
Power wires Wire size 1 mm2 or 18 AWG solid copper recommended
RS-485 Communication Wires 22 or 24 AWG Twisted Shielded Pair Double-insulated Cable
Ethernet communication wires Cat 5e cable (twisted pairs)
Sensor wires 22 AWG twisted shielded pair double-insulated cable
Accessories and options See Figure 8: Optional Accessories
Agency approval CE Mark compliant to EMC and Low Voltage Directives
Shipping weight 0.2 kg (0.44 lb)
Dimensions See Figure 4: Dimensions in mm
The performance specifications above are nominal and subject to tolerances and application variables of generally acceptable industry standards.
The manufacturer shall not be liable for damages resulting from misapplication or misuse of its products.
2 NT50 Series RS-485 Modbus RTU Room Thermostats Product Bulletin

Figure 1: NT50 Series Model Number Selection Guide
NT50 Series RS-485 Modbus RTU Room Thermostats Product Bulletin 3
NT50 Series RS-485 Networking Room Thermostats Model Number Selection Guide
(Complete Sets)
NT5 0–1M R
Product Type Power Supply Separator Control Type Options
NT5 = NT50 Series 0 = 110-230 VAC 1 = Single 2-wire on-off output, R = with infra-
RS-485 cool only or heat only red receiver
Networking 1M = Single 2-wire on-off output, for RCU-1
Room manual cool/heat changeover B = without
Thermostats 1A = Single 0(2)-10 VDC output, buzzer for
cool only or heat only key touch
1AM = Single 0(2)-10 VDC output, sounding
manual cool/heat changeover W = with white
1F = Single 3-wire floating output, color
cool only or heat only faceplate
1FM = Single 3-wire floating output,
manual cool/heat changeover
2 = Dual 2-wire on-off outputs,
manual or Auto cool/heat
changeover
2A = Dual 0(2)-10 VDC outputs,
manual or Auto cool/heat
changeover
Model
Numbers
Outputs Applications Cooling/Heating
Mode
External
Seasonal
Changeover
System
Modes
Fan Control Unoccupied
Mode
NT50-1Single
2-Wire
On-Off
Cooling Only
or Heating Only
(2-Pipe System)
Auto Only
Yes Cool or Heat-Fan
Only-Off Hi-Med-Low-Auto Yes
NT50-1M Single
2-Wire
On-Off
Cooling/Heating
(2-Pipe System) Manual Only No Cool or Heat-Fan
Only-Off Hi-Med-Low-Auto Yes
NT50-1F Single
3-Wire
Floating
Cooling Only
or Heating Only
(2-Pipe System)
Auto Only
Yes Cool or Heat-Fan
Only-Off Hi-Med-Low-Auto Yes
NT50-1FM Single
Line-Voltage
3-Wire
Floating
Cooling/Heating
(2-Pipe System) Manual Only No Cool or Heat-Fan
Only-Off Hi-Med-Low-Auto Yes
NT50-1A Single
0-10 VDC Cooling Only
or Heating Only
(2-Pipe System)
Auto Only
Yes Cool or Heat-Fan
Only-Off Hi-Med-Low-Auto Yes
NT50-1AM Single
0-10 VDC Cooling/Heating
(2-Pipe System) Manual Only No Cool or Heat-Fan
Only-Off Hi-Med-Low-Auto Yes
NT50-2Dual
2-Wire
On-Off
Cooling and
Heating
(4-Pipe System)
Manual
or Auto No Cool-Heat-Auto-
Fan Only-Off
Or
Auto-Off
Hi-Med-Low-Auto Yes
NT50-2A Dual
0-10 VDC Cooling and
Heating
(4-Pipe System)
Manual
or Auto No Cool-Heat-Auto-
Fan Only-Off
Or
Auto-Off
Hi-Med-Low-Auto Yes
Figure 2: NT50 Series Application Guide

4 NT50 Series RS-485 Modbus RTU Room Thermostats Product Bulletin
Figure 3: Dimensions in mm
Remote Control Unit
Front View
Back View
Figure 4: Mounting Details
Figure 5: Optional Accessories
Description Part No.
Remote control unit RCU-1
Probe temperature sensor TE10-1
Duct temperature sensor TE10-2
With infra-red receiver capability NT50-xxxR
Without buzzer capability NT50-xxxB
With white-color faceplate NT50-xxxW
Bottom View
Item Description
Network Trunk Cabling It is recommended to use networking cabling that matches the following specifications:
• Balanced 100 to 120 ohms nominal impedance, 22 or 24 AWG Twisted Shielded Pair (TSP) Cable
• Nominal capacitance of 52 pF/m or lower
• Nominal velocity of propagation of 66% or higher
• Terminating the shield to ground at one end only for each isolated segment will prevent ground loops in the
shield and drain RF energy to ground. Grounding at the BACnet router or controller is preferred.
10Base-T Cabling Cat 5e cable with twisted pairs are recommended.
Topology Ensure the BACnet MS/TP or Modbus RTU network cable is installed as a daisy chain from one device to the
next.
Maximum Nodes The maximum number of devices per BACnet MS/TP or Modbus RTU network is 32.
Terminator A terminator of 120-ohm impedance must be installed at each end of network segment, or two per network.
Ensure that this requirement is not overlooked in laying out the network architecture and when ordering
product.
Cable Shielding Use a shielded, twisted pair cable for communications. Never directly ground wire in more than one point on
the shield. Doing so can induce large currents and result in communication problem.
Repeater A repeater is not necessary unless the BACnet MS/TP or Modbus RTU network is extended beyond 1,000 m.
Step-down Transformer A separate isolated double-wound transformer is recommended for supplying 24 VAC power to each BMG or
BMGE. If and when the same transformer is shared with other devices, observe the polarities of the power
supply of all devices including the BMG or BMGE.
Network, Cabling and Step-down Transformer Requirements
To ensure network stability and reliable communications, it is imperative that the following network, cabling and step-
down transformer requirements are adhered to:
Mounting
The thermostat can be surface mounted or secured
to a standard European 75 x 75 x 47 mm (strongly
recommended) electrical box. Two mounting screws
are included.

Figure 6: Network Configuration
Modbus RTU Network Notes:
1. Ensure the recommended balanced
cable is used.
2. Ensure the cable is installed as a daisy
chain from one device to the next
(1,000 m maximum) and the shield is
grounded at one single point of the
network only.
3. Ensure a terminator is installed on each
end of each Modbus RTU network.
4. The maximum nodes per Modbus RTU
network is 32
BACnet MS/TP Network Notes:
1. Ensure the recommended balanced
cable is used.
2. Ensure the cable is installed as a daisy
chain from one device to the next
(1,000 m maximum) and the shield is
grounded at one single point of the
network only.
3. Ensure a MS/TP terminator is installed
on each end of each MS/TP network.
4. The maximum nodes per MS/TP
network is 32 without a repeater.
With BMGE BACnet-over-Ethernet Gateway
With BMG BACnet MSTP Gateway
NT50 NT50 NT50 NT50
BMG
(Master)
BMG
(Master)
To BACnet MS/TP
Slaves
NT50 Series RS-485 Modbus RTU Room Thermostats Product Bulletin 5
NT50 NT50 NT50 NT50
BMGE
(Master)
NT50 NT50 NT50 NT50
Slaves
Slaves

Figure 7: Jumper Settings
The models NT50-2 and NT50-2A can be re-configured in the field to other model numbers by a qualified servicing agent,
if necessary, by changing the jumper positions of JP2 and JP3. The locations of these jumpers can be found after
removing the thermostat cover from its baseplate.
Operation Notes
Model Number Jumper Settings of JP2 and JP3
JP2 JP3
NT50-1Cut Cut
NT50-1M Cut Cut
NT50-2Uncut Uncut
NT50-1F Cut Uncut
NT50-1FM Cut Uncut
NT50-1A Cut Cut
NT50-1AM Cut Cut
NT50-2A Uncut Uncut
Jumper Settings of JP1 and JP4
Jumper Cut Uncut
JP1 With Exter-
nal Sensor
With Built-
in Sensor
JP4
For 2-10
VDC
Output
For 0-10
VDC
Output
Note: JP4 is available in 0-10
VDC/2-10 VDC output models
only. Factory setting is 0-10 VDC.
Note: Terminals V1+, GND and
V2+ are only available in 0(2)-10
VDC output models.
Operation
■LCD shows ambient temperature constantly except when set point adjustment is being made.
■Press the system key Ф to enter into the desired operating mode: Cool-Heat-Auto-Fan Only-Off, etc.
■Press the fan key to change the fan speed mode: High-Med-Low-Auto.
■Increase or decrease temperature set point by rotating the adjustment dial clockwise or counter-clockwise. When the
dial is rotated, the LCD shows the existing setpoint setting.
Unoccupied Mode
■When the unoccupied contact closes, it will override the operating mode and operate the thermostat in energy saving
mode despite the thermostat being in operating or standby mode, depending on activation setting of unoccupied mode
in setup menu.
■In unoccupied mode, the factory-set temperature cut-in points are 26°C for cooling and 16°C for heating. Meanwhile, all
operating keys are locked out until the unoccupied contact opens.
■During unoccupied mode, the default fan speed is set at “low” when pre-set cut-in temperature is reached, or otherwise
the fan output is always “off”.
■Unoccupied mode can be activated in the following manner when the unoccupied contact closes:
For 2-pipe models with auto seasonal changeover, the unoccupied cooling or heating mode is determined by the
status of the SR2 seasonal changeover sensor and the valve output is activated according to the measured
temperature.
For 2-pipe models with manual seasonal changeover, the unoccupied cooling or heating status is determined by the
last status of the occupied mode and the valve output is controlled according to the measured temperature.
For 4-pipe models, the unoccupied cooling or heating mode is always determined by the measured temperature and
valve output is also activated according to the measured temperature.
Unoccupied mode activation in operating mode only or in both standby and operating mode will be determined by
activation setting in setup menu. Low fan will run according to fan action setting in setup menu.
Parameter Setup Mode
■The thermostat allows authorized service agent to change a number of operating parameters in the field. Refer to the
parameter setup manual for details.
Error reporting
■All valve and fan outputs will be shut down when error is reported.
6 NT50 Series RS-485 Modbus RTU Room Thermostats Product Bulletin

Figure 9: Wiring Diagrams and Application Notes
Wiring and Application Notes
■Cut jumper JP1 open if an external sensor is wired to
SR1 and GND. Run the wiring away from any electrical
motors or power wiring. Failure to do so may result in
poor thermostat performance due to electrical noise.
■22 or 24 AWG twisted shielded pair double-insulated
cable must be used as RS-485 communication wiring
and its length must not exceed 1,000 m without a re-
peater
■22 or 24 AWG twisted shielded pair double-insulated
cable is recommended as RS485 communication and
remote sensor wiring and the remote sensor cable
length must not exceed 25 m.
■Do not bundle and run power wiring and RS485 com-
munication/remote sensor wiring in the same conduit and
cross-wiring in the same junction boxes is prohibited.
■The seasonal changeover sensor should be wrapped
around the supply water pipe when associated with a wa-
ter system. When the changeover sensor temperature ex-
ceeds 30 ºC, the thermostat enters into heating mode.
■External seasonal changeover sensor or switch is applica-
ble to heat only or cool only 2-pipe models only.
■Unoccupied contact closure activates unoccupied mode.
■Hidden-line wiring is applicable to dual-output models on-
ly.
■The thermostat outputs of on-off models are designed for
controlling zone valves. If used for controlling electric
heaters, external contactors must be used.
NT50 Series RS-485 Modbus RTU Room Thermostats Product Bulletin 7
Figure 8: Network Control Unit and LCD Layout
Figure 10: NT50 Series RS-485 Networking Room Thermostat Wiring Diagrams
Piping Notes:
1. On a single-output unit, V1 can be either a 2-wire
spring-return cooling or heating valve.
2. On a dual-output unit, V1 must be a 2-wire spring-
return cooling valve and V2 a 2-wire spring-return heat-
ing valve.
3. V3 must be a 3-wire floating valve. In cooling mode,
Terminal 6 output opens valve on temperature rise and
Terminal 7 output closes valve on temperature drop.
The action in heating mode is reversed.
4. On a single-output unit, V4 can be either a 0-10 VDC
cooling or heating valve.
5. On a dual-output unit, V4 must be a 0-10 VDC cooling
valve and V5 a 0-10 VDC heating valve.
WARNING
Incorrect wiring connection may cause permanent equip-
ment damages to the thermostat.
Connections of Sensors and Contacts

Wiring Diagram for Single and
Dual 2-Wire On-Off Valve Outputs
V1 and V2 are 2-wire on-off spring-return valves
Wiring Diagram for Single 3-Wire
Floating Valve Output
V3 is a 3-wire floating valve
Mega Controls Limited
Room 1225, Star House
3 Salisbury Road, Tsimshatsui, Kowloon, Hong Kong
NT50, 23-11(Mega)
Wiring Diagram for Single and Dual 0(2)-10 VDC Valve Outputs
V4 and V5 are 0(2)-10 VDC valves
8 NT50 Series RS-485 Modbus RTU Room Thermostats Product Bulletin
This manual suits for next models
8
Table of contents
Other MegaControls Thermostat manuals
