manuals.online logo
Brands
  1. Home
  2. •
  3. Brands
  4. •
  5. MEGATRONIX
  6. •
  7. Remote Starter
  8. •
  9. MEGATRONIX KE 470 User manual

MEGATRONIX KE 470 User manual

KE 470
1
KE 470
DELUXE 3-CHANNEL
KEYLESS ENTRY SYSTEM
Installation And Operation Manual
MEGATRONIX
CALIFORNIA, U.S.A.
KE 470
2
WIRING DIAGRAM
H1: MAIN 5 PIN WIRE HARNESS:
5. Red Wire: +12V To Constant Battery Source
4. Brown Wire: Positive output To
3. Black Wire: Ground to Vehicle FRAME
2. White Wire: Parking Light Relay Output
15A Fuse
1. Red / White Wire: Parking Light Relay input
Siren Or Horn (Programmable)
H3: 6 PIN MINI CONNECTOR WIRE HARNESS:
6. Gray Wire: (-) 200mA Programmable Output
2. Blue Wire: NOT USED
1. Violet Wire: NOT USED
4. Yellow Wire: Zone 5 / To Ignition Switched + 12V
5. Orange Wire: 200mA Grounded when armed
3. Green Wire: NOT USED
H4: RF ANTENNA - BLACK THIN WIRE
The black thin wire on control module is the receiver antenna wire. Antenna placement is very
important!!!
Ensure that it is unwrapped and stretched out with the last 6" straight and keep it away from large
metal objects or chassis for best reception.
H7: 3 PIN DOOR LOCK CONNECTOR:
H1: Main 5 Pin White harness
H3: 6 Pin White Mini Connector
Black Antenna Wire
LED
Indicator
Valet
Switch
H7/3 Blue Wire: (-) 200mA Unlock
H7/1 Green Wire: (-) 200mA Lock Pulse
Pulse
H7 3 Pin
White
H5 2 Pin
Blue
H6 2 Pin
White
H4 Black
Wire
H1 5 Pin
White
H3 6 Pin
White
Blue Wire
Green Wire
(- ) 200MA Lock Pulse
(- ) 200MA Unlock Pulse
KE 470
3
PROGRAMMING
A. PROGRAMMING TRANSMITTER:
Enter:
1. Turn the Ignition 'switch ‘OFF/ON’ 3 TIMES and stay in ON position. Within 15 seconds.
2. Push the Valet switch 3 times and hold it until a long chirp is hearing then release the valet switch. You
are now in the Transmitter programming mode.
Program:
1. Press on first transmitter until siren responds with chirp. First transmitter is now programmed.
2. Press on second transmitter until siren responds with chirp. Second transmitter is now programmed.
3. Apply the same procedure to program 3rd and 4th.
Exit: Turn Ignition to 'OFF' position, or leave it for 15 seconds. 3 long chirps to confirm exit.
Note: If more than 4 transmitters programmed, the system only kept the last 4 transmitters.
B. FEATURE PROGRAMMING:
FEATURE “I” PRORAMMING:
1. Turn the Ignition 'switch ‘ON/OFF’ 3 TIMES and stay in OFF position.
2. Push the Valet switch 2times and hold it until one chirp with a long chirp is hearing then release the
valet switch. You are now in the Alarm feature ‘I’ programming mode.
3. Press and release the transmitter button ‘A’ corresponding to the feature ‘A’ you want to program.
a. The siren chirps and LED pause will indicate the latest setting.
b. The factory default settings is always [1] LED flash, [1] chirp.
4 Depress the transmitter button ‘A’ to change the feature. Simple re-depressing the transmitter button ‘A’
again until the module advances to your desired setting.
In this case, Press button ‘A’ again, the module would advance to [2] LED flash, [2] chirp. Press button
‘A’ again, the module would advance to [3] LED flash, [3] chirps etc.
5. Depress the transmitter button ‘B’ corresponding to the feature ‘B’ you wants to program.
Press
Transmitter
Button
One Chirp /
LED one pulse
Factory Default Setting
Two Chirps /
LED two pulse
1
Chirps on
Chirps off
2
Automatic Rearm On
Automatic Rearm Off
Exit: Turn Ignition to 'ON' position, or leave it for 15 seconds. 3 long chirps to confirm exit.
FEATURE “II” PRORAMMING:
1 Turn the Ignition 'switch ‘ON/OFF’ 3 TIMES and stay in OFF position.
2 Push the Valet switch 4times and hold it until two chirps with a long chirp is hearing then release the
valet switch. You are now in the Alarm feature ‘II’ programming mode.
3 Press and release the transmitter button ‘A’ corresponding to the feature ‘A’ you want to program.
Press
Transmitter
Button
One Chirp /
LED one pulse
Factory Default Setting
Two Chirps /
LED two pulse
Three Chirps /
LED three pulse
1
0.9-second Door lock pulses
3.0-second Door lock
pulse
Double pulse unlock
2
Active arming
Passive arming without
passive door locking
Passive arming with
passive door locking
3
Ignition controlled door locks
& unlocks
Without ignition controlled
door locks & unlocks
Exit: Turn Ignition to 'ON' position, or leave it for 15 seconds. 3 long chirps to confirm exit.
FEATURE “III” PRORAMMING:
1 Turn the Ignition 'switch ‘ON/OFF’ 3 TIMES and stay in OFF position.
2 Push the Valet switch 6 times and hold it until three chirps with a long chirp is hearing then release the
valet switch. You are now in the Alarm feature ‘III’ programming mode.
3 Press and release the transmitter button ‘A’ corresponding to the feature ‘A’ you want to program.
Press
Transmitter
Button
One Chirp /
LED one pulse
Factory Default Setting
Two Chirps /
LED two pulse
Three Chirps /
LED three pulse
1
H1/4 Brown Wire = Siren
Output
H1/4 Brown Wire = Horn
Output
2
H3/6 Gray Wire = Trunk
(Channel 2) Output
H3/6 Gray Wire = Two
Step Door Unlock Output
H3/6 Gray Wire = Pager
Output
Exit: Turn Ignition to 'ON' position, or leave it for 15 seconds. 3 long chirps to confirm exit.
KE 470
4
OPERATION MANUAL
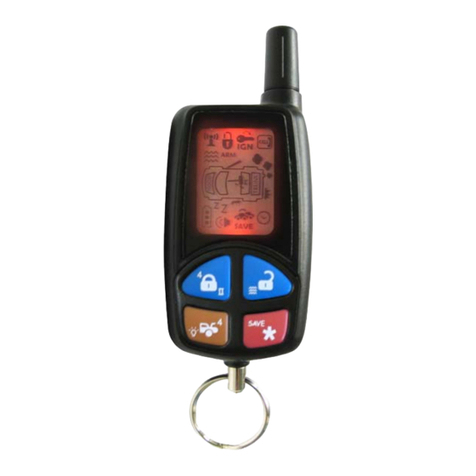
A. TRANSMITTER OPERATION:
Transmitter Button
System Function
Remark
Button
Arm / Lock door
Button
Car Locator
While system armed
Button for 3 seconds
Panic function
Press for 3 seconds
Button
Disarm & Unlock Door
–Button
Two-Step Door Unlock & Disarm
Press twice within 3 seconds
/ AUX Button for 2 seconds
Pop Trunk Release
Press for 2 seconds
B. LED INDICATORS:
LED
Function
LED
Function
Off
Disarmed
2 flashes... pause
Trigger on trunk/hood
Slow flash
Armed
3 flashes... pause
Trigger on door switch
Fast flash
Passive arming
4 flashes... pause
Trigger on Dual Zone Shock Sensor
On (solid)
Valet mode
5 flashes... pause
Trigger on Ignition switch
C. CHIRP INDICATORS: D. PARKING LIGHT:
Chirp
Function
Parking light
Function
1 chirp
Arm
1 flash
Arm
2 chirps
Disarm
2 flashes
Disarm
6 chirps
Car Locator
E. OPERATING CONDITION:
Siren
Parking Light
LED
Doors
Starter disable
1. Arming
1 Chirp
1 Flash
Slow flash
Locking
On
2. Disarming
2 or 4 Chirps
2 or 3 Flashes
Off / Fast flash
Unlocking
Off
F. ACTIVE ARMING –LOCK & ARM:
1. Press button on transmitter.
2. The siren will chirp once and parking light will flash once indicating that the system is now armed. The
vehicle doors will lock upon arming when interfaced with the security system.
H. ACTIVE DISARMING –UNLOCK & DISARM:
1. Press the button on the transmitter.
2. The siren will chirp twice and parking light will flash twice to indicating that the security system is now
disarmed. The vehicle doors will unlock disarming when interfaced with the security system.
TAMPER DISARM: If alarm triggered, upon disarm system, siren chirp 4 times, parking light flash 3 times.
TWO-STEP DOOR UNLOCK: (See Feature III –2 Programming.) This feature will independently unlock
the driver’s door only when disarming the security system. Pushing the button on the transmitter a
second time within 3 seconds will unlock the entire vehicle.
I. DISARMING WITHOUT A TRANSMITTER
The Override function may be used if the remote transmitter is lost or inoperative.
1. Enter the vehicle and turn the ignition switch to 'ON’ position.
2. Within 10 seconds push and release the valet switch
J. VALET MODE:
The valet switch allows you to temporarily bypass all alarm function, eliminating the need to hand your
transmitter to parking attendants or garage mechanics. When the system is in valet mode, all alarm
function are bypassed, however the remote panic feature and remote door locks will remain operational.
Enter Valet Mode:
1. Turn the ignition to “ON” position.
2. Push and hold valet switch for 2 seconds until LED turns on to indicate system is in 'valet mode'.
Exit Valet Mode:
1. Return to normal operation, turn ignition 'ON'.
2. Push and hold valet switch for 2 seconds. LED turns off to indicate system exited ‘valet mode’.
N. IGNITION CONTROL DOOR LOCKS. (See Feature II –3 Programming.).
If vehicles door locks have been interfaced to security system, system will automatically lock vehicle's
doors when ignition is turned “ON” and /or unlock vehicle’s doors when ignition is turned “OFF”.
O. TRUNK RELEASE. (See Feature III –2 Programming.).
Press and hold / AUX button on transmitter for two seconds to control trunk release or other
electriconic devices.
P. CAR LOCATOR
Press the button on the transmitter to activate car locator. The siren will chirp 6 times. The parking light
will flash 12 times, for you to easily locate your car.

Other MEGATRONIX Remote Starter manuals

MEGATRONIX MEGALARM MEGA 200 User manual

MEGATRONIX

MEGATRONIX MEGALARM MEGA 200 User manual

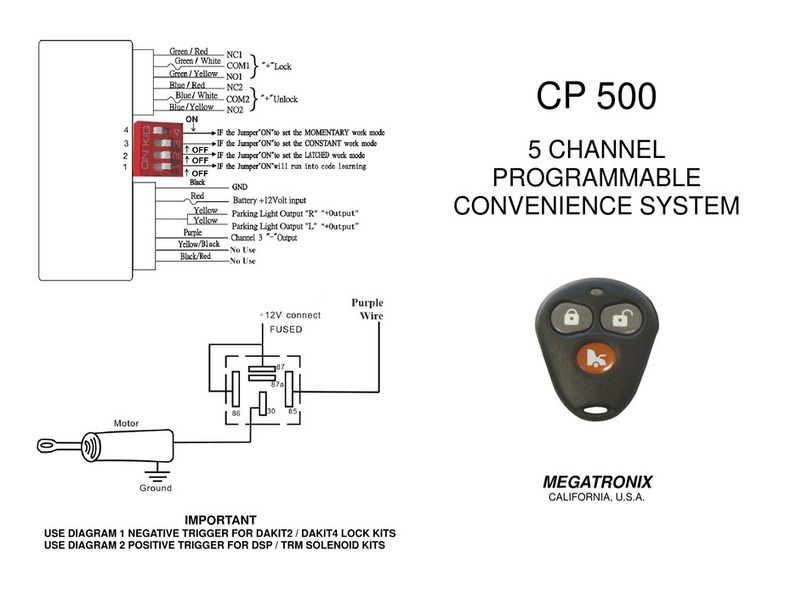
MEGATRONIX CP 500 User manual

MEGATRONIX

MEGATRONIX CP 500 User manual

MEGATRONIX Viking VS 2000 User manual

MEGATRONIX

MEGATRONIX Viking VS 2000 User manual

MEGATRONIX RS 110 User manual

MEGATRONIX

MEGATRONIX RS 110 User manual

MEGATRONIX MEGALARM MEGA 310 User manual

MEGATRONIX

MEGATRONIX MEGALARM MEGA 310 User manual

MEGATRONIX Megalarm MEGA 680 User manual

MEGATRONIX

MEGATRONIX Megalarm MEGA 680 User manual

MEGATRONIX CP 300 User manual

MEGATRONIX

MEGATRONIX CP 300 User manual

MEGATRONIX MEGALARM MEGA 2000 User manual

MEGATRONIX

MEGATRONIX MEGALARM MEGA 2000 User manual

MEGATRONIX VS 3525 Viking User manual

MEGATRONIX

MEGATRONIX VS 3525 Viking User manual

MEGATRONIX Viking VS 200 User manual

MEGATRONIX

MEGATRONIX Viking VS 200 User manual

MEGATRONIX MEGALARM MEGA 3400 User manual

MEGATRONIX

MEGATRONIX MEGALARM MEGA 3400 User manual

MEGATRONIX MEGALARM MEGA 250 User manual

MEGATRONIX

MEGATRONIX MEGALARM MEGA 250 User manual

MEGATRONIX MEGALARM MEGA 2400 User manual

MEGATRONIX

MEGATRONIX MEGALARM MEGA 2400 User manual

MEGATRONIX VIKING VS 2400 User manual

MEGATRONIX

MEGATRONIX VIKING VS 2400 User manual

MEGATRONIX KE 680 User manual

MEGATRONIX

MEGATRONIX KE 680 User manual

MEGATRONIX MEGALARM MEGA 3400 User manual

MEGATRONIX

MEGATRONIX MEGALARM MEGA 3400 User manual

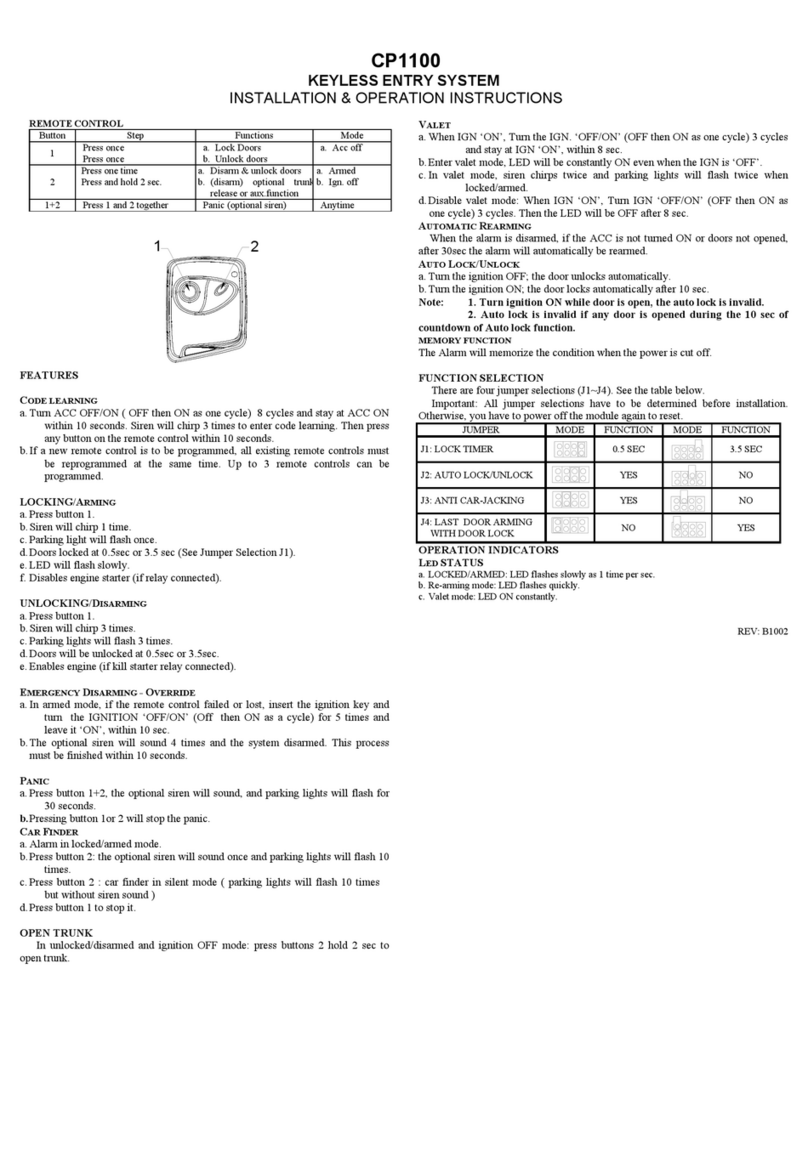
MEGATRONIX CP1100 Installation instructions

MEGATRONIX

MEGATRONIX CP1100 Installation instructions

MEGATRONIX VIKING VS 2700 User manual

MEGATRONIX

MEGATRONIX VIKING VS 2700 User manual

MEGATRONIX VIKING VS 2400 User manual

MEGATRONIX

MEGATRONIX VIKING VS 2400 User manual

Popular Remote Starter manuals by other brands

Peak Portable Power System 300 owner's manual

Peak

Peak Portable Power System 300 owner's manual

AstroStart RSS-2514XR user manual

AstroStart

AstroStart RSS-2514XR user manual

Panther PA-620C installation manual

Panther

Panther PA-620C installation manual

Wagan iOnBoost V6 user manual

Wagan

Wagan iOnBoost V6 user manual

Berner Truck Pac operating instructions

Berner

Berner Truck Pac operating instructions

Lexus REMOTE ENGINE STARTER TVIP V4 owner's guide

Lexus

Lexus REMOTE ENGINE STARTER TVIP V4 owner's guide

Ultra Start 35 SERIES install guide

Ultra Start

Ultra Start 35 SERIES install guide

Bulldog Security KE100, KE150, 1702 installation guide

Bulldog Security

Bulldog Security KE100, KE150, 1702 installation guide

CrimeStopper Ezee Start EZ-90 operating instructions

CrimeStopper

CrimeStopper Ezee Start EZ-90 operating instructions

Fortress Automotive Security FS-99 Operation instructions

Fortress Automotive Security

Fortress Automotive Security FS-99 Operation instructions

SP tools SP61073 user manual

SP tools

SP tools SP61073 user manual

Craftsman CMXCESM14143 instruction manual

Craftsman

Craftsman CMXCESM14143 instruction manual

Scytek electronic Astra 1000RS Series product manual

Scytek electronic

Scytek electronic Astra 1000RS Series product manual

Autostart AS-1452v Quick installation guide

Autostart

Autostart AS-1452v Quick installation guide

Autostart AS-1565 user guide

Autostart

Autostart AS-1565 user guide

Tack life KP120 user manual

Tack life

Tack life KP120 user manual

Autostart AS-3472TW-FM installation guide

Autostart

Autostart AS-3472TW-FM installation guide

Auto Page KE-120 Operation manual

Auto Page

Auto Page KE-120 Operation manual

manuals.online logo
manuals.online logoBrands
  • About & Mission
  • Contact us
  • Privacy Policy
  • Terms and Conditions

Copyright 2025 Manuals.Online. All Rights Reserved.