Megaware KeelGuard User guide
!
3974 Airport Road Ogden, Utah 84405 1.800.292.9835!
APPLICATION INSTRUCTIONS
Thank you for purchasing your Megaware KeelGuard. You are now part of a family of thousands of boat
owners who have discovered the pleasure of worry-free boating. With proper installation, you too will enjoy
years of carefree boating. The KeelGuard is a very simple product to install; however, the following
instructions must be strictly followed. Any short cuts or missed steps will jeopardize and compromise the full
bonding capabilities of the 3M adhesive.
IMPORTANT!!
If your trailer is designed with the boat resting on center rollers or a support beam along the keel, we do not
recommend installing a keel protector. If the rollers can be lowered or the side bunks raised to clear the roller,
the KeelGuard adhesive bond will not be compromised. The KeelGuard is not suitable for some aluminum
boats, pontoons, catamarans, personal watercraft, or boats with a non-standard V shaped keel. Please call for
suitability. !
Remember, the bond is only as good as the surface to which it is applied. Severe damage to your boat’s keel,
repairs that have not been done professionally, or any paint or gelcoat that may not have the proper bond to
the boat’s original surface can cause separation of the KeelGuard, taking any loose or improperly prepared
paint or gelcoat with it. It is important to have a good solid surface before you start.!
3M recommends the adhesive should not be applied when temperatures are below 65° F or above 100° F.
This specifically applies to the temperature of the boat hull, not necessarily the ambient air temperature. If the
boat is stored outside in cooler weather, we recommend bringing it into a warm shop or garage and leaving it
overnight, giving the boat sufficient time to rise to an acceptable temperature. It is important that the
KeelGuard and the boat hull are at the same temperature during the application process. !
The KeelGuard should be mounted at least 4-6 inches above the waterline on the bow, ending at least 2-3
feet beyond the lowest point of the keel. If protection is required above the bow eye, a separate BowGuard is
available in 1-3 foot lengths. We also offer stainless steel BowGuards to protect against marring from the
trailer roller or V Brace. !
Installation consists of four basic steps. 1) ETCH 2) CLEAN 3) PRIME 4) APPLY
Average installation time is 60-90 minutes depending on the length of the KeelGuard. Each kit includes
everything needed for a professional installation except the cleaning agent, isopropyl alcohol, used in step 2.!
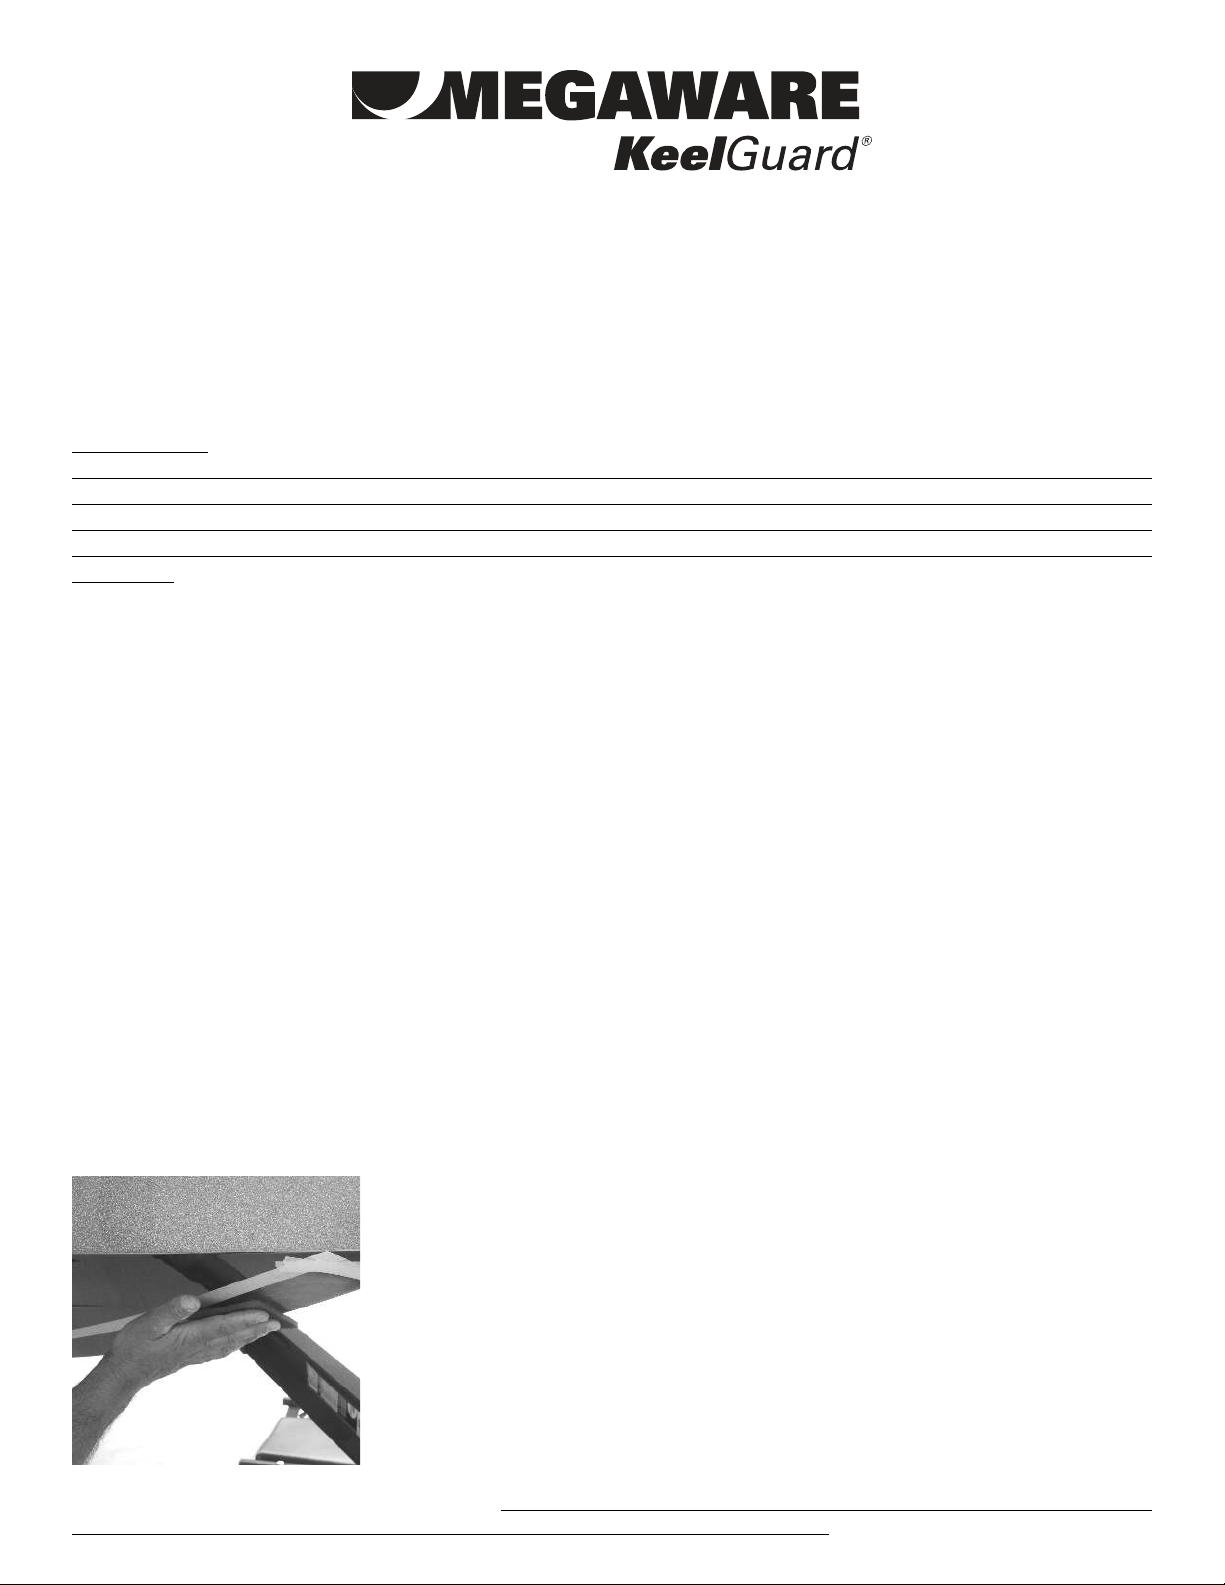
STEP 1: ETCH
Etch the surface where the KeelGuard will be installed. Any fiberglass mold
release agents and wax must be removed. This step is extremely important
and must be done thoroughly so that the full bonding qualities of the 3M
adhesive can be realized. The removal of the release agent or any other
contamination is best accomplished by using the 3M Scotch-Brite pad provided
in each kit. For an even cleaner looking installation, you can mask the area
surrounding where the KeelGuard will be installed. Measure out a 5 inch wide
area or use the KeelGuard as a template. Center the guard and mark
approximately every 2 feet down each side with a pencil, using these marks to
align the masking tape. The tape can be left on during the cleaning and priming
steps, and will be useful in keeping the KeelGuard centered. The supplied pad
is a mild grit and will not damage the keel’s gelcoat or paint. If you have access
to a DA sander, this can be used instead of the Scotch-Brite pad. Do not use
anything stronger than 180 grit sandpaper. If your boat has anti-fouling boat bottom paint applied, it must be
removed to expose the original gelcoat where the KeelGuard will be installed.!
STEP 2: CLEAN
Thoroughly clean the area with isopropyl alcohol using paper towels or a clean
rag. Repeat until there is no sign of residue. Do not use paint thinner or other
petroleum based cleaners as they will compromise the bond of the adhesive.
Always remember to wear protective gloves.!
!
STEP 3: PRIME
Apply a very thin coat of the 3M #94 Keel Primer provided in the kit. Follow the
instructions attached to the applicator. Make certain that the entire area
where the KeelGuard will be applied is primed, especially the edges. $The
primer interacts with the adhesive to create a bond that will become stronger
over time.$Do not confuse the primer for a cleaning agent or adhesive. The
primer is clear and will dry almost instantly. Do not over prime, leaving too little
primer to complete the job.!
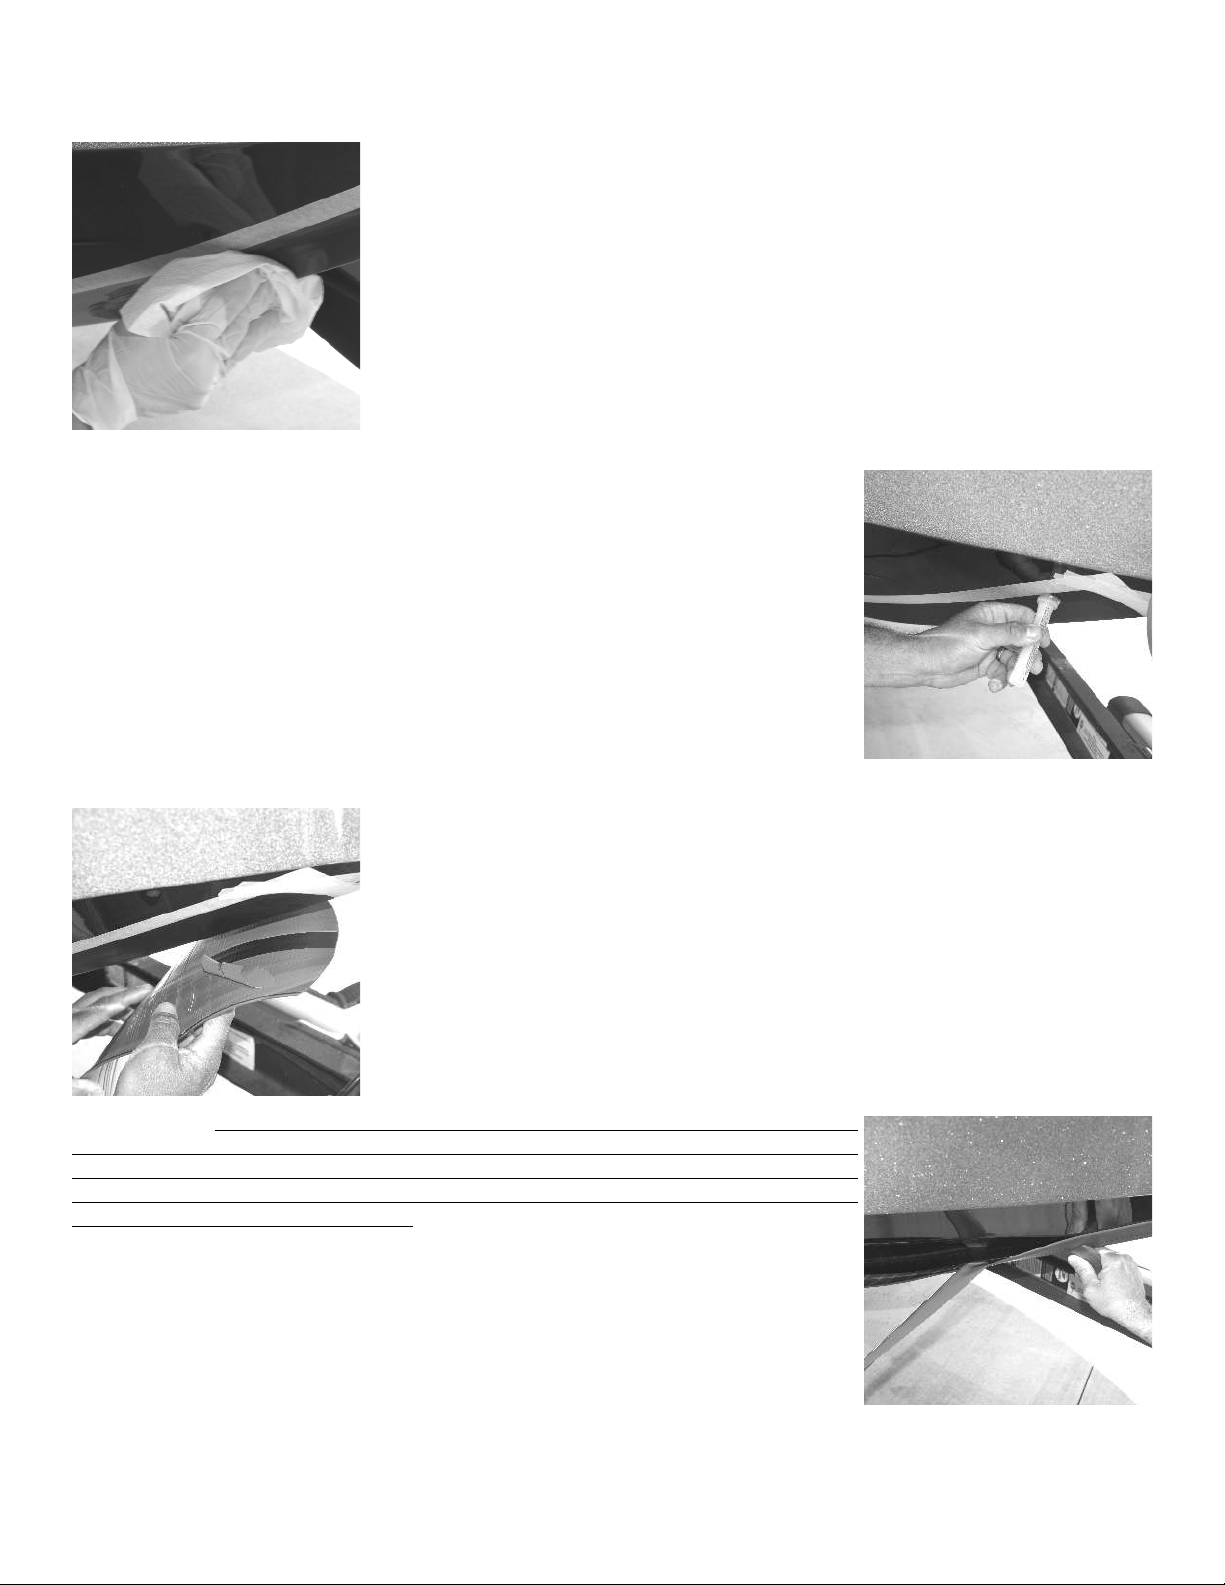
STEP 4: APPLY
The adhesive has a red protective liner that has been scored approximately 1
inch wide down the center to aid in centering the KeelGuard. Pull back the
center liner approximately 8-10 inches exposing the 3M adhesive. Do not touch
the adhesive with your hands, as any contamination may compromise the bond.
Carefully center the KeelGuard along the keel, and press it firmly in place using
your hand or the supplied burnishing tool. (Once the adhesive touches the
primed surface it becomes a permanent bond and will not release without
tearing the adhesive.) Continue to align the KeelGuard and peel back the center
strip until the entire center of the KeelGuard is attached to the boat. !
Starting at the bow, working in 2-3 foot sections, pull back the protective liner
on either side of the KeelGuard and begin pressing it on with the burnishing
tool. Work from the center out to ensure no air is trapped between the hull and
the adhesive. If you are applying the KeelGuard over chines or lifting strakes,
leave approximately 2-3 inches above the strake unattached. Press and bond
under the strake first, then press the unattached 2-3 inches, working down
toward the strake. This will help relieve tension of the material when going over
irregular or protruding surfaces. Continue working toward the rear until
completed. Repeat the process for the other side of the KeelGuard.!
Once fully attached, use the burnishing tool to apply additional pressure to the
entire KeelGuard ensuring the pressure sensitive adhesive is firmly attached to
the boat. A rubber mallet may also be used to apply even more force to the 3M
adhesive. You are now finished and ready to enjoy worry-free boating. No
curing time is required, and your boat can now be put in the water.!
If you have any questions about product suitability or installation please call us at 1.800.292.9835.!
Thank you for choosing Megaware KeelGuard for your boat protection needs.
Table of contents
Popular Boating Equipment manuals by other brands

Dometic
Dometic Optimus i7800 installation manual

SLEIPNER MOTOR AS
SLEIPNER MOTOR AS Side-Power Automatic Main Switch installation manual

Barton
Barton DINGHY BOOMSTRUT installation instructions

MINN KOTA
MINN KOTA i-Pilot Link Quick reference guide

DockCraft
DockCraft 100 Series manual

MINN KOTA
MINN KOTA TALON manual


