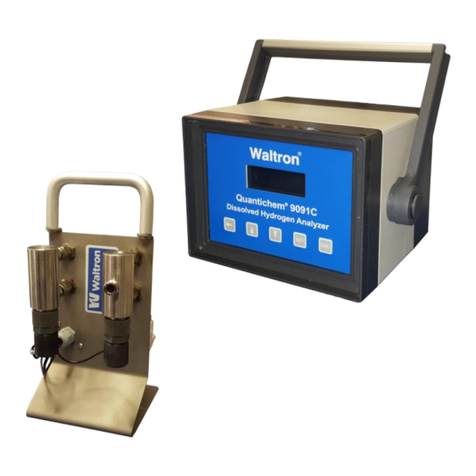
Megawin ME6000 Series Installation guide

800531-1.0-eng
Quick Manual for ME6000 and MegaWin
This manual is quick manual for ME6000 measurement system and for MegaWin PC-software.
More detailed information about device and MegaWin PC-software you can find from English
versions of manuals on MegaWin CD-rom.

Page 2 of 32
800531-1.0-eng ME6000 and MegaWin Quick Manual
Index
1.
GETTING STARTED WITH ME6000 ....................................................................................................................... 4
1.1.
C
ONNECTORS AND
B
UTTONS
...................................................................................................................................... 4
1.2.
R
EVERSE SIDE OF
D
EVICE
........................................................................................................................................... 6
1.3.
H
OW TO INSTALL
ME6000
SYSTEM
............................................................................................................................ 6
1.4.
CF-M
EMORY CARD USE
............................................................................................................................................ 8
1.5.
C
ONNECTING THE
EMG
REAM LIFIER
C
ABLES
............................................................................................................. 9
1.6.
C
HANGING BATTERIES
............................................................................................................................................. 10
1.7.
G
ENERAL HANDLING
............................................................................................................................................... 10
2.
GETTING STARTED WITH MEGAWIN ..................................................................................................................12
2.1.
M
EGA
W
IN ROGRAM GROU
.................................................................................................................................. 12
2.2.
R
UNNING THE ROGRAM
......................................................................................................................................... 12
2.3.
C
ONFIGURING THE CORRECT
COM
ORT
.................................................................................................................... 14
2.4.
ERFORMING FIRST MEASUREMENTS
......................................................................................................................... 14
2.4.1
How to create Person? .............................................................................................................................. 14
2.4.2
How to choose an existing protocol? ........................................................................................................ 15
2.4.3
How to perform measurement? ................................................................................................................ 15
2.4.4
How to obtain results? .............................................................................................................................. 16
3.
ME6000 MANAGER ............................................................................................................................................17
3.1.
C
ONNECTION TAB
.................................................................................................................................................. 17
3.1.1
U B cable (COM port) selections ............................................................................................................... 18
3.1.2
WLAN selections........................................................................................................................................ 18
3.2.
RESETS TAB
......................................................................................................................................................... 19
3.3.
F
ILES TAB
............................................................................................................................................................. 19
3.4.
C
ALIBRATION INFO
................................................................................................................................................. 21
3.5.
U
DATE FIRMWARE
................................................................................................................................................ 21
3.6.
W
IRELESS
............................................................................................................................................................. 22
3.7.
C
WLAN
SETTINGS
.............................................................................................................................................. 24
3.7.1
Making WLAN connection......................................................................................................................... 25
4.
MAIN WINDOW IN MEGAWIN ...........................................................................................................................26
4.1.
B
UTTONS
............................................................................................................................................................. 27
4.2.
M
ENU
................................................................................................................................................................. 27
4.2.1
File Menu .................................................................................................................................................. 27
4.2.1.1
Export......................................................................................................................................................................27
4.2.1.2
Import MegaWin exchange file ...............................................................................................................................28
4.2.1.3
Import MegaWin ASCII file ......................................................................................................................................29
4.2.1.4
Import Tagged File Format file (flash card reader) .................................................................................................30
5.
ME6000 TECHNICAL SPECIFICATIONS .................................................................................................................31
6.
MEGAWIN FEATURES .........................................................................................................................................32

Page 3 of 32
800531-1.0-eng ME6000 and MegaWin Quick Manual
Intended use of ME6000
ME6000 equipment is based on measurement of surface EMG signa s intended for assessment and eva uation of musc e
function and condition, rehabi itation, biofeedback training and scientific research purposes.
With additiona sensors ME6000 can be used for ECG, EEG, HR goniometers, inc inometers, force sensors, etc.
Classification of ME6000
In accordance with MDD 93/42/EEC: Class IIa product
ME6000 equipment is designed according to and fu fi s the requirements of fo owing standards:
EN60601-1 (IEC601-1) Medica e ectrica equipment. Part 1: Genera requirements for safety
EN60601-1-2 (IEC601-1-2) Medica e ectrica equipment. Genera requirements for
safety. E ectromagnetic compatibi ity - Requirements and safety
EN60601-2-40 (IEC601-2-40) Medica e ectrica equipment. Particu ar requirements
for safety of e ectromyographs and evoked response equipment.
ANSI/AAMI EC 12-1991 Disposab e ECG e ectrodes.
ME6000 is according to EN60601-1 interna y powered c ass IIa equipment.
The symbols used with the device:
The device is CE-marked for the conformity to Counci Directive 93/42/EEC regarding medica devices.
The device is equipped with type BF app ied parts fu fi ing the EN 60601-1 (IEC60601-1) standard
.
The e ectrodes are for sing e use on y.
The enc osure protection is c ass IP20 according to EN60529.
This symbo , found on some equipment parts, means that additiona instructions that further exp ain use
of a particu ar part or function is found in the Device Manua or Service Manua .
LOT O.
The Lot number fo ows this symbo .
The battery type and po arity are exp ained with this symbo .
USE BEFORE:
The e ectrodes sha not be used after the date fo owed this symbo .
We are continuous y deve oping our products. We keep the right to change our products without prior notice.
IP20
AA

Page 4 of 32
800531-1.0-eng ME6000 and MegaWin Quick Manual
1
1.
.
G
G
E
ET
TT
TI
IN
NG
G
S
ST
TA
AR
RT
TE
ED
D
W
WI
IT
TH
H
M
ME
E6
60
00
00
0
1.1. Connectors and Buttons
ME6000
5. Start:
- Measurement 6. Stop:
- Measurement
1. Back
2. Menu-Select-Change
4. Down
3. p
7. Power:
- On
- Off
8. Marker
ME6000 buttons.
Button Function
1
1.
.
B
BA
AC
CK
K
Back to previous screen.
2
2.
.
M
ME
EN
NU
U-
-
S
SE
EL
LE
EC
CT
T-
-
C
CH
HA
AN
NG
GE
E
Confirm your se ections or changes.
3
3.
.
U
UP
P
Move up in the menu or se ect a different channe in
On ine Raw measurement.
4
4.
.
D
DO
OW
WN
N
Move down in the menu or se ect a different channe in
On ine Raw measurement.
5
5.
.
S
ST
TA
AR
RT
T
Start the measurement
6
6.
.
S
ST
TO
OP
P
Stop the measurement
7
7.
.
P
PO
OW
WE
ER
R
Power on/off
8
8.
.
M
MA
AR
RK
K
Data marker insertion

Page 5 of 32
800531-1.0-eng ME6000 and MegaWin Quick Manual
1.
2.
3.
4.
ME6000 measurement unit connections
Connector Function
1
1.
.
E
EM
MG
G-
-P
PR
RE
EA
AM
MP
PL
LI
IF
FI
IE
ER
R
C
CA
AB
BL
LE
ES
S
o
or
r
O
OT
TH
HE
ER
R
S
SI
IG
GN
NA
AL
L
C
CA
AB
BL
LE
ES
S
Connectors for EMG-preamp ifier cab es or other
signa cab es supp ied by Mega E ectronics Ltd.
Warning! Do not connect any other cab es in these
connectors.
2
2.
.
M
MA
AR
RK
KE
ER
R
/
/
T
TR
RI
IG
GG
GE
ER
R
O
OU
UT
T
Marker / Trigger Out from this connector.
3
3.
.
U
US
SB
B
USB connector with mini B p ug
4
4.
.
M
MA
AR
RK
KE
ER
R
/
/
T
TR
RI
IG
GG
GE
ER
R
I
IN
N
Marker /Trigger signa in with this connector (TTL
Input.)
The warning symbol , indicates that you should read this manual when
you are using connectors.
The definitions of signs and symbols on the interface panel are
explained at the beginning of this manual.
NOTE
!
!
WARNING

Page 6 of 32
800531-1.0-eng ME6000 and MegaWin Quick Manual
1.2. Reverse side of Device
Reverse side.
1.
3. 5.
2.
4.
1. Labe ing
2. Battery case
3. Battery type and notice for memory card hand ing
4. Battery cover
5. CF –Memory card
The warning symbol indicates that you should read this manual
when you using CF-memory card.
1.3. How to install ME6000 system
1.
Insta MegaWin software and ME6000 device driver to the PC. (For
detai ed instructions p ease see MegaWin Comp ete Eng ish User’s
Manua ).
2.
Connect the ME6000 device to the PC USB port and start MegaWin
software.
3.
Open MegaWin program and choose the right COM port settings in
System Setup. P ease see chapter 3 for instructions.
The system is now ready for use. For instructions on how to perform
measurements see Chapter 4 from comp ete Eng ish ME6000 user manua .
!
WARNING

Page 7 of 32
800531-1.0-eng ME6000 and MegaWin Quick Manual
Settings
Download
Measure
ME6000
Isolation Transformer
The connections of the ME6000 system
Use only parts specified and supplied by Mega Electronics Ltd.
You should use a medical approved Isolation Transformer when using
ME6000 with USB connection. If the PC or its accessories are near the
patient environment it is recommended to use the
Isolation Transformer
also when using WLA connection.
See further information about connecting preamplifier cables to the skin
Chapter 4 from complete English ME6000 user manual.
Before starting to use ME6000 for medical purposes, familiarize yourself
with the menus and functions of the device by reading Chapter 5 from
complete English ME6000 user manual.
!
WARNING
NOTE
!
NOT
E
!
!
WARNING

Page 8 of 32
800531-1.0-eng ME6000 and MegaWin Quick Manual
1.4. CF-Memory card use
Under the battery cover of the ME6000 measurement unit there is a socket for
the memory card. Whi e using the card, it is important to notice the fo owing
instructions:
Hand e the memory card carefu y.
Memory card must be inserted into the measurement unit before the
measurement and down oad in Recording or saving forms. Recording
and Saving forms are discussed further in Chapter 5 in comp ete Eng ish
ME6000 user manua .
Before inserting or removing the memory card, the measurement unit
must be turned OFF.
Memory card keeps its data a so when it is disconnected.
Be sure that you are a ways inserting the memory card right way.
Do not use too much force.
Inserting memory card into the measurement unit.
After the memory card is inserted, check all measuring parameters before
starting the measurement.
Remove memory card only after stopping the measurement or after
measurement is stopped automatically. Removal of memory card during
the measurement will produce incorrect data in memory card preventing
the data file creation.
NOTE
!
label side

Page 9 of 32
800531-1.0-eng ME6000 and MegaWin Quick Manual
1.5. Connecting the EMG Preamplifier Cables
To ensure the accuracy of the measurement, connect the EMG Preamp ifier
Cab e to its specified channe socket. The cab e is marked with a abe
indicating the channe number and co or. Connect the EMG Preamp ifier
Cab es as shown in the fo owing figure:
Connecting the measuring cables.
For EMG measurements, connect all wires to the patient or disconnect a
totally free cable from the measurement unit. If some wires of a preamplifier
cable are unused, rotate them and shield the snap connectors and grounding
connector to prevent their contact to any conductive surface.
Do not rotate the connectors when plugged in. Set the marked points (red
dots) in connectors towards each other.
!
CAUTION
!
WARNING

Page 10 of 32
800531-1.0-eng ME6000 and MegaWin Quick Manual
1.6. Changing batteries
1.
Switch off the measurement unit.
2.
Open the battery cover.
3.
Remove o d batteries from the measurement unit.
4.
P ace the new batteries as shown in the fo owing figure.
5.
C ose the battery cover.
Inserting batteries into the measurement device.
1.7. General handling
The ME6000 system devices inc ude sensitive e ectronics. Fo ow these genera
instructions when hand ing the system devices:
Hand e the device carefu y.
Be carefu not to drop the device on hard surfaces.
Be carefu not to batter the device.
Do not wash the device with water and avoid extreme y high humid
conditions. Do not use for over 30 minutes in humid p ace (re ative
humidity over 80%) without proper protection. (water proof bag)
Do not expose to temperatures under 0 °C / 32 °F /273K or above 50 °C /
122 °F / 323K or re ative humidity over 80 % without proper iso ation.
These inc udes a so storing and transportation any part of the system.
Do not open the device or the mou ded preamp ifiers joints on the EMG
Preamp ifier Cab es.
In fie d measurement - use the measurement unit inside the be t bag.
Fasten the measurement unit carefu y in the be t.
Carry the device in its own case.
When disconnecting the EMG Preamp ifier Cab es from the device, pu at
the connector. Do not pu at the cab e and do not rotate the connectors.
If externa memory cards are used, hand e them very carefu y. Do not
expose them to magnetic sources, and insert them gent y into the card
socket in the device. Do not bend or f ex the memory card. Avoid
damaging the insu ation on the card.
Remove the batteries when the device is not used within 6 months. P ace
the device in its case. Remove the memory card.
+
+
+
+
+
+
+
+
-
-
-
Batterycase

Page 11 of 32
800531-1.0-eng ME6000 and MegaWin Quick Manual
You should inspect your device and cables regularly. If there is visibly
something broken, it is best to have it repaired at your local distributor or
Mega Electronics Ltd.
Use only cables, electrodes, memory cards and other accessories specified
by the manufacturer.
!
CAUTION

Page 12 of 32
800531-1.0-eng ME6000 and MegaWin Quick Manual
2
2.
.
G
G
E
ET
TT
TI
IN
NG
G
S
ST
TA
AR
RT
TE
ED
D
W
WI
IT
TH
H
M
M
E
EG
GA
A
W
W
I
IN
N
This chapter gives a short introduction on how to start using ME6000 with
MegaWin and desctiber basic functions. Note, however, that MegaWin
features and operation are discussed systematica y and extensive y in the
comp ete Eng ish MegaWin user manua .
2.1. MegaWin program group
By navigating Start -> Programs -> MegaWin you wi see the MegaWin
program group. The fo owing icons are found there:
Database backup / restore uti ity
MegaWin program
MegaWin database repair too
2.2. Running the program
You can run the program by doub e-c icking the MegaWin icon on your
desktop, or by se ecting Start
Programs
MegaWin
MegaWin.
When MegaWin is run first time, the program tries to se ect anguage that
matches your oca e of Windows (Contro Pane / Regiona and Language
options). If MegaWin does not support the anguage of your Windows
anguage setting, it is started in Eng ish. You can change the anguage from
Options
Language.
MegaWin Main Window.

Page 13 of 32
800531-1.0-eng ME6000 and MegaWin Quick Manual
The
buttons in M
Ma
ai
in
n
w
wi
in
nd
do
ow
w
gives quick access to the MegaWin main
features:
P
Pe
er
rs
so
on
n button opens the P
Pe
er
rs
so
on
n
w
wi
in
nd
do
ow
w for creating and updating the
Person records: persona detai s, address, appointments etc. Right-c ick the
P
Pe
er
rs
so
on
n button to get a pop-up menu of avai ab e persons. Then you can se ect
the active person. For more on P
Pe
er
rs
so
on
n
w
wi
in
nd
do
ow
w see Chapter 7 in Comp ete
Eng ish MegaWin manua .
P
Pr
ro
ot
to
oc
co
ol
l button opens the P
Pr
ro
ot
to
oc
co
ol
l
w
wi
in
nd
do
ow
w.
. In short, Protocol defines
how the measurement is to be performed. It contains device configuration,
signa sources and measurement components. Right-c ick the P
Pr
ro
ot
to
oc
co
ol
l
button to get a pop-up menu of avai ab e protoco s. Then you can se ect the
active protoco .
From this button you can access the P
Pr
ro
ot
to
oc
co
ol
l
w
wi
in
nd
do
ow
w and choose a
predefined protoco from the list box, or you can easi y create a new protoco :
1.
C ick
New
to create a new protoco .
2.
Fo ow the P
Pr
ro
ot
to
oc
co
ol
l
E
Ed
di
it
to
or
r wizard instructions.
3.
When you reach the ast window in the P
Pr
ro
ot
to
oc
co
ol
l
E
Ed
di
it
to
or
r wizard c ick
Finish & Measure
to begin the measurement.
For more on P
Pr
ro
ot
to
oc
co
ol
l
w
wi
in
nd
do
ow
w see Chapter 9 in Comp ete Eng ish MegaWin
manua .
M
MM
Me
ea
as
su
ur
re
e button opens the M
Me
ea
as
su
ur
re
e
w
wi
in
nd
do
ow
w.
. This is a quick way to start a
measurement – just choose Protocol and Person from the list boxes and c ick
Run
protocol
.
For more on M
Me
ea
as
su
ur
re
e
w
wi
in
nd
do
ow
w see Chapter 10 in Comp ete Eng ish MegaWin
manua .
F
Fa
av
vo
or
ri
it
te
e button gives you a direct access to a frequent y used protoco ,
which was previous y set as favorite. Right-c ick the F
Fa
av
vo
or
ri
it
te
e button to get a
pop-up menu of avai ab e protoco s. Then you can se ect the active favorite
protoco .
For more on Favorite see Chapter 9 in Comp ete Eng ish MegaWin manua .
R
Re
es
su
ul
lt
ts
s button opens the R
Re
es
su
ul
lt
ts
s w
wi
in
nd
do
ow
w. From this window you can
view and ana yze the measurement’s data, as we as open saved resu ts.
For more on R
Re
es
su
ul
lt
ts
s
w
wi
in
nd
do
ow
w see Chapter 11 in Comp ete Eng ish MegaWin
manua .

Page 14 of 32
800531-1.0-eng ME6000 and MegaWin Quick Manual
2.3. Configuring the correct COM port
To be ab e to start performing measurements your measurement device needs
to communicate with MegaWin program. For that purpose you need to make
sure, first of a , that your device is connected to the correct COM port in the
PC, and that the correct COM port is configured in the system setup.
Check correct COM port setting from ME6000 manager. More detai ed
instructions for setting correct COM-port in chapter 3.1.1 on this manua .
2.4. Performing first measurements
This section is intended to he p you with your first measurements. For the
beginner user of MegaWin, it is usefu to divide the process into four stages:
1.
Creating a Person record - that is the persona record of the examinee on
which you are about to perform the measurement.
2.
Choosing or creating the appropriate protoco to be used.
3.
Performing the measurement
4.
Performing ca cu ations and obtaining resu ts.
2.4.1 How to create Person?
To create person record c ick the P
Pe
er
rs
so
on
n button to get to P
Pe
er
rs
so
on
n w
wi
in
nd
do
ow
w:
Person Window.
Here you can edit the Person records.
1.
To create a new Person record c ick the
New person button.
2.
In the Last name dia og box, type the examinee’s ast name (or the name
by which you wish to identify him).
3.
In the Birthday dia og box, type the examinee’s birthday.

Page 15 of 32
800531-1.0-eng ME6000 and MegaWin Quick Manual
4.
Note that Last name and Birthday, are the two parameters by which you
can view your Person records in the Select person fie d.
5.
Type the examinee’s detai s in the other fie ds.
6.
Choose the Appointment tab. Here you can edit and update the
examinee’s appointments detai s: anamnesis, status, diagnosis and plan.
7.
C ick the
New Appoint button to create a new appointment record.
8.
From the Date list box you can choose and edit the Person’s previous appointments.
9.
C ick
Save and Close .
For more on P
Pe
er
rs
so
on
n window see Chapter 7 on Comp ete Eng ish MegaWin
manua .
2.4.2 How to choose an existing protocol?
A protoco defines how the measurement is to be performed. Hence, defining
the appropriate protoco is crucia for the success of the measurement.
Protoco contains the fo owing settings:
onfiguration: defines which measuring device is used
Signal source: assigning the signa sources to the musc e groups you
are about to measure
Type of measurement: on ine or off ine (down oad)
Measuring components (one or more)
To open the P
Pr
ro
ot
to
oc
co
ol
l
w
wi
in
nd
do
ow
w c ick P
Pr
ro
ot
to
oc
co
ol
l button from M
Ma
ai
in
n
w
wi
in
nd
do
ow
w.
.
Protoco s are discussed extensive y in Chapter 9 Comp ete Eng ish MegaWin
manua . However, you shou d note here that MegaWin 2.x has a wizard sty e
editor for creating protoco . This feature makes the task of creating protoco
much easier and faster compare to previous MegaWin versions. A so,
MegaWin comes with severa existing typica protoco s, which you can use for
your first measurements.
You can se ect existing protoco s which are suitab e for your system
configuration, and start performing a few test measurements. Afterwards you
can move on to Chapter 9 in comp ete Eng ish MegaWin user manua , to
create and edit protoco s with more advanced settings to fit your needs.
2.4.3 How to perform measurement?
Performing measurements is exp ained in detai s in Chapter 10. At this stage,
to continue from the previous section, and after you have chosen a protoco
from the menu box in the P
Pr
ro
ot
to
oc
co
ol
l
w
wi
in
nd
do
ow
w, you can start the measurement
by c icking
Measure…
1.
The M
Me
ea
as
su
ur
re
e
w
wi
in
nd
do
ow
w then opens. C ick
Run protocol
to start the
measurement, and fo ow the instructions on the screen.
2.
After the measurement is comp eted it is saved automatica y to the
database. However, if you stopped the measurement manua y, you’ be

Page 16 of 32
800531-1.0-eng ME6000 and MegaWin Quick Manual
prompted to save it. If you want to be ab e to obtain resu ts, then choose
Yes
.
3.
You can perform as many measurements as you ike. After you have
finished, c ick
Close
.
For more on performing measurements see Chapter 10.
2.4.4 How to obtain results?
MegaWin offers extensive features for performing ca cu ations and obtaining
resu ts as we as fo ow-up on resu ts and producing reports. These are a
exp ained in detai s in Chapters 11 – 15 in Comp ete Eng ish MegaWin
manua .
At this stage, after you’ve made numerous measurements you can try out
some of these features in order to get fami iar with the software. MegaWin
a so comes with an existing demo database which you can use for this purpose
as we .
1.
C ick R
Re
es
su
ul
lt
t button to access the R
Re
es
su
ul
lt
t
w
wi
in
nd
do
ow
w.
2.
From the Person menu box you can choose a person and view the
measurements associated with him in the Measurements area. Se ect the
measurement from the ist and doub e-c ick the measurement’s phase in
the Phases of the measurement area to open it in the V
Vi
ie
ew
w
w
wi
in
nd
do
ow
w. For
more on R
Re
es
su
ul
lt
t
w
wi
in
nd
do
ow
w see Chapter 11.
3.
The V
Vi
ie
ew
w
w
wi
in
nd
do
ow
w is then opened. From the too -bar you can try and
perform some of the basic ca cu ations, such as Basic results, Work /
Loading, Fatigue etc. Note that there are different ca cu ations buttons for
raw type and average type data. For more on V
Vi
ie
ew
w
w
wi
in
nd
do
ow
w see Chapter
12.

Page 17 of 32
800531-1.0-eng ME6000 and MegaWin Quick Manual
3
3.
.
M
ME
E6
60
00
00
0
M
M
A
AN
NA
AG
GE
ER
R
In
M
Ma
ai
in
n
w
wi
in
nd
do
ow
w se ect Options
ME6000 Manager from the menu to open
the M
ME
E6
60
00
00
0
M
Ma
an
na
ag
ge
er
r. This menu command is avai ab e on y if your
MegaWin icense a ows use ME6000 unit.
There are the fo owing tabs in this window:
Connection
Presets
Fi es
Ca ibration info
Update firmware
Wire ess (avai ab e on y if WLAN is a owed in the icense)
3.1. Connection tab
The onnection tab has the settings for making the connection to ME6000
device.
ME6000 Manager - Connection.
Se ect the connection method, USB-cable ( OM port) if you don’t have WLAN
option or you want to edit the Wire ess profi es. Se ect WLAN if you have set
the Wire ess parameters correct y and you are ready to use the Wire ess
connection.

Page 18 of 32
800531-1.0-eng ME6000 and MegaWin Quick Manual
3.1.1 USB cable (COM port) selections
Ensure that the device is connected and the power is ON. Press
Auto-detect port
button to automatica y detect the port. If it can’t be detected, se ect port
manua y. Press
System port list…
button to show the avai ab e COM ports of the
system. The ist is disp ayed for examp e as fo owing:
ME6000 device uses Prolific USB-to-Serial driver. In
this case, the port number is COM15. Therefore,
COM15 is the correct port for Port drop-down box. If
you can’t find Pro ific USB-to-Seria driver in this ist,
you haven’t insta ed the Pro ific driver or the device
is not connected.
After the correct COM port is se ected, press
Apply
to activate it. If you wi be
given an error message and it is the correct port for sure, restart the software
and try again. If it sti does not work, restart the computer.
3.1.2 WLAN selections
If you know the IP address of your ME6000 device, manua y enter it in
ME6000 IP address fie ds.
You can search the avai ab e ME6000 devices from network by se ecting
Search
wireless devices
. Then change to another page to start WLAN connection search.
After a few seconds the fo owing window appears showing a the devices
found from the oca area network. If the computer is wired to institute’s
network, it a so searches ME6000 devices there for ME6000 devices that may
have been configured to operate with wire ess access point.
Wireless device selection.
Se ect your ME6000 device from the ist and then press Connect. If you se ect
Store address, and then the IP address of the se ected device is stored into
onnection page’s ME6000 IP address fie ds as the defau t address for WLAN
connection.
Define the connection password to onnect with password fie d in the
onnection page if the device is password protected. See section 3.6 for
password protecting the device.

Page 19 of 32
800531-1.0-eng ME6000 and MegaWin Quick Manual
3.2. Presets tab
ME6000 Manager - Presets.
ME6000 has four user-editab e measurement presets. The presets are main y
for off- ine measurements. Some presets may have been ocked from the
meter, so you can’t edit them from software. Change the preset to be edited
with
1
,
2
,
3
and
4
buttons. Edit a preset, then press
Apply
to send the preset
to ME6000 unit. P ease see ‘Comp ete Eng ish ME6000 device manua ’ for
detai ed info of presets.
3.3. Files tab
ME6000 Manager - Files.

Page 20 of 32
800531-1.0-eng ME6000 and MegaWin Quick Manual
The Fi es tab shows the current fi es in the f ash card of ME6000 unit. You can
copy the fi es from f ash card to oca disk or from oca disk to f ash card. And
you can check the free f ash card space and de ete unnecessary fi es.
Files on ME6000:
Shows a the fi es on the card. When you have dozens of fi es, it is important
that you can sort the fi es. You are ab e to sort the fi es by name, modification
time and size. The sorting is done by c icking the co umn tit e. C ick the same
co umn tit e again to change the sorting between ascending/descending. A
b ue arrow icon on the tit e co umn shows the current sorting basis. Press
Refresh
to read the contents of the card again, if it has changed.
Local files:
Shows the oca fi e fo der and the fi es in it. Press
Refresh
to read the fo der
contents if it has changed.
ard info:
Shows card capacity, free space, used space and usage percent.
Copying files from ME6000 flash card to PC
Se ect the fi e to be copied from Files on ME6000 area. Se ect the target fo der
from Local files area. If you want to copy severa fi es at same time, use Ctr
and Shift keys to se ect severa fi es. Then Press C
Co
op
py
y
t
to
o
P
PC
C button (arrow
down) to start copying.
Copying files from PC to ME6000 flash card
Se ect the fi e to be copied from Local files area. If you want to copy severa fi es
at same time, use Ctr and Shift keys to se ect severa fi es. Then Press C
Co
op
py
y
t
to
o
M
ME
E6
60
00
00
0
button (arrow up) to start copying.
Deleting files from ME6000 flash card
Se ect the fi es to be de eted from Files on ME6000 area. Then press
Delete
to
de ete the se ected fi es.
Other manuals for ME6000 Series
1
Table of contents
