Melges 14 Quick start guide

RIGGING GUIDE
MELGES.COM • MELGES14.COM

CONGRATULATIONS... on the purchase of your new MELGES 14!
Designed by Reichel Pugh, the Melges 14 exudes innovation and excellence in One Design
sailing. It’s speed, quality, durability, comfort and fun wrapped into one dynamic and
modern sailing package. It offers a fun and exciting upwind and downwind experience
when compared to other boats in its size range. Perfect for all ages, it features a large,
comfortable open cockpit — so no bailing. An ultra-cool carbon mast and boom
complements its modern, yet flexible sail plan. You can car top or tow it behind any
vehicle. It’s easy to move around on a custom Melges 14 dolly. It’s a fantastic beach boat
— a fun, family-style sailboat or a one-design racing platform.
The large cockpit makes sailing with two a breeze!
Lets sail cool boats — the new Melges 14!
The following comprehensive guide takes you through the rigging and set up of your new
Melges 14. If you have any questions please contact your local dealer or
melges.com for anything you may need.
MELGES.COM • MELGES14.COM


THE MELGES 14.
MODERN, FUN, EASY TO SAIL
PRODUCT SPECIFICATIONS
LENGTH: 14 ft 2-3/8 in (4.328 m)
BEAM: 5 ft 2 in (1.584 m)
WEIGHT: 114 lbs (51.7 kg)
SAIL AREA
GOLD: 97.95 sq ft (9.1 m2)
BLUE: 79.65 sq ft (7.4 m2)
RED: 59 sq ft (5.5 m2)
CREW: 1-2
MELGES.COM • MELGES14.COM

THE MELGES 14 GUIDE
This guide will help you familiarize yourself with the rigging, parts !
and maintenance of the Melges 14 Full Range, Mid-range and Youth
Range rigs. The different sail sizes utilize different mast tips and !
different outhaul front spectra lengths to make the switch through !
the different sail sizes.
The first thing to do is unpack the extra parts you received !
with your new boat and lay them out on the floor or table to
identify what you have.
1. Daggerboard
2. Rudder with rudder head and tiller quick pin.
3. Tiller with extension
4. Upper mast
5. Lower mast
6. Boom
7. Sail with battens
8. Mainsheet 7mm X 10.668M
9. Boom vang system with vang lines
10. Cunningham control line (yellow)
11. Cunningham spectra 3mm X 610mm
12. Outhaul control line (black)
13. Outhaul front spectra 3mm X 1.83M
14. Outhaul aft spectra 3mm X 2.21M
15. Traveler line with 2 stopper balls. 4mm
16. Traveler line pulley (29mm) with lead ring.
17. 2 X 40mm T2 blocks for mainsheet
18. Large loop for mid boom block
19. Zip tie for aft boom block
20. Dinghy clew hook (Harken 394)
21. 2 X 18mm T2 Blocks for outhaul
22. 16mm swivel(#417) for outhaul
23. 18mm double block for cunningham
24. Spectra clew strop.
25. Self starting O ring for vang to mast
MELGES.COM • MELGES14.COM

NAUTICAL TERMS
Aft: Toward the back end of the boat
Port: Left side of the boat looking forward
Starboard: Right side of the boat looking forward
Leeward: Direction away from the wind
Windward: Direction from which the wind is coming
Inboard: Direction toward the center of the boat
Outboard: Direction toward the outer edge of the boat
Useful knots are listed below.
It would be beneficial to Google how
to tie the following knots:
Bowline
Figure 8 knot
Square knot
Half hitch
Slip knot
MELGES.COM • MELGES14.COM

THE MELGES 14 : STEP 1
INSTALL THE BATTENS IN THE MAINSAIL
•Lay the battens out on top of the sail batten pockets with
the correct length battens corresponding to the correct length
batten pockets.
•Insert battens into the batten pockets with the smaller
tapered end going in first and forward towards the mast.
•Unscrew batten tensioners so that they go far enough into
batten pockets to allow both webbing loops to hook over
batten tensioner hooks.
•Tension battens so that all vertical wrinkles through the pockets
just go away. Take care not to over tension the battens and bow
them in the pocket.
•Battens that are too tight will be more difficult to pop
through on tacks and gybes and make it more difficult to feed
the sail onto the mast.
•When not using the sail for extended periods of time it is best
to loosen the batten adjusters or remove the battens from the sail.
•Always rinse salt water off the sail after use and put away dry.
Do not put a wet sail in the bag for any extended period of time.
•Keep the sail covered or out of the sunlight as much as
possible and store in a cool dry place.
•Small tears can be repaired with sail repair tape or
shipping tape. More substantial repairs should be performed
by a sail repair facility.
MELGES.COM • MELGES14.COM

THE MELGES 14 : STEP 2
ASSEMBLE THE BOOM
•Attach the 16mm swivel to the forward bottom eyestrap
on the boom.
•Using the long loop attach 1- 40mm T2 block to the center
boom, making sure the loop goes through the black eyestrap.
•Attach 1-40mm T2 block to the bottom black eyestrap
at the aft end of the boom using the supplied loop.
•Using the loop supplied with the mid boom T2 block attach
it to the aft block per photo and zip tie it onto the block.
•Tie the aft spectra line onto the top black eyestrap
at the aft end of the boom using a bowline knot.
•Lead the aft spectra line through the clew hook block
(keep the hook on the starboard side), back through the aft
eyestrap and forward. On the front end of this spectra line tie
on an 18mm T2 block.
•Tie the front spectra line to the bottom eyestrap at the front
end of the boom, lead it aft through the 18mm block on the front
end of the aft spectra, forward through the 18mm swivel block
at the front end of the boom and then tie on the end of this line
an 18mm T2 block.
•NOTE: When rigging for the Mid-range sail or Youth Range
ensure that you use the longer 3mm X 2M spectra line.
MELGES.COM • MELGES14.COM

THE MELGES 14 : STEP 3
ASSEMBLE THE BOOM VANG
•Note picture with the vang parts included.
•Assemble the curved vang key and
16mm double block (#206) using the small
D shackle. Tighten shackle with a tool. Also
attach the Micro single block (#224) to the
shackle at the top of the cleat bracket.
•Tie the red vang control line to the becket
end of the Micro block(#225) using a bowline
and lead through the cleat bracket as shown.
•Tie the vang spectra line to the opposite
end of the micro block(#225) using a
bowline knot. Lead the line through
the 16mm double block(#206) and the
bracket as shown, and dead end on the
pin of the shackle that is attaching the
single micro block to the bracket.
MELGES.COM • MELGES14.COM

THE MELGES 14 : STEP 4
ASSEMBLE THE TRAVELER BRIDLE
•Take the 4mm X 2.286M Vectran line and tie a figure 8
knot at the black mark that is 565mm from one end.
•Then slide the small 16mm stopper ball out to this knot
with the counterbored side of the ball sliding over the knot.
•Next slide the Harken lead ring (#3269) over the long end
of the Vectran line. Make sure that the 29mm T2 block
(#2146) is tied to the lead ring.
•Then slide on the other 16mm stopper ball so it opposes
the first one.
•Tie a second figure 8 knot at the other black mark
which is 708mm from the first mark.
•-Starting with the short end of the line from the figure
8 knot, tie this end onto the port side black traveler !
eyestrap using a bowline.
•Approximately 200mm from the eyestrap on the starboard
side of th boat, tie a slip knot with a half hitch over the loop,
run the tail through the eyestrap and back through the loop
of the slip knot. Tighten the line so it is taut and tie several
half hitches to secure the traveler line.
MELGES.COM • MELGES14.COM

THE MELGES 14 : STEP 5
ASSEMBLE THE RUDDER HEAD AND RUDDER
•Tie a knot in the end of the rudder hold down line,
4mm X 1220mm black line. Feed through the counterbored
hole on the side of the rudder and lead out the front side.
•Remove the pivot bolt from the rudder head and feed
the line through and above the top gudgeon block.
•Slide the rudder in the head and insert the pivot bolt.
•Tighten with 1/2” wrenches so that the head is snug
on the rudder.
MELGES.COM • MELGES14.COM

THE MELGES 14 : STEP 6
STEPPING THE MAST
•If you have purchased a Dolly you should assemble the dolly
using the directions included with the dolly.
•Set the boat on the dolly and position the bow into the wind.
•Make sure there is no sand or dirt in the mast step socket
or on the mast base bearings. Any debris can damage the gelcoat.
•Make sure there are no power lines or electrical wires
near by or above.
•Remove the sail from the bag and lay out on the grass
or a smooth surface.
•Slide the upper mast section into the lower mast section.
•Slide the mast into the sail luff sleeve starting at the tack
of the sail. Align the gooseneck of the mast with the foot of the sail.
•Ensure that the top of the sail seats in the plug in the top
of the mast.
•Step the mast from the top to the bottom, hand over hand
until the mast is vertical, keeping your hand spread apart for
better support. Ensure that you slide the mast into the deck
socket straight down. Try not to let the mast tilt over to the
side half way into the socket or you could risk damaging the
socket of the boat. Also, slide the mast in carefully and
do not drop it down or you could damage the mast socket.
MELGES.COM • MELGES14.COM

THE MELGES 14 : STEP 7
BOOM ON AND LEAD OUTHAUL LINES
•Once the mast is stepped turn the boat so
the bow is pointing into the wind and the sail
is blowing straight back down the centerline
of the boat towards the transom.
•Position the front end of the boom so that
it slides over the gooseneck on the mast.
•Attach the clew hook into the clew of the
sail and the clew strop around the boom and
through clew grommet. Take care to keep
forward pressure on the boom so it does not
fall off the gooseneck.
•Lead the black outhaul control line starting
at one of the inboard side deck cleats, going
forward to the inboard 29mm block by the
mast, up through the 18mm block on the
end of the front spectra line, back down
to the inboard stand up 29mm block on the
other side of the mast and aft to the inboard
control cleat. Tie a figure 8 knot 100mm
from the ends of the control lines.
MELGES.COM • MELGES14.COM

THE MELGES 14 : STEP 8
ATTACH THE BOOM VANG TO THE MAST AND BOOM
•Remove the 6 mm pin from the front
of the vang cleat bracket and attach to the
vang tang on the mast just above the deck.
•Insert the curved vang key into the
vang plate on the boom
•Take the slack out of the vang
lines and cleat.
MELGES.COM • MELGES14.COM

THE MELGES 14 : STEP 9
LEADING THE CUNNINGHAM LINES
•Tie the 3 mm X 610 mm spectra line
to the 18 mm double block (#2698)
using a bowline.
•Lead the spectra line through the
tack grommet of the sail and tie off on
the eyestrap on top of the boom at the
forward end.
•Starting at one of the outboard control
cleats lead the yellow control line through
the cleat, forward to the outboard stand up
29 mm block at the base of the mast, up
through one side of the 18 mm double block,
down through the micro block on the top
of the vang cleat bracket, up through the
other half of the 18mm double block, back
down to the outboard stand up block on
the deck and aft to the outboard control
cleat. Tie figure 8 knots 100 mm from
the end of the control lines.
MELGES.COM • MELGES14.COM

THE MELGES 14 : STEP 10
LEADING THE MAINSHEET
•Start at the 57 mm carbo ratchet mounted
aft of the board box.
•Lead the 7 mm black mainsheet line
through the ratchet in the opposite direction
of the arrows on the side of the block.
•Go up through the mod boom 40 mm T2
block, aft through the sheet minder webbing,
aft through the 40 mm T2 block on the aft
end of the boom, down through the 29 mm
T2 block on the traveler bridle, (lead through
from stern to bow) then up to the loop
attached to the 40 mm T2 on the aft end of
the boom. Lead the line through the loop
from stern to bow, make sure you put the
line through the two ends of the loop, right
next to the zip tie. Then tie a figure 8 knot
in the end of the line.
MELGES.COM • MELGES14.COM

THE MELGES 14 : STEP 11
INSTALL THE RUDDER AND TILLER
•Ensure that the rudder is in the up position on the rudder
head and slide the rudder head onto the transom gudgeons.
•Ensure that you work the rudder all the way down and
the rudder retaining clip springs back over the top of the lower
gudgeon block on the rudder head.
•Slide the tiller under the traveler bridle from the bow aft,
keep the tiller extension over the top of the bridle.
•Slide the tiller into the rudder head with the hole facing up.
•Align the holes in the tiller and rudder head and insert
the quick pin making sure the pin goes through the bottom
hole in the rudder head.
•Make sure the rudder head bolt is tight enough to hold the
rudder in the up position. If the rudder falls and hits the ground
it could damage the gelcoat on the rudder.
•Lead the rudder hold down line forward to the cleat on the side
of the tiller and tie a figure 8 knot in the end of the line.
•Once the boat is in the water, you can push down the rudder,
make sure that it goes all the way down, then tighten the line
and cleat it to keep the rudder in the down position.
•Make sure that if you are sailing into shallow water or
onto the beach you uncleat the rudder hold down line.
It is best to flip the rudder up prior to getting to the
shallow water to avoid damaging the rudder or the
transom of the boat.
MELGES.COM • MELGES14.COM

THE MELGES 14 : STEP 12
LAUNCHING THE BOAT AND PUTTING IN THE DAGGERBOARD
•There are a number of ways to the launch the Melges 14. You can either launch
it off the dolly from the beach or a boat ramp, or you can launch the boat from
a dock or dinghy dock.
•Take care to always look above for power lines or electrical wires around
the launch area.
•Make sure the inspection hatch cover is properly screwed on and the transom
drain plug is tightly screwed in prior to launching the Melges 14.
•Take care to not slide the hull on any abrasive surface. Sand or debris will
scratch or dent the hull and damage the gelcoat. Always slide the boat on a
clean debris free surface.
•Once the boat is in the water it will be more tippy. You can install the daggerboard
from alongside the boat if you are in shallow enough water, or you can install the board
from on the boat, either tied to a dock or when you push off from the beach or pier.
•Once the boat is in the water, you can install the daggerboard into the board trunk.
Ensure the the board trunk and daggerboard are free of debris. Dunk the daggerboard
in the water to lubricate the board and slide it into the board trunk.
•Once the board is all the way down to the board stop, pull the board shock chord
and tube retainer over the board and behind the trailing edge of the board to help
maintain daggerboard height when sailing and to ensure the board does not fall out
of the board trunk when the boat is capsized.
•Take care of the trailing edge of the daggerboard
and the rudder, they are the sharpest points of the foils
for performance but care should be taken when
swimming around the boat and foils to avoid injury.
MELGES.COM • MELGES14.COM

MELGES.COM • MELGES14.COM
ADDITIONAL PHOTOS

SAILING YOUR MELGES 14
The Melges 14 is a joy to sail and will offer years of fun. It is best
to always follow proper safety guidelines. Always wear a lifejacket
and/or gear appropriate for the air and water temperature. Never
sail in conditions you do not feel comfortable in or might be
outside of your ability level.
It is best to start out in lighter winds to familiarize yourself with
the sailing characteristics of the Melges 14. Work your way up the
wind and wave scale as you become more comfortable in the boat.
Never venture offshore without another boat with you,
power or sail and always check the weather forecast.
Never sail with more than 115 kgs of crew weight on the boat in
more than 15 knots of wind and overload the boat and equipment.
This could potentially cause gear failure and injury.
TIPS FOR SAILING UPWIND
Light air, keep the cunningham loose, ease the outhaul in 25mm to
make the sail fuller down low at the boom and just snug the boom
vang. Sit forward in the boat. As the wind increases, tighten the
cunningham, outhaul and vang to flatten the main, bend the mast
and depower the boat. And, hike out! When it is very windy, you
can raise the daggerboard up 50-100mm to help ease windward
helm when sailing to windward.
TIPS FOR SAILING DOWNWIND
Downwind is the most fun point of sail on the Melges 14. When
broad reaching we pull the daggerboard up 1/2 way, ease the
cunningham all the way out, ease the outhaul in approximately
20mm and apply medium boom vang. Move your weight well !
aft if planing. Keep it forward in light air. When sailing straight
downwind, raise the board 1/3 up and move your weight closer !
to the center of the boat, typically on one knee so you can move
quickly. The main will be eased out to be 90 degrees to the
centerline of the boat and you will have to heel the boat slightly !
to windward. When it is very windy it is best to reach more for
stability and not attempt to go straight downwind. You have to
experiment with the best technique for you and test your limits.
MELGES.COM • MELGES14.COM
Table of contents
Popular Boat manuals by other brands

Lake Powell
Lake Powell 54 ESCAPE instruction manual

Pacific Trawler
Pacific Trawler 2001 37-foot Pacific Trawler Operation manual

Triton
Triton Ladoga 1 advanced Assembling Instruction
Sea Ray
Sea Ray Express Cruiser 390 1989 manual
BRIG
BRIG Eagle Series owner's manual

Pro-Line Boats
Pro-Line Boats 2009 Grand Sport 29 owner's manual
McLaughlin International
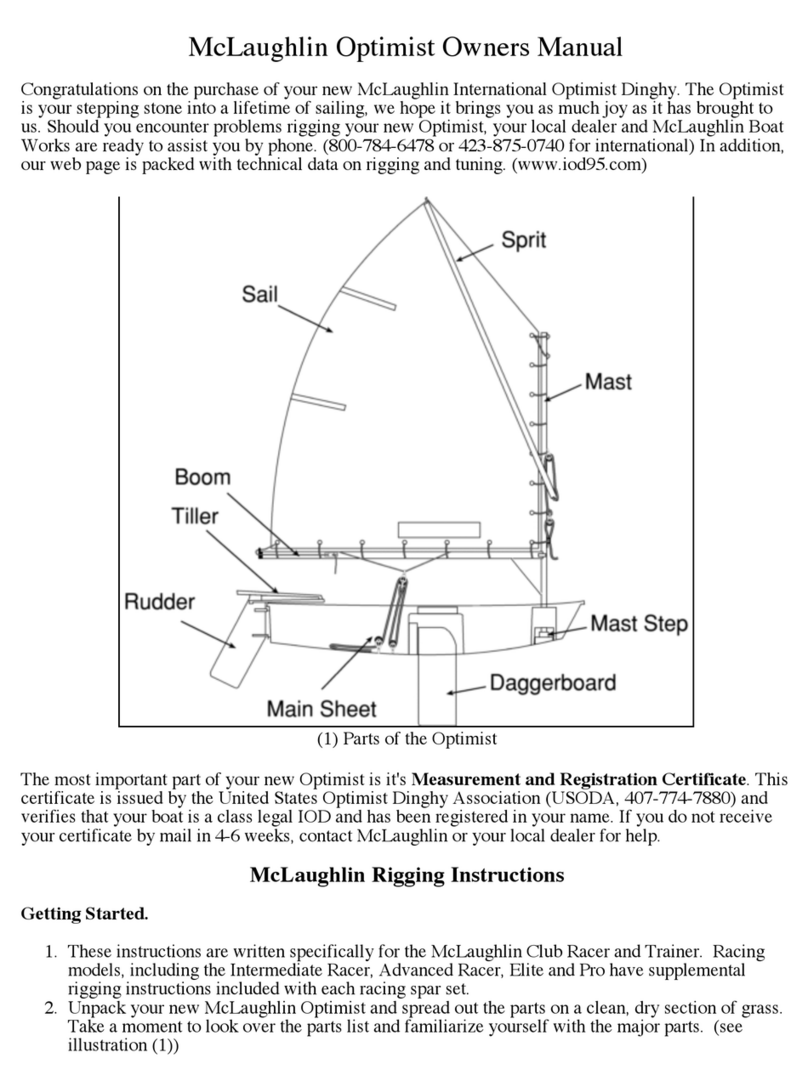
McLaughlin International Optimist owner's manual

Lake Powell
Lake Powell 48 NAVIGATOR instruction manual
Cobalt Digital Inc
Cobalt Digital Inc 37 owner's manual

MasterCraft
MasterCraft ProStar 190 owner's manual

CORRECT CRAFT
CORRECT CRAFT 100077 owner's manual

Rave Sports
Rave Sports Bongo 10 owner's manual
