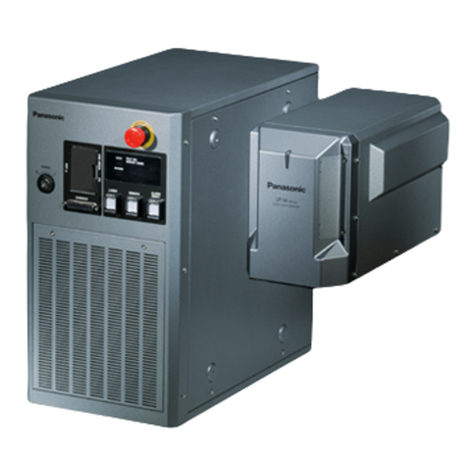
Memjet VIPColor VP600 User manual

2
Copyright © 2018 VIPColor Technologies Pte Ltd. All rights reserved.
No part of this document may be photocopied, reproduced, or translated to another language without the
prior written permission of VIPColor Technologies Pte Ltd.
Trademarks
Firefox is a trademark of the Mozilla Foundation.
Intel and Intel Core are trademarks of Intel Corporation in the U.S. and/or other countries.
Java and Oracle are registered trademarks of Oracle and/or its affiliates.
Microsoft, Windows, and Windows Server are registered trademarks of Microsoft Corporation in the U.S.A.
and/or other countries.
Memjet is a trademark of Memjet Ltd.
Edition
Edition 1, March 2018.
FCC
This device complies with Part 15 of the FCC rules. Operation is subject to the following two conditions:
(1) this device may not cause harmful interference, and (2) this device must accept any interference
received, including interference that may cause undesired operation.
Mantenimiento Periféricos Informáticos C/Canteras, 15 28860 Paracuellos de Jarama (Madrid) Tel: 00 34 917481604 Web: https://mpi.com.es/

3
Safety Precautions
Electrical Shock Hazard
Do not disassemble any part of your printer. There are no user-repairable parts
inside the printer. Disassembly of any part of the printer will void all warranties.
Fire Hazard
Keep the printer well away from all heat sources and flammable substances.
Switch your printer off immediately and unplug the power cord from the wall
socket if you notice any of the following:
• Smoke rising from the printer.
• An acrid smell coming from the printer.
• Sparks being emitted from printer.
Contact your supplier as soon as possible.
WARNING: Hazardous Moving Parts
Keep fingers and other body parts away from the printer.
Installation
• Install the printer on a flat, level surface.
The printer must remain level at all times. Tilting the printer may cause undue
leakage of ink and affect performance and print quality.
• Avoid wide temperature variations.
Install the printer in a protected location away from direct sunlight, open
windows or any other places subject to temperature extremes.
Power Supply
• Always use the Power button on the control panel to turn the printer off.
Removing power to the printer in any other manner may damage the printer.
• Use only the supplied power cord.
Use of any other power supplies or cords may damage the printer and void your
warranty.
Input Rating 100–240 VAC, 50/60 Hz, 3.6 A
Operating Temperature 15°C to 35°C
Mantenimiento Periféricos Informáticos C/Canteras, 15 28860 Paracuellos de Jarama (Madrid) Tel: 00 34 917481604 Web: https://mpi.com.es/

4
Printer Usage
• Ensure adequate ventilation to the printer.
Blocking ventilation openings around the printer may cause it to overheat and
become damaged.
•Keep liquids and heavy objects away from the printer.
Heavy objects may warp the outer shell, damaging the printer. Liquids may
discolor or damage the skin and, if they penetrate it, may damage the printer
beyond repair.
• Use only authorized consumables.
Use of any printhead other than authorized Memjet technology printheads will
damage the printer and void your warranty. Use of unauthorized inks or ink
cartridges may damage the printer and will void your warranty.
•Clear media jams promptly.
To avoid further problems, promptly attend to all media jams, as well as any
other cause of printer failure.
• If you are moving the printer, allow sufficient time after installation for the
temperature and humidity of the internals of the printer to arrive at equilibrium
with the surroundings.
Mantenimiento Periféricos Informáticos C/Canteras, 15 28860 Paracuellos de Jarama (Madrid) Tel: 00 34 917481604 Web: https://mpi.com.es/

5
Contents
Safety Precautions . . . . . . . . . . . . . . . . . . . . . . . . . . . . . . . . . . . . . . . . . . . . . . . . . . . . . .3
Using the Printer. . . . . . . . . . . . . . . . . . . . . . . . . . . . . . . . . . . . . . . . . . 7
Parts of the Printer . . . . . . . . . . . . . . . . . . . . . . . . . . . . . . . . . . . . . . . . . . . . . . . . . . . . . 8
Using the Control Panel . . . . . . . . . . . . . . . . . . . . . . . . . . . . . . . . . . . . . . . . . . . . . . . . . 9
Selecting the Security Level . . . . . . . . . . . . . . . . . . . . . . . . . . . . . . . . . . . . . . . . 11
Choosing Label Media. . . . . . . . . . . . . . . . . . . . . . . . . . . . . . . . . . . . . . . . . . . . . . . . . 12
Loading Label Media. . . . . . . . . . . . . . . . . . . . . . . . . . . . . . . . . . . . . . . . . . . . . . . . . . 15
Loading Fanfold Media. . . . . . . . . . . . . . . . . . . . . . . . . . . . . . . . . . . . . . . . . . . . . . . . 17
Printing Labels . . . . . . . . . . . . . . . . . . . . . . . . . . . . . . . . . . . . . . . . . . . . . . . . . . . . . . . 18
Change Default Settings in Printer Driver . . . . . . . . . . . . . . . . . . . . . . . . . . 18
Select the Media Type . . . . . . . . . . . . . . . . . . . . . . . . . . . . . . . . . . . . . . . . . . . . . 20
Adjust Alignment for Printing . . . . . . . . . . . . . . . . . . . . . . . . . . . . . . . . . . . . . . 21
Printing Borderless (Full-Bleed) Labels . . . . . . . . . . . . . . . . . . . . . . . . . . . . . . . 22
Saving Custom Media Size Settings . . . . . . . . . . . . . . . . . . . . . . . . . . . . . . . . . . . . 23
Turning Off the Printer . . . . . . . . . . . . . . . . . . . . . . . . . . . . . . . . . . . . . . . . . . . . . . . 24
Managing Printer Security (Administrator). . . . . . . . . . . . . . . . . . . . . . . . . . . . 25
Embedded Web Server (EWS) . . . . . . . . . . . . . . . . . . . . . . . . . . . . . . . . . . . . . . . . 27
Other Support Tools . . . . . . . . . . . . . . . . . . . . . . . . . . . . . . . . . . . . . . . . . . . . . . . . . . 35
Printer Maintenance . . . . . . . . . . . . . . . . . . . . . . . . . . . . . . . . . . . . .37
Guidelines for Preventive Maintenance. . . . . . . . . . . . . . . . . . . . . . . . . . . . . . . . 38
Replacing an Ink Cartridge. . . . . . . . . . . . . . . . . . . . . . . . . . . . . . . . . . . . . . . . . . . . 39
Cleaning the Printhead. . . . . . . . . . . . . . . . . . . . . . . . . . . . . . . . . . . . . . . . . . . . . . . . 40
Replacing the Printhead . . . . . . . . . . . . . . . . . . . . . . . . . . . . . . . . . . . . . . . . . . . . . . 41
Opening/Closing the Clamshell . . . . . . . . . . . . . . . . . . . . . . . . . . . . . . . . . . . . . . . 44
Cleaning Debris from the Cutting Zone . . . . . . . . . . . . . . . . . . . . . . . . . . . . . . . . 45
Cleaning the Sensors. . . . . . . . . . . . . . . . . . . . . . . . . . . . . . . . . . . . . . . . . . . . . . . . . . 46
Replacing the Output Module/Cutter Assembly. . . . . . . . . . . . . . . . . . . . . . . . 47
Replacing the Service Station . . . . . . . . . . . . . . . . . . . . . . . . . . . . . . . . . . . . . . . . . 51
Replacing the Transfer Wiper Assembly. . . . . . . . . . . . . . . . . . . . . . . . . . . . . . . 54
Replacing the Aerosol Fan Filter . . . . . . . . . . . . . . . . . . . . . . . . . . . . . . . . . . . . . . 56
Replacing the Waste Ink Absorber . . . . . . . . . . . . . . . . . . . . . . . . . . . . . . . . . . . . 57
Troubleshooting . . . . . . . . . . . . . . . . . . . . . . . . . . . . . . . . . . . . . . . . .59
If Error Messages Appear . . . . . . . . . . . . . . . . . . . . . . . . . . . . . . . . . . . . . . . . . . . . . 60
Poor Print Quality or Incorrect Printout . . . . . . . . . . . . . . . . . . . . . . . . . . . . . . . 64
Other Printing Problems . . . . . . . . . . . . . . . . . . . . . . . . . . . . . . . . . . . . . . . . . . . . . . 67
Clearing a Media Jam . . . . . . . . . . . . . . . . . . . . . . . . . . . . . . . . . . . . . . . . . . . . . . . . . 68
Clearing Clogged Ink Nozzles . . . . . . . . . . . . . . . . . . . . . . . . . . . . . . . . . . . . . . . . . 68
Adjusting Sensor Sensitivity . . . . . . . . . . . . . . . . . . . . . . . . . . . . . . . . . . . . . . . . . . 70
Mantenimiento Periféricos Informáticos C/Canteras, 15 28860 Paracuellos de Jarama (Madrid) Tel: 00 34 917481604 Web: https://mpi.com.es/

6
Appendix . . . . . . . . . . . . . . . . . . . . . . . . . . . . . . . . . . . . . . . . . . . . . . . .71
System Requirements. . . . . . . . . . . . . . . . . . . . . . . . . . . . . . . . . . . . . . . . . . . . . . . . . 72
Additional Networking Information . . . . . . . . . . . . . . . . . . . . . . . . . . . . . . . . . . . 74
If the Printer Has a Static IP Address . . . . . . . . . . . . . . . . . . . . . . . . . . . . . . . 74
If the Connection to the Printer Has Changed. . . . . . . . . . . . . . . . . . . . . . . 74
Config Options on the Control Panel. . . . . . . . . . . . . . . . . . . . . . . . . . . . . . . . . . . 75
Printer Interface (GPIO) Specifications . . . . . . . . . . . . . . . . . . . . . . . . . . . . . . . . 79
Regulatory Information . . . . . . . . . . . . . . . . . . . . . . . . . . . . . . . . . . . . . . . . . . . . . . . 81
Worldwide VIPColor Technologies Contacts. . . . . . . . . . . . . . . . . . . . . . . . . . . 84
Mantenimiento Periféricos Informáticos C/Canteras, 15 28860 Paracuellos de Jarama (Madrid) Tel: 00 34 917481604 Web: https://mpi.com.es/

Using the Printer 7
Chapter 1
Using the Printer
Parts of the Printer 8
Using the Control Panel 9
Choosing Label Media 12
Loading Label Media 15
Loading Fanfold Media 17
Printing Labels 18
Printing Borderless (Full-Bleed) Labels 22
Saving Custom Media Size Settings 23
Turning Off the Printer 24
Managing Printer Security (Administrator) 25
Embedded Web Server (EWS) 27
Other Support Tools 35
NOTE: Once the printer has been set up, be sure to change the security passwords
using the Embedded Web Server (EWS). See Change Passwords on page 25.
Mantenimiento Periféricos Informáticos C/Canteras, 15 28860 Paracuellos de Jarama (Madrid) Tel: 00 34 917481604 Web: https://mpi.com.es/

8Using the Printer
Parts of the Printer
Control Panel
Top Cover
Front Cover
Output Slot
GPIO Port
USB Port
Ethernet Port
Power Socket
Power Switch
Media Feed Slot
Media Feed Cover
Mantenimiento Periféricos Informáticos C/Canteras, 15 28860 Paracuellos de Jarama (Madrid) Tel: 00 34 917481604 Web: https://mpi.com.es/

Using the Printer 9
Using the Control Panel
The printer is ready to print when the control panel displays
Printer Online
. The Data
and Status LEDs together with messages indicate the printer status and any
potential problems (Table 1).
The control panel also shows the estimated levels of the ink cartridges. In the
example below, the yellow ink cartridge level is between 25 to 50%.
The icons above the printer buttons indicate their functions, which change
depending on the current operation (see Table 2).
Printer Online
Power LED
Power Button
Printer Buttons
Data LED
Status LED
Ink Status
Table 1 Printer LEDs
LED Description
Data LED
Blinking Printer is receiving data from the computer.
On There are print jobs in the printer memory.
Status LED
Blinking • Printhead is being serviced, or
• Attention needed; a message will be displayed. (See If Error
Messages Appear on page 60.)
On • An error has occurred; a message will be displayed. (See If
Error Messages Appear on page 60.)
Mantenimiento Periféricos Informáticos C/Canteras, 15 28860 Paracuellos de Jarama (Madrid) Tel: 00 34 917481604 Web: https://mpi.com.es/

10 Using the Printer
The icons above the printer buttons indicate their functions (Table 2).
• When the printer is online, press (
Config
) to access the configuration menus.
The options are described in Config Options on the Control Panel on page 75.
• Press and to scroll through the menus.
• Press (
Select
) to select an option or setting.
• Press (
Return
) to return to the previous menu.
Table 2 Printer Buttons
Function Description
Config Access the Configuration menus.
Up, Down Move through the menu options.
Select Select a menu option or confirm a setting.
Return Return to previous menu.
Unload Media Unload the labels.
Pause, Resume Pause or resume printing.
If printing Roll to Roll, the printer pauses for 10 seconds,
then prints the next page and pauses again. It will
continue to print and pause.
Cancel Cancel printing.
C
K2
M
K1
Y
Printer Online
CONFIGURATION
1. Setup
Mantenimiento Periféricos Informáticos C/Canteras, 15 28860 Paracuellos de Jarama (Madrid) Tel: 00 34 917481604 Web: https://mpi.com.es/

Using the Printer 11
Selecting the Security Level
By default, the printer powers up in security Level 0 (operator), which does not
allow changes to some printer parameters. To make changes, select security Level 1
(supervisor) and enter the password provided by your administrator.
Security Level 2 gives administrator access to all functions.
1. On the control panel, select (
Config
)
SETUP
SECURITY
Level 1
or
Level 2
.
2. Enter the 3-digit password.
3. Press to return to the main menu.
C
K2
M
K1
Y
Printer Online
CONFIGURATION
1. SETUP
SETUP
2. SECURITY
SECURITY
2. Level 1
(Config)
(Select)
(Select)
(Select)
ENTER PASSWORD
Press , to set.
Press to move to next digit.
Mantenimiento Periféricos Informáticos C/Canteras, 15 28860 Paracuellos de Jarama (Madrid) Tel: 00 34 917481604 Web: https://mpi.com.es/

12 Using the Printer
Choosing Label Media
Ensure that the label media meets the requirements for the printer (see Table 3 and
the following illustrations). Always test the media first to see if it meets your
expectations. To check the compatibility of label media, print the barcodes test page.
Figure 1 Media Roll
Table 3 Media specifications
Media Type and Dimensions
Media type Gloss, semi-gloss, and matte.
Label width 2.0” to 8.5” (50.8 mm to 215.9 mm)
Label length Continuous/Roll to Roll: Maximum 40” (1.016 m)
Roll to Cut/Print and Present: Maximum 8" (203.2mm)
Label thickness Maximum 0.01” (0.3 mm) (including liner, if any)
Minimum 0.005” (0.13 mm)
Core size 3” (76.2 mm)
Roll diameter Maximum 6” (152.4 mm)
Media Handling
Print mode • Roll to Cut
• Print and Present (non-peel)
• Roll to Roll
Detection • Gap
• Continuous
• Black mark
Coating on
JI
Minimum Maximum
I 3.0” (76.0 mm) cardboard core 3.0” (76.0 mm) cardboard core
J N/A Up to 6” (152.4 mm)
the outside
Mantenimiento Periféricos Informáticos C/Canteras, 15 28860 Paracuellos de Jarama (Madrid) Tel: 00 34 917481604 Web: https://mpi.com.es/

Using the Printer 13
Figure 2 Gap (Transmissive) Media
Figure 3 Black Mark (Reflective) Media
A
BC
D
E
Minimum Maximum
A 0.125”(3.0 mm) 0.3” (8.0 mm)
B 0.0 2.0” (50.8 mm)
C 0.0 0.4” (10mm)
D 2.0” (50.8 mm) 8.5” (216.0 mm)
E 2.0” (50.8 mm) 40.0” (1016.0 mm)
E
G
H
D
Minimum Maximum
D 2.0” (50.8 mm) 8.5” (216.0 mm)
E 2.0” (50.8 mm) 40.0” (1016.0 mm)
H 1.0” (25.4 mm) 8.5” (216.0 mm)
G 0.125” (3.0 mm) 0.3” (8.0 mm)
Reverse side of tag stock
Mantenimiento Periféricos Informáticos C/Canteras, 15 28860 Paracuellos de Jarama (Madrid) Tel: 00 34 917481604 Web: https://mpi.com.es/

14 Using the Printer
Print Test Page
Load 4” x 4” or larger labels. Be sure to select the label type (continuous, gap, or black
mark) in the EWS Diagnostics page.
1. On the control panel, select (
Config
)
MAINTENANCE
PRINT TEST PAGE
Barcodes
.
2. Verify the following on the test page:
• Label is printed in black with no other color visible.
• The text is legible.
• The barcodes are readable.
• No ink smear, color mix or streaks.
C
K2
M
K1
Y
Printer Online
CONFIGURATION
2. MAINTENANCE
MAINTENANCE
1. PRINT TEST PAGE
PRINT TEST PAGE
1. Barcodes
(Config)
(Select)
(Select)
(Select)
Sample Barcodes Test Page
Mantenimiento Periféricos Informáticos C/Canteras, 15 28860 Paracuellos de Jarama (Madrid) Tel: 00 34 917481604 Web: https://mpi.com.es/

16 Using the Printer
3. Push the roll cover against the media roll. Make sure the slot in the roll cover is
over the flat side of the spindle. Then tighten the knob.
4. Feed the media into the printer:
a Open the media feed cover.
b Feed the media under the arm and into the printer. Wait for the printer to
load the media.
c Slide the media guide to the edge of the media.
5. Close the media feed cover.
Slot
Flat side
Mantenimiento Periféricos Informáticos C/Canteras, 15 28860 Paracuellos de Jarama (Madrid) Tel: 00 34 917481604 Web: https://mpi.com.es/

Using the Printer 17
Loading Fanfold Media
Figure 5 Fanfold media path
1. When loading fanfold media, place the media stack 15 mm or more away from
the rear of the printer.
2. Feed the media into the printer, aligning it with the left side of the media feed
slot. Wait for the printer to load the media.
3. Slide the media guide to the edge of the media.
15 mm
Mantenimiento Periféricos Informáticos C/Canteras, 15 28860 Paracuellos de Jarama (Madrid) Tel: 00 34 917481604 Web: https://mpi.com.es/

18 Using the Printer
Printing Labels
The printer is ready to print when the control panel displays
Printer Online
.
1. Select the Print command from your application.
2. Select the printer and click the Setup, Properties or similar button.
The print settings displayed are the defaults that were set in the printer driver.
3. Change the print settings if needed.
NOTE: Ensure the media settings (e.g. label size) match the media loaded in the
printer.
4. Print the document.
Any changes to the settings only apply to the current print job. Once you exit the
application, the changes may be lost. Make the changes in the printer driver if you
wish to keep the settings as the default for all print jobs.
Change Default Settings in Printer Driver
To select the default print settings that will be used for all print jobs:
1. From the Windows Start menu, select Devices and Printers1.
2. Right-click the printer, and select Printing preferences.
3. Make the changes (see Figure 6) and click OK to save.
1. For Windows 7. The steps will differ for other Windows versions.
Mantenimiento Periféricos Informáticos C/Canteras, 15 28860 Paracuellos de Jarama (Madrid) Tel: 00 34 917481604 Web: https://mpi.com.es/

Using the Printer 19
Figure 6 Printing Preferences
Adjust horizontal and vertical print position.
See Adjust Alignment for Printing.
Display a print confirmation message before printing.
Use the settings on the printer
control panel.
Print pages without any gap (continuous media only)
Render entire document to disk before sending to the
printer. Select this option if labels are skipped when
printing large files.
Select this option if labels are skipped when printing
small labels.
Select this option to remove print artifacts with
image file with multiple layers.
Select the Media Type that matches the media
loaded in the printer.
Sheets per cut – Cut after printing the specified number
of labels.
Print and Present – Print, cut, and present label.
Remove the label to continue printing.
Roll to Roll – Select Roll to Roll if a rewinder is used.
Choose whether to print the first label or print multiple
jobs without cuts in-between.
Adjust the various offsets
Mantenimiento Periféricos Informáticos C/Canteras, 15 28860 Paracuellos de Jarama (Madrid) Tel: 00 34 917481604 Web: https://mpi.com.es/

20 Using the Printer
Select the Media Type
Selecting the media type that matches the media you are printing on will usually
give the best print results.
Select this Media Type: When you are printing on:
Plain Paper Plain (uncoated) paper and labels.
Matte Coated Label Matte coated labels.
Premium Matte Coated
Label
Matte coated labels. This option uses more ink for
better color.
Glossy Label Glossy labels. This option optimizes print quality and dry
time.
Premium Gloss Label Glossy labels. This option uses more ink for better color.
Mantenimiento Periféricos Informáticos C/Canteras, 15 28860 Paracuellos de Jarama (Madrid) Tel: 00 34 917481604 Web: https://mpi.com.es/
Table of contents
Other Memjet Label Maker manuals


