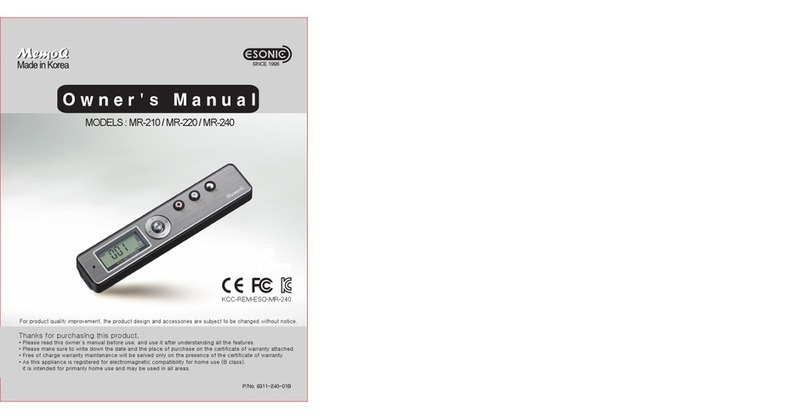
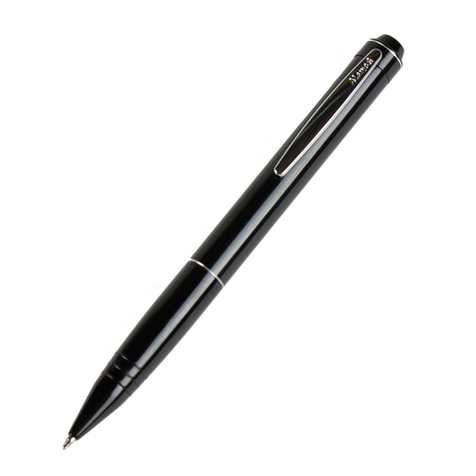
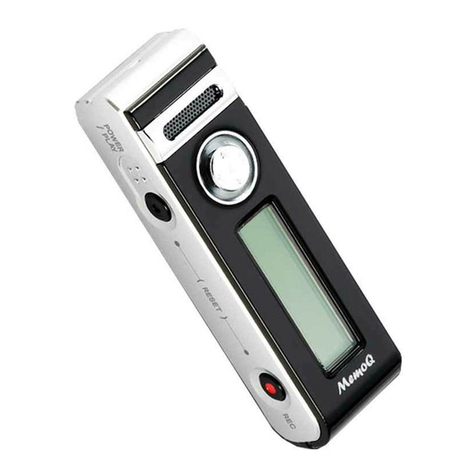
Memoq MQ-D920 User manual

tvklsaGtxTk`YWVtxTk`[WVtxTk`_WG
Owner's Manual
Before connecting, operating or adjusting this product,
please read this owner's manual carefully and completely.
Designs and specifications are subject to change without notice for provement.

G
mjjG
u
G
hGGGGGGGGGGGGGGGGGGGGGG
GGNGGGGGUG
mjjGjG
{GGGGGGGGGGGGGGjGiGGSGGGwGX\GGGmjjGyUG
{GGGGGGGGGGGGGGUG{GGSGG
GGGGGGGSGGGGGGGGGGSGSGGGG
GGUGoSGGGGGGGGGGGGGUGpGGGGG
GGGGGGGSGGGGGGGGGGGGSGGGGG
GGGGGGGGGGGGGbG
TGyGGGGGUGGGGGGGGGGGGGGGGGGGGGGGGG
TGpGGGGGGGUG
TGjGGGGGGGGGGGGGGGGGUG
TGjGGGGGGV{}GGGUG
Table of Contents
1. Safety Note........................................................... 3
2. Denomination of Each Part................................... 4
3. Explanation of LCD Screens ................................ 5
4. Preferation before Using(Charging)...................... 6
6. Usage of DC Power.............................................. 7
6-1. PC USB Port Power Usage............................. 7
6-2. USB PC Adapter(5V) Power Usage ................ 6
7. Power On/Off........................................................ 8
8. Play Back Mode Selection.................................... 8
9. Recording ............................................................. 9
10. Adjustment of Mike Sensitivity.......................... 10
11. Playing the Recorded File ................................ 11
12. Volume Control................................................. 11
13. Controlling the Play Speed............................... 12
14. Uploading / Downloading Files......................... 13
15. Browsing Folder and File.................................. 14
16. Setting the Mode ............................................. 15\
16-1. Erase (Deleting the file)............................... 16
16-2. EQ setting the EQ ...................................... 16
(playing characteristics)
16-3. REP(repeated playing) Setting ................... 17
16-4. Setting the MIC(microphone) Sensitivity .... 17
16-5. Setting the (recording) Mode....................... 18
16-6. Setting the LOW CUT Mode........................ 18
16-7. Selecting the LCD ....................................... 19
16-8. Setting the Voice Operation
System(VOS)............................................... 19
16-9. Selecting the Recording Folder ................... 20
16-10. Formatting ................................................. 20
16-11. Exiting from the mode setting.................... 20
17. Using Ball-point Pen......................................... 21
18. Using Gender .................................................. 22
18-1 Listening by Earphone ................................. 22
18-2. By using Ear MIC and
Recording Phone Call (option) ................... 22
18-3. By Using Land Line Phone Adaptor
and Eecording Phone Call (option)............. 23
Warranty card, Specifications ................................ 24

3
1. Safety Note
• This manual is for preventing the user and his/her property from being damaged, so please read it thoroughly before using.
• We are not responsible for the loss from using this product and the claim by the third party.
• We are not responsible for the damage from the loss of the recorded contents due to failure, repair and other reasons.
• We recommend you to save the important recorded contents at the computer immediately.
• The illegal usage is prohibited.
Caution and warning for the main body
Caution
• Shocking or dropping the product may cause the failure.
• Do not use alcohol, benzene or thinner to clean the surface of the product.
• Do not use the earphone to listen to music or operate the product while driving or walking. It may cause the traffic accident.
Warning
• Do not disassemble or modify the main body, which causes fire or failure.
• Listening via the earphone for a long time may hurt your hearing ability.
• Do not use this product at too low/high temperature. The condensation by the electric leakage may cause fire or failure.
• Do not leave this product at the location exposed to water or oil. It may cause fire or failure.

4
2. Denomination of Each Part
eeGiTGsGwGcc
ྙ iTGwGsGGGྚGiTGwGsGyGwGGGྛGmGjGGGྜGoGjGGGྜྷGlVtGqGG
ྞG|ziGqGGGྟG|ziGwGGGྠGsjkGGGྡGtGGGྡྷGqVtOwPGiGGGྣGyGiGGྤGz
eeGnGwGcc eeGtGwGcc
ྡྷqVt
GOwPi

5
3. Explanation of LCD Screens
~Gy }GyGk ~Gw zGtOXP
Folder Name
File Name
Music File Name
zGtOYP~GwGttGyGkw
yG
k
yG
t
yG
{
yG
mGu
yV
w
w
{
mG
s mG
mG
u
mG
s
t
m
t
mGu
t
w
t
mGu
lxGt w
{
tGm
u
i
p
y
w
y
m
t
z
uhG
oxG uhG
oxG
uhG
oxG
msG
twZG
msG
twZG
QtGzaGuGuvythsSGGoGopno
QyGmaGhSGGiSGGjSGGk
QyGtaGswSGGoxSGGoxSGGwjt
QyGwaGGGGGvmmSGXGGGGXSGGhGGGhssSGGmGGGGmvskly
QlxGtaGmsmsh{SGyvyvjrSGovov|zlSGkhkhujlSGqhqhSGihihsshkSGyiyMiSGjsjshzzpjG

6
4. Preferation before Using(Charging)
5. Reset
• This unit include a battery
• Perchased product should be charged by connection with USB terminal and PC USB port (or USB PC adabter)
• Charged condition can be verified by LED power on made as below
• If you want reset press play and REC buttons together
• Reset the product in case of no USB reading or no charging.
• Reset the product in case of not using the unit long time, charging or operation is impossible.
• After reset, press play button for 3 seconds with power of condition to turn on the power.
• In case of not reading of USB, Do reset.
Caution
Power will not turn on in case of empty battery
Caution
If Reset the unit during recording th recorded contents will not lost.
l sG| tG| l

7
6. Usage of DC Power
• This unit can be charged and operated by using a external DC adapter.
6-1. PC USB Port Power Usage
• Connect this unit to PC USB terminal
• LED screen will show when USB is connected.
• When play back button is pressed for more than 3 seconds the operation made will happen,
then charging, play back and recording are possible
• In case fo PC USB Power operation mode, file up/down load will be impossible.
• If this unit is disassembled and reconnected, USB connection made will happen, file up/down load is possbie.
6-2. USB PC Adapter(5V) Power Usage
• Connected USB PC adapter terminated and the unit then will adaper.
• When play back button is pressed for more than 3 seconds the operation made will happen,
then charging, play back and recording are possible
NA
HQ
Caution
Remove hardware before
disconnect this unit from PC
body for your safety.

8
7. Power On/Off
8. Play Back Mode Selection
• If you press more than 3 seconds LED screen MemoQ will appear and disappear than the contact will be on stand by in the last
recorded folder.
• At stand by mode, push jog button " - " direction about 3 seconds, Music mode will change to Voice mode and then Voice mode to
Music Mode.
• Music Mode - Playback Music File in the Music Folder.
• Voice Mode - Playback Recorded file in the Voice Folder.
Caution
1) File playback is only possible in the Voice Folder or lower folder.
2) This Unit's Screen will not show "MUSIC" or "VOICE" Folder, it will show only the lower folders.

9
9. Recording
• When power off connection, press REC button for more than 3 seconds. Power will come on and
recording will start.
• When power on connection, press REC button. Briefly recording will start.
• Recorded file types are mp3 or PCM file, interchanger abillity is excellent and recorded in th selected
folder.
• Recording will happen in the selected folder starting with A-R00001 continnusly(If stop the unit with in
3 seconds after recording, the Recorded content will be lost)
• Initial Recording mode(See Mode Selection) is XHQ(high fidelity), Microphone Sensitivity is
in the Normal(4m).
1) Long period of Recording is divided by 10 hours automatically. It is easy to play back, search, and manage.
2) When the 999 folders created in th one folder automatic file transfer and recording will happen.
Caution
NA
HQ
XHQ NORMAL

10
10. Adjustment of Mike Sensitivity
• It is possible to adjust Microphone Sensitivity during Recording or Mode selection.
• During recording Mic Sensitivity adjustment will happen when the(+ button) is pressed for more than 3 second (Normal High)
happend, the(- button) is pressed for more than 3 seconds High Normal will happend
•Adjusted Mic Sensitivity can be verified in the LED screen.
•Adjust Optirmum distance for the desired record level.
Recorded sound can be different in accordance with source of the sound level.
Caution
SensitivityAdjusment
Exemple
Mic Sensitivity(Normal)
Interview, Medium Voice
"Recording talking, Music lecture"
Mic Sensitivity(High)
"Low Voice, Long distance Recording"
"Hall, Meeting Room, Whole Office"
NA
Mike
Sensitivity
HQ
NORMAL HIGH NORMAL
HIGH

11
11. Playing the Recorded File
12. Volume Control
• The play mode should be set as VOICE for playing the recorded file.
• At the ready state, pressing the PLAY button starts playing.
Pressing the PLAY button toggles between pausing and playing.
• While pausing or playing, pushing the jog button to Previous (<) or Next (>) direction moves to the previous or next file within the
selected folder.
• While playing, pushing and holding the job button to Previous (<) or Next (>) direction
for 2seconds or longer performs the fast searching.
• It plays via the earphone or the built-in speaker, so adjust the volume properly.
• When the power is turned on, the volume over 11-level is reset to 10-level.
(It protect the hearing sense against the highest volume when using the earphone.)
• At the play or ready state, pushing the jog button to the (+) or (-) direction
displays the volume level at the LCD and the volume is controlled.
• If the volume level is 11 or higher when the power is turned on, it is reset to
10-level, which protects the hearing sense against the highest sound.
ڨۄۉۄۈېۈ ڨڼۓۄۈېۈ
NA
HQ
NA
HQ
NA
HQ
When browsing the folder,
please use the search function
Caution

12
13. Controlling the Play Speed
• Whenever you push and hold the jog button to the (+) direction for 3 seconds or
longer while playing, the play speed can be sequentially selected within the
playing file by the order of -20%, -10%, NORMAL, +10% and +20%.
• Whenever you push and hold the jog button to the (-) direction for 3 seconds or
longer while playing, the play speed can be sequentially selected within the
playing file by the order of +20%, +10%, NORMAL, -10% and -20%.
• When moving to the other file, the speed is automatically set to NORMAL.

13
14. Uploading / Downloading Files
txOmaP
• Connect the USB cable to the main body of the product and the USB port of the PC.
• After several minutes at maximum, the PC automatically recognizes this product as portable disk.
• Uploading/downloading files can be used same to the Windows explorer function.
• Any file can be saved regardless the file type and this product can be also used as the USB MEMORY DISC.
• If the voice file is saved at A, B, C or D folder within the “VOICE” folder and the music file is saved at the “MUSIC” folder, the files
can be played with the best quality.
<Screen showing connection to the PC
as MemoQ (F:) portable disk>
<Folder tree>
Saved Music File
Saved Voice File

14
15. Browsing Folder and File
iGa
mG
iGa
tGmG
wVuG
tGGG
wOGcGP uOGeGP
OGP
WG
XG
YG
ZG
ڃچڄٻ
ڃڈڄٻ
s m mGu s tGm mGu
• The browsing function searches for the file, which can search for the file to play immediately even while playing.
• Pressing the MODE(PLAY) button while pausing or playing for more than 3 seconds, then switches to the
BROWSE mode
• pushing the jog button to Previous ( < ) or Next ( > ) direction moves to the previous or next folder.
• Pushing the jog button to the volume (+) or (-) direction searches for the folder
and the music file within the selected folder.
•
Pressing the MODE(PLAY) button plays the searched file and the BROWSE function is disabled.
• Pressing the MODE(PLAY) button for 3 seconds or longer disables the BROWSE function
• BROWSE function is divided by MUSIC and VOICE mode, it's possible in the next folder of
MUSIC and VOICE (The level is displayed from Level 0 to Level 9).
Caution
- “MUSIC” and “VOICE” folders are not displayed at the LCD of the product, but their
subfolders are displayed. (The Level 0 is not displayed.)

15
16. Setting the Mode
ORP
OTP
G
G
GG}vz
GGGG
GGTT
GG
sjkGG
G
G
G
G
OTP ORP OcP OeP
tOwPG
qG
• The mode setup sets erasing files, EQ (playing characteristics), repeated playing,
microphone sensitivity, recording characteristics, LCD screen display, automatic
sensitivity control, setting the ready-to-record, selecting the recording folder and
setting the VOS(Voice Operation System).
• At the ready (stop) state, pushing the Jog button to the volume (+) direction for 3
seconds or longer switches to the mode selection
• Pushing the jog button to the volume (+) or (-) direction for selecting setting mode.
• Pressing the MODE(PLAY) button for 3 seconds or longer disables the mode setup
function.

16
16-1. Erase (Deleting the file) 16-2. EQ setting the EQ
(playing characteristics)
• Play the file to delete, and check its contents.
• Press the PLAY button again to pause.
• Pressing the jog button to the volume (+) direction for more than
3 seconds to switch to screen .
• Use Previous (<) or Next (>) jog button to select .
• When you press the MODE(PLAY) button, the screen for
confirming to erase is displayed.
• If you select ‘YES’ and press the MODE button,
screen is displayed and then disappeares,
and the selected file is deleted.
• For canceling the file deletion, it is cancelled by selecting
and then pressing the MODE button.
• At the EQ mode screen, Use Previous (<) or Next (>) jog button
to select the playing characteristics (EQ).
• At the selected screen, press the MODE(PLAY) button to set
the displayed mode
• When you press and hold the MODE(PLAY) button for 3
seconds or longer, the mode setting is stored and the mode
setup function is disabled.
* Select and play the music via the EQ (playing characteristics)
setup by genre and preference.
Caution Caution
1) It is not possible to restore the deleted file.
2) File deletion is also possible at the PC.
The EQ (playing characteristics) is applied
when playing the music file, but it is set FLAT
(EQ OFF) when playing the voice file.

17
16-3. REP(repeated playing) Setting 16-4. Setting the MIC(microphone) Sensitivity
• The repeated playing can be set to OFF, 1, ALL or FOLDER.
• At the REP screen, use Previous (<) or Next (>) jog button to
select the REP mode.
• Press the MODE at the selected screen to set as the displayed
mode.
• The microphone sensitivity can be selected as normal(4m) or
high(8m).
• The microphone sensitivity can be set according to the distance
of the sound source and the volume of the sound.
• At the MODE screen, use Previous (<) or Next (>) jog button to
select the distance.
• Pressing the MODE key at the selected screen to set the
displayed distance.
• When you press and hold the MODE button for 3 seconds or
longer, the mode setting is saved and the mode setup function
is disabled.
• When you press and hold the MODE button for 3 seconds or
longer, the mode setting is saved and the mode setup
function is disabled.
uh
ox
uh
ox
uh
ox
uh
ox
X
h
m
uvythsuvyths opno
uvyths
Play all files starting from the playing file
at the selected folder only and then stop.
Only the file displayed at the LCD is
repeated to play
Repeat playing all files at the selected
folder from “VOICE” or “MUSIC” folder
Repeat playing the files only
at the selected folder.

18
16-5. Setting the (recording) Mode 16-6. Setting the LOW CUT Mode
• At screen, use Previous (<) or Next (>) jog button to select ON/
OFF.
• When you press and hold the MODE button for 3 seconds or
longer, the LOW CUT mode setting is saved and the mode
setup function is disabled
• LOW CUT function has cut low noise(ventilation fan, other
machine sound) and has recording by cleaner tone quality
• LOW CUT function is suitable in voice recording.
• The recording mode can be set to long-playing (LP), high quality
(HQ), extra high quality (XHQ) or CD quality(PCM) depending
on the recording environment.
• PCM mode is optimal for the music recording, which can make
a high quality of music file.
• At mode screen, use Previous (<) or Next (>) jog
button to select the recording mode.
• Pressing the MODE at the selected screen sets the displayed
mode.
Caution The recording time depends on the configuration
of folder or file
PCM
sv~Gj|{
sv~Gj|{ sv~Gj|{
yGGG
txTk`YWOYnPGGGGGGGGGGGtxTk`[WO[nPGGGGGGGGGtxTk`_WO_nP
swGGG GY__G G\^]GGGG GXX\Y
oxGGG GX[[G GY__GGGGGGGGG G\^]
oxGG GZ]G G^YGGGGGGGGGG GX[[
wjtG G]G GXYGGGGGGGGGG GY[

19
16-7. Selecting the LCD 16-8. Setting the Voice Operation System(VOS)
• At screen, use Previous (<) or
Next (>) jog button to select ON or OFF.
• Pressing the MODE(PLAY) key at the selected screen sets ON
or OFF displayed on the screen.
• With the VOS function, when you press and hold the MODE
button for 3 seconds or longer, the mode setting is saved and
the mode setup function is disabled.
※When the voice is not recognized, the VOS function pauses recording. But when
the voice is recognized, it automatically starts recording, which can efficiently use
the memory.
※Battery service life does not increase
• At screen, use Previous (<) or Next (>) jog
button to select ON, 3, 10, 30, 60 seconds
• Press the MODE(PLAY) at the selected screen to set
as OFF(3, 10, 30, 60 seconds) or ON
• If LCD is selected screen as OFF (3, 10, 30, 60 seconds) when
recording, LCD screen is OFF after setting time(3, 10, 30, 60
seconds) not using button.
• If LCD is ON when recording ,
LCD is ON continuously.
• During LCD OFF, if press record button then the LCD is ON to
confirm condition.
• Press record button again during LCD ON to stop recording
• When you press and hold the MODE(PLAY) button for 3
seconds or longer, the mode setting is saved and the mode
setup function is disabled.
* The LCD OFF function is useful for hiding the recording operation and reduce electric cell exhaustion during recording and playing.
60
310 30 60
ON

20
16-9. Selecting the Recording Folder
• The folder selection function saves the recording file at the selected
folder
• It is convenient when the recorded contents are managed by folder.
• (folder A) screen, use Previous (<) or Next (>)
jog button to select the folder.
• Pressing the MODE(PLAY) key at the selected screen sets the folder
displayed on the screen.
• When you press and hold the MODE button for 3 seconds or longer,
the mode setting is saved and the mode setup function is disabled.
16-10. Formatting
• It deletes all files.
• Formatting can be also done at the PC, but when you perform formatting
at this product, the speed of the operation such as starting or stopping to
record gets faster.
• We recommend the formatting at this product.
16-11. Exiting from the mode setting
• At screen, press the MODE button to disable
the mode setting. Or, pressing and holding the MODE button
for 3 seconds or longer saves the mode setting and then
disables the mode setup function.
• The mode setup function is automatically disabled 30 seconds
after stopping the mode setting.
• At screen,push the jug button to Next (>) direction
to select ‘FORMAT YES’. And when you press the MODE key at the
selected screen, the screen for confirming whether to format is displayed.
When you select ‘YES’ and press the MODE button,
screen is displayed and then disappears, and formatting starts.
• If you press the MODE button after selecting ,
formatting is cancelled.
The deleted file can not be restored. For preventing the system, formatting
can be performed only when the battery is higher than Level 1.
Caution
Make sure to save the information files to the PC before formatting.
This manual suits for next models
2
Table of contents
Other Memoq Voice Recorder manuals
