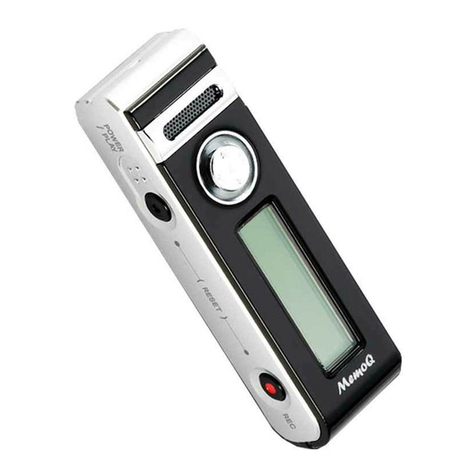
Memoq MR-210 User manual

t\t\stp Cl
Made in Korea w
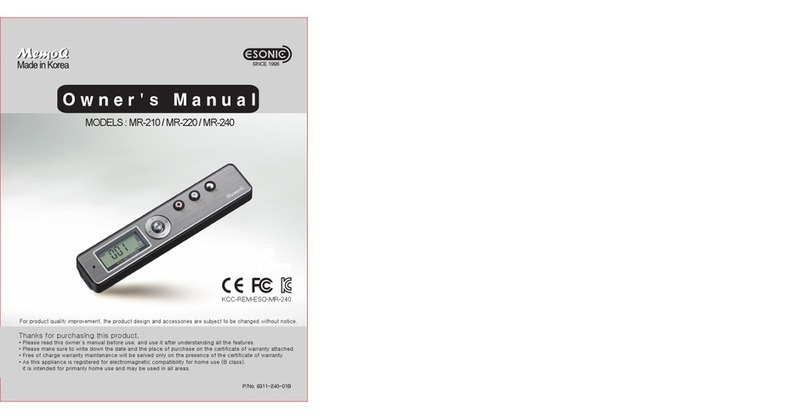
MODELS : MR-2101Mk220/ MR-240
C€FOre
For product quality improvement, the product design and accessories are subject to be changed without notice
Thanks for purchasing this product.
. Please read this owner's manual before use, and use it after understanding all the features.
. Please make sure to write down the date and the place of purchase on the certif icate of warranty attached.
. Free of charge warranty maintenance will be served only on the presence of the certif icate of warranty.
. As this appliar^ce s registereo for eleclromagnetic comparrbility for honae use (B class).
It is intended for primarily home use and may be used in all areas.
KCC-REM-ESO-MR.24O
P/No. 631 1 -240-01 B


ffi
iffil
ffi;..:.
1. SAFETYPRECAUTIONS
. As hese instuctions are for usefs safeV and property protection, tp user is r@uired to read before use
and to follotvfre instuctiom.
. The comparry shail not be enlited to bke responsibiliV for he damage caused by tre use of ttis product
or any clajms from tird pafties.
. The company shall not be liable to fre damage from fre loss of recorded data czused W failure, re@jr or
ary otrer reasons.
. As he memory of he product is subject to malfunction carsed W he mmputer Vruses, and fte recorded
data may be deleted, please make sure to tmtMruses of tre mmputerto be used.
. lt is recommended to store he impoftant recordings prompS/ to he computer.
. Unauhor2ed use is sticty prohibited.
>> N/AIN BODY CAI.JTIONS AI{D WARNINGS <<
'/l warning
. Please do noi disassemble or alter he main body. Ofrerwise, it mry cause fi re or failure.
. lf he earphone is used in loud volume for a long time, it may cause dannge to healing.
. Please do not use in he lcrwer or h'rgher temperature. Ofrerwise, it ma/ cause shott circuit due to
condensation and may cause fi re orfailure.
. Please keep arvay from fre humid places or te oiV places. Otprwise, it may cause fi re or failure.
ACaution ,
. lf tre product is impacted or dropped, it ma/ czuse failure.
. Please do not dean he surface of tre product wthr such as alcohol, berzene or paint trinner.
. Wfrile driving or walking, to avoid t-re risk of tre faffi c accidenb, please avoid to hea wih te eaphone
orto operate fe product
>> BATTERY CAUNONS AND WARNINGS <<
,A, Warning
. Please do not appV short circuit, dlsassemble, heat or impact to he battery.
. Fire may be caused by fre friction, please keep aryq/ from metal objecb.
. OnV prescribed batteries lnnn" lyce Alkaline) are to be used, and dease make sure of he polaiV (+,-)
before use.
. Please do not charge tre battery. Oherwlse, it mqy czuse fi re or injury due to explosion.
. lf not used for a long time (i.e. over a mont-r), fre battery should be remclred from he product and kept
in he safe place. Oherwise, he bdtery leakage may cause fi re or injury.
Acaution
. lf tre skin or clotrs are adhered by he battery leakaqe, hey should be washed witt clean water immediateV.
In case of 'eye mnhct, please do not rub tre eyes. Please wash eyes wih running clean water immediateV
and make sure to get medicai attention. ffi
#

ffi,i;.;:S
ffi::'i':i# "";'-. @
@Jog buttons detailed view
O Microphone jack
@ Earphone / USB jack
@ Built-in microphone
@ LCD panel
@Jos buttons (+, -, { <, > >, M)
@ neC / PAUSE button
@ PLAY /PAUSE button
@ STOP / ERASE button
@ Speaker
@ Battery cover
$='
0

si
3. LCD PANIEL DESCRIMON
ORecord/Play mode
Ollme and Fite numberdisplay
OBattery life indicator
@ECording indicator
@|-AY indicator
Ar-^^-. .
€-Enl\ t InOlCatOf
OVOS indicator
@ecording folder indicator
Ofi/usic mode indicator
4. PREPAMNON PRIORTO USE
r BafieryPlaoenrent
'Opel tE battery mver of tre main body, place a battery according to fl-e n'sht polafity, and close tte
bdaycoruer.
. L.be a battery of "MA" type, 1F03, UM-4 or equivaents.
r B#ryStahrs lors . '
H*, H?';T** [Jnr** [ff?,fff]n*,*
r B#ryD^ralbn
--e bdery drrdirn for recording under tre earphone disconnected mnditi,cn.
=ecording mode
:-sio quality) PCM HQ SP LP
>-aery duration About 2 i hours About 19 hourslAbout 20 hourslAbort ZO n*,o
AC".rtlon
' f t€E 's nr @ay on tre LCD panel after fl're narv battery replacement, please check t-re polariV of tre battery.
--E 'aEY srded wifr he product is for monitoring purpose and tre battery duration may be shorter t-ran
=e*c-
tr$,wrning
-ftei€-r's-rerrnredwhile recording, recording paused, playing oraasing, tre recording content
arEE *ase nd<e ure notto remo,ue t-e batterywtrile beinS operated. mey be
#
$TIHHTT,TH
r|t 7d:rrA H
vos oil v6 oFF
0

5. DCPO\A/ERSUPPLYUSE
.lhis app1ance may be operated witrtre external po,ver suppV (DC adaptor), wthrout a battery installed.
51. Po ,ersupply Use cf PC USB PORT
. Connect te earphone/USB iack to a USB port of a PC wiht USB cable.
.Wren fre USB communication is established, tre LCD panelOSota,sl- U5b l.
. lf fl-re pLAy/pAUSE button is pressed for more han 3 semnds, it enters tre operation mode and in he
standby (stop) sate, and it is enabled to "play and record"'
. lf it's in t-re PC USB porver suppMoperdion mode, tre fi le upload/dorvnload featr.re's not operational.
. D'smnnect and hen connect again, fren it enters he USB communication mode, and tre file upload/
dorunload feaUre is operational.
$2. Use d USB DC Poner Supply ADAPTER(SV)
. Connect tre earphone/USB jack wifr USB DC Pcrwer SuppV ADAPIER pott'
After awhile, t're LCD panelturns into [- U5b--l .
. lf he pLAy/pAUSE button is pressed for more han 3 semnG, it enters tre operalion mode and
in tre stand8 (stop) state, and it's enabled to "play and record".
.,
ACaution
. \Mren to disconnect tre product from tre PC, it 'rs recommended to execute safe hardr,vare removal utility
fortre data protection of he product.
6. PO\ /EROI\YOFF
G1. Ponerot
. press dre PI-AY/PAUSE button long enough (for rnore tran 3 semnds), hen te pcrwer is on.
. press tae REC/PAUSE button long enough (for more fran 3 semnds), tren fe porver is on and he
recording'ts stalted.
G2. PoirerOff
. wl-pn in tre sToP state for more tran 3 minutes, the porver is ar.rtomaticalv off.
. Wren in the standby mode, press he REC/PAUSE button long enough (for more tmn 3 seconG),
tren fle power is off.

tr ' 'j
7. FUNCTION(MUSlCMOlCqHo,serpil/OlCEp6r,; CI-{ANGE
. When you push jog button to tre direction of volumer long(more tran Ssemnds) in shndby, it is changed
to MUSIC -> VOICE(HO,SP,LP) -> VOICE(rcM) -> MUSTC and bemmes standbv.
= J H,|v computer
. In MUSIC, you can plOr backfre music files of foher.
. In VOICE(HQ,SP,LP), you mn play backhe recorded files of 'A" or
"8" foher and you can record to 1'A" or "8" folder by Mp3 format.
. In VOICE(PCM), you can play backhe recorded files of "pCM" folder
andyou can record to "PCM" folder by PCM fonnat.
8. RE@RDING
. When you press REC button long(more than 3seconds) in poryer-off, pcnrver is turned on and recording
starts by MP3 format(HG,SP,LP) which 's set.
'When vou press REC button shorfly in standby, recording stab by MP3 format(HQ,SP,LP) or by pCM
fomatwt-rich is set.
'When you press REC button shordy in recording, it becomes "pause", when you press STOP button sho0,
recording is stopped.
. Remrded file fonnat has good mmpalibiliV as MP3 or PCM(*.war) file and is sarcd into flre selected folder.
. Recording is made in turns from 001 in selected folder.
\Men vou check it in PC, you can see A-R001 .MP3 or B-R001 .MP3 in 'A,8" folder and PCM-R0O1 .wau
in PCM folder. 0&hen you stop recordhg wifirin 3seconds after stating, fe recording is not sared)
. Inibal recording mode is set to "HQ" of MP3 format.
ACaution
' The recorded fi les mry be stored under tre folders A and B and PCM, and each folder may store up to
999 files.
' lf files ae not recorded or fre pla/ed sounds are com-pted, execute OLEAI\ operation.
(lf CLEAN operation is initiated, ailte data stored in tre product is erased.)
. lf a fi le name is modifi ed from PC, fl-re fi le cannot be plared from he product.
' lf to plar hd fi le of wlT ich tre name is modifi ed from PC, store t're fi le under tre MUSIC folder.
. When memory becomes in shortage or file numbers are exceeded, 'FUU' is shonr.
Fflnnnl| F'rrnnd F*TiTtr nl
l- LIUL. ",jll I iiiiij *jl k r ULL.,jl
(MP3 format Recording Standby) (pCM format Recording Standby) (Recording FULL screen)
(Folder lnitial Structure)

,m
:#i
9. RECODRED FILE PLAYBACK
.Forfreprabackotrecordedfite,sbndbvscreen |*l.!J'! ! -l:il l*ffit fti
shoutdbetikerrerishtpictr.ire. l* tjU i .,#l I tju ' '';l
. When you press PIAY bntton shorty in standby, (MP3 Format (PCM Format
fre file of number shoam on screen is played back standby screen) standby screen)
When you press it shorty again, it pauses and when you press it again, it continues to be played back.
. Vvhen you push JOG button to tre direciion of PreMous( { { ), Next ( ) }) shorU in stop or playback,
it mo,res to previous file or next file in tre selected folder'
. Vlhen you push JOG button to fl're direction of Previous( { { ), Next( } )) more ttan 3seconds in
plarbacK fast search statts.
. The volume of more tran 1 1tr level is set to l0h louelagain in turning on he pcrwer.
ffhis function is to protect hearing from high sound in using eaphone)
1 O. AUDIO VOLUME CONTROL
. push tre 1cg buttons briefl y in fre directions of eid'rer higher volume(+) or lo,ver volume(-), tren t-p LCD
panel displaa zudo volume lercl and t're zudo volume is confolled accordlngv.
. lf fre volume is set to oter level 1 1 and tre porrver is off and on, it is reset to volume level 1 0 for heaing
orotection from ffre loud zudio volume damage.
ruLnf,Fl(Minimum
I oro*l aUdiO VOlUme)-
11. RE@RDEDTIMECHECK
. In tre standby mode, press fre MODE button briefl y to display tre recorded time of t're selected file.
There mry be 1 or 3 seconds difference in he actualtime lengfr depending on fe files'
|W'l't:rT*$| (Recorded ti me rensth d ispray)
12. REMAINING RECORDING TIME CHECK
. In t-re siandby mode, push he jog button long enough ( for more t'ran 3 semnds) in he direction of
volume(-), tren it displry tre remaining recording time. The time differs depending on tp audio
recording quality.
.lte time is attomaticalV calculated according to tre recording auto qualiV mode (rcM' HO' SP' LP).
lf tre remaining tinre is orcr 10 hours, tre "MlNtJfEs" and "SE@NDs" are not displayed and onV
"HOURs" is displaved.lhe displav metrod is "TIME H".
(Maximum
audio volume)
(Remaining recording
time less than 10 hours) (Remaining recording
time over 10 hours)
hour mtn sec

1 3. FILE PREVIB/V FEATURE
. In fre standby state, press tre PLAY/PAUSE button long enough (for more tran 5 seconds), fren tle file pre-
vie.w fedure's initiated as t"re each file from selected one to fe end file 's played for 5 seconG and stopped.
14. RECORDED FILE ERASE
.lnhestandbystate,operatefeprevious({{)and/ornext(}})buttonstoselectt"pfiletobeerased.
. Press STOP/ERASE button long enough (for more fran 5 semnds), hen tre file to be erased starts to be
plAyed for verifi cation, t're LCD panel blinks EFASE and PLAY imns and he file 's plared for 'l 0 seconds.
. Wl.rile playing for 10 seconds, press STOP/ERASE button brieffy to erase ffe file.
lf any otrrer button is pressed or STOP,/ERASE button 's not pressed, he erase command is cancelled.
ffimEEE.!| ;[:?:f;,. .T:H:'g:T*::roreraseoral oru.renresorrorderderetion,
I@EWEErcsqrcarl 6liq6l2y) lulul t\J lvNJUE wtul l\/.
A Caution . The erased files cannot be restored. . lt is recommended to check if tre file is important
before erase and to pedorm baclcp of fre imporhnt flles to PC.
. lf a file is erased, t're internai numbers move accordingV.
b<arnple) lf fl're number 00'l is erased, he number 002 becomes he number 001, and
il-re number 003 *.?knumber 002, il'rat is he numbes move one step ahead.
(Files before erase)QQD, )02,. ,003. )04, -005 .....
(Fites after erase) d2. 002='' 0n?'' 004<:
1 5. FILE UPLOAD/DOIVI{LOAD
. Connect fre earphone jack of fl're main body of tte product to he PC
USB pottwfth he connedion cable as shounrin he ftgure.
. After standby (for up to several minutes), he PC automaticalV
rec@n2e fl're product as a remcrtmble disk
. By i'CenticalV using tre windorrs explorer function, file upload /
dorvnload ma/ be executed. (W Computer, referto figures belorru)
. Regardless of tte file Vpes, t'te files may be stored, and te product
ma/ be used as a USB MEMORY.
. lf fre remrded files are stored underhe "VOICE" folderand tre music
files under fre "N/US|C" folder se@rateV, hqy mAr be plared in he best zudio qualiV.
A Caution . lt is recommended to exeo:te "safe hardr,vare removal" utiliiy for t-re protection of
stored data, before dismnnecting of trc main body of flre product from he PC.
*lil w8l@ftr
r+: ;} $yS8cument
.a, g l,SyffiGlputer
* ; @&lSS(e:)
-' 0WreDBH\ECt'lilrHE0)i
. *fitffi?dtr
(PC window showing connected
as a removable disc)
""" hlamoQ 4F:]
-* hlilSlC -Savins the music file
: iJOlCE -Saving the voice file
(Recorder folder
confi guration)
t-l
II 'II
-
:
l.i, O I lffi)
ka€/ -e
nd
H'
t1 l
\J
@6
(LCD panel display:
USB connection)

16. MODESETTING
. The MODE setting fmture is to set recording MODE, recording FOLDER, VOS (voice operated srstem)
recording, REPmted plAy, LCD panel displAy, EQ (equalZer, play attibute) and CLEAN of folders/all of t're
files.
. In tre standby (stop) mode, press fre MODE button for more than 3 seconds, it entes into he MODE
setting fedure.
. Push he jicg buttons in tre directions of volume(+) and/or volume(-) briefiy to select tp mode to be set.
. Press he MODE button for more han 3 seconds to store the mode settings and to exit to flrc sbndby
mode.
(tush intre dir.*".,iffiflfril:top and bottomto use)
A
,4.' A ,/-A\ /a"'
(@y tQt = mrr@?)o
\-_-,' \,m.
0H
(-)direction (+)direction (( ()direction () ))direction
MODEbutton
2<-+\
HDJ
\v/\-/
(Press he centerto use)
F--drrS
@3
Kjl
@q
tm-;q
|FFIq
fm,nq
F)cf€diffr
t^
,,-*\
//:\\
t(at))]
\----l
0
(-Xredir
---Set recording quality MODE
---Set recording FOLDER
---Set VOS (voice operated system) recording
---Set REPeated play
---Set LCD panel disPIaY
*--Set EQ (equalizer) play attribute
--- Set CLEAN of folders/all the files
<LCD paneldisplay by mode>

1G1. MODE(RE@RDNG MODQttosep) SEIING
. You can set recording mode to long hou(LP), middle sound quaiiV(SP), high sound qualiV(HQ) and set it
according to recording ervironment.
. Please refer to tuNCTlON CF{ANGE of 7h page for tp setting of PCM mode.
. When you push JOG button to tre direction of volume(+, -) in tre selected screen, selected recording
mode is sarcd and moved to rexi mode and when you press IVODE btttton more han 3semnds,
mode setting fundion is completed and mwes to standby.
.MFt|forndreocftglire
Mode MR-210(1G) MR-220(2G) MR-240(4G)
HO About 36 hours About 72 hours About 144 hours
SP About 72 hours About I44 hours About 288 hours
LP About 288 hours About 576 hours About l l52 hours
tirp
Mode MR-210(1c) MR-220(2G) MR-240(4G)
PCM About 1 2 hours About 24 hours About 48 hours
A Caution . The recorded time may valy Oepending on such as confi gurdions of folder and files.
1 G2. Remrding FOLDER Seflirg
.lhe FOLDEF selecting feature enables t-le remrded fi le to be stored in he folder seleded.
. lf fre remrded contenb are managed by sepaaed folders, it is corven'ent.
.ntt']-FOLil F|displa,,byusinsprevious({{)and/ornext()))}.osbuttonstoselectfrefolder.
|Eil-Fl l@q
. At tre selected displar, push he jog buttons in tre directions of volume (+, -) to store tre folder selection
and to morye to next setting mode. Press fre MODE button for more fnn 3 seconds to complete he
recording FOLDER setling feature and to mo,re to he standby mode.
*rcM

lti**if ,
16-3. VOS(Vctue Ofrabd q6tem) Remrdirg Seting
. lhe VOS fmture is the feature to detect ffe zudo sound during recording.
lf fre audio sound 's not detected, tre recording ls paused and if tre audio sound is detected, fe recording
is continued again. The rnemory rnqy be util2ed effectiveV.
Rt t're [-1tf-
r I nf -- el displqy, by using previous ( { { ) and/or next ( > > ) lcS buttons to selecl ON/OFF.
I 'u** "t FF.*J tW5-J
. At he selected displar, push t,-e
jog buttons in tre direct-ns of volLlme (+, -) to store fre VOS recording
setting and to moye to nex setting mode. Press tre MODE button for more than 3 seconds to complete
he VOS recording setting featre and to moue to tte standby mode.
ACaution .lheVOSfeature does not incrmsehe batterylife.
1 64. REPeated P'lay Seting
.lhe repeated play setting mat be set by fi le NO, 1 (single fi le) and folder.
' At tre |r[-fr.;q T#dH,I T, and/or lexr ( ) ) ) lcs buttons to setect REpeated ptay mode.
.lhe REP NO ptaa tre rehainlno R-ingfi bs from tre culrent position irn trre fobe?one-flffi-edstops.
.lhe REP 1 plas repededV on fre fi ledisplayed on he LCD panel.
' Ihe REP F plan repeatedV he fi les under he folder selected'
. At f1g selected display, push tre j'cg buttons in t're directions of volune (+, -) to store t're REPmted
play setting and to mo/e to next setting mode. Press tre MODE button for more fnn 3 seconds to
mmplete he REPeded play setting fmture and to move to he sbndby mode.
1G5. LCD Pand DbdaySefling
. lf he LCD panel display off time (10, 30, 60seconds) is set, tre LCD panel displqy goes off after he set
tme (10, 30, 60semnds)while remrding.
. lf t-re LCD Panel Display is set to ON, tre LCD disp{ay is on ail he time.
' At t"e I L l;;; Hl ffi,H;?t 'ifrd/or next (> > ) j,os burons to serect oN, 1 0, s0, 60 semnds.
tfd-;el +
. Wlrile tre LCD panel display is off, press arry button to turn tre LCD panel display on. While he LCD
panel displry is on, press tp STOP/ERASE button to stop recording.
. At tre selected display, push he jog buttons in ffre directons of volume (+, -) to store tre setbng and
to move to next setting mode. Press fre MODE button for more than 3 seconds to complete t-le LCD
paneldisplay setting feature and to mwe to he standby mode.

ffi
ffil
ffi,.
1ffi. EQ (eqmlZer, dayafritute) Seiling
' At he EQ settins mode displq/, by using previous ( ( { ) andlor next (> > ) i,cs buttons to select Ee play
atributesetrins Eq-TIq FIil;El . FF,Ee| "Frilry
"FrilnI FEq-rnEl ,Fm{q m
'lhe available EQ modes are FL(RAI, ro(ROCt{, Ho(HOUSE), dA(DAI{CA, JA(JAa),bA(BAu-AD),
b(R&B) and CL(CI,ASSIC). The feature is to enlby music as selecting by cdegory and/or preference.
. At fe selected display, push fl're j,og buttons in tre directions of volume (+, -) to store fre Ee setting
and to move to next setting mode. Press he MODE button for more than 3 seconds to comolete fl^re
EQ settinq feailre and to move to he standby mooe.
A Caution .lhe EQ(equal2er, play att'ibute)feature is onV appti,ed to tre MUSTC file ptry.
ForheVOlCE (recorded)fite ptAr, apptied Ee is setto FLAT(EQ OFO.
1G7. CLEAI{ (Erase a Fdder FlildAll of he Files) Setirp
. The feature is for erasing a folder fi le selected or ail of he files.
'fte CLEAI{ ALL is iCenticalto tre formatting of PC, and tre setting values are initiaiZed to defzult setting.
' lf he CLEANI ALL's performed at fre main bod, ffre operation speed for such as recording start and stop
is impror,red.
. tt is highV recommend to perfonn t're CLEAMI_L at t-re mah bodr of tre product.
. Wpn t'le CLEAI\ is perfomed, he poruer's off automaticalV after erasing t-re file(s).
1)CLEAI{ ALL
Athe CLEAN displAy, push tre j,cg button in tre direction of neK () ))to selectAl lf he MODE button
is pressed bn'efly at he selected display, "YES NO" is displayed for erase confirmation. Select "YES" and
press te MODE button briefly, tren he "CLEAI!" is display and ailfl're data in he memory are erased.
2) CLEAI\ Alltre Files in ffre Selected Folder
AttleCLEAI{disptay,pushfrejobbuttoninfl-pdirectionof next(})) toFOLD(MUS|C,A,B,rcM).
lf t-te MODE button is pressed briefly at tre selected FOLDeT displry, "yES NO" is displA/ed.
Select "YES" and press he MODE button brieffy, fren fl're "CLEAN" is display and alltre data in he
selected folder are erased.
F,mq .mr{gl IFF ^cltrSFBf, q,lHilBl
<FoherMUSlC> <FolderA) (FoherB) "FolderrcD
' fush t'e j,og buttons in tre directions of volume (+, -) to cancel tre CLEAJ\ operatbn and to mo,rc to next mode.
Press te MODE button for more han 3 seconds, it ex'b to flre standW mode and tre CI-EAI',I operation is cancelled.
A Caution . [/ake sure to store t'e important files to pC prior to formatting.
The erase files cannot be restored.
fl ' For qntem protection, tre CLEAN may be operational only when fre battery life level is bigger tran
H lovel 2. lf remained battery life is less tran lorcl 1, replace tre battery before OLEAI\.

w
w
ffi
ffi
ffi
17. RE@RDING BY USE OF DfiERI\AL DB/ICES
. ft is tre remrding feafure by using external de/ces (such as external microphone, eKernal devices and
wired telephone.
17-1. Re@rding Tdephonewih he Ear{Mkrcphone
. Plug tre ear-microphone, wfrich a microphone is buift in,
in a mr and connect he oher side to tre microphone jack
of tre product. Hold tre telephore handset or fe mobile phone
athe earwih tre ear-microphone and
oress he REC/PAUSE button on telephone callto remrd he call.
1 7-2. Re@rdirg Call wihr !\lircd Tdephone Adapb'
. Connect he audio cable to t-re microphone jacK and fe ofer sde of tre cable to he wired telephone
adaptor. Connect fre wired telephone adaptor to fre telephone widr fre telephone line cabe, as shcrv'ar
in he fi gure belorv.
. Press tre REC/PAUSE button briefl y to start recording.
. Press fre STOP/ERASE button briefl y to stop and to store.
Telephone jack
Audio cable
External telephone line
A Caution
. The design of tre Wred telephone adaptor is subject to be changed wi['lout notice.
. Some handseb of kqAchones (digitaltelephones) may not be recorded dependirrg on he models.

SPECIFICATIONS
Model MB-21 0L4R-220 M R-240
Memorv Cavicatv 1GB 2GB 4GB
L4aximum
recororng
nours oy
audio quality
PCM About l2 hours About 24 hours About 48 hours
HQ About 36 hours About 72 hours Aboutl 44 hours
SP About 72 hours About 1 44hours About 288 hours
LP About 288 hours About 576 hours Aboutll52hours
Battery
life time
F""ort-"g(F"h PPCll\,1 About 21 hours
HQ About 19 hours
SP About 20 hout
LP About 20 hours
I rray
er) votcE | 999 Files(A) + 999Files(B) + 999Files(Pcl,4)
Speaker output Power 17mm (8ohms, 90mW)
Practically maximum output powerl 2mW + 2mW / 16 ohm, earphone
Dime nsio nWXHXD=1 05.5X22.5X1 4.5
Power suoo 1 .5v (AAA Alkaline x 1 )
OperatinO environment 0 b-40 c
Accessories Earohone xl , battery x1, Owner's manual, USB cable x
4
"lt
-1
sJl
t
d
d,
.{
r{
d
r)t
"{
ds
"I
rd
"{
4,
d
3)l
.D
CERTI FICATE OF WARRANTY
Product Dioital voice recorder
Model
Date
Place
Tel. price I
Others
Period 1 year
o
E
a
f
r)
Name
Address
Tel
Service Charged
- Damage due to inappropriate use or handling.
- Damage due to arbitrary internal modif i cation by the user'
- oamage caused by the force of nature such as fi re, salt water, fl ood and earthquake
- Damage caused by the computer virus infection
- No presence of the certifi cate of warranty or the purchase receipt'
- When the warranty period is expired'
n"
*
Fs
f.e
'-
tf6
*13
kb
k
l-
bs
E
fts
({b
fra
t-
ktt
&
{rs
tw
k$
*g
n-
Other manuals for MR-210
1
This manual suits for next models
2
Table of contents
Other Memoq Voice Recorder manuals
Popular Voice Recorder manuals by other brands

Marantz
Marantz PMD620 user guide
Wilson Electronics
Wilson Electronics Sophia Series 3 instructions
Dictaphone
Dictaphone travel master 220 instruction manual
Olympus
Olympus dm-770 Training guide
EDIC-mini
EDIC-mini Tiny B30 series Short operating instructions

Olympus
Olympus DR 1000 - Directrec Dictation Kit instructions
