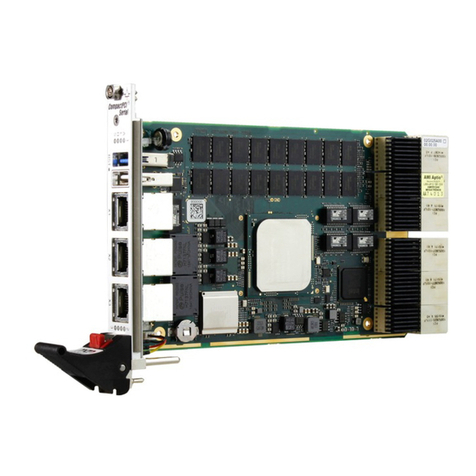
MEN G233 User manual

User Manual
G233
Diagnostic Board with Front Display
3U CompactPCI Serial
2017-10-2020G233-00 E1

20G233-00 E1 2017-10-20 Page 2
Contents
Contents
Contents. . . . . . . . . . . . . . . . . . . . . . . . . . . . . . . . . . . . . . . . . . . . . . . . . . . . . . . . . . 2
About this Document . . . . . . . . . . . . . . . . . . . . . . . . . . . . . . . . . . . . . . . . . . . . . . 4
Product Safety . . . . . . . . . . . . . . . . . . . . . . . . . . . . . . . . . . . . . . . . . . . . . . . . . . . . 6
Legal Information . . . . . . . . . . . . . . . . . . . . . . . . . . . . . . . . . . . . . . . . . . . . . . . . . 7
1 Product Overview . . . . . . . . . . . . . . . . . . . . . . . . . . . . . . . . . . . . . . . . . . . . . . . 9
1.1 Product Description . . . . . . . . . . . . . . . . . . . . . . . . . . . . . . . . . . . . . . . . . . . . . . . . 9
1.2 Product Architecture . . . . . . . . . . . . . . . . . . . . . . . . . . . . . . . . . . . . . . . . . . . . . .10
1.2.1 Interfaces. . . . . . . . . . . . . . . . . . . . . . . . . . . . . . . . . . . . . . . . . . . . . . . .10
1.2.2 Functions. . . . . . . . . . . . . . . . . . . . . . . . . . . . . . . . . . . . . . . . . . . . . . . .11
1.3 Technical Data . . . . . . . . . . . . . . . . . . . . . . . . . . . . . . . . . . . . . . . . . . . . . . . . . . . .12
1.4 Product Identification. . . . . . . . . . . . . . . . . . . . . . . . . . . . . . . . . . . . . . . . . . . . . .14
2 Getting Started . . . . . . . . . . . . . . . . . . . . . . . . . . . . . . . . . . . . . . . . . . . . . . . . 15
2.1 Connecting and Starting . . . . . . . . . . . . . . . . . . . . . . . . . . . . . . . . . . . . . . . . . . .15
2.1.1 Integrating the Board into a System . . . . . . . . . . . . . . . . . . . . . . . . .15
2.1.2 Preparing the Web Server on the Host CPU. . . . . . . . . . . . . . . . . . .15
2.1.3 Configuring the Host CPU . . . . . . . . . . . . . . . . . . . . . . . . . . . . . . . . . .15
2.1.4 Starting up the G233 . . . . . . . . . . . . . . . . . . . . . . . . . . . . . . . . . . . . . .16
2.2 Setting the LEDs . . . . . . . . . . . . . . . . . . . . . . . . . . . . . . . . . . . . . . . . . . . . . . . . . .16
2.3 Exchanging the Fonts . . . . . . . . . . . . . . . . . . . . . . . . . . . . . . . . . . . . . . . . . . . . . .16
3 Functional Description. . . . . . . . . . . . . . . . . . . . . . . . . . . . . . . . . . . . . . . . . . 17
3.1 Power Supply. . . . . . . . . . . . . . . . . . . . . . . . . . . . . . . . . . . . . . . . . . . . . . . . . . . . .17
3.2 Web Browser . . . . . . . . . . . . . . . . . . . . . . . . . . . . . . . . . . . . . . . . . . . . . . . . . . . . .17
3.2.1 Web Browser Application Behavior. . . . . . . . . . . . . . . . . . . . . . . . . .18
3.3 Structure of HTML Files . . . . . . . . . . . . . . . . . . . . . . . . . . . . . . . . . . . . . . . . . . . .19
3.3.1 G233-Specific Control Tags and Parameters . . . . . . . . . . . . . . . . . . 19
3.3.2 Display Configuration . . . . . . . . . . . . . . . . . . . . . . . . . . . . . . . . . . . . . 20
3.3.3 Timer Configuration. . . . . . . . . . . . . . . . . . . . . . . . . . . . . . . . . . . . . . .20
3.3.4 Supported Standard HTML Tags . . . . . . . . . . . . . . . . . . . . . . . . . . . .21
3.4 Reset Behavior . . . . . . . . . . . . . . . . . . . . . . . . . . . . . . . . . . . . . . . . . . . . . . . . . . .22
3.5 Memory . . . . . . . . . . . . . . . . . . . . . . . . . . . . . . . . . . . . . . . . . . . . . . . . . . . . . . . . .22
3.5.1 Flash. . . . . . . . . . . . . . . . . . . . . . . . . . . . . . . . . . . . . . . . . . . . . . . . . . . .22
3.5.2 SRAM . . . . . . . . . . . . . . . . . . . . . . . . . . . . . . . . . . . . . . . . . . . . . . . . . . .22
3.6 User LEDs . . . . . . . . . . . . . . . . . . . . . . . . . . . . . . . . . . . . . . . . . . . . . . . . . . . . . . . .22
3.6.1 LED Control . . . . . . . . . . . . . . . . . . . . . . . . . . . . . . . . . . . . . . . . . . . . . .23
3.7 User Buttons . . . . . . . . . . . . . . . . . . . . . . . . . . . . . . . . . . . . . . . . . . . . . . . . . . . . .24
3.8 CompactPCI Serial. . . . . . . . . . . . . . . . . . . . . . . . . . . . . . . . . . . . . . . . . . . . . . . . .25
3.8.1 Onboard Ethernet Status LEDs . . . . . . . . . . . . . . . . . . . . . . . . . . . . .25

20G233-00 E1 2017-10-20 Page 3
Contents
Figures
Figure 1. Front interfaces . . . . . . . . . . . . . . . . . . . . . . . . . . . . . . . . . . . . . . . . . . . . . . . . . . .10
Figure 2. Board layout – top view. . . . . . . . . . . . . . . . . . . . . . . . . . . . . . . . . . . . . . . . . . . . .11
Figure 3. Functional diagram . . . . . . . . . . . . . . . . . . . . . . . . . . . . . . . . . . . . . . . . . . . . . . . .11
Figure 4. Product labels. . . . . . . . . . . . . . . . . . . . . . . . . . . . . . . . . . . . . . . . . . . . . . . . . . . . .14
Figure 5. Web browser application behavior . . . . . . . . . . . . . . . . . . . . . . . . . . . . . . . . . . .18
Figure 6. User button functionality . . . . . . . . . . . . . . . . . . . . . . . . . . . . . . . . . . . . . . . . . . .24
Tables
Table 1. HTML tags: control tag for display configuration . . . . . . . . . . . . . . . . . . . . . . .20
Table 2. HTML tags: control tag for timer configuration. . . . . . . . . . . . . . . . . . . . . . . . .20
Table 3. HTML tags: supported standard tags . . . . . . . . . . . . . . . . . . . . . . . . . . . . . . . . .21
Table 4. User LEDs at front panel . . . . . . . . . . . . . . . . . . . . . . . . . . . . . . . . . . . . . . . . . . . .22
Table 5. User LED control – byte 1 – select LED . . . . . . . . . . . . . . . . . . . . . . . . . . . . . . . . 23
Table 6. User LED control – byte 2 – set LED state. . . . . . . . . . . . . . . . . . . . . . . . . . . . . .23
Table 7. Onboard rear Ethernet status LEDs (host connection). . . . . . . . . . . . . . . . . . .25

20G233-00 E1 2017-10-20 Page 4
About this Document
About this Document
This user manual is intended only for system developers and integrators, it is not
intended for end users.
It also includes special details for application programmers.
It describes the design, functions and connection of the product. The manual does not
include detailed information on individual components (data sheets etc.).
History
G233 product page with up-to-date information and downloads:
www.men.de/products/g233/
Issue Comments Date
E1 First issue 2017-10-20

20G233-00 E1 2017-10-20 Page 5
About this Document
Conventions
Indicates important information or warnings concerning situations which
could result in personal injury, or damage or destruction of the
component.
Indicates important information concerning electrostatic discharge which
could result in damage or destruction of the component.
Indicates important information or warnings concerning proper
functionality of the product described in this document.
The globe icon indicates a hyperlink that links directly to the Internet.
When no globe icon is present, the hyperlink links to specific information
within this document.
Italics Folder, file and function names are printed in italics.
Comment Comments embedded into coding examples are shown in green text.
IRQ#
/IRQ
Signal names followed by a hashtag "#" or preceded by a forward slash "/"
indicate that this signal is either active low or that it becomes active at a
falling edge.
In/Out Signal directions in signal mnemonics tables generally refer to the
corresponding board or component, "in" meaning "to the board or
component", "out" meaning "from the board or component".
0xFF Hexadecimal numbers are preceded by "0x".
0b1111 Binary numbers are preceded by "0b".

20G233-00 E1 2017-10-20 Page 6
Product Safety
Product Safety
Electrostatic Discharge (ESD)
Computer boards and components contain electrostatic sensitive devices.
Electrostatic discharge (ESD) can damage components. To protect the PCB
and other components against damage from static electricity, you should
follow some precautions whenever you work on your computer.
Power down and unplug your computer system when working on the
inside.
Hold components by the edges and try not to touch the IC chips, leads,
or circuitry.
Use a grounded wrist strap before handling computer components.
Place components on a grounded antistatic pad or on the bag that came
with the component whenever the components are separated from the
system.
Only store the product in its original ESD-protected packaging. Retain
the original packaging in case you need to return the product to MEN for
repair.

20G233-00 E1 2017-10-20 Page 7
Legal Information
Legal Information
Changes
MEN Mikro Elektronik GmbH ("MEN") reserves the right to make changes without further
notice to any products herein.
Warranty, Guarantee, Liability
MEN makes no warranty, representation or guarantee of any kind regarding the
suitability of its products for any particular purpose, nor does MEN assume any liability
arising out of the application or use of any product or circuit, and specifically disclaims
any and all liability, including, without limitation, consequential or incidental damages.
TO THE EXTENT APPLICABLE, SPECIFICALLY EXCLUDED ARE ANY IMPLIED WARRANTIES
ARISING BY OPERATION OF LAW, CUSTOM OR USAGE, INCLUDING WITHOUT LIMITATION,
THE IMPLIED WARRANTIES OF MERCHANTABILITY AND FITNESS FOR A PARTICULAR
PURPOSE OR USE. In no event shall MEN be liable for more than the contract price for
the products in question. If buyer does not notify MEN in writing within the foregoing
warranty period, MEN shall have no liability or obligation to buyer hereunder.
The publication is provided on the terms and understanding that:
1. MEN is not responsible for the results of any actions taken on the basis of
information in the publication, nor for any error in or omission from the publication; and
2. MEN is not engaged in rendering technical or other advice or services.
MEN expressly disclaims all and any liability and responsibility to any person, whether a
reader of the publication or not, in respect of anything, and of the consequences of
anything, done or omitted to be done by any such person in reliance, whether wholly or
partially, on the whole or any part of the contents of the publication.
Conditions for Use, Field of Application
The correct function of MEN products in mission-critical and life-critical applications is
limited to the environmental specification given for each product in the technical user
manual. The correct function of MEN products under extended environmental
conditions is limited to the individual requirement specification and subsequent
validation documents for each product for the applicable use case and has to be agreed
upon in writing by MEN and the customer. Should the customer purchase or use MEN
products for any unintended or unauthorized application, the customer shall indemnify
and hold MEN and its officers, employees, subsidiaries, affiliates, and distributors
harmless against all claims, costs, damages, and expenses, and reasonable attorney fees
arising out of, directly or indirectly, any claim or personal injury or death associated with
such unintended or unauthorized use, even if such claim alleges that MEN was negligent
regarding the design or manufacture of the part. In no case is MEN liable for the correct
function of the technical installation where MEN products are a part of.
Qualified Personnel
The product/system described in this documentation may be operated only by
personnel qualified for the specific task in accordance with the relevant documentation,
in particular its warning notices and safety instructions. Qualified personnel are those
who, based on their training and experience, are capable of identifying risks and
avoiding potential hazards when working with these products/systems.

20G233-00 E1 2017-10-20 Page 8
Legal Information
Conformity
MEN products are no ready-made products for end users. They are tested according to
the standards given in the Technical Data and thus enable you to achieve certification of
the product according to the standards applicable in your field of application.
RoHS
Since July 1, 2006 all MEN standard products comply with RoHS legislation.
Since January 2005 the SMD and manual soldering processes at MEN have already been
completely lead-free. Between June 2004 and June 30, 2006 MEN’s selected component
suppliers have changed delivery to RoHS-compliant parts. During this period any change
and status was traceable through the MEN ERP system and the boards gradually became
RoHS-compliant.
WEEE Application
Nevertheless, MEN is registered as a manufacturer in Germany. The registration number
can be provided on request.
Copyright © 2017 MEN Holding. All rights reserved.
The WEEE directive does not apply to fixed industrial plants and tools. The
compliance is the responsibility of the company which puts the product on
the market, as defined in the directive; components and sub-assemblies
are not subject to product compliance.
In other words: Since MEN does not deliver ready-made products to end
users, the WEEE directive is not applicable for MEN. Users are
nevertheless recommended to properly recycle all electronic boards which
have passed their life cycle.
Germany
MEN Mikro Elektronik GmbH
Neuwieder Straße 3-7
90411 Nuremberg
Phone +49-911-99 33 5-0
France
MEN Mikro Elektronik SAS
18, rue René Cassin
ZA de la Châtelaine
74240 Gaillard
Phone +33-450-955-312
USA
MEN Micro Inc.
860 Penllyn Blue Bell Pike
Blue Bell, PA 19422
Phone 215-542-9575
China
MEN Mikro Elektronik
(Shanghai) Co., Ltd.
Room 808-809, Jiaxing
Mansion, No. 877 Dongfang
Road
200122 Shanghai
Phone +86-21-5058-0961
www.men.de
www.men-france.fr
sales@menmicro.com
www.menmicro.com
sales@men-china.cn
www.men-china.cn

Product Overview
20G233-00 E1 2017-10-20 Page 9
1 Product Overview
1.1 Product Description
Interactive OLED Display
The G233 is a 3U CompactPCI Serial board featuring a 3.12" OLED display for showing
diagnostic status and error messages. Two control buttons at the front panel can be
used for user interactions, e.g. scrolling or doing set-up. Eight programmable LEDs are
provided for user-defined functions.
Simpler Troubleshooting and Less Downtime
The G233 provides an easy to use, interactive diagnostics interface suitable for train
maintenance personnel during troubleshooting or performing routine service checks.
The displayed information is fully customizable. Any status or fault message visible to
the host CPU can be sent to the G233 and shown on the display or represented by the
LEDs.
Shorter Development and Integration Time
The native onboard web browser communicates via backplane Ethernet interface with a
web server running on the host CPU. Only an HTTP web server software is required on
the host computer which facilitates integration and set-up.
Full Configuration of Displayed Data and Front Panel LEDs
The displayed data is controlled by writing to an HTML file. Any status or error message
available to the CPU can be shown on the front panel.
Suited for Harsh and Mobile Environments
The G233 is designed for -40 to +85°C operating temperature and conformal coated in
order to be used also in harsh and mobile environments.

Product Overview
20G233-00 E1 2017-10-20 Page 11
Figure 2. Board layout – top view
1.2.2 Functions
Figure 3. Functional diagram
A2
User LEDs
CompactPCI Serial
connector P1
CompactPCI Serial
connector P6
Ethernet Status LEDs
SPEED Link_ACT
8LEDs
F
STM32ARM
Cortex‐M7MCU
Power
SRAM
P1
R
FastEthernet P6
R
OLEDDisplay
F
ControlButtons
F
USB2.0
I2C
Flash
FFront RearR

Product Overview
20G233-00 E1 2017-10-20 Page 12
1.3 Technical Data
Display
OLED
Screen size: 3.12"
Resolution: 256 x 64 pixels
Background color: black
Emitting color: blue
MCU
STM32 ARM 32-bit Cortex-M7
Running embedded RTOS with web browser
Memory
Flash
-4 MB
SRAM
-2 MB
Front Interfaces
Eight user LEDs
Two control buttons
Backplane Standard
Compliance with CompactPCI Serial PICMG CPCI-S.0 Specification
Host connection:
-One 100BASE-T Ethernet channel
-One OTG USB channel
-One I2C channel
Electrical Specifications
Supply voltage
-+12 V (-5%/+5%)
Power consumption
-1.75 W typ.
Mechanical Specifications
Dimensions
-3U, 12 HP
Weight
-150 g (model 02G233-00)
Environmental Specifications
Temperature range (operation)
--40°C to +85°C (qualified components), compliant with EN 50155, class TX
(model 02G233-00)

Product Overview
20G233-00 E1 2017-10-20 Page 13
Temperature range (storage): -40°C to +85°C
Cooling concept
-Air-cooled, airflow 1.0 m/s min.
Humidity: EN 50155:2007 (+25/+55 °C, 90-100 %)
Altitude: -300 m to +3000 m
Shock: EN 61373:2010
Vibration: EN 61373:2010
Conformal coating
Reliability
MTBF: 3 074 049 h @ 40°C according to IEC/TR 62380 (RDF 2000) (model 02G233-00)
Safety
Electrical Safety
-EN 50155:2007
-EN 50153:2014
-EN 50124-1:2001 + A1:2003 + A2:2005
EMC
EN 50121-3-2:2015 (radiated emission)
EN 50121-3-2:2015 (conducted emission)
EN 50121-3-2:2015 (EMC immunity)
Software Support
OS-independent

Product Overview
20G233-00 E1 2017-10-20 Page 14
1.4 Product Identification
MEN documentation may describe several different models and design revisions of the
G233. You can find the article number, design revision and serial number affixed to the
G233.
Article number: Indicates the product family and model. This is also MEN’s main
ordering number. To be complete it must have 9 characters.
Revision number: Indicates the design revision of the product.
Serial number: Unique identification assigned during production.
If you need support, you should communicate these numbers to MEN.
Figure 4. Product labels
*
Revisionnumber Serialnumber
Completearticlenumber

Getting Started
20G233-00 E1 2017-10-20 Page 15
2 Getting Started
2.1 Connecting and Starting
You can use the following check list when installing the board in a system for the first
time and with minimum configuration.
2.1.1 Integrating the Board into a System
»Make sure that the slot in which you want to install the G233 supports an Ethernet
connection on CompactPCI Serial connector P6.
»Power down the system.
»Insert the G233 into a peripheral slot of your CompactPCI Serial system, making
sure that the backplane connectors are properly aligned.
Note: The peripheral slots of every system are marked by a circle with a plus sign behind
it on the backplane and/or at the front panel:
»Power on the system.
2.1.2 Preparing the Web Server on the Host CPU
The G233 requires the following software infrastructure on the host CPU:
Suitable software querying diagnosis data inside the CompactPCI Serial system, e.g.
CPU temperature.
Web server software, e.g., Apache for Linux or XAMPP for Windows.
Web server scripting environment, e.g., using PHP, to dynamically aggregate data
and provide HTML output.
The HTML files must include an index.html file as the start page for the G233 display
output.
2.1.3 Configuring the Host CPU
»Configure the network adapter of the host CPU:
- Static IP address: 192.168.3.60
- Netmask: 255.255.255.0
»Set up the web server, e.g., Apache for Linux using the following command:
»Store your HTML files in the corresponding folder on the web server, e.g., for Linux
Apache /var/www/html/.
»Set port 8090.
»Start the web server using, e.g., the following command for Linux:
»If there are problems, check if the firewall blocks the port.
$ sudo apt-get install apache2
$ sudo service apache2 start

Getting Started
20G233-00 E1 2017-10-20 Page 16
2.1.4 Starting up the G233
»Press one of the user buttons. The G233 sends an initial HTTP request to the web
server and the display is turned on.
»To end the application manually (i.e.to turn off the display and stop communication
with the server) go to the start window and press and hold the backward button B2.
2.2 Setting the LEDs
The LEDs can be set using a server script, e.g. using Ruby as described in the following
example:
»Set up the TCP server:
»Wait for the connection and accept it:
»Send the command for starting the LED application (command: 0x01):
»Send the LED configuration in a 16-bit command:
This command can be sent cyclically to adapt the configuration.
2.3 Exchanging the Fonts
The fonts can be exchanged using a server script, e.g. using Ruby as described in the
following example:
»Set up the TCP server:
»Wait for the connection and accept it:
»Send the command for starting the font application (command: 0x02):
»Wait for the start command (0x10)
»Send the total font image size in byte (as 16-bit integers)
»Send image cyclically in 1024 byte packages:
- For each package, wait for the data request command 0x20
- Send one 1024 byte package
server = TCPServer.new('192.168.3.60', 8090)
socket = server.accept()
socket.print 0x01
socket.print "\r\n"
socket.print {LED-Config}
socket.print "\r\n"
server = TCPServer.new('192.168.3.60', 8090)
socket = server.accept()
socket.print 0x02
socket.print "\r\n"

Functional Description
20G233-00 E1 2017-10-20 Page 17
3 Functional Description
3.1 Power Supply
The G233 is supplied via the backplane.
3.2 Web Browser
The web browser running on the G233 supports:
Display of content of the HTML file provided by the web server on the host CPU, no
other sources possible
HTML data input with support of a limited number of HTML tags.
Update rate of 100 ms or better
Character encoding: UTF-8
Fonts in 3 different sizes: normal, bold and italics. Every font has to be saved in nine
versions. The font library is expandable to up to 3000 fonts.
Communication with different web servers. The default web server is hard coded.
The web server can be changed using the href attribute.
Error behavior with configurable timeout values.
See Chapter 3.3 Structure of HTML Files on page 19 for a detailed description.
See Table 2, HTML tags: control tag for timer configuration on page 20 for a
detailed description.

Functional Description
20G233-00 E1 2017-10-20 Page 18
3.2.1 Web Browser Application Behavior
Figure 5. Web browser application behavior
StartApplication
Initialisation
RunningMode
Display:OFF
UserInput?
No
Yes
RunningMode
Display:ON
Webserver
reached?
No
Yes
Display
output
Timeoff
Display
errorpage
Retrytoreach
Webserver?
Yes
No
RunningMode
Display:ON
UserInput?
StartTimer2
Timer2
expired?
Yes
Handle
UserInput
Yes No
No
StartTimer3
UserInput? Timer3
expired?
Issue
Warning
Yes
No
Yes No
ResetTimer3
ResetTimer2

Functional Description
20G233-00 E1 2017-10-20 Page 19
3.3 Structure of HTML Files
The G233 supports:
Simple HTML structure including a <head> and <body> element
Starting page must be named index.html
Any number of further HTML pages
G233-specific tags and parameters to control display behavior
The following shows a simple example of an index.html:
3.3.1 G233-Specific Control Tags and Parameters
The G233 supports a number of special tags in the index.html to control the display and
web browser application behavior.
If these tags are present in the index.html, the G233 uses their attribute settings. If one or
both of the tags are missing, the G233 uses the default values.
<html>
<head>
<title>Main Menu</title>
<display orientation="vertical" flipped="no"></display>
<timer timeNoInput="30" timeConnection="5" timeWarning="10"></timer>
</head>
<body>
<h1>Main Menu</h1>
<b>Select Element</b>
<br/>
<ol type="1">
<li value="1">
<a href="ipConfig.html">IP Config</a>
<br/>
<i>Configure IP address</i>
</li>
<br/>
<li>
<a href="systemTemp.html">Sys Temp</a>
<br/>
<i>Get system temperature</i>
</li>
<br/>
<li>
<a href="systemInformation.html">Sys Info</a>
<br/>
<i>Get system information</i>
</li>
</ol>
<br/>
</body>
</html>

Functional Description
20G233-00 E1 2017-10-20 Page 20
3.3.2 Display Configuration
Table 1. HTML tags: control tag for display configuration
For example:
3.3.3 Timer Configuration
Table 2. HTML tags: control tag for timer configuration
For changing the timer settings, the G233 has to be turned off and started again. Each
timeout can be deactivated by setting the time to 0.
For example:
Tag Attributes Possible Values
display orientation horizontal
vertical (default)
flipped yes (default)
no
<head>
<title>Start Page</title>
<display orientation="horizontal" flipped="yes"><display>
</head>
Tag Attributes Possible Values Description Default
timer timeConnection Time value in
seconds
Timeout t1: Time the application will
wait if the web server can't be reached
after a user input.
After t1 has run out, the application will
issue the following message if no user
input occurs:
Connection to Server failed. Do you
want to retry
5
timeNoInput Time value in
seconds
Timeout t2: After t2 has run out, the
application will issue the following
message if no user input occurs:
Application will end in xx sec! Press
any button to continue
120
timeWarning Time value in
seconds
Timeout t3: Time the application will
wait after issuing the message to turn
off the display before actually turning
off.
15
<head>
<timer timeConnection="5" timeNoInput="30" timeWarning="10"></timer>
</head>
Table of contents
Other MEN Computer Hardware manuals

