MERCARI LONE WORKER ALARMS NZ Guide

NZ START GUIDE
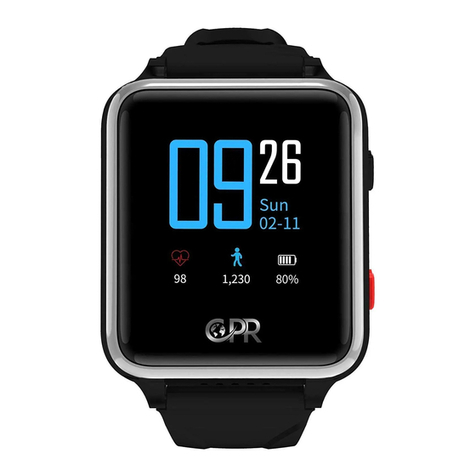
4G GPS SOS TRACKER : MOBILE ALARM WITH GPS & FALL DETECTION
Seng for NZ; Updated Mar 2020

OVERVIEW & INTRODUCTION
The mobile alarm with GPS & Fall detecon is a smart personal alert system. Your alarm pendant re-
lies on a connecon to the 4G and 3G (rollback) mobile networks to operate. It uses a Nano SIM card
that connects to the Spark or Vodafone mobile networks. It also uses GPS, wi and Bluetooth 5 to per-
form locaon funcons.
Your device uses SMS and voice frequencies across the 4G network to send out the text help messages
and perform voice to voice communicaon with your emergency contacts. Being a mobile device, like a
mobile phone it needs to be recharged occasionally using the included charging leads. It is important
that the user/operator of the device retains a copy any ‘SMS Programming Guide’ and this User Manual
as it is likely they will be needed as a reference in the future.
BEFORE YOU START
The device requires a SIM Card with credit in order to operate (Not Supplied).
We strongly recommend using a Brand New 4G SIM card in a Smart Phone before inserng into the de-
vice to make sure the SIM card has voice and SMS services connected on the network. In some instances,
the SIM cards are not fully acve unl voicemail has been set up and a voice call made.
Please ensure your voicemail is set up and has been tested in a Smart phone for voice and SMS before
inserng the SIM card into the device.
Note:
Some older/used 4G SIM cards do not have the funconality required to operate in the new 4G devices,
or may have minor wear & tear which may cause the alarm device to be non responsive. Using brand new
SIM cards are recommended.
To acvate the alarm, press the SOS buon for 2 seconds and it will enter its emergency sequence.
The following pages will set the basics for that sequence.
SOS Buon
Fall Detecon
Fall detecon is enabled by default. To change sengs, please consult the SMS Programming guide.
Fall detecon is designed to automacally acvate during serious impacts only and requires minimum 1
meter altude change, angle change (Like falling forward or backward) and impact to acvate.

BASIC PROGRAMMING
Programming the device is done by sending SMS/Text commands from your own smart phone to the
device.
The device is a highly customisable personal alarm with mulple adjustable parameters that can be pro-
grammed for a wide range of capabilies specic to a users individual circumstances and needs. As such,
this quick start guide is designed to get the basics and essenals programmed.
The following programming sengs are the basics based upon feedback from our REAL WORLD kiwi
customers who use this device on a daily basis, and covers what maer most for them. These sengs
suit approximately 95% of our real world client scenarios, however further customisaon and program-
ming instrucon can be found in the SMS Programming guide and Master List documents.
Here we will set-
1) Set Emergency Contacts
2) Turn o Calling Out feature (Recommended)*
3) Set Personal Name in emergency text message
4) Set Time Zone
5) Turn o ‘Low Baery’ alert (If le enabled, SMS are sent to all contacts alerng ‘Low Baery’)
6) Turn o ‘Bluetooth’ (Only required if Bluetooth base staon has been purchased separately)
Emergency sequence descripon if programming to above recommendaons
If a user acves the SOS (Press SOS for 2 seconds), the device sends an SMS to all emergency contacts
simultaneously. Contacts will receive SMS message from the device including Name, ‘Help Me’ message,
me & locaon data with internet maps link. At this point, any available emergency contacts would im-
mediately respond by calling the device to make contact and establish communicaon. The user waits
for the rst responder to call with the device automacally answering incoming calls aer 5 seconds and
voice to voice communicaons are established (Like a speaker phone).
Please note; The Fall detecon is already set to ON as default. Adjustments to sensivity can be done by
consulng the SMS Programming guide.
* This sets the Emergency/SOS buon to only send SMS messages to the nominated contacts and dis-
bales all ‘Calling Out’ funcons. In real world scenarios, users will want the rst available person to be
able to respond immediately instead of having to wait for outgoing calls to be answered which engages
the line prevenng others making contact.

Set Emergency Contacts/Turn O Outgoing Calls
The device can have up to 10 emergency contact numbers programmed (1 minimum).
Cell phone numbers are recommended as SMS and locaon data can be received when the SOS buon
has been acvated. Landlines & internaonal can be programmed if desired.
SMS Command (Send the device the following SMS)
A1,1,0, 1st contact number (Example—A1,1,0,02123456789) No Gaps. The device will respond back ‘Set
contact number 1 OK
A2,1,0, 2nd contact number
A3,1,0, 3rd contact number
A4,1,0, 4th contact number
A5,1,0, 5th contact number
A6,1,0, 6th contact number
A7,1,0, 7th contact number
A8,1,0, 8th contact number
A9,1,0, 9th contact number
A10,1,0, 10th contact number
If you wish to change any number at any me, simply repeat the command in the A1-10 slot as required.
To check contact numbers set
SMS Command
A?
This will reply with numbers that have programmed.
NOTE: Programming instrucons above are recommended and sets the device to only SMS the emergen-
cy contacts during acvaon. This stops all outgoing call funcons providing a clean phone line, allowing a
rst responder to call into the device immediately to render assistance.
Set Device Name
Sets the Name of the device for SMS/Tracking
SMS Command
Prex1,johnsmith
The device will reply with—Set Johnsmith ok. Up to 100 Characters can be used for the name descrip-
on.

Turn O Low Baery Alert
Set Time Zone
Default me zone is based o UTC. To set NZ Standard me please use the following command
SMS Command
Tz+12
(tz+13 for Daylight Savings)
Emergency SMS messages received by contacts will display me stamps associated with the above seng
By default, the device sends a ‘Low Baery’ SMS warning to all contacts when power drops to 15%. To
turn this o use the following command
SMS Command
Low0
(The word ‘low’, then the number zero, without gaps)
Turn O Bluetooth & Wi
The device is equipped with Bluetooth 5 and is able to communicate with a Bluetooth Charging Base Sta-
on & Speaker Set (Sold Separately).
If the separate Bluetooth base staon has not been purchased, It is advised to turn the Bluetooth Func-
on o as it saves baery and does not interfere with Locaon nding. It is also advised to turn o Wi if
not connecng to 3rd party tracking plaorms.
SMS Command
BLE0
(Command is ‘BLE’ with the number zero, no gaps)
Wi0
(Command is ‘wi’ with the number zero, no gaps)
Turning o the wi also allows the locaon nding to be more accurate as the device will look for GPS sig-
nals only which are signicantly more accurate than a wi locaon. If a GPS x is not available the device
will respond with a ‘last known’ GPS x.

Locaon Finding
The device locaon can be found by using the following commands
SMS Command
Loc
The device will respond back with current GPS locaon (Will search for 3 minutes) or will respond with
last known GPS locaon (If Bluetooth & Wi have been disabled)
Quesons?
Please feel free to get on touch by emailing your quesons to [email protected]
Table of contents
