Merck RiOs-DI ZRDS0P3WW User manual
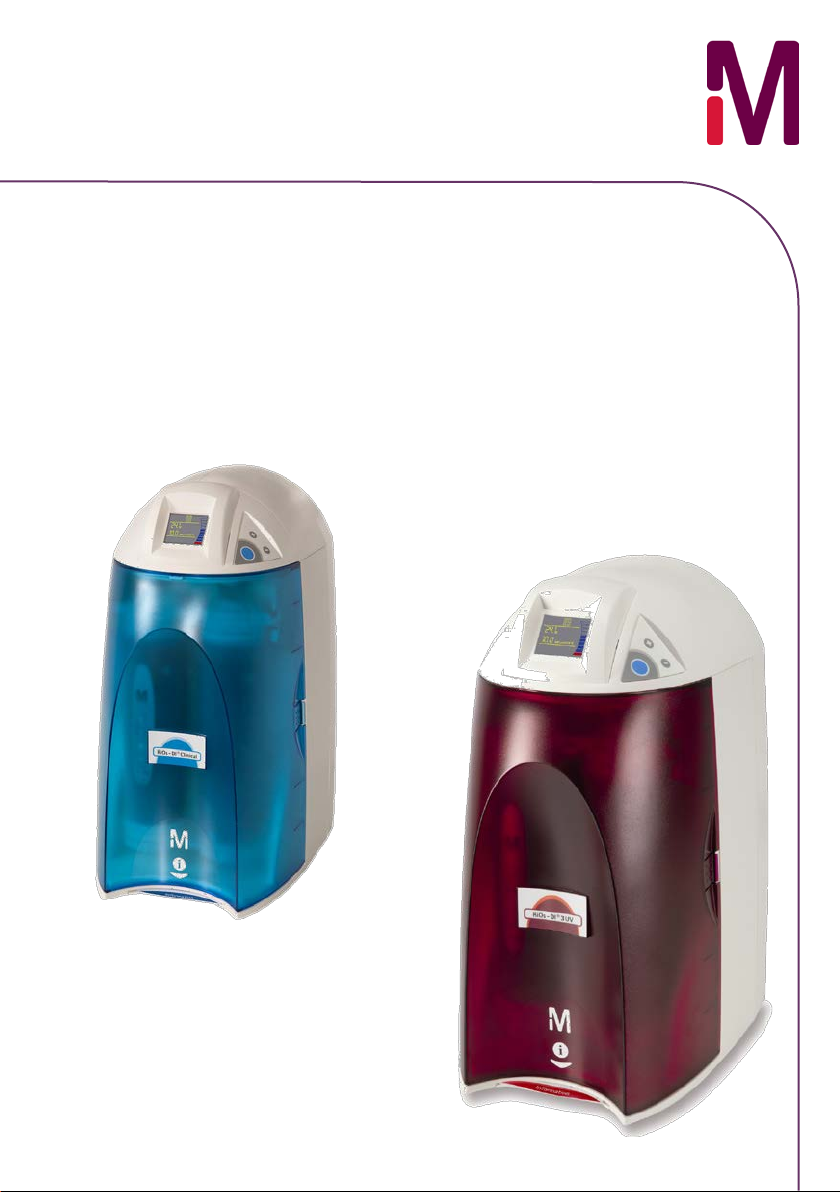
RiOs-DI™ 3 (UV) system
RiOs-DI™ Clinical system
User manual


Notice
The information in this document is subject to change without notice and should not be construed as a
commitment by Millipore SAS. Millipore SAS assumes no responsibility for any errors that might appear in this
document. This manual is believed to be complete and accurate at the time of publication. In no event shall
Millipore SAS be liable for incidental or consequential damages in connection with or arising from the use of this
manual.
We manufacture and sell water purification systems designed to produce pure or ultrapure water with specific
characteristics (µS/cm, T, TOC, CFU/ml, Eu/ml) when it leaves the water purification system provided that the
RiOs-DI Systems are fed with water quality within specifications, and properly maintained as required by the
supplier.
We do not warrant these systems for any specific applications. It is up to the end user to determine if the quality
of the water produced by our systems matches his expectations, fits with norms/legal requirements and to bear
responsibility resulting from the usage of the water.
Copyright
2012 MILLIPORE SAS. PRINTED IN FRANCE. ALL RIGHTS RESERVED. THIS BOOK OR PARTS THEREOF MAY NOT
BE REPRODUCED IN ANY FORM WITHOUT THE WRITTEN PERMISSION OF THE PUBLISHERS.
THE PHOTOS ARE NON-CONTRACTUAL.
FTPF09558
V.4.0 – 05/2012
Trademarks
Millipore, Millex, SmartPak, RiOs-DI and Milli-Q are registered trademarks of Merck KGaA.
RiOs and RODI are trademarks of Merck KGaA.
The “M” Mark is a trademark of Merck KGaA.
All other trademarks are trademarks of their respective manufacturers.
Product warranty and limitation of liability
The applicable warranty and limitation of liability for the products listed in this publication may be found at
http://www.millipore.com/ec/cp3/terms within the "Terms and Conditions of Sale" applicable to your purchase
transaction.
Directive 2002/96 EC: For European users only
The symbol “crossed b
in” on a product or its packaging indicates that the product
should not be treated like household waste when discarded. Instead the product
should be disposed of at a location that handles discarded electric or electronic
equipment.
Proper disposal of equ
ipment containing electric or electronic components will help
to
reduce pollution effects to the environment or to human health. Proper recycling
of these products helps in environmental preservation and helps to protect natural
resources.
For more information about recycling of products containing electric or
electronic components, please contact your local recycling representative or
organisation.

Table of Contents
Introduction ............................................................................................................................ 1
Using this Manual ............................................................................................................................................................... 1
Safety Information.............................................................................................................................................................. 1
Contacting Millipore® SAS ............................................................................................................................................... 2
Product Information............................................................................................................... 3
RiOs-DI System Overview.................................................................................................................................................. 3
RiOs-DI Product Water Specifications.......................................................................................................................... 3
Schematic of Main Components .................................................................................................................................... 4
Operating principle ............................................................................................................................................................. 4
Technical Specifications.................................................................................................................................................... 5
Pre Installation ....................................................................................................................... 7
Installation Requirements................................................................................................................................................. 7
Optional Equipment You May Need .............................................................................................................................. 8
Unpacking the RiOs™-DI −What’s Inside?.................................................................................................................. 8
Installation .............................................................................................................................. 9
Preparation of the System................................................................................................................................................ 9
Connection of Tubing......................................................................................................................................................... 9
Connection of the Power Cord −Turning on the System Power........................................................................12
Installation of the SmartPak..........................................................................................................................................13
Installation of the Vent Filter ........................................................................................................................................16
How to Show Resistivity or Conductivity Units (C01)...........................................................................................17
How to Set the Resistivity Setpoint (C02).................................................................................................................19
Using the RiOs-DI................................................................................................................. 21
Understanding the Display .............................................................................................................................................21
How to Get Water from the RiOs-DI...........................................................................................................................21
Operating Modes ...............................................................................................................................................................22
How to View the Product Resistivity and Temperature in Tank Full mode.....................................................24
How to View the RO Permeate Conductivity in Filling Tank mode or in Tank Full mode ..........................24
How to Understand RiOs-DI messages.......................................................................................................................25
Maintenance .........................................................................................................................27
Maintenance Schedule ....................................................................................................................................................27
How to Replace the SmartPak.......................................................................................................................................28
Flush Mode ..........................................................................................................................................................................30
How to Clean the Screen Filter .....................................................................................................................................31

How to Calibrate the Tank Level (C03) .......................................................................................................................33
How to Sanitize the Tank ................................................................................................................................................35
How to Replace the UV Lamp (UV System only)......................................................................................................39
How to View or Reset the UV Lamp Timer (C04).....................................................................................................42
Troubleshooting.................................................................................................................... 45
Ordering Information .......................................................................................................... 47
Catalogue Numbers for RiOs-DI Systems...................................................................................................................47
Catalogue Numbers for RiOs-DI Clinical System.....................................................................................................47
Catalogue Numbers for Consumables.........................................................................................................................47
Catalogue Numbers for Accessories ............................................................................................................................47
Clinical kit ............................................................................................................................................................................47
1
Introduction
Using this Manual
This User Manual is a guide for use during the installation, normal operation and maintenance of a RiOs-DI 3 or a
RiOs-DI 3 UV Water Purification System. ‘RiOs-DI’ is used in this manual to refer to either the RiOs-DI 3 or the
RiOs-DI 3 UV unless otherwise noted. It is highly recommended to completely read this manual and to fully
comprehend its contents before attempting normal operation or maintenance of the Water Purification System.
Safety Information
Your RiOs-DI System should be operated according to the instructions in this manual. In particular, the hydraulic
and electrical specifications should be followed and met. It is important to use this equipment as specified in this
manual; using this equipment in a different manner may impair the safety precautions of the RiOs-DI System.
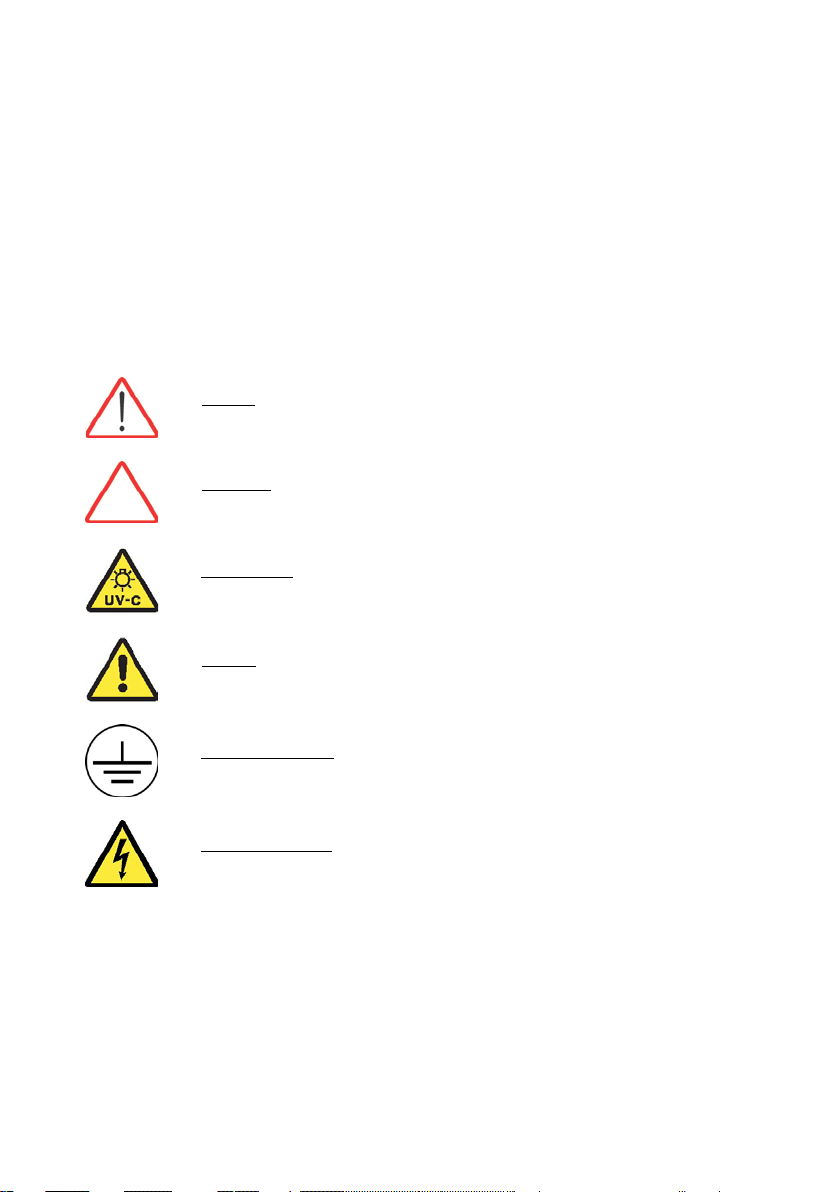
Symbol
What it means
This HAZARD symbol is used to refer to instructions in this manual that need to be done safely and
carefully.
This ATTENTION symbol is used to refer to instructions in this manual that need to be done
carefully.
this UV RADIATION sticker is used to refer to a position on the system cabinet or inside of it where
exposure to uv light is possible.
This DANGER sticker is used to refer to a position on the system cabinet or inside of it that
could be
hazardous.
this ELECTRICAL GROUND sticker is used to refer to a position on the system cabinet or inside
where an electrical ground connection is made.
this ELECTRICAL DANGER sticker is used to refer to a position on the system cabinet or inside
where an electrical danger could exist.

Introduction
2
Contacting Millipore® SAS
Internet
The Millipore SAS Internet Site can be used to find addresses, telephone/fax numbers and other information.
Internet Site Address: www.millipore.com
www.millipore.com/techservice
www.millipore.com/lab_water
Manufacturing Site
Millipore SAS
67120 Molsheim
FRANCE

3
Product Information
RiOs-DI System Overview
The RiOs-DI produces purified water from potable tap water by combining several purification technologies. The
Product Water is stored in an internal tank for routine laboratory applications, or it can be used to feed an
ultrapure water purification system such as a Milli-Q®.
DISPLAY
KEYPAD
The DISPLAY is used to
monitor the water quality
and system status.
The KEYPAD is used to
access operating functions
and system settings.
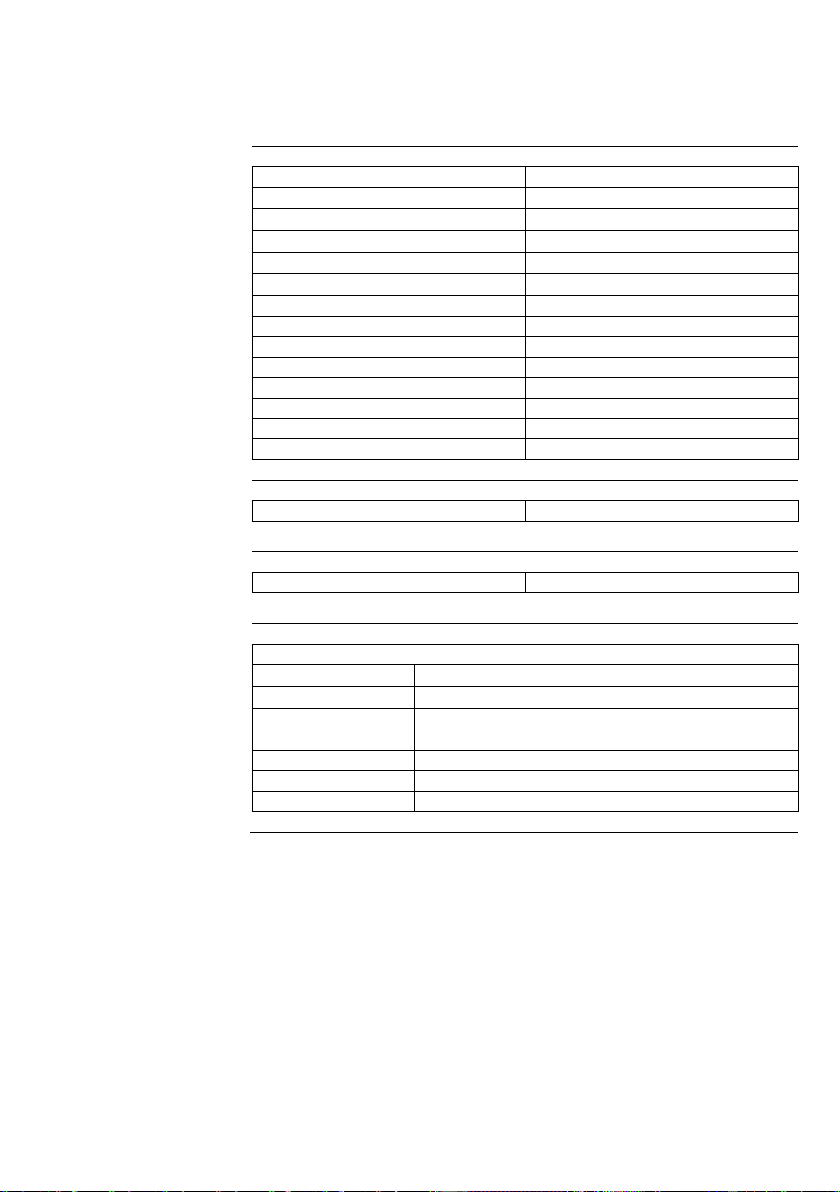
RiOs-DI Product Water Specifications
Water
Flowrate
Specifications
PRODUCT WATER FLOWRATE
REJECT WATER FLOWRATE
(5
°
C < T < 35
°
C)
> 2.4 LPH @ 15 °C (typical)
> 3.5 LPH @ 25 °C (typical)
30 LPH
Product
Water
Quality
Resistivity
Typically > 10 MΩ.cm @ 25 °C
Conductivity
Typically < 0.1 µS/cm @ 25 °C
Total Organic Carbon (TOC)
< 50 µg/L (ppb)
Silica
> 90 %

Product Information
4
Schematic of Main Components
5
1
2
3
4
6
7
8
9
10
1 Booster Pump 6 Check Valve and RO Permeate Conductivity Cell
2 Inlet Solenoid Valve 7 SmartPak RODI (Ion Exchange Polisher Cartridge)
3 SmartPak® RODI™ (Pretreatment and RO Cartridge) 8 Product Resistivity Cell
4 RO Reject Solenoid Valve 9 UV Lamp 254 nm (UV System)
5 RO Reject Capillary 10 6 Litre Tank
Operating principle
Potable tap water enters the SmartPak RODI through the Booster Pump. The SmartPak RODI (called ‘SmartPak’ for
the remainder of this manual) is an all-in-one twin-cartridge containing three water purification technologies.
The first cartridge combines Pretreatment media and a Reverse Osmosis (RO) membrane. The second cartridge
contains Ion Exchange resin. The SmartPak is a consumable device that needs to be periodically replaced during
the maintenance of the system.
Tap water is pretreated to protect the RO membrane from organic fouling and chlorine oxidation. The RO
membrane has 2 exiting streams. The RO water is sent to the Ion Exchange Polisher cartridge to deionize the
water. The ions, particles, organic molecules and bacteria rejected by the RO membrane are sent to the drain via
the Reject tubing.
The deionized water passes through the UV Lamp (UV System). The UV Lamp emits light at 254 nm. It is used to
kill bacteria. The UV Lamp is a consumable device that needs to be periodically replaced during the maintenance
of the system. Product Water is then generally stored for routine laboratory applications, or it can be used to feed
an ultrapure water purification system such as a Milli-Q.

Product Information
5
Technical Specifications
Dimensions
System Height, Width and Depth
Shipping Box
•
Height: 56 cm
•
Width: 42 cm
•
Depth: 64 cm
Weight
SYSTEM
RiOs-DI 3
RiOs-DI 3 UV
Operating Weight
16.8 kg
17.4 kg
Dry Weight
7.3 kg
7.8 kg
Shipping Weight
12.6 kg
13.1 kg
Noise Level
A RiOs
-DI System has a maximum noise level of 36 dB at a distance of 1 metre away.
Electrical
•
100 VAC ±10%, 50/60 Hz. 0.68 amp source, 2 amp T (Time Lag) fuse, Power = 80 VA
•
120 VAC ±10%, 50/60 Hz. 0.60 amp source, 2 amp T fuse, Power = 80 VA
•
230 VAC ±10%, 50/60 Hz. 0.37 amp source, 2 amp T fuse, Power = 80 VA
The source of electrical power should b
e within 2.5 metres of the
system. The source of electrical power must be earth grounded.

7
Pre Installation
Installation Requirements
Feedwater
Requirements
Type of Feedwater
Potable
Flowrate
≥40 LPH
Minimum Pressure
≥0.5 bar
Maximum Pressure
≤6 bar
Conductivity
< 2000 µS/cm
Temperature
5 to 35 °C
pH
4 - 10
Fouling Index
< 10
Iron
< 0.1 ppm as CaCO3
Aluminum
< 0.05 ppm as CaCO3
Manganese
< 0.05 ppm as CaCO3
Free Chlorine
< 1 ppm
Langelier Saturation Index
< +0.2
TOC
< 2000 ppb
Feedwater
Connection
Needed
Feedwater Piping Connection
1/2 inch Male GAZ, NPTM or BSPM
Reject Flow
Requirement
Drain Capacity
30 LPH
Environmental
Requirements
Indoor Use Only
Storage Temperature
5 °C < T < 40 °C
Operating Temperature
5 °C < T < 40 °C
Relative Humidity
Should not exceed 80% for temperatures below 31 °C
Should stay within 50% to 80% between 31 °C and 40 °C.
Altitude
< 3000 metres
Installation Category
II
Pollution Degree
2

Pre Installation
8
Optional Equipment You May Need
Wall Mounting
Bracket
The
Millipore SAS Catalogue Number for the Wall Mounting Bracket is WMBSMT001.
The mounting hardware for attaching the bracket to a wall is not included and must be
supplied.
Unpacking the RiOs™-DI −What’s Inside?
Open the RiOs
-DI System Shipping Box. Use the checklist included in the Accessories
Bag to make sure all items were shipped and are accounted for. It is highly suggested
to become familiar with the items that are shipped since these
will be used in the
Installation section of this manual.
Contact
Millipore SAS if an item is missing.

9
Installation
Preparation of the System
A
•
Open the front cover.
Locate the tie wrap used to hold the Booster Pump in place during
shipping (A).
B
•
Press on the tab of the tie wrap (B).
Remove and pull the tie wrap out.
C
•
Locate the protective foam found at the UV lamp cable.
Remove it (C).
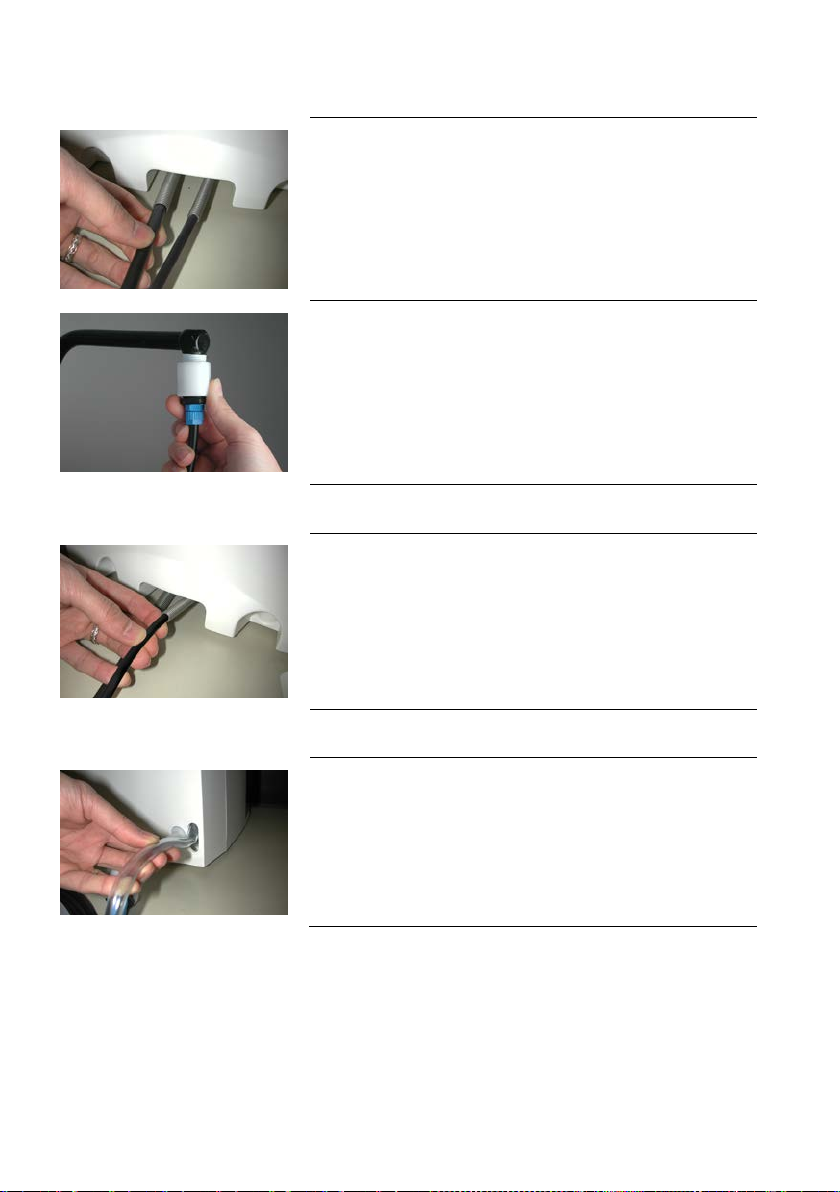
Connection of Tubing
A
•
Rotate the RiOs-DI so you can see the back of the system
(see photo A).
1. Feedwater tubing
2. Reject tubing
3. Overflow tubing
4. Tank outlet
Installation
10
Feedwater Tubing
B
•
Locate the Feedwater Tubing exiting from the bottom middle of the
system (B). A 1/2 inch Female GAZ fitting with a screen filter is
attached at the end of this tubing. Unroll it until the fitting reaches
the Feedwater source.
•
Apply white tape on the thread of the 1/2 inch Male GAZ valve or
fitting of the Feedwater source.
C
•
Connect the fitting to the valve (C).
Reject Tubing
D
•
Locate the Reject Tubing exiting from the bottom middle of the
system (D). Unroll it.
•
Secure the tubing into a sink or drain.
Overflow Tubing
E
•
Locate the Overflow Tubing exiting from the bottom right of the
system (E). Unroll it.
•
Secure the tubing into a sink or drain.

Installation
11
Tank Outlet Tubing (RiOs-DI only)
F
•
Locate the Tank Outlet Valve, the Tank Outlet Tubing and the
adaptor fitting in the Accessories Bag.
•
Install the Tank Outlet Valve and Tubing as shown
(F, G and H).
G
H
I
•
Open the Tank Outlet Valve (I). This allows the tank to be emptied of
any water in it. This is necessary when the SmartPak is flushed with
water after it is installed.
NOTE:
For RiOs-DI Clinical, use the Clinical kit provided with the system to direct feed analyser.
Installation
12
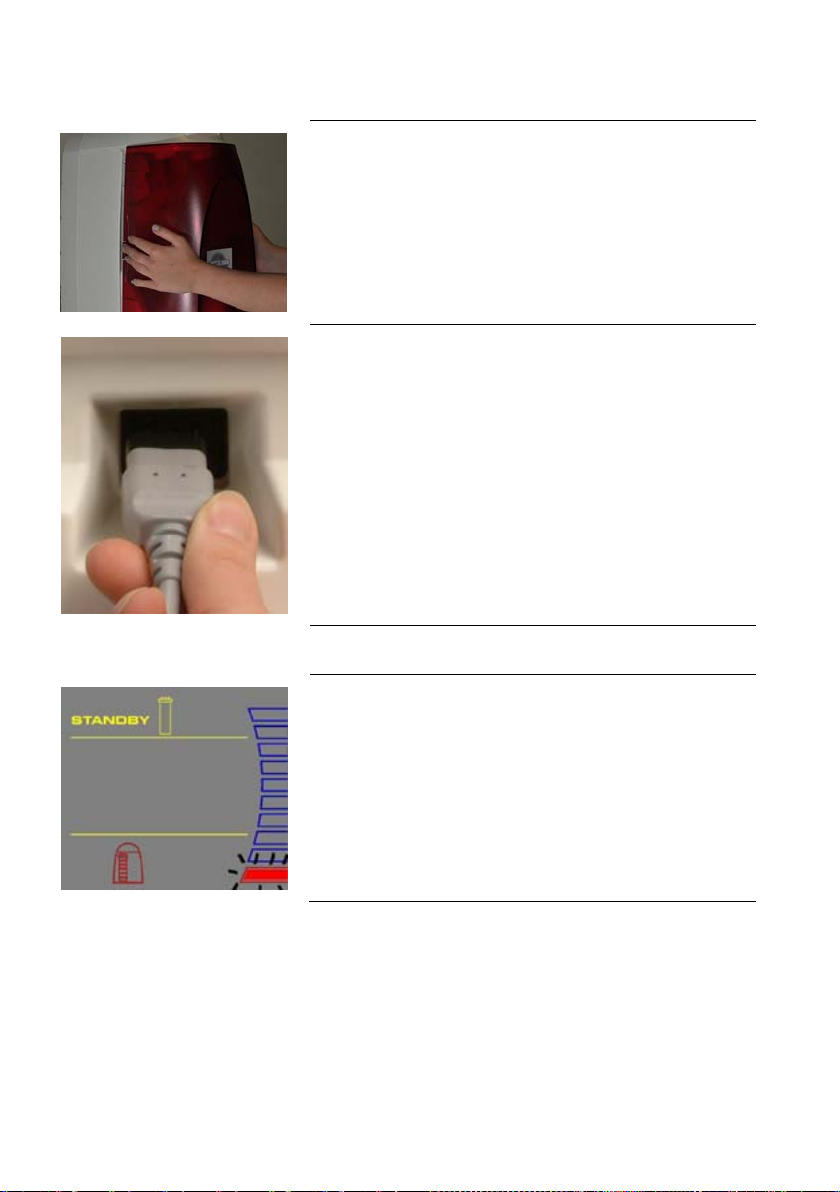
Connection of the Power Cord −Turning on the System Power
A
•
Open the front cover of the system (A).
This will allow the system to go into STANDBY mode once the
system is powered.
B
•
Plug the Power Cord into the system (B).
•
Plug the other end of the Power Cord into an appropriate source of
electrical power (i.e. wall outlet). The system is immediately
powered.
•
Open the Feedwater Supply Valve.
Start
-up Displays
C
•
Once the system is powered, the system will start to display
information about the software before going into STANDBY
mode (C).
Installation
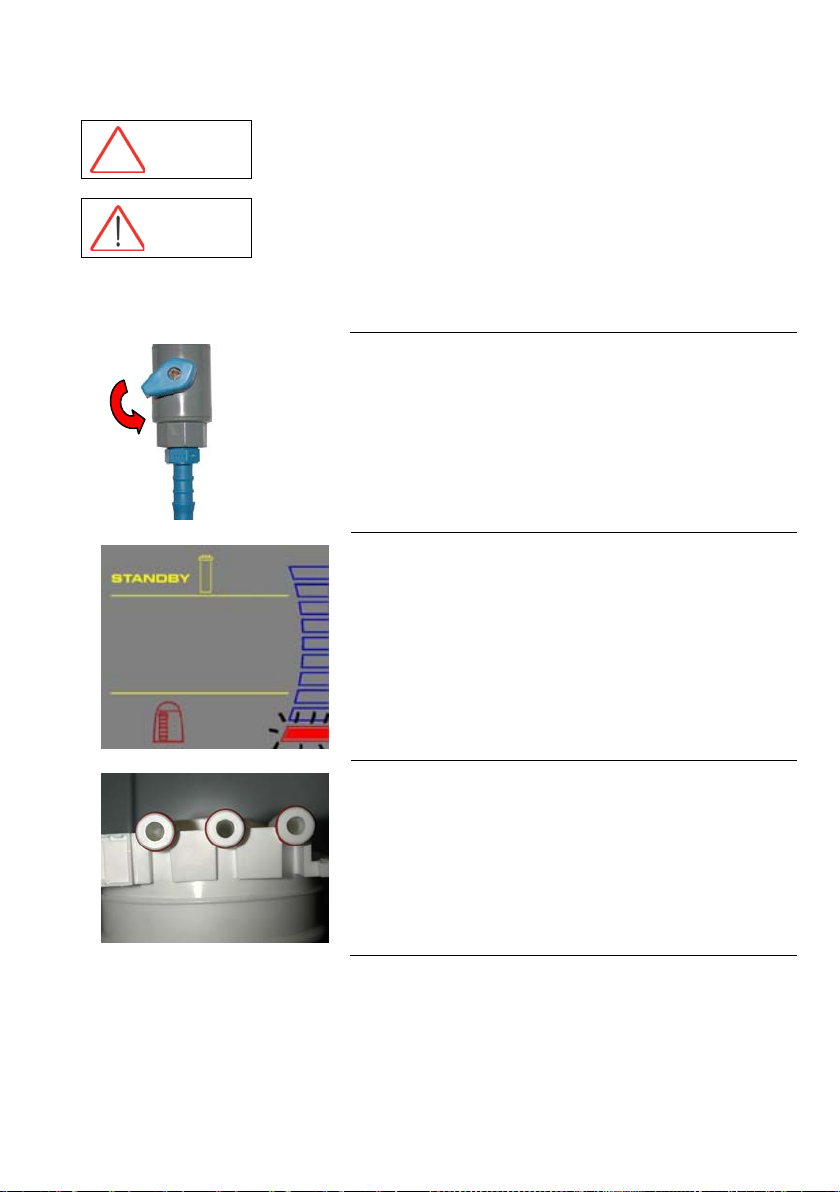
13
Installation of the SmartPak
ATTENTION Open the Tank Outlet Valve before installing a new SmartPak. This keeps the
tank from filling until the SmartPak is rinsed out (A).
HAZARD Do not touch the UV Lamp when replacing the SmartPak.
Installation
A
•
Make sure the front cover is opened.
B
•
STANDBY should be viewed on the Display (B).
•
Remove the SmartPak from its shipping box.
•
Remove the protective caps on the ports of the SmartPak and of the
system.
C
•
Locate the O-rings on the ports (C). Wet them with water. It is
preferable to wet them with ultrapure water.

Table of contents
Other Merck Water Filtration System manuals


Popular Water Filtration System manuals by other brands

Global Industrial
Global Industrial 641753 manual

Clean Water Systems
Clean Water Systems Fleck 9100 Installation & start?up guide

3M
3M Aqua-Pure AP430SS Installation and operating instructions

3M
3M 3MRO401 Installation and operating instructions for

NSF
NSF Kasco CertiSafe PM-100 Assembly & installation manual

Clack
Clack WS1 Series Installation, operation & maintenance manual


