Metaloterm UE User manual
Metaloterm®UE
Installation instructions / Montageanweisung / Mode de Montage / Istruzioni di montaggio / Montagehandleiding
Regulation
The system must be built to national regulations and to
the instructions of the manufacturer, as indicated in the
documentation. This documentation will be sent free on
application.
Installation
Check all parts for possible damage. During installation
you may ha e to use our special installing grease. This is
a ailable at your dealer. The installation of the chimney
starts at the appliance and then progresses upwards to
the terminal.
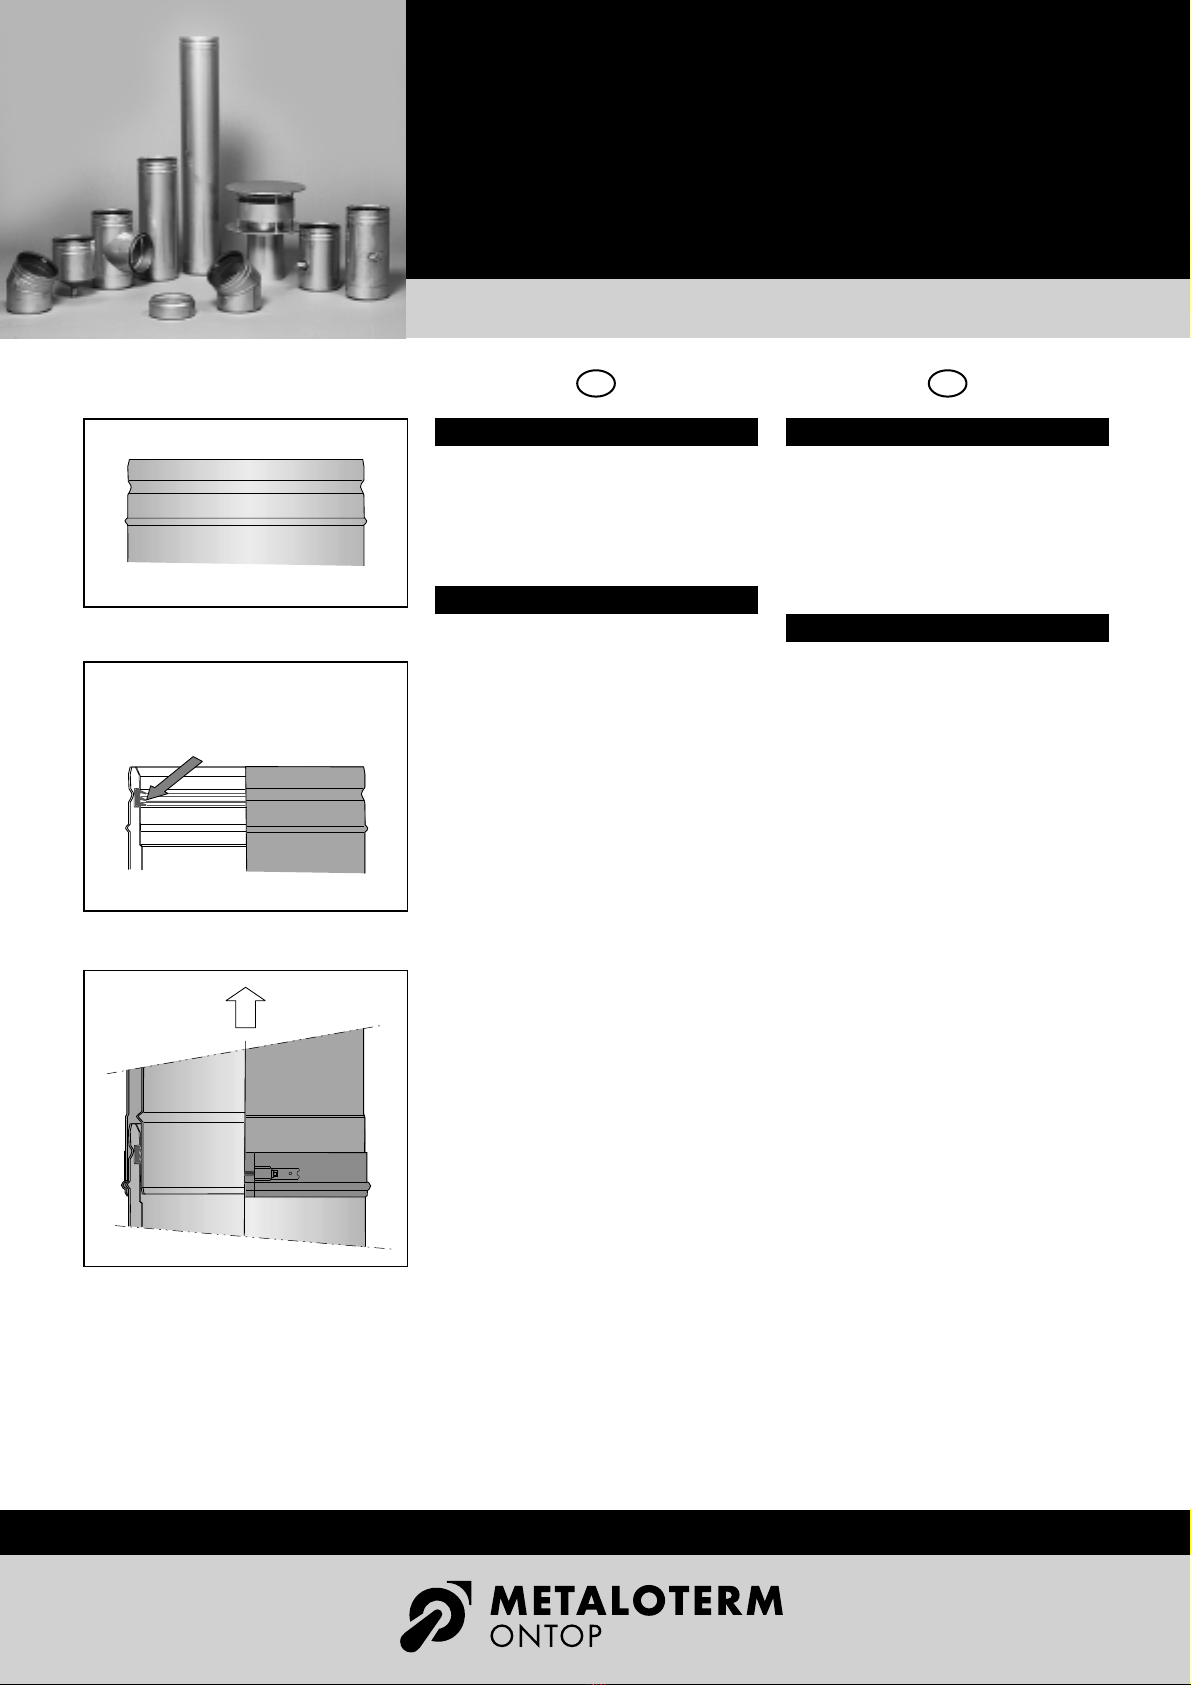
The top of each element can be recognized by the pro-
filed edge (fig. 1). Before connecting the elements it
may be necessary to put a thin coat of installing grease
on the sealing ring that is in the inner wall (fig. 2).
Connect two elements by pushing them ertically into
each other. For isual reasons it is ad isable to place the
welding seams at the rear if possible.
The sealing ring in the inner wall must remain in its po-
sition and must not be damaged during connection of
the elements. When the elements are connected then fix
the locking band, code UEKB (fig. 3).
Then install the next element as instructed abo e.
Baurecht
Das Schornsteinsystem muß entsprechend den nationa-
len Vorschriften des jeweiligen Landes und der
Montageanleitung des Herstellers installiert werden.
Diese Anleitung wird Ihnen auf Anfrage kostenlos zuge-
sandt.
Montage
Vor der Montage sind die Bauteile auf Vollständigkeit
und Beschädigungen zu überprüfen. Die Installation der
Anlage erfolgt on der Schornsteinsohle nach oben,
wobei der Außenmantel der Elemente immer “entwässe-
rend” zusammengesteckt wird.
An der Oberseite jedes Elementes befindet sich ein
Profil, über den der Außenmantel des nächsten
Elementes montiert wird (Fig. 1). Vor dem
Zusammenstecken kann eine dünne Lage Montagefett
(Zubehör) auf das Abdichtprofil am Ihnenrohr benützt
werden (Fig. 2).
Das zu montierende Element wird senkrecht auf-
gesteckt, wobei die Schweißnähte aus optischen
Grunden zur Rückseite auf der gleichen Längsachse
sitzen sollten.
Das Abdichtprofil am Ihnenrohr soll im Sicken bleiben,
und nicht beschädigt werden. Anschließend wird das
Klemmband(Kode UEKB) so über den Elementstoß ge-
legt, das die beiden umlaufenden Sicken des
Außenmantels eingreifen (Fig. 3).
Anschließend das nächste Element auf die gleiche Weise
installieren.
Total Solutions in Chimney Systems
GB D
Fig 3
Fig 2
Fig 1
Top/Oben /Supérieure/Alto/Bo en
Grease/
Montagefett/
Mastic/
Grasso/
Montage et

Prescriptions
Le conduit de fumées doit être monté selon les régle-
mentations nationales ainsi que les instructions du fa-
bricant, comme indiqué dans notre documentation.
Cette documentation est disponible gratuitement sur
demande.
Montage
A ant de commencer, il faut contrôler chaque élément
afin de détecter d’é entuels défauts.
Nous recommandons notre mastic de montage, qui est
fourni par otre distributeur.
L’installation du conduit commence par le bas et fini par
le haut.
Le côté supérieur peut être identifié par le profil (fig. 1).
Mettez un peu de mastic au ni eau du profil (fig. 2).
Montez deux éléments pour un emboîtement ertical.
Pour des raisons esthétiques nous recommandons de
placer les soudures alignées, ers l’arrière du conduit
(si possible).
Assurez- ous que les joints d’étanchéité de paroi inté-
rieure restent en place et ne sont pas abimés pendant le
montage. Après l’emboîtement des éléments, la bande
de sécurité, si besoinest, doit être fixée. Mettez la bande
en position exacte, où les profils se fixent dans ceux des
éléments (fig. 3). Après positionnement exact des élé-
ments, serrez la bande de sécurité a ec un tourne is.
Ensuite le prochain élément peut être monté de la
même façon.
Norme di riferimento
Camini, canne fumarie e canali da fumo de ono essere
conformati ed installati secondo le leggi e le Normati e
igenti.
Le istruzioni di montaggio degli elementi sono riportate
nel catalogo e sono fornite a corredo dei singoli elemen-
ti. Vi saranno inoltre in iate gratuitamente dietro Vs. ri-
chiesta.
Montaggio
Prima di iniziare il montaggio controllate gli elementi.
Installate gli elementi a partire dalla base del camino
erso l’alto, facendo attenzione alla corretta direzione
del flusso dei fumi indicata con una freccia sui singoli
elementi.
Procedete quindi all’assemblaggio degli elementi con-
giungendoli erticalmente e a endo cura che le guarni-
zione, inserita nella parte alta della parete interna, ri-
manga correttamente posizionata nella sua sede senza
subire danni e che la saldatura della parete esterna sia
orientata in posizione nascosta.
Le profilature alta e bassa della parete esterna sono rap-
presentate nella fig. 1.
Prima dell’assemblaggio si può lubrificare con un sottile
strato di grasso(accessorio) la parete interna a contatto
con la guarnizione (fig. 2).
Montate la fascia di sicurezza a compressione meccani-
ca (Art. UEKB). La coppia di scanalature della fascia di si-
curezza a compressione do rà inserirsi perfettamente
nella scanalatura dell’elemento inferiore e nella scanala-
tura dell’elemento superiore per garantire un corretto
assemblaggio (Fig. 3).
Installate gli elementi successi i seguendi le stesse pro-
cedure.
Voorschriften
Het rookgasaf oersysteem moet opgebouwd worden
olgens de nationale regelge ing en de oorschriften
an de fabrikant, zoals aangege en in de documentatie
en de installatie oorschriften. Deze documentatie wordt
op aan raag kosteloos toegezonden.
Montage
Controleer alle onderdelen op e entuele beschadigingen
oordat u met de montage begint.
De montage geschiedt anaf het toestel richting de uit-
monding.
De bo enkant an de schoorsteenonderdelen is herken-
baar aan het profiel (fig. 1).
Breng desgewenst montage et aan op de afdichtring
aan de binnenkant (fig. 2).
Koppel twee elementen door deze rechtstandig in elkaar
te schui en. Om optische redenen erdient het aanbe e-
ling om de naden aan de achterzijde en in elkaars er-
lengde te plaatsen.
Let op dat de afdichtring an de binnenwand niet er-
schuift of beschadigd wordt tijdens de montage.
Nadat de elementen op elkaar staan de klemband
(UEKB) aanbrengen. Plaats de klemband zodanig dat de
randen an de klemband in de randen an de elementen
allen (fig. 3). Positioneer de elementen juist ten opzich-
te an elkaar en draai de klemband aan.
Ver olgens het olgende element op dezelfde wijze kop-
pelen.
Internet: www.metaloterm.com
NLFR I
Ontop Abgastechni GmbH
Postfach 1340, 51657 Wiehl
Albert-Einstein-Straße 8, 51674 Wiehl
Telefon (0 22 61) 7 08 –0
Fax (0 22 61) 7 08 90 / 7 08 95
E-mail: info.de@metaloterm.com
Metaloterm France
ZAC du Mandinet
18 Rue des Campanules, 77185 Lognes
Téléphone: 01 64 62 12 30
Fax: 01 64 62 11 08
E-mail: info.fr@metaloterm.com
Ontop B.V.
Postbus 135, 4330 AC Middelburg
Oude Veerseweg 23, 4332 SH Middelburg
Telefoon: +31 (0)118 689 900
Fax: +31 (0)118 689 999
E-mail: info.nl@metaloterm.com
10.02.20M
G.B.D. s.r.l.
Canne fumarie Metaloterm Telefono +39 031-524441
Via al Piano, 41 Fax +39 031-523332
Popular Ventilation Hood manuals by other brands

Galvamet
Galvamet Touch Installation, operating and maintenance instructions

ZUHNE
ZUHNE Ventus 30 Installation and use manual

Salda
Salda RIS 2500PE EKO 3.0 Technical manual

Smeg
Smeg P52/2 Installation and operating instructions

GUTMANN
GUTMANN Futura 01 ML Operating instruction

Dometic
Dometic GY11 Installation and operating manual


