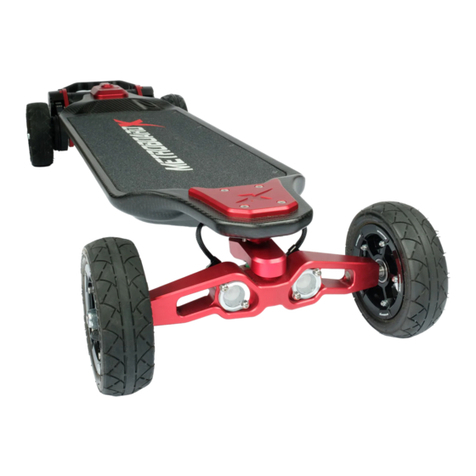
Metroboard X.o User manual

X.o User Guide
READ BEFORE YOU RIDE
HP1 and HR1 Controller

First Things First
Congratulations on your new
Metroboard X.o!
From all of us at Metroboard, thank you!
If you have questions or concerns you
can reach us at 360-851-9586 or
(note the hyphen)
Please read this guide while you charge.

Charge!
Plug the charger into the wall and then insert the 3-pin
connector into the charge port on the rear top plate of
your Metroboard. The charger’s LED light will turn red
while charging and the charger’s internal cooling fan may
turn on.
When the light turns green, the board is fully charged.
Also be sure to charge your remote! Plug the micro-USB
cord into the remote and plug the other end into any USB
power source. Always charge your remote when you
charge your board. That way, you don’t have to remember
when the last time you charged your remote was. If you’re
wondering, the remote has enough power for 3 or 4 rides.
But don’t gamble.
When the remote power is very low it will vibrate every
few seconds. When that happens, stop and charge your
remote immediately before you lose connection. In a
pinch you can charge the remote from a pocket power
source while riding, but only do so in an emergency.
Battery Tips
Charge time from a drained battery to full is about 3
hours. Your board is shipped with the battery at ~50%
charge, so you should be ready to ride in about an hour.
60-70% is also the optimal charge level to store your
board if you don’t plan to ride for more than a week.
For care of your battery, let it rest for ~20-30 minutes af-
ter you ride before putting it back on the charger. This will
give the individual cells in the pack a chance to balance
out and help ensure a full charge and a long-lasting bat-
tery. Additionally, leaving the board on the charger for an-
other 15 minutes after the light turns green will also help
ensure all the cells are balanced and at maximum capac-
ity. There is no harm in leaving the board on the charger
for longer, but we don’t recommend leaving it plugged in
all the time.

Safety Gear
Everybody falls.
It is better to crack a helmet than your skull.
Always wear a helmet.
We strongly encourage a full-face helmet.
Gloves are also highly recommended because shredded palms
are just the worst.
Knee and elbow pads are also advised.
Armored jackets and hoodies are a good idea.
Dress for the slide, not for the ride.
Helmet.
Gloves.
Knee & elbow pads.
Slide protection.
Study and practice how to fall without injury. Practice in the
grass at your local park. Do not try to catch yourself with your
arms extended. At speeds under 18mph it is possible to tuck-
and-roll. At speeds beyond that, you should be prepared to
slide.
Always ride within your ability.

Using the Remote Control
Remote Pairing Procedure
The Metroboard X.o ships with a custom 2.4 Ghz Flipsky VX1
remote as shown in the illustration below.
If your remote becomes un-paired, the process for pairing your
remote is simple:
1) Turn off both the remote and the Metroboard.
2) Power on the remote by pressing the power button once.
3) Now press and hold BOTH BUTTONS on the remote for 3
seconds or until the red connection light starts to ash quickly
signaling the remote has entered pairing mode.
4) Turn on the Metroboard.
The Metroboard will pair with the remote instantly.
Accelerate/Brake & Reverse
Remote Connection
Skateboard Battery Indicator
(Each LED = 25%)
Remote Battery Indicator
(Remote will vibrate when low)
Power Button
(Press and hold for pairing)
Toggle Lights On/Off
& Cycle 3 Brightness Modes

Inspection
Always inspect your board before riding. Here are some things
to check:
Axle nuts should be tight but not overly tight to keep the
wheels from free-spinning. Tighten each axle nut until it stops
and then back off ~1/6 turn to give the wheel the smallest de-
tectable bit of “slop” (or wiggle).
Check your belts and pulleys often for small rocks or other
debris as these can cause uneven and early wear. If you hear a
“tick-tick-tick” sound as you ride, check your belts for tiny peb-
bles. A small hex key works well to pluck tiny rocks wedged in
pulleys and belts.
Check for loose hardware screws. If you have screws which
keep backing out due to vibration, we recommend adding a
drop of Loctite Threadlocker Blue 242.
Always test your remote connectivity as part of your pre-ride
inspection. Use the handle on the Metroboard to lift the rear
wheels up off the ground and test the remote by throttling the
thumb-wheel gently all the way forward, and braking/reversing
by pulling all the way back.
Recommended Tools
Lid Enclosure Screws: 2.5mm hex
Axle Nuts: 11/16 socket
Kingpin Nuts: 9/16 socket
Motor Mounts: 5/16 socket
photo credit: Marvin Elliott

Your First Time
An empty parking lot is the perfect place to practice and ne-
tune your trucks. Bring your skate tool along on the rst few
rides to make truck adjustments while you’re still getting a feel
for the board.
Powering On
We recommend turning on the remote rst, and then powering
on the board.
1. Press the power button on the remote
2. Press the power button on the rear top plate of the
Metroboard
The board and remote should link automatically. If the remote
does not connect immediately see the Remote pairing proce-
dure in this guide.
Test the remote
Always test your remote connectivity as part of your pre-ride
inspection. Use the handle on the Metroboard to lift the rear
wheels up off the ground...
Accelerating
With the drive wheels off the ground, test the remote by throt-
tling the thumb-wheel gently forward.
Braking
Pull back on the thumb-wheel to brake. Once the board has
stopped, simply let go of the thumb-wheel.
Reverse
If you keep holding the thumb-wheel back after you come to
a stop, the board will start to go in reverse. Push the thumb-
wheel forward to brake when riding in reverse.
Lights
The left remote button toggles the lights on and off and cycles
brightness through 3 modes. The sequence is: brightest, off,
medium, off, low, off.

New Rider Tips
Your feet should be parallel to each other with your toes point-
ed slightly forward on the deck.
Prepare for acceleration by bending your front leg slightly and
bracing with your back leg.
Prepare your body for braking by bracing your front leg and
bending your back leg a little.
Now, practice accelerating, braking, and turning heel-side and
toe-side. The faster you go, the easier it is to turn.
Always keep one foot on the board when stopped. This will
keep you from accidentally bumping the thumb-wheel and
sending your board into trafc or a pedestrian. It’s a good habit
to start now.
Never stand on the board or let anyone else stand on the board
while someone else is holding the remote.
Put the lanyard around your wrist while riding.
Practice Foot Braking. This maneuver can save your life in a
pinch.
Ride within your capabilities.
photo credit: Khoung Lam

Adjusting Your Trucks
Double-Kingpin (DKP) Trucks have more going on than tradi-
tional trucks, but they offer a more ne-tunable experience.
The easiest way to think about your trucks is that you want
the front road-side pair (F3-F4 shown below) loosest of all to
facilitate turning, and the rear board-side pair (R1-R2) tightest
of all to prevent speed wobbles. The other two pair should be
somewhere in the middle according to your preference. This
illustration shows the trucks in the wheels-up position and
depicts all of the bushing hardware in installation order for a
medium-weight rider.
If the board feels overall too loose, start by tightening each nut
1/3 turn. If the board seems too hard to turn, start by loosening
the front trucks 1/3 turn at a time.
Take care not to overcompress your bushings. If they’re bulg-
ing in the middle, back off. There shouldn’t be more than 3
threads of the kingpin exposed. If the board still feels too
loose, you need harder bushings.
Small Flat Washer
Kingpin Nut
Small Flat Washer
Short Street Barrel
Street Fat Cone
Large Flat Washer
Short Street Barrel
Street Barrel
Large Cup Washer
Kingpin Nut
(Rounded side up)
(Rounded side down)
(Rounded side down)
(Wide side down)
F4
F3
F2
F1
Small Flat Washer
Kingpin Nut
Large Cup Washer
Street Barrel
(Rounded side up)
Short Street Barrel
(Rounded side down)
Short Street Barrel
(Rounded side down)
Street Chubby
(Wide side down)
Small Flat Washer
Large Flat Washer
Kingpin Nut
R4
R3
R2
R1
ROAD SIDE
DECK SIDE
FRONT REAR
WEIGHT CLASSES:
Light: <160 LBS / 72 KG
Medium*: 160-200 LBS / 72-90 KG
Heavy: >200 LBS / 90 KG
*Illustration depicts Medium
Riptide Bushing Installation Guide
Questions?
Email [email protected]
or Call 360-726-3785
Shop our store at
www.metro-board.com
87A (white)
90A (green)
93A (burgundy)
Light
Medium*
Heavy
90A (green)
93A (burgundy)
96A (grey)
90A (green)
93A (burgundy)
96A (grey)
Light
Medium*
Heavy
90A (green)
93A (burgundy)
96A (grey)

Changing Wheels
The following steps describe the wheel swap procedure. If you
prefer to watch and learn, we’ve got a video you can follow
along with here: https://metro-board.com/pages/wheel-swap
Step 1
Remove the rear handle from the
Metroboard X, Remove the belt covers
from each side, & loosen all 4 motor
mount bolts on each side.
Step 2
Insert the M5 35mm screw into the
back of the motor plate. Thread by
hand until it stops. Use a tool to turn
the screw a few times to compress the
spring and put slack on the belt.
Step 3
Remove the axle nut and remove the
wheel, pulley, and belt. A speed ring
should remain innermost on the axle.
Step 4
Put on the new pulley, belt, and wheel.
When switching to street wheels you
will need to add a Wheel Spacer lastly
before putting on the nut. Tighten the
axle nut until it stops and then back off
1/2 turn. Do not overtighten!
Step 5
Remove the M5 screw. Give the wheel
a few spins both directions to allow the
perfect tension to settle. Re-tighten all
4 motor mount bolts and re-install the
belt cover. Repeat Steps 2-5 for the oth-
er side and then re-attach the handle.
Step 6
Replace your front wheels, taking care
to include a Wheel Spacer lastly on
each side when changing to Street
Wheels. Keep your wheel spacers in a
safe place when not in use.

Do’s & Don’ts
Know the law. Research and obey local trafc, sidewalk, and
trail rules, ordinances and laws in your area.
Be courteous and give the right of way to pedestrians.
Do not ride under the inuence of drugs or alcohol. You can
still get a DUI.
Avoid water and do not ride in wet conditions. Your
Metroboard is sealed against the elements, but riding in the
rain or on wet roads is especially dangerous due to slick roads
and poor visibility. If you get caught in a down-pour, seek shel-
ter and try to wait it out.
Do regular inspections and maintenance to check nuts and
hardware, bearings, bushings, pivot cups, and look for debris
caught in belts and pulleys.
Creeky/Squeeky bushings and pivot cups can be remedied
with graphite powder, wax or soap shavings. Do not use pe-
troleum-based lubricants on your bushings (including most
canned spray types) as these will destroy your bushings.
Keep your AT wheels aired up. More pressure means more
range, but at a cost to comfort. If you have the range to spare,
try a little less than max PSI for a softer ride. We set the pre-
sure are 25PSI at the factory. 36PSI is the recommendation by
the manufacturer for our 155mm and 200mm wheels.
Rotate your wheels occasionally to keep the wear even. (i.e.
Put the drive wheels on the front and vice versa.)
Do not store your Metroboard where temperatures will swing
wildly or get excessively cold (below 50º F) or hot (above 90º
F). This is not good for the battery.
photo credit: Ray Belden

FCC Statement
WARNING:
Changes or modications not expressly approved by the party
responsible for compliance void the users authority to operate
the equipment.
This equipment has been tested and found to comply with the
limits for a Class B digital device pursuant to part 15 of the
FCC rules. These limits are designed to provide reasonable
protection against harmful interference in a residential instal-
lation. This equipment generates, uses, and can radiate radio
frequency energy and, if not installed and used in accordance
with the instructions, may cause harmful interference to radio
communications. However there is not guarantee that interfer-
ence will not occur in a particular installation.
If this equipment does cause harmful interference to radio or
television reception, which can be determined by turning the
equipment off and on, the user is encouraged to try to correct
the interference by one or more of the following measures:
Re-orient the receiving antenna
Increase the separation between the equipment and receiv-
er
Connect equipment to an outlet on a circuit different from
that which the receiver is connected
Consult a dealer or an experienced radio TV technician for
help.
Wireless Electrical Parameters:
RF Range: 2408-2475MHZ
RF Power: >20dBm(EU
Input Power: 1S3.7V *1000mAh
HP1: 2AZE4-HP1
HR1: 2AZ4-HR1

WARRANTY
We offer a 6 month warranty, which can be extended up to 3
years through Extend, available at purchase or any time during
the initial 6 months. We also offer one free maintenance (ship-
ping borne by customer) and fair prices on any additional re-
pairs or spare part needs.
Spare Electric Skateboard Parts
We stock a variety of spare Electric Skateboard Parts includ-
ing wheels, timing belts, chargers, remotes, and every other
part of the electric skateboard! We honestly don’t sell a lot of
spare parts due to the super high quality of our components
which are designed to last a long time (typically 2-3 years)!
Nonetheless, we’ll have them ready for you to make sure your
Metroboard Electric Skateboard is always up and running!
This manual suits for next models
2
Table of contents
Other Metroboard Scooter manuals
