05
Conditions Appropriate/intended use Improper use
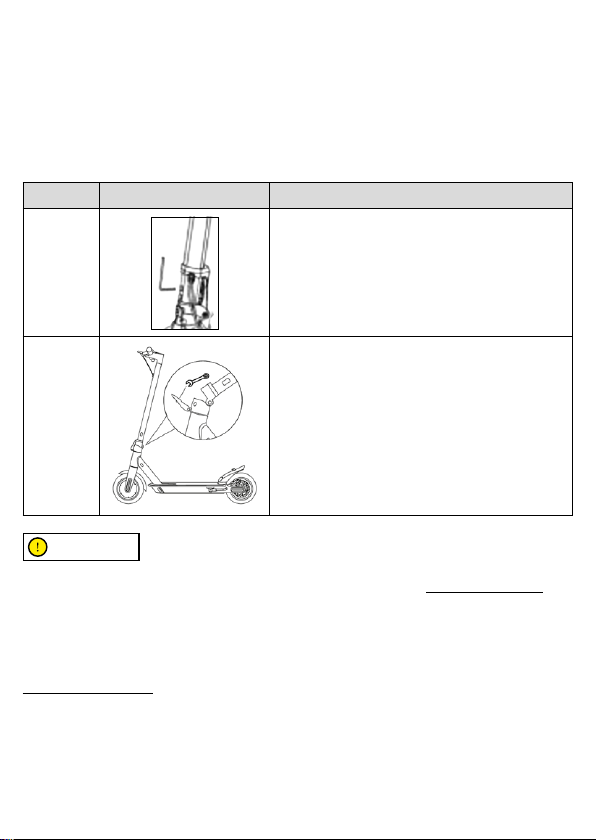
Stationary
The person riding the item must be able to eas-
ily place both feet on the ground while holding
the handlebars at the correct height.
Not being able to keep the item stationary
and balanced.
Sitting on the item while it is running or
stationary.
Riding under normal
conditions
No objects hanging from handlebars. Objects hanging from handlebars result in
instability and may impede manoeuvring.
Riding with both hands on handlebars. One-handed or hand-free riding.
Not using devices such as phones, smartwatch-
es, music players, or headphones.
Using devices such as phones, smart-
watches, music players, or headphones.
Riding with both feet on the footrest comfortably
and safely.
Riding with one or both feet outside the
footrest.
It is prohibited to place or amass weight
on the rear mudguard.
Riding with helmet and protective equipment. Riding without helmet and protective
equipment.
Riding on easily accessible, smooth and com-
pactroads,avoidingareaswithintensetrafcor
overcrowded areas:
e.g. dedicated cycle path, smooth paved
surfaces.
Riding on motorways, long-distance
roads.
Riding on busy roads.
Riding on pavements.
Riding in overcrowded areas.
Riding on very rough roads.
Riding near: ravines, escarpments,
harbours, sea, lakes or rivers.
Failure to comply with regulations and the
highway code.
Complying with local regulations and the
highway code.
Failure to comply with regulations and the
highway code.
Looking ahead and watching out for obstacles,
vehicles or nearby pedestrians.
Being distracted while driving.
Changing direction, making sure to be seen,
moderating speed.
Changing direction abruptly at high
speed without making sure that you have
been seen.
Anticipating the route and moderating speed
while observing the highway code and those that
are the most vulnerable.
Braking and cornering at the same time
makes the vehicle unstable.
Using direction indicators, if included on the
item.
Not using direction indicators.
Slowing down when pedestrians are present. Accelerating or maintaining a constant
speed when pedestrians are present.
Using pedestrian mode in pedestrian areas
(6 km/h).
Riding without using pedestrian mode in
pedestrian areas (6 km/h).
Warning others of your presence by using
the bell.
Not warning others of your presence by
using the bell.
Uneven road condi-
tions: speed bumps/
steps/rough road
surfaces
Riding at moderate speed. Riding at high-speed.
Bend knees slightly for better shock absorption
when traversing uneven surfaces.
Accelerating over bumps or ditches, going
down steps, jumping over obstacles,
climbing pavements, riding harshly.