MEWOI K3 User manual

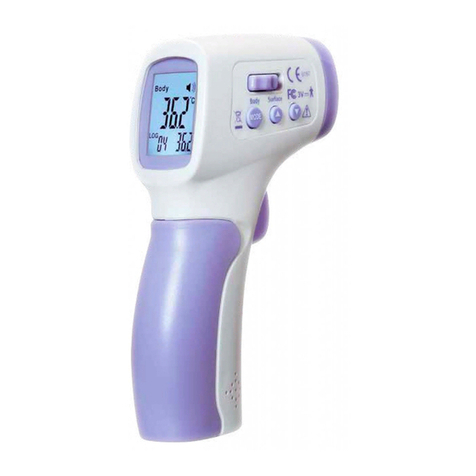
Infrared Thermometer
MEWOI-K3
User Manual
www.mewoi.com


CONTENT
I. Brief Introduction....................................................................... 1
II. Main Features ........................................................................... 2
III. Technical Specification.............................................................. 2
IV. Status description...................................................................... 4
V. Operating Instructions............................................................... 5
VI. Precautions, Warnings and Tips ............................................... 6
VII. Accessories............................................................................... 7

-1-
I. Brief Introduction
1, Tripod Fixing Hole 2, USB Port
3, Power Switch 4, Temperature Sensor
5, Distance Sensor 6, LCD Screen 7, Hanging Hole
8, Double Sided Adhesive Area 9, Sticker

-2-
II. Main Features
1. Non-contact, no need to hold, avoid cross infection.
2. New chip is adopted, the sensing time is faster (0.1s); the
passing rate per minute is greatly improved (50 people / min).
3. High temperature measurement accuracy, accuracy tolerance: ±
0.2 (34 ~ 45 ℃)
4. It has detection failure light prompt and abnormal temperature
light prompt early warning.
5. It can be connected to USB power supply, power bank and
self-contained lithium battery.
6. High definition display, 5 meters visual distance.
7. Intelligent infrared forehead thermometer, no need to hold, can
hang / double-sided adhesive tape / bracket fixation, etc.
8. The price makes up for the price vacuum of hand-held frontal
temperature gun and high-cost thermal imaging camera.
9. It can be used in different occasions. Office / subway / family /
supermarket / store / community / entrance, etc.
III. Technical Specification
Product Name
Infrared Thermometer
Measure Range
0ºC to 50ºC
Measuring Method
Non-Contact
Accuracy
±0.2ºC(34~45℃)

-3-
Resolution
±0.1ºC
Response Time
0.5S
Measure Distance
5-10cm
Standby
Non-working time 5S standby, red dot
dynamic cycle
Screen
Digital Display
Input
USB DC 5V 1500mA
Power Supply
USB Charging/ Battery (Support USB
PowerAdapter or Power Bank)
Unit
ºC/ºF
Fever Automatic Sound
Alarm
Flashing+"Di Di" Sound Alarm
Size
170*150*140mm
Weight
350g
Counting function
999times
Storage Temperature
-20ºC-55ºC,Humidity: ≤85%
Working Temperature
10ºC-10ºC,Humidity: ≤85%

-4-
IV. Status description
1. Standby: as shown in Figure 1, the red dot in the lower right
corner of the display lights up in turn.
2. Insufficient power: as shown in Figure 2, the crossbar lights in
the middle of the display.
3. Normal temperature: as shown in Figure 3, the display shows
the temperature value, and the warning lights on both sides flash
green.
Figure 1 Figure 2 Figure 3
4. Temperature abnormality: as shown in Figure 4, the display
shows the temperature value, and the alarm lights on both sides
flash red.
Figure 4
5.Out of range: as shown in Figure 5, the display shows Lo
indicating that the range exceeds the minimum temperature range,
as shown in Figure 6, the display shows Hi indicating that the
range exceeds the maximum temperature range.
Figure 5 Figure 6

-5-
V. Operating Instructions
1. Temperature measurement: the measured object is facing the
temperature measuring head as shown in Figure 7, and the
temperature data can be measured by approaching it and hearing
a beep.
Figure 7
2. Mode switching: there is a small hole on the back of the device
as shown in Figure 8. Use a 3mm diameter screwdriver to insert
the hole and press the button.
(1) Click to switch the temperature measurement unit, and C or F
will be displayed as shown in Figure 9 and figure 10. C is Celsius
and F is Fahrenheit.
(2) Press and hold for 3 seconds to switch the temperature
measurement mode. At the same time, the display of sur or BOD
or cou is as shown in Figure 11, 12 and 13. Sur is the surface
mode, BOD is the face mode, and cou is the counting mode.
Figure8 Figure9 Figure10 Figure11 Figure12 Figure13

-6-
3. Battery installation and replacement:
(1) Remove the specification label, loosen the back three screws,
(2) open the back cover and replace the 18650 lithium battery.
4. Schematic diagram of installation: suspension, double-sided
adhesive tape, support fixation
1,Hang to wall 2, Fixed with tripod 3, Sponge glue paste
VI. Precautions, Warnings and Tips
1. The user is responsible for ensuring the electromagnetic
compatibility environment of the equipment, so that the
equipment can work normally.
2. It is recommended to evaluate the electromagnetic
environment before using the equipment.

-7-
3. When changing the use environment, the equipment shall
be left standing for more than 30 minutes.
4. Please put your forehead on the thermometer.
5. It is recommended not to use it outdoors or under strong
light.
6. The equipment shall be far away from air conditioning port,
fan and other equipment during use.
7. Please use qualified and safety certified batteries. It is
possible to use unqualified or non-rechargeable batteries May
cause fire or explosion.
8. If the battery does not work after installation, please insert
the charging line to charge and activate it before normal use.
VII. Accessories
Host
1pc
USB
1pc
Screws
1set
User Manual
1set


Your Testing Specialist
Table of contents
