Mezzo CHT-2100 User manual
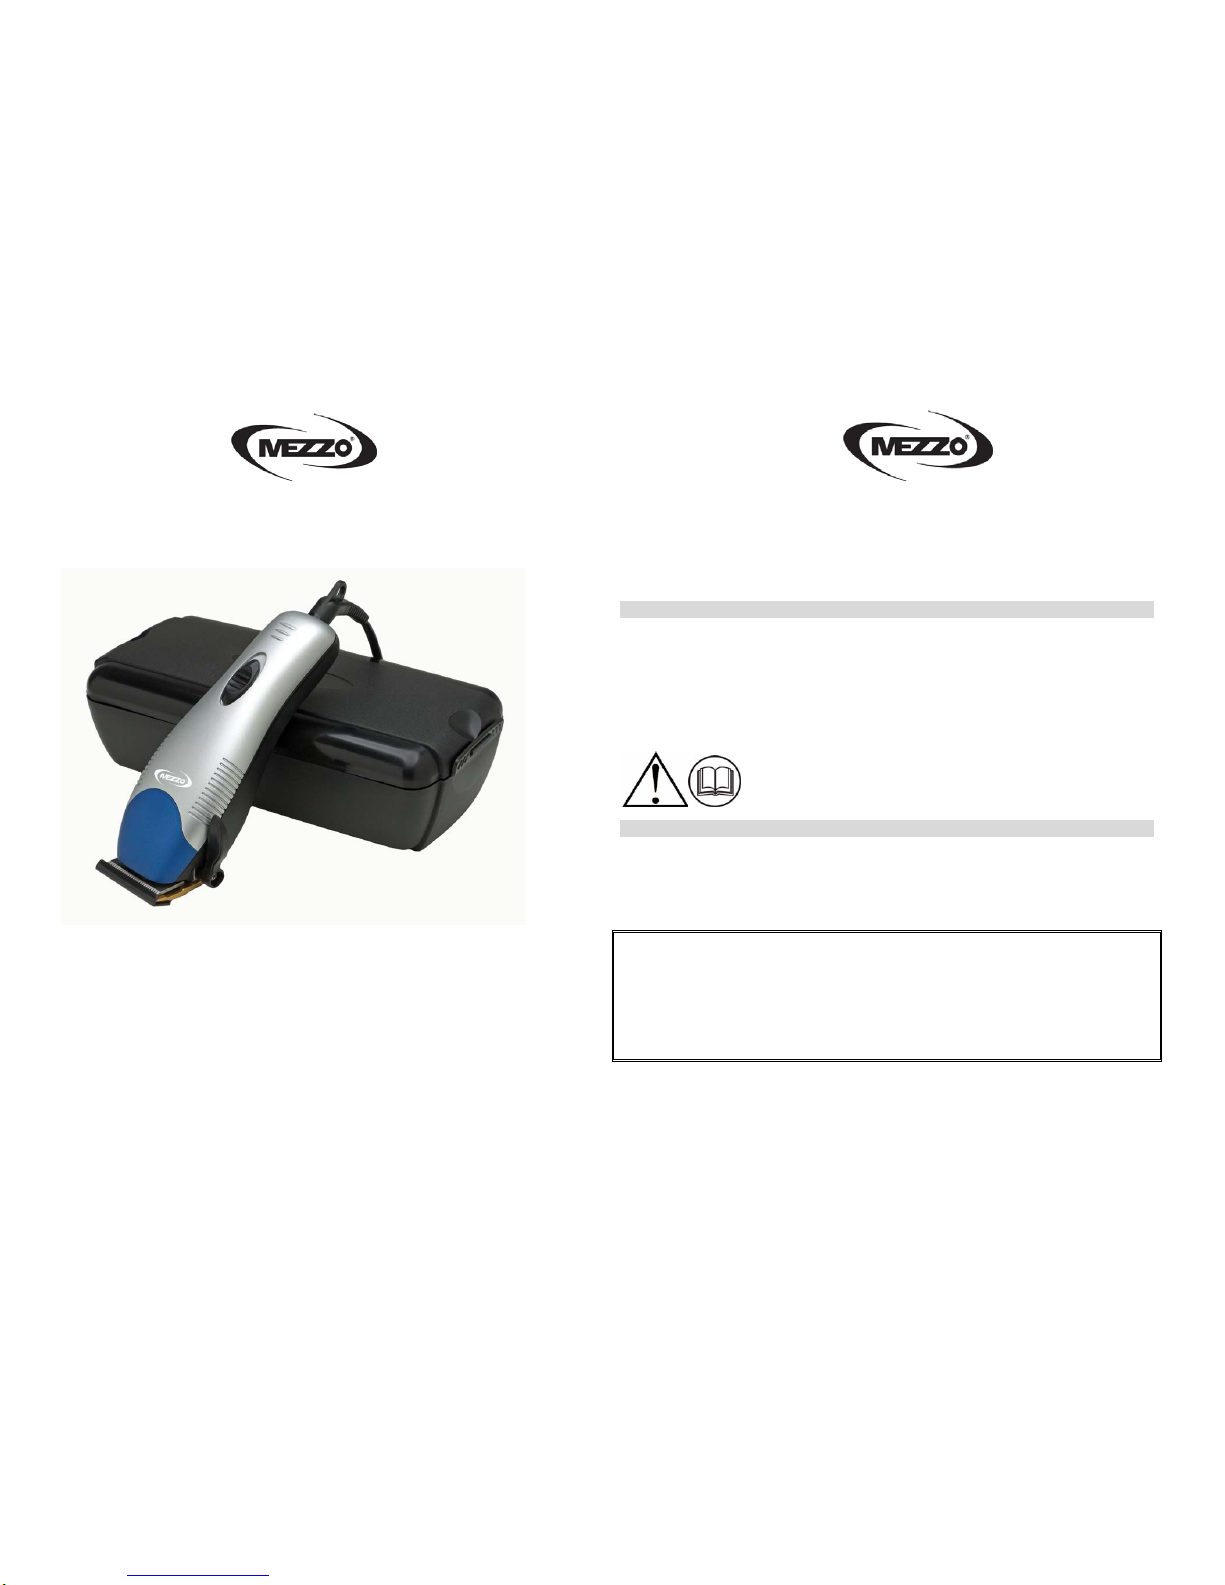
USERS MANUAL Hair Trimmer Set
Model: CHT-2100 01/06
Hair Trimmer Set
Thank you for choosing to purchase one of our MEZZO products, we appreciate your business and believe that
we have provided you with a product that is both reliable and value for money. We encourage you and your
friends to choose from our range of MEZZO products again in future.
PACKAGE CONTENTS
1 Hair Clipper
1 Comb
1 Brush
1 Oil Bottle
4 Cutting Combs
1 Instruction manual
Confirm all parts before disposing of carton.
SAFETY INSTRUCTIONS
Carefully read this manual before using this appliance. Make sure that you know how the appliance functions and
how to operate it. Maintain the appliance in accordance with the instructions to ensure that it functions properly.
Keep this manual with the appliance. If the appliance is to be used by a third party, this instruction manual must
be supplied with it. The safety instructions, by themselves, do not eliminate danger completely, and proper
accident prevention measures must always be used.
For any customer query or in the unlikely event of a product failure, please phone or
email the helpline contact details below for assistance.
DO NOT RETURN THE PRODUCT TO THE RETAILER.
Toll Free Help line: 1300 366 144
1
BEFORE INITIAL USE
Remove all packaging. Carefully wipe the outer case with a soft damp cloth and dry it afterwards with a dry
towel. Do not immerse the appliance in water or any other liquid. Wash the comb accessories in warm soapy
water to remove any impurities that may have accumulated. Check for any damage that may have occurred
during transit. Do not use if the appliance is damaged in any way or if the supply cord is damaged. Immediately
contact the service details located at the beginning of this instruction manual.
PRE USE TEST
Fully unwind the supply cord and connect to a suitable 230-240 V ~ AC 50Hz power supply.
Switch the clippers on briefly to check operation of the cutting blades. The blades are oiled and set at factory
level before shipment and so should not need any adjustment. If they appear to need adjustment refer to
adjustment operation latter in manual. Once you are happy with the operation of the cutting blades you may
commence operation.
BLADE ALIGNMENT
The blades are factory set before leaving the factory.
The blades must be realigned after removal for cleaning.
To adjust blades, set the adjustment lever in the uppermost position (short cut position). Loosen the two securing
screws. Line up the upper and lower teeth point for point. The end of the top blade teeth should be approximately
1.2mm back from the top of the bottom blade teeth. Tighten the screws after aligning the blades.
OILING
To maintain your clipper in peak condition, the blades should be oiled every few haircuts. Place 2-3 drops onto
the blades and switch on for a brief period. Wipe excess oil with a cloth. Use the oil supplied.
Do not use hair oil, grease, oil mixed with kerosene or any solvent. The solvent will evaporate and leave thick
oil, which will put a load on the motor slowing down the blade motion.
If replacement oil is needed, the oil to be used is White Mineral Oil or similar. This should be available from you
local hardware store.
2
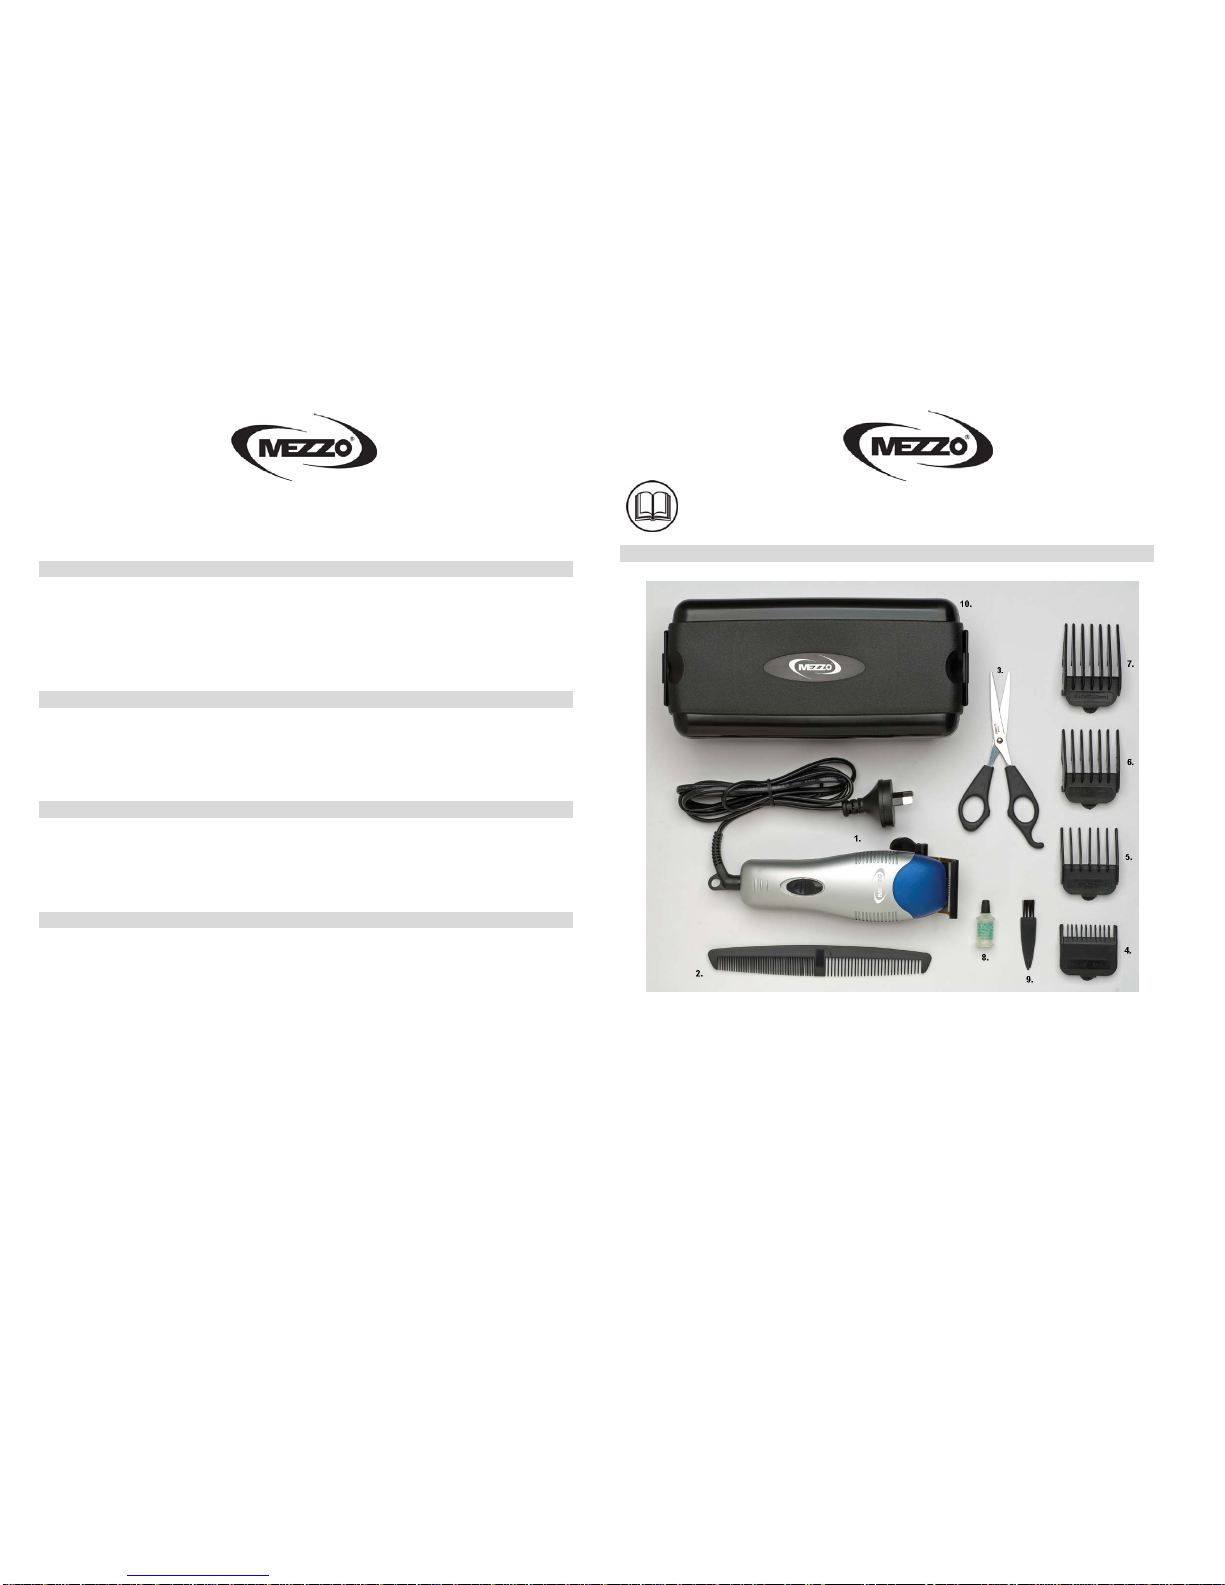
PARTS DESCRIPTION
1. Hair Clipper Unit 6. Attachment Comb 3 (9mm)
2. Comb 7. Attachment Comb 4 (12mm)
3. Scissors 8. Oil Bottle
4. Attachment Comb 1 (3mm) 9. Cleaning Brush
5. Attachment Comb 2 (6mm) 10. Plastic Carry Case
3

BLADE ADJUSTING LEVER
The Blade adjusting lever is conveniently located near your thumb (When held in your right hand) so it can easily
be adjusted while operating the clipper.
The lever adds versatility to your clipper by allowing you to gradually change the closeness of your cut without a
comb attachment.
When the lever is in the uppermost position, the blades will give you the closest cut and leave the hair very short.
Pushing the lever downward gradually increases the cutting length.
In its lowest position, the lever will leave the hair approximately the same length as a #1 comb.
Adjusting the lever will also extend the life of your blades since a different part of the cutting edge is used in
each setting.
If extremely heavy hair cutting has jammed the blades, adjusting the blades will help you remove hair that has
become wedged between the two blades.
To help keep the clipper blades free of hair, rapidly move the lever from “close cut” to “longer cut” a couple of
times while the clipper is running. Doing this each time after you have finished using your clipper will help to
keep the blades clear of cut hair.
OPERATION
Inspect the clipper, making sure that the cutting blades are free of large amounts of oil. Turn the unit on to
distribute any oil and to make sure that the unit is running smoothly. Wipe off any excess oil. This should be
done before each use.
Seat the person so their head is approximately at your eye level. This allows ease of visibility while cutting and
gives a relaxed control of the unit.
Before cutting, comb the hair so that it falls in its natural direction and is tangle free.
Place a towel around the neck and shoulders of the person having the haircut.
While using the unit, you may need to untwist the cord from time to time to avoid tangling.
Cut the hair in a relaxed and slow manner. Use short strokes only, working gradually over the entire head.
Always take off a little hair at each movement you can always trim off additional hair later.
As you work, frequently comb the hair back into the required hairstyle.
When cutting with this hair clipper, it is better to leave the hair dry, not wet. It is much easier to control the
amount of hair being cut with the hair dry.
Cutting hair requires practice so it is always better to leave the hair longer for the first few haircuts until you
become accustomed to the length to which each comb attachment cuts the hair.
• Attachment Comb #1 leaves 3mm (1/8 inch) hair length.
• Attachment Comb #2 leaves 6mm (1/4 inch) hair length.
• Attachment Comb #3 leaves 9mm (3/8 inch) hair length.
• Attachment Comb #4 leaves 12mm (1/2 inch) hair length.
4
Each comb attachment is marked accordingly on its outside middle surface.
To attach a comb, hold the comb with its teeth upward and slide it onto and along the clipper blade until the V
shaped recess in the centre of the comb firmly sits against the front of the clipper blade.
To remove the comb, pull the tab at the rear of the comb upward and away from the clipper blade.
For even cutting, allow the comb attachment / cutter to cut its way through the hair. Do not force it through
quickly. Also remember to comb the hair frequently to remove trimmed hair and to check for uneven strands.
For a short and neat haircut, try the following steps…
STEP 1 – NAPE OF NECK
Attach comb attachment 3mm or 6mm.
Hold the clipper cutting edge pointed up and begin the haircut, starting at the centre of the head at the base of the
neck.
Hold the clipper comfortably in your hand and hold lightly against the head with the comb teeth pointing upward.
Gradually and slowly lift the clipper, working upwards and outwards, through the hair, trimming just a little at a
time.
As you cut, gradually lift the hair clipper head towards you. Continue to cut the back area from the bottom of the
neck upward to the top of the ears.
STEP 2 – BACK OF THE HEAD
Change to the next longest comb attachment 9mm or 12mm and cut the hair at the back of the head.
STEP 3 – SIDE OF THE HEAD
Change to one of the shorter combs 3mm or 6mm, trim sideburns, i.e. the hair directly in front of the ears. Then
change to one of the longer combs, 9mm or 12mm and continue to cut to the top of the head.
STEP 4 – TOP OF THE HEAD
Using comb attachment 9mm or 12mm, cut top of head from back to front against the direction in which the hair
normally grows. In some cases, this may require the reverse, or cutting from front to back.
Comb attachment 3mm or 6mm are used to achieve a close crew cut or short cut.
For longer hair on top use the comb provided and lift hair on the top of the head. Cut over the comb, with the
hair lifted or hold the hair between your fingers to lift it and cut it to the desired length. Always work from the
back of the head. You can cut the hair shorter gradually by reducing the space between the comb/fingers, and the
head. Comb out trimmed hair and check for uneven strands.
STEP 5 – THE FINISHING TOUCH
Finally, use the taper lever without an attachment comb for close trimming around the base of the neck, the sides
of the neck and the ears.
To produce a clean straight line at the sideburns, reverse the hair clipper by turning the reverse side uppermost.
Press the clipper at right angles to the head, tips of the blades lightly touching the skin and work downwards.
This way you will obtain as clean a cut as would be given by a razor.
5
ELECTRICAL SAFETY
When using electric appliances always observe safety regulations where applicable to reduce the risk of fire,
electric shock and personal injury.
Always check that the power supply corresponds to the voltage on the rating plate.
Supply cord and plug.
Always fully unwind any cord to avoid overheating. Never allow the supply cord to come in contact with hot
objects. Do not carry the appliance by the cord or yank the cord to disconnect it from the mains supply.
Disconnect by first switching off the outlet, grasping the plug and pulling it out gently. Do not let the supply cord
hang over the edge of a table or counter.
If the supply cord is damaged, it must be replaced by the manufacturer, its service agent or a similarly qualified
person in order to avoid a hazard.
Children.
Caution. Keep out of reach of children.
This appliance is not intended for use by young children or infirm persons. Young children must be supervised to
ensure that they do not play with the appliance.
Water.
Do not immerse..
Do not immerse any part of this appliance or supply cord in water or other liquid. Do not use with wet hands or
use in damp situations.
Handling.
Do not drop the appliance. Do not use this appliance if it has been damaged in any way, immersed in water, the
supply cord is damaged or the operation is faulty. Contact with any damaged appliance could result in electric
shock.
Unattended.
Do not leave the appliance unattended while in use. Disconnect from the power supply.
Use
This appliance is for domestic household use only.
Store in a safe place
When not in use store your appliance and all its accessories and instruction manual in a safe and dry place.
Liability.
No liability can be accepted for any damage or personal injury caused by non-compliance with these instructions
or any other improper use or mishandling. This appliance is intended for household use only.
6
CARE AND CLEANING
Before cleaning.
When not in use or before cleaning, always disconnect the appliance from the mains supply.
Cleaning guide.
Regularly clean the outside of the appliance with a soft damp cloth and dry it with a dry towel. Do not immerse
in water. Wash the accessories in warm soapy water. Do not use harsh solvents to clean the plastic components.
Oiling.
Regularly drop a few drops of the oil onto the blades. Failure to keep oiled will result in poor cutting action.
Storage
When not in use store the appliance, accessories and these instructions the plastic case provided, in a dry place.
TECHNICAL SPECIFICATIONS
Supply Voltage 230-240V ~ AC 50Hz
7
WARRANTY CARD
This product is guaranteed against faulty materials and workmanship for a period of twelve months from the date
of purchase. This warranty becomes void if the product has been tampered with, damaged by accident, damaged
in any other way by improper use or has been purchased second hand. All production orders have quality
inspections.
For any customer query or in the unlikely event of a product failure, please phone or
email the helpline contact details below for assistance.
DO NOT RETURN THE PRODUCT TO THE RETAILER.
DOMESTIC USE ONLY – NOT FOR COMMERCIAL USE
Product: ____________________________________________________________________________
Model No.: _____________________________________ Purchase Date:___________________
Product Purchased From: __________________________________________________________
___________________________________________________________________________________
Your Name: ______________________________________________________________________
Address: _________________________________________________________________________
______________________________________________ Phone Number: ____________________
IMPORTANT!
Please retain this warranty card along with your purchase receipt. Please do not post to the
retailer Toll Free Help line: 1300 366 144
Email: [email protected]
Table of contents
Other Mezzo Electric Shaver manuals


