Mezzo FP6000 User manual

USERS MANUAL FOOD PROCESSOR
Model: FP6000
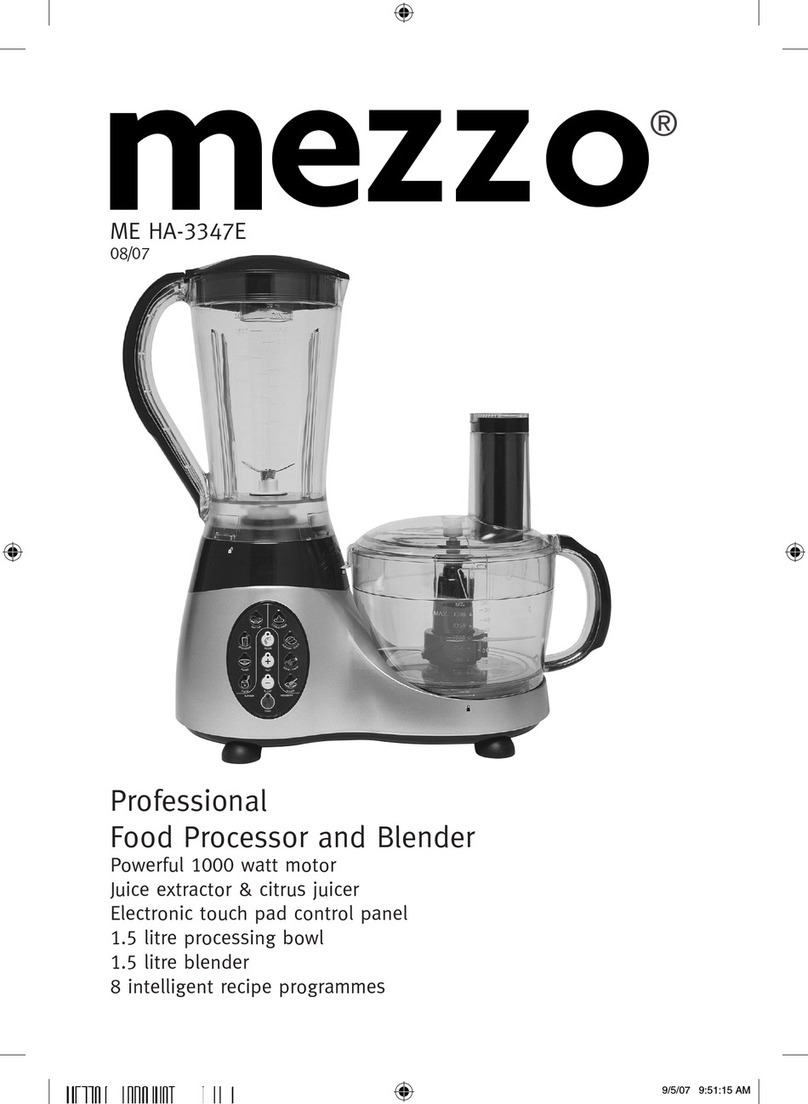
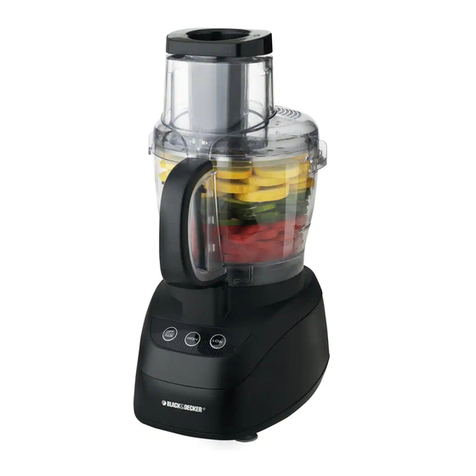
Food Processor
Thank you for choosing to purchase one of our MEZZO products, we appreciate your business and believe that
we have provided you with a product that is both reliable and value for money. We encourage you and your
friends to choose from our range of MEZZO products again in future.
PACKAGE CONTENTS
1 x Food Processor
1 x Transparent Mixing Bowl
1 x Transparent Lid
1 x Food Pusher
1 x Stainless steel “S” Blade
1 x Disc Stem
1 x Dough Blade
1 x Shredding/Slicing Disc
1 x Thin Shredding/Slicing Disc
1 x Instruction manual
Confirm all parts shown above have been supplied before disposing of the carton.
SAFETY INSTRUCTIONS
Carefully read this manual before using this appliance. Make sure that you know how the appliance functions and
how to operate it. Maintain the appliance in accordance with the instructions to ensure that it functions properly.
Keep this manual with the appliance. If the appliance is to be used by a third party, this instruction manual must
be supplied with it. The safety instructions, by themselves, do not eliminate danger completely, and proper
accident prevention measures must always be used.
For any customer query or in the unlikely event of a product failure, please phone or
email the helpline contact details below for assistance.
DO NOT RETURN THE PRODUCT TO THE RETAILER.
Toll Free Help line: 1300 366 144
1

BEFORE INITIAL USE
Remove all packaging. Carefully wipe the outer case with a soft damp cloth and dry it afterwards with a dry
towel. Do not immerse the appliance base in water or any other liquid. Wash accessories in warm soapy water
and dry with a dry towel. WARNING! When handling the discs handle with care as cutters are very sharp.
PARTS DESCRIPTION
1 – Shredding/Slicing Disc
Use the shredding side of the disc for cheese, carrots, potatoes or foods of a similar texture.
The slicing side can be used for cheese, carrots, potatoes, cabbage, cucumber, courgette, beetroot and onions.
2 – Disc Stem
Use the disc stem before placing the slicing and shredding discs into the blender.
3 – Stainless Steel “S” blade
This blade is very effective for chopping and mixing. It can used to chop raw meats to mince, chocolate to
crumbs and nuts to paste.
4 – Dough Blade
This blade is ideal for kneading and mixing. Ideal for making bread, pastry and cakes.
5 – Food Pusher
Use this item to push the ingredient to be blended through the food chute. Never push through with your fingers.
6 – Transparent Lid
7 – Transparent Mixing Bowl
8 – Food processor 2
9 – Thin Shredding/Slicing Disc
The thin shredding slicing disc is ideal for slicing fruits, vegetables, raw meats, chicken and deli meats like
salami.
OPERATION GUIDE
This appliance has been designed for general indoor household use only. Disconnect from the power supply
when not in use.
Specific Safety Instruction
Warning! Keep children away. Only allow children to use this appliance under supervision.
Caution! Do not move the appliance when power is on and appliance operating.
Warning! Do not leave on or connected to the power supply while unattended.
Safety Interlock System
This appliance has a safety interlock system so the Food Processor will not operate unless the bowl and cover are
correctly fitted. Warning! Always ensure the appliance has stopped completely before removing and the lid.
Basic Assembly Guide
Place the bowl over the centre post in the base with the handle at the left of the safety switch located on the right
side of the appliance. Turn the bowl anti clockwise until it locks into place. Snap the bowl in so that the handle
lines up straight over the safety switch, ensuring that it locks into place (fig 1).
Place the selected cutting disc or blade onto the centre post (fig 2).
Place the lid onto the bowl and turn anti clockwise until it locks into place (fig 3).
Connect to the mains supply. To operate simply press the ON/OFF or PULSE buttons.
Removing the Lid and Bowl
The Food Processor has a safety lock in place so that the Lid or Bowl cannot be removed during operation.
NOTE: The lid and the bowl cannot be removed at the same time.
First, remove the lid by turning it in a clockwise direction until it unlocks itself. Remove the lid.
After the lid has been unlocked and removed, turn the mixing bowl clockwise to remove from the Food Processor
unit.
3

Slicing
With the bowl securely in place, fit the Disc Stem onto the centre post. Carefully place the Slicing/Shredding
Disc or the Thin Slicing/Shredding Disc onto the disc stem with the Slicing Blade raised upwards as required.
Warning! The cutting edges are very sharp, handle with care.
Place the lid onto the bowl and lock into place.
Feed the food items into the food chute and turn on. Using the pusher, gently press the food items into the bowl.
Do not use excessive force or oversized food items.
Shredding
With the bowl securely in place, fit the Disc Stem onto the centre post. Carefully place the Slicing/Shredding
Disc or the Thin Slicing/Shredding Disc onto the disc stem with the small Shredding Blades raised upwards as
required. Warning! The cutting edges are very sharp, handle with care.
Place the lid onto the bowl and lock into place.
Feed the food items into the food chute and turn on. Using the pusher, gently press the food items into the bowl.
Do not use excessive force or oversized food items.
4
Chopping
With the bowl in place fit the chopping cutter onto the centre post. Warning! The cutting edges are very sharp,
handle with care.
Place the lid onto the bowl and lock into place.
Feed the food item into the food chute and turn on. Using the pusher, gently press food item into the bowl. Do
not use excessive force or oversized food items.
Ice
Warning! Do not attempt to chop ice in this appliance. Damage to the bowl, cutters or appliance may result
which will void warranty.
Short Term Operation
Warning! Do not use continuously for longer than 3 minutes. Short-term use only
Sharp Edges
Warning! Handle with care. The cutting discs are extremely sharp. Care is needed when handling cutting blades,
especially when removing the blade from the bowl, emptying the bowl and during cleaning.
WARNING!DO NOT ALLOW THE SUPPLY CORD TO HANG OVER THE
EDGE OF ANY BENCH OR TABLETOP. THERE MAY BE A RISK OF BURNS,
ELECTRIC SHOCK OR OTHER INJURY SHOULD YOUNG CHILDREN PULL
THE APPLIANCE FROM THE BENCH OR TABLETOP BY THE CORD.
CHOPPING GUIDE
Baby Food
Up to 4 cups. Add up to 4 cups of cooked vegetables and meat to the processor bowl, along with ½ cup of
cooking liquid/broth. Process to reach desired fineness.
Bread Crumbs
Up to 10 Slices. Break either fresh, toasted or stale slices in quarters. Add to the processor bowl and process
until finely crumbed.
Eggs - Chopped
Up to 3. Peel, dry and halve hard-boiled eggs. Add to bowl. Pulse to chop, checking fineness after 4-5 pulses.
Garlic – Minced
Up to 5. Drop cloves down the food chute while the unit is running. Pulse until desired fineness is achieved.
Meat – Chopped (Raw or cooked)
Up to 2 cups. Cut meat into 1” (2.5cm) cubes. Add to bowl and pulse to chop.
5

Mushrooms – Chopped
Up to 20 medium. Halve large mushrooms and add to bowl. Chop to desired fineness.
Nuts – Chopped
2 Cups. Add to bowl and process to chop.
Onions – Chopped
Up to 3 large. Quarter and add to bowl. Pulse 2 times to coarsely chop. For green onions, cut into 1” (2.5cm)
pieces and add up to 3 cups.
Hard Chesses (incl. Parmesean, Romano) – Grated
Up to 1-1 ½ Cups. Allow the cheese to reach room temperature. Cut it into 2.5cm cubes. Add to the bowl and
process to desired fineness.
Parsley – Chopped
Up to 2 cups. Add to the bowl and pulse to chop to desired fineness, for approximately 10-15 seconds. Process
other herbs in same manner (e.g. basil, cilantro, mint, coriander)
Pie Dough
Up to 2 x 9” pie crusts. Follow the processor recipe on page 10 for more details. See One-Crust pie crust recipe.
Soups – Pureed or Creamed
2 Cups. Add up to 2 cups of hot (not boiling) vegetable soup for pureeing and creaming.
Squash, Pumpkin, Butternut – Mashed
Up to 5 cups. Add 2.5cm cubes, up to 8 cups of cooked, drained vegetable into the processor.
Tomatoes – Chopped
4 Medium. Quarter Tomatoes. Add up to 4 and pulse to desired fineness
SHREDDING GUIDE
Use the shredding disc to cut very fine cabbage or slaw. Cut it into pieces to the fit the chute. Shred using light
pressure. Empty bowl as cabbage reaches disc.
Cheese - Cheddar or similar firmness
Cut to fit chute. Cheese must be well chilled
Cheese – Mozzarella
Cut to fit in chute. Cheese must be chilled in freezer for 30 minutes prior to shredding. Use light pressure.
Potatoes
Position in chute. Cut large potatoes in half or quarters
Zucchini
Cut to fit chute, either lengthwise or horizontally
6
SLICING GUIDE
Apple
Quarter and stack horizontally in chute. Use firm pressure
Cabbage
For coarsely shredded results, use slicing side of disc. Cut into pieces to fit chute. Empty bowl as cabbage
reaches disc.
Carrots
Cut into 10cm lengths and pack in chute, alternating thick and thin ends
Celery
Remove string. Cut stalks into thirds. Pack chute for best results.
Mushrooms
Stack chute with mushrooms on their sides for lengthwise slices.
Nuts
For coarsely chopped results, fill chute with nuts and slice.
Onions
Quarter and fill chute, positioning onions upright for coarsely chopped results.
Peppers – Green
Halve and seed. Fit pepper into the chute, squeezing slightly to fit if necessary. Cut large ones into quarters or
strips, depending on desired results. Slice using moderate pressure.
Pepperoni
Cut into 8cm lengths. Remove the inedible casing. Slice 2 pieces at a time using firm pressure.
7

RECIPES
Speedy Processor Pizza Dough
2 cups plain flour
7g active dry yeast
1 tablespoon sugar
¾ teaspoon salt
1 tablespoon vegetable oil
¾ cup hot tap water
With Dough Blade in place, add flour, yeast, sugar and salt to Food Processor bowl. Process for approx 5
seconds to blend.
Add vegetable oil to hot water.
With processor running, slowly add water/oil mixture down the food chute (should take about 30 seconds)
Continue processing to knead dough for 1-1 ½ minutes. Stop, and test dough for stickiness.
If dough is still sticky, process to knead for another 15 to 30 seconds.
Let the dough rest for 10 minutes
On a floured board, fold the dough over 3 or 4 times to knead slightly.
For 1 large pizza baked in a 15-inch x 10-inch x 1 inch (38x25x2cm) jellyroll pan, roll dough out to
approximately that size, and transfer to greased pan.
Gently push dough out to cover pan and form crust edge up the sides of pan.
For 2 thin crusts, divide dough in half.
Roll dough out to form a circle and transfer it onto a greased pizza pan.
Shape crust partially up the sides of pan to form crust edge.
(Dough will be thin and be sure to push dough together if any holes or rips occur)
Cover crust with pizza sauce, vegetables and cheeses as desired.
Bake at 200°C (420°F) for approximately 20 minutes for large single pizzas, or approx 12 to 15 minutes fir
thinner round pizzas.
Basic White Bread ( 1lb Loaf )
2 cups of plain flour
1 ½ tablespoons of sugar
1 ½ teaspoon salt
1 teaspoon olive oil
1 ½ package active dry yeast (Surebake)
1 ½ tablespoons non-fat milk powder
1 cup warm water
Position Dough Blade in Processor Bowl. Add flour, milk powder, sugar and salt
Process to mix, for approx 5 seconds.
In a measuring cup, add yeast to ¼ of water. Stir to disperse and allow the yeast to dissolve – approx 10 minutes.
With the processor running, slowly add yeast mixture and water down the food chute (should take approx 30
seconds to add liquid ingredients)
Continue processing to knead the dough, for approximately 45 seconds.
Stop. Remove the cover and press dough down into the bottom of the bowl.
Cover and process to knead for an additional minute.
8
Turn dough out; shape into a ball; place in a greased mixing bowl, rotating to grease surface.
Cover. Let the dough rise at room temperature until it has doubled in size. (approximately 1 – 1 ½ hrs)
Turn the dough and form it into a smooth ball and let it rest for 15 minutes.
Shape it to fit a greased bread pan (size approx 23x23x8cm)
Cover and let it rise again in a warm place until the dough has risen approx 1-inch over the sides of the pan (or
approx 1 hour)
Bake it in a preheated oven at 190°C (375°F) for approx 35 to 40 minutes or until golden brown.
Turn it out of the pan immediately.
NOTE: Do not double this recipe. Only 1 loaf of bread can be mixed at a time.
Standard Pie Crust
1 cup plain flour
½ teaspoon salt
¼ cup vegetable shortening, at room temperature, divided into 3 parts (Kremelta, Shreddo etc)
1 tablespoon butter or margarine, well chilled
3 tablespoons of chilled water
Position Chopping Blade in Bowl. Add flour, salt, vegetable shortening and butter.
Process until particles resemble coarse crumbs, approx 15 seconds.
Add water all at once through food chute with Processor running, until it forms a ball (or no more than 20
seconds)
If dough does not form a ball, stop the processor. Tip the dough out onto a floured board and process it by hand.
Roll out for pie, or as directed in recipe.
If crust is to be baked before filling, prick the base generously with a fork.
Bake in a preheated oven at 230°C (450°F) or until golden brown. (approx 9-10 minutes)
ELECTRICAL SAFETY
When using electric appliances always observe safety regulations where applicable to reduce the risk of fire,
electric shock and personal injury.
Always check that the power supply corresponds to the voltage on the rating plate.
Supply cord and plug.
Always fully unwind any cord to avoid overheating. Never allow the supply cord to come in contact with hot
objects. Do not carry the appliance by the cord or yank the cord to disconnect it from the mains supply.
Disconnect by first switching off the outlet, grasping the plug and pulling it out gently. Do not let the supply cord
hang over the edge of a table or counter.
If the supply cord is damaged, it must be replaced by the manufacturer, its service agent or a similarly qualified
person in order to avoid a hazard.
Water.
Do not immerse. Do not immerse any part of this appliance or supply cord in water or other liquid. Do not use
with wet hands or use in damp situations.
9

Children.
This appliance is not intended for use by young children or infirm persons unless they have been adequately
supervised by a responsible person to ensure that they can use the appliance safely.
Handling.
Do not drop the appliance. Do not use this appliance if it has been damaged in any way, immersed in water, the
supply cord is damaged or the operation is faulty. Contact with any damaged appliance could result in electric
shock.
Unattended.
Do not leave the appliance unattended while in use. Disconnect from the power supply.
Store in a safe place
When not in use store your appliance and all its accessories and instruction manual in a safe and dry place.
Liability.
No liability can be accepted for any damage or personal injury caused by non-compliance with these instructions
or any other improper use or mishandling. This appliance is intended for household use only.
CARE AND CLEANING
Before cleaning.
When not in use or before cleaning, always disconnect the appliance from the mains supply.
Cleaning guide.
Regularly clean the outside of the main body with a soft damp cloth and dry it with a dry towel. Wipe any
spillages from the appliance immediately. Rinse parts immediately after use to aid cleaning. Clean all accessories
in hot soapy water and dry with a dry towel. The accessories may be cleaned in a dishwasher if loaded on the top
rack only. Do not load on bottom rack or in the utensils tray.
WARNING! Do not immerse the main body of appliance in water. Do not use harsh solvents to clean the plastic,
as these will damage the plastic.
Storage
When not in use store the appliance, accessories and these instructions in a dry place.
TECHNICAL SPECIFICATIONS
Supply Voltage 230-240V ~ AC 50Hz
Rating 500W
10
WARRANTY CARD
This product is guaranteed against faulty materials and workmanship for a period of twelve months from the date
of purchase. This warranty becomes void if the product has been tampered with, damaged by accident, damaged
in any other way by improper use or has been purchased second hand. All production orders have quality
inspections.
For any customer query or in the unlikely event of a product failure, please phone or
email the helpline contact details below for assistance.
DO NOT RETURN THE PRODUCT TO THE RETAILER.
WARRANTY FOR APPLIANCES USED COMMERCIALLY LIMITED TO 90 DAYS
Product:____________________________________________________________________________
Model No.: _____________________________________ Purchase Date:___________________
Product Purchased From: __________________________________________________________
___________________________________________________________________________________
Your Name: ______________________________________________________________________
Address: _________________________________________________________________________
______________________________________________ Phone Number: ____________________
IMPORTANT!
Please retain this warranty card along with your purchase receipt. Please do not post to the
retailer Toll Free Help line: 1300 366 144
Email: [email protected]
Table of contents
Other Mezzo Food Processor manuals
