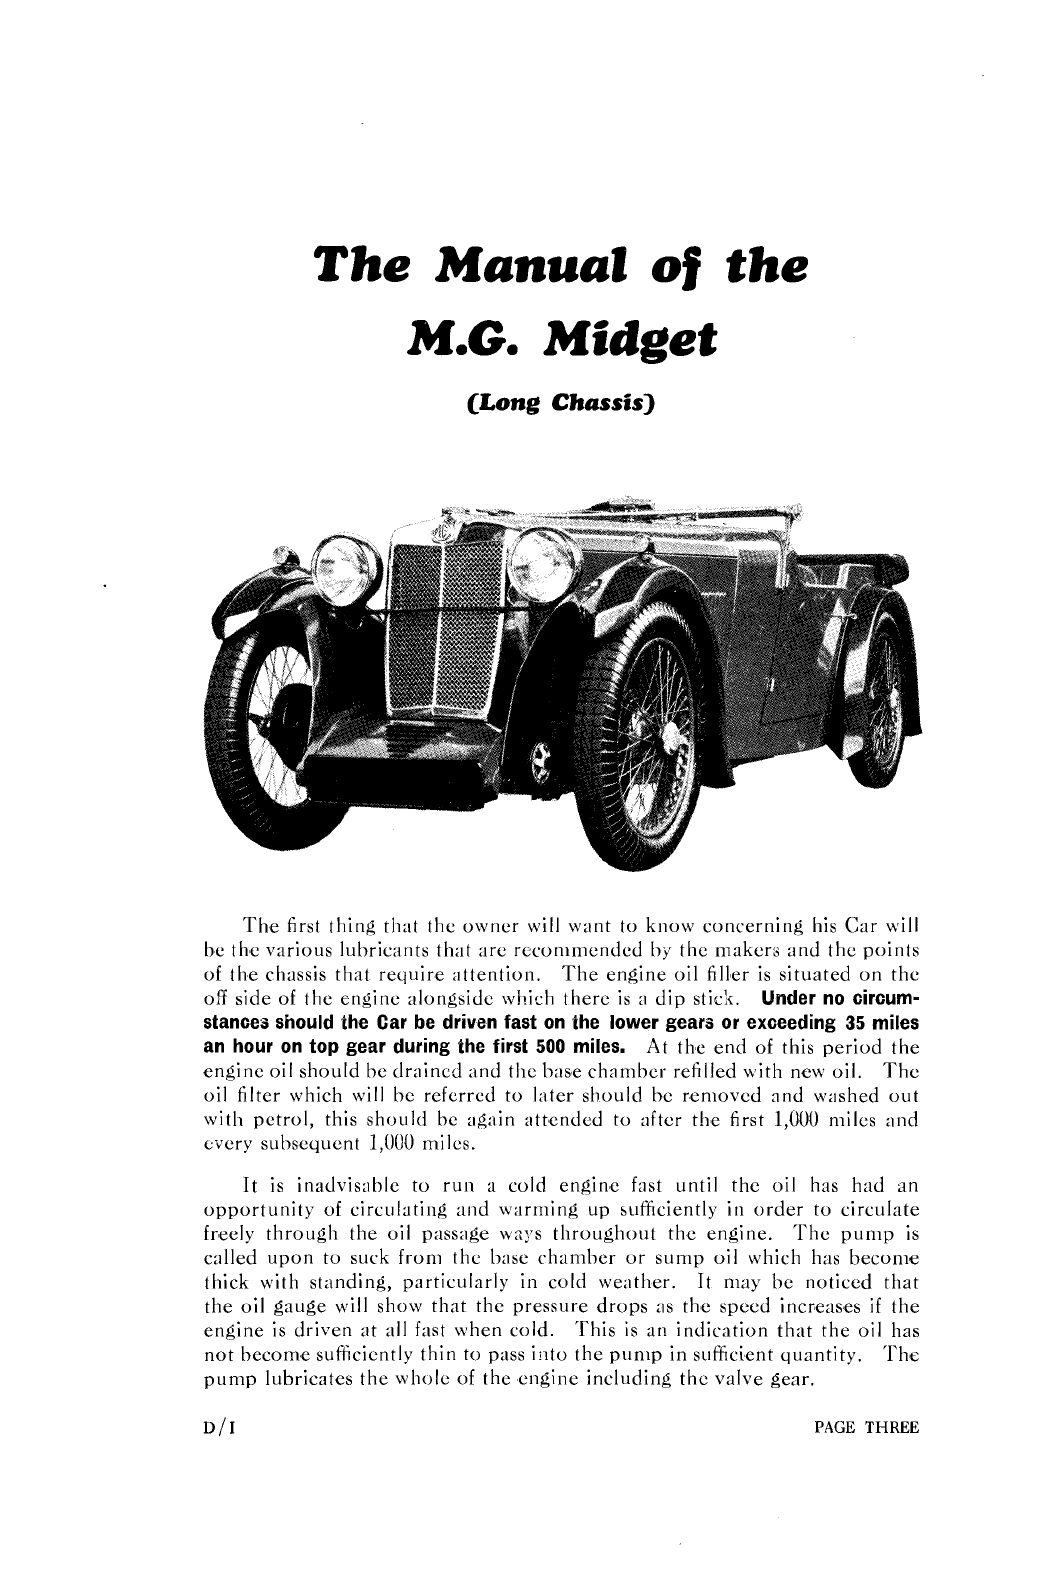
MG Midget User manual


CAR
NO.
-1
TELECRAMS:
EMCEE
liBINCOON.
PHONE:
ABlNCDON
251.
ANY QUESTION
AFFECTING
THE CUARANTEE ATTACHED
TO THIS CAR TO BE REFERRED [VIA THE ACENT FROM
WHOM THE CAR WAS PURCHASED] TO THE MANUFACTURERS
The
M.G.Car
Company
LT
Abingdon-on-T
hames
CHANGE OIL COMPLETELY EVERY
1500
MILES
GUARANTEE CEASES ON REMOVAL
OF
THIS PLATE.
.
.
Ihis ~platc
is
lo
I)r fi~uncl
on
the Enginc side of thc d;~slilx~ard,
and bears
the
11liicia1 chassis
nil
vnginr nu~nl)rrs.\\.liich 41ould al\\.:iys
be
quoted
in
any
corrripundence rcl;~tingto the car.

INDEX
I.UBRICATlON
...
...
...
Approved Engine oils
... ...
...
...
...
Engine
lubrication
...
...
...
Dynamo 1ubric:ltion
...
...
...
...
...
The 1)istributor
...
...
...
...
Contact breaker
Chassis I. ubrication Chart
\\rill
be found at the end of
the Manual
...
...
GENERAI. SURVEY
...
...
...
...
Steering
...
...
...
Brakes
...
...
...
Engine
Engine bearings
... ...
...
Steering ge:lr
...
Shock
absorbers
...
...
...
...
...
Ignition
The
Oil
Restrictor
...
...
...
Clutch thrust
...
...
...
Gearbox and back axle
...
...
...
Clutch
...
Universal joint :~ndpropelier shaft
Suspension
...
...
...
Carburetter
...
...
Uody
hints
...
...
Petrol tank
...
...
I, uggage platform
...
...
Spare wheel
Hood on four-seaters
...
Bonnet fasteners
...
...
Sliding roof on saloons
Front fairing
...
...
...
Tool locker
...
r
>
...
...
I
yres
ADJUSTMENTS
...
Brake adjustment
...
Decarbonising
...
Removing valves
...
Grinding-in valv'es
...
Reassembling valves
Replacing camshaft
...
...
Adjusting rockers
Replacing cylinder head
...
Rocker cl'earance
...
Clutch adjustment
Engine dismantlement
...
...
'Timing dismantlement

...
...
Draining the sump
...
...
...
Axle dismantlement
...
...
...
Removing the dyn;~mo
...
...
The detection and remedy of ignitionf:lults
...
...
Evgine will not fire
...
...
...
Misfiring and bad starting
...
...
Replacement of lamp b~~lbs
...
...
...
Carburetter
...
...
...
...
Tyre pressure
...
...
...
Removing tyres
...
...
Brushcs
...
Commutator
...
Dynamo field fuse
...
Third brush regulator
...
Starter motor
...
...
...
Battery
...
...
Arnmseter
...
...
Fuses
...
The Cut-out
...
...
Distributor
...
...
...
Coil
...
Warning lamp
...
He:~dlarnps
...
Side Ian~ps
and
tnil
lan~p
Horn
...
Petrol pump
... ...
Wiring di:~Cram
...
44
...
45
...
45
...
47
...
48
...
48
...
19
...
49
...
49
...
50
51
51
52
...
S3
...
.S
3
...
54
facing page
40
The
lists of
M.G.
Agents. I1:ldiator Iiepnir Service Depots.
1.
ucas Agents.
are to be found
:~t
tlic end of the Msnual
.

..............................................................................
Cl~trssis
No
I
Must be quoted
in
all
E~~gille
NO
................................................................
1
correspondence

IMPORTANT
HE
attention of owners of new
M,,.
Midget Sports cars is
drawn to the following.
The importance of carefully
running-in a new engine cannot
be over-estimated, and care and
restraint during the first 2,000
miles will
be
handsomely repaid.
Change the engine oil after the
first 500 miles, and every 1,000-
1,500 miles thereafter.

FOREWORD.
Theobject of this Instr~lctioi~Rook is to place fhc oavzcr in posscssioir of
uc ~,i/rchdctailrd i~rforn~crtic~~r(1s
i~
po\cihlc covcr~ri~in:ithe
S/d3
11.0.
M
.G.
Midvet. It is intcwdcd fir~tof
(111
iu the crrrl~chnptc,rs
to
ufford
a
pictorial
survey of the Chassis jicr~cralll,m1e1 the 1jook is
so
arr~ingedthat all thc
essential informatiot~and itrstrrrctiotrs licccssary to tnui71tail1 the car
ill
eficient conditiolr arc contailled iii thc rwly put.
l'hc
rcnrainif~,pchapters
contain nlorc detailed ivformatiotr whic.11 it is 11opcd will pro71c
of
intcrcct
to most owners.
The tiwe arises whoz a cur has to
hc
tlisnlantlcd, and it is then that the
reference to the lnstrr~ctiolr
llook
can of co~~sitlcrahlc
rd~lcl
as
it points
out both to the ozcvler and Repair Shops, zlnacqtraiutcd with the constr~ictio~~
ofthe car, the correct method of proced~lrc.
PAGE
ONE

,us Instruction
Plates

The
Manual
of
the
M.G.
Midget
(Long
Chassis)
The first thing that the owner will want to know concerning his Car will
be the various lubricants that are rcconlmendcd
hy
the maker:, and the points
of the chassis that require attention. The engine oil filler is situated on the
off side of the engine alongside which there is
a
dip stick.
Under no circum-
stances should the Car be driven fast on the lower gears or exceeding
35
miles
an hour on top gear during the first
500
miles.
At the end of this period the
engine oil should be drained and the base chamber refilled uith new oil. The
oil filter which will be referred to later should be removed and washed out
with petrol, this should be again attended to :liter the first
1,000
miles and
cvery suhsequent
1,000
miles.
It is inadvisable to run a cold engine fast until the oil has had an
opportunity of circulating and warming up sufficiently in order to circulate
freely through the oil passage ways throughout the engine. The pump is
called upon to suck from the base chamber or sump oil which has become
thick with standing, particularly in cold weather. It may he noticed that
the oil gauge will show that the pressure drops
:IS
the speed increases
if
the
engine is driven at all fast when cold. This is an indication that the oil has
not become sufficiently thin to pass into the punip in sufficient quantity. The
pump lubricates the whole of the engine including the valve gear.
D
/I
PAGE
THREE

It
is just
:IS
important when warming up the engine not to allow
it
to tick
over too slowly, as this will prev,ent the cylinder walls being properly
lu!>ric:~tcdo.ving to thickness of the oil, also
do
not use the choke any longer
th:~
11
nuessnry.
*
3
I
he gearbox and rear axle are provided with hexagon sh;rpe caps situated
in such
:I
manner that they automatically indicate the height level to which
oil should he filled, and prevent the possibility of over filling.
It
should be
remembered that the Car should not be moved in any way when the gear
box and back axle ;Ire filled, otherwise additional lubricant may be carried
round by the teeth of the gears thus causing the housing to cont:~inmore oil
th:~nthey need
and
above the proper level.
Chassis fittings :Ire conveniently lubricated from
6
oil nipples, 3 on either
side of the Car, which are to be found on the brackets supporting the dash-
board. The bonnet has to he lifted and the nipples fed by the oil gun
provided with the Car. Reference to the plates attached to the dash-board
show that on the off side of the Car there are nipples marked
A,
B
and C and
on the near side of the Car nipples
L),
I?
and
F.
The points lubricated by
these various nipples :Ire the hr:~k~ecables, the spring shackles, the steering
box and column and the brake cross shaft. 'The brake operating spindles
which pass through the brake drums are sep:~ratelylubricated as also are the
steering head pins and the track rod and other steering hall socket joints.
Only use Shell gear oil in the oil gun.
A
lubricating chart is provided at the end of the hook indicating th,e
lubrication that is c:~rriedout from the central dash-board nipples and is
shown in black and the other points
on
the Chassis that have to he individually
lubricated are shown
\vith
a
red circle surronnding them, and
if
th'ere is any
doubt in :In> ojtner's mind as to the exact location of the nipples, they can
be seen in one or nlore of the il1ustr:~tionsof the parts contained in this
manual.
The following lubricants :Ire recomn~endedby the Company
:
Approved Engine Oils.
Every
M.G.
Midget is tested on AeroShell
and
the sump and spare tin are filled with the same brand when the car is issued
new. We very strongly recommeild the use of this oil, as
we
have found
it
most satisfactory under the most arduous racing conditions.
On the rare occasions when AeroShell cannot he obt:~inedthe following
is the list of Oils approved for use
:-
Shell Triple (summer and winter).
Castrot XI, (winter),
XSI,
(sutnmer).
Duckham's Adcol N1'2 (winter), N1'3 (summer).
Filtrate Medium (winter), Extra Heavy (summer).
Mohiloil
AF
(winter),
KU
(summer).
Morrisol (summer and winter).
I'ratts' Heavy (summer and winter).
Price's Motorine
"
C
"
de I.use (summer and winter).
Speedolene
"
B
"
(sonlmer and winter).
PAGE
FOUR

Gearbox and Back Axle.-As
in the case of engine oils, we also append
the following list as approved for use in the g'earhox and hack axle
:-
Ilacl~
A
ale.
Shell Gear
Oil.
Castrol Ge:lr
Oil.
I)uckh:~m's Gear
Oil
"
N."
Mohiloil
"
C,"
I'ratts' Gear
Oil.
Price's Motorine An~her
"
13."
Speedolene
"
H."
and under no circumstances are a mineral and vegetable base oil to be mixed
in the engine.
Great care should h,eexercised in mixing oils at all, and it is far preferable
if
anybody wishes to run on a particular oil or is so forced by circumstanc,es,
that the old oil should he drained out first and a complete replenishment
made.
IJnder no circumstances should paraffin he used to wash out th'e lubric-
ating system unless the engine is kingdismantled. More detailed instruction
of
the lubricating system of the engine will be found on pages
30
and
31
which
deals with the complete travel of the oil from the sump to the pump, thence
through the various pipes and passages in the engine to the main and big
end bearings and to the overhead valve gear. The oil pump is provided with
a relief valve of very simple construction consisting of a spring and dash-pot
~nclosedin a cover plug. 'The details of this will also he found on page
31.
We will now leave the general lubrication sumrn:lry with the advice to
only use recommended oils whenever obtainable.
Five gallon drums can
:~lwaysbe supplied hy :~ccrcditedAgents, and this is by far the cheapest
way of buying oil. K'eep the receptacle that is ~~sedfor filling clean
and covered, and also wash around back axle and gear box filler
GIPS
hefore these are unscrewed.
The gearbox and back axle should be re-
filled for preference after the Car has been running some time, so that the
lubricant has had a chance to become fluid.
General Survey.
Inlmediately after taking delivery of the crlr
it
is
advisable to become famili:ir with its general mechanical details and in order
lo
assist as much as possible
it
has been thought advisable to give
a
brief
pictorial survey of the chassis.
The view shown in Illustr:~tionNo.
1
is perhaps
n
little unconventional
to somepeople, but it is the view ohtained by looking at a chassis from ~~nder-
neath. The batteries and petrol tank are not in position, but the ~~nder
shield beneath the gear box and front passenger's compartment can h,e seen.
Certain views taken from below will be described later, more particularjy
the front and rear axles.
r
.
I
he engine suspension is three point, the single or front point being
mounted in the centre of the front cross member of the chassis. The nose
piece of the engine is fitted into the cross member by means of a split bearing
into which is fitted
a
ruhhcr hush. This nose piece has two brackets, one on
either side, on to which the radiator is fixed by means of two studs.
D
/
1 PAGE FIVE

The underslung chassis frame is of unusual design having an extrem'ely
low centre of gravity, the main principles of which having already heen tested
and hrought to perfection in conipctition work and r:icing.
I'igure
2
is
n
rear clid view of the chassis and shows the back axle attached
to the springs by long
"
U
"
holts and a spacer, the mounting of the shock
absorbers, the rear cover to the hack axle with its filler cap, and the cradle for
the battery. The rear cross member has extensions on either side in which
the rear end of the rear springs are located. The Petrol tank is, in point
of fact, actually supported in the Body. The two petrol feed pipes coupling
up to the main and reserve supplies are shown.
PETROL
PIPES
Illustration
No.
3
shows the location of the petrol tank in relation to
the pipe lines, but as before mentioned the petrol tank is actually mounted
in the Body itself.
PAGE
SIX
D/I

l
RESERV
Figure
4
may need a little explanation.
It
contains
n
close up view of
the rear of the chassis as well as a view taken of the spring anchorage and
shock absorber bracket as seen from beneath the Car. 'The springs are held
in position by two
"
U
"
bolts. It is obvious that these will require tighten-
ing from time to tinle, and therefore the illustration shows exactly how they
are mounted Shock absorbers need no lubrication whatever, being mounted
'L
on silent blocs."
To
tighten the shock absorber turn the nut in a clock-
wise direction.
Illustration
4~
is
a close up
view
of the shock absorber mounting
assembly from above, the rebound nxlc clip being situated alongside this.
The rear brake cable has been purposely drawn through the yoke in order to
show how this terminates in a brass stop into which the cable is swaged.
Carefully note the position of the hr:lke cam shaft lubrication nipple. Care
must be taken not to o\er lubricate this point as this is only
:I
very short bush
and e:ccssive oil will get onto the brake linings and irn~aretheir effectiveness.
Figure
4
and 4a.-\'ir\v
OS
111e
off
siclc 01
IIJI.
n.ar
;I\~I.,
:IS
wrn
I'rom
almvc
ancl
Iwlow.
'l'hr
shock
al~sorber
adjuslmcnt
and
mounling
arc
\isil~lc.
D/
I
PAGE
SEVEN

-,
.-.
.-
CABLE'
'?RACK
ROD
BALL
SOCKET
Steering.
As the majority of the parts of the steering lay-out are
normally out of view, it is as well that th'e owner should become familiar with
the design and principle, so as to be able to carry out his part of lubrication,
and in the event of any accidental damage occurring to see exactly how the
parts are mounted. The steering box proper is attached to a bracket on
cross member of the frame and is fitted with a drop arm which is coupled to
a transverse pull and push rod. This will be seen in subsequ'ent illustrations,

hut the view shown in Illustration No.
5
is of the Steering Gear Box and
the off side steering arm which is in turn coupled to the steering head and
the track rod. Every articul:iting joint of the Steering is fitted with an oil
nippl'e. The track rod is threaded at either end. In fact, a11 the Steering
Rod, or, to be more exact, Tubes, :Ire threaded. This permits of accurate
adjustment, and to take cane of any irregularities in the tracking of the wheels.
Illustration No.
6
is
a
view taken from beneath the Car. While
it
is
primarily intended to show
thc
underneath side of the Steering Box, the Pull
and Push Rod, Track Rod, anti Steering Arms, yet at the same time it affords
an excellent opportunity to examine the underneath side of the Engine,
Timing Case,
Oil
Pump, Extension Bracket which supports the Radiator and
the attachment of the Front Axle to thc spring by means of four bolts.
Illustrotion
No.
7
is also an underneath view of the front end of the
frame showing the near side steering arm to which are attached two ball
sockets of the Steering Rods. 'This illustration shows clearly the shock
absorber mounting, the rubber buffer htetween the frame and the spring and
the various lubricators on the near side front axle :~ssembly.
D/l
PAGE
NINE

Illustration No.
8
is the same view as Illustration No.
7,
but taken
from above, and after it has served its purpose to illustratfe the lubricating
points of the steering Head Pin, Steering Rod Joints, and Brake Camshaft
Spindle, it is proposed to pass on to the most important part, namely the
Brakes.
Brakes.
No useful purpose will be served by including redundant
illustrations in the book, and it will already have become apparent from the
examination of Illustrations Nos.
4,
5
and
8
that the brakes ;ire appli,ed
PAGE
TEN

through the agency of steel cables which pass through rubber covered outer
cables fromeither side of the centre of the chassis to the brake drums, the
final application being shown
in
Illustration No.
8.
A cross shaft is placcd
in the middle of the chassis anchored at either end and supported in the
centre to
a
tubular cross member of the frame. The hand brake lever
is
situated on the near side of the gearbox, and towards the base an extension
will be found on which there is a thumh nut. The foot brakle adjustment
is
on
the
off
side of the Car. The 17r:ike cross shaft removed from the C:lr
is shown in Illustration No.
9.
c.
I
I-e foot ,rake pcd:il is coupled to the actuating cross sh;lft
bp
n
rod
i1lld
either extremity of the cross shaft is provided with
a
pulley having holes
drilled through it top and bottom to receive the end adaptors of the cables.
As either brake
is
applied, the cross shaft is rotated pulling the rear ]>rake
cables forward, and the front brake cables backward.
PAGE
ELEVEN

Independent adjustment.
Should it be necessary to adjust the Brakes
independently this can be done by means of adjusting screws fitted to the
cahle stops on the axle back plates. At this point on the cables a rubber dirt
excluder is fitted
in
the form of
a
rubber tube, and this tube is mounted on
what is actually the locknut for this adjustment.
By undoing this locknut the cable stop can he adjusted on its thread by
the amount requircd and the locknut re-tightened.
The whole of the hrake cross shaft is luhricated from the dashwall
nipples, and in order to give perfect freedom for the rotation of the cross shaft,
it
is mounted at one end on what are termed needle bearings. These are
shown in Illustration No.
9.
Should it ever become necessary to remove
the cross shaft,
if
care is exercised the entire bush of the needle bearings need
not be removed. To re-assemble the needle bearing the inner shaft should
be covered with grease and the hearings irnbedded in it when it will be found
that they will stop in position in order that they can be inserted inside the
cable operating pulley.
The front and rear brake drums of the Car are identical in design.
It
is
necessary from time to time to remove the brake drums in order to clean out
the brakes or have them re-lined. 'The procedure is very simple. When
PACE
TWELVE
D
/
I

INDlViDUAL
BRAKE
ADJUSTING
NUT
the wheel is removed as shown in Illustration No.
10,
take off the nuts
with a
h''
spanner, and after releasing the brake, the drum can be withdrawn
by a slight tapping on the ribs with a wooden mallet or a piece of wood and
a hamm'er. The brake drum and its components are shown in the centre of
Illustration No.
10,
and in the off side of the illustration the brakre shoes
with the two pull off springs can be seen.
The purpose of the countersunk screw in the fluted portion of the hub
is to provide
a
means of easy acoess to the split pin of the hub nut. When
the screw has been removed the split pin can easily be taken out or replaced
through the hole in the hub.
REMOVING
BRAKE
DRUM
DUST
SHIELD BRAKE
SILENCING
h
DEVICE
Figure
l0
-'l%rc~(~\ic,\vs
elf
:I
l)ralw Ix~ingdiwientlc~cl,lirit sIio\ving tlic, dru~ii.
l~c,i~ig
rcmiuv(d,
[he centre view of the hub \vilh drum removed, end
on
the right the brake shoes end brake
silencing device.
PAGE
THIRTEEN
Table of contents
Other MG Automobile manuals