MHC Medical Products EasyTouch HealthPro User manual

Dear Easy•Touch® HealthPro™
Glucose Monitoring System Owner Important Information
4 5
Thank you for choosing the EasyTouch® HealthPro™ Glucose Monitoring
System. This manual contains everything you need to know about your new
glucose meter and how it works. Please take a moment to read the
instructions carefully.
The EasyTouch® HealthPro™ Glucose Monitoring System oers a fast, accurate,
and convenient way to read your glucose levels. The meter has been designed
to automatically turn on when the test strip is inserted into the meter,
automatically code the meter to the strip, and automatically turn o after
the reading. Please take a moment to read this manual to learn of more
convenient features to help you manage your diabetes. After doing so, we
hope you will agree, the EasyTouch® HealthPro™ Glucose Monitoring System
is designed to oer a better user experience.
Always consult with your healthcare professional before making any changes
to your diabetes management. The EasyTouch® HealthPro™ Glucose
Monitoring System is for in-vitro diagnostic use only. MHC Customer Service
is available toll free at (877) 358-4342, Monday thru Friday, 9am to 5pm EST.
Intended Use
The EasyTouch® HealthPro™ Glucose Monitoring System is intended to be
used for the quantitative measurement of glucose (sugar) in fresh capillary
blood samples drawn from the ngertips, ventral palm, dorsal hand,
upper arm, forearm, calf and/or thigh. The EasyTouch® HealthPro™ Glucose
Monitoring System is intended to be used by a single patient and should
not be shared.
The EasyTouch® HealthPro™ Glucose Monitoring System is intended for
self-testing by people with diabetes at home and on the go, and also for
healthcare professionals in a clinical setting. The EasyTouch® HealthPro™
Glucose Monitoring System should not be used for the diagnosis of or
screening of diabetes or for neonatal use. Alternative site testing should be
done only during steady–state times (when glucose is not changing rapidly).
The EasyTouch® HealthPro™ Glucose Test Strips are for use with the
EasyTouch® HealthPro™ Meter to quantitatively measure glucose (sugar) in
fresh capillary blood samples drawn from the ngertips, ventral palm, dorsal
hand, upper arm, forearm, calf and/or thigh.
The EasyTouch® HealthPro™ Glucose Control Solutions are for use with the
EasyTouch® HealthPro™ Meter and Test Strips to check that the meter and test
strips are working together properly. The test also serves as a quality control
to ensure the accuracy of the glucose test results.
The EasyTouch® HealthPro™ Glucose Monitoring System provides a quick and
easy way for patients with diabetes to measure their blood sugar levels.
It should only be used with fresh capillary blood samples. It is designed for
in-vitro diagnostics use only and should not be used for any purpose other
than monitoring blood sugar levels. It should not be used for the diagnosis of
diabetes or for the testing of newborns (neonates).
WARNING:
Do not change your medication based on the EasyTouch® HealthPro™
meter test results without contacting your physician or healthcare
professional.
Important Safety Instructions
The Centers for Disease Control and Prevention (CDC) and the US Food and
Drug Administration (FDA) have become increasingly concerned about
the risks for transmitting Hepatitis B virus (HBV) and other blood born
pathogens to persons undergoing nger stick procedures for blood sampling
(Ex. Persons with diabetes who require assistance monitoring their blood
glucose levels). Reports of HBV infection outbreaks linked to diabetes care
have been increasing. This notice serves as a reminder that nger stick
devices should never be used for more than one person.
WARNING:
1. The EasyTouch® HealthPro™ Meter and Lancing Device are for single
patient use only. Do not share them with anyone, including other family
members. Do not use on multiple patients.
2. All parts of the kit are considered bio-hazardous and can potentially
transmit infectious diseases, even after you have cleaned
and disinfected.
3. Always use a new sterile lancet. Lancets are for single use only.
4. Avoiding getting hand lotions, oil, dirt or debris in and/or on the lancets
and lancing device.
5. Please refer to page 33 for cleaning and disinfecting the EasyTouch®
HealthPro™ Glucose Monitoring System.
“FDA Public Health Notication: Use of Finger stick Devices on More than One Person Poses Risk for Transmitting
Blood born Pathogens: Initial Communication Update 11/29/2010”
http://www.fda.gov/medicaldevices/safety/alertsandnotices/ucm224025.htm
“CDC Clinical Reminder: Use of Finger stick Devices on More than One Person Poses Risk for Transmitting Blood
born Pathogens”(2010) http://www.cdc.gov/injectionsafety/Fingerstick-DevicesBGM.html

About your New Easy•Touch® HealthPro™
Glucose Monitoring System
Table of Contents
About Your New EasyTouch® HealthPro™
Glucose Monitoring System . . . . . . . . . . . . . . . . . . . . . . . . . . . . . 7
EasyTouch® HealthPro™ Kit Contents . . . . . . . . . . . . . . . . . . . . . . . . . 7
EasyTouch® HealthPro™ Meter . . . . . . . . . . . . . . . . . . . . . . . . . . . . . 8
EasyTouch® HealthPro™ Meter Display . . . . . . . . . . . . . . . . . . . . . . . . 9
EasyTouch® HealthPro™ Glucose Test Strip . . . . . . . . . . . . . . . . . . . . 10
Before Your Test . . . . . . . . . . . . . . . . . . . . . . . . . . . . . . . . . . . . 11
Comparing your Meter and Lab Results . . . . . . . . . . . . . . . . . . . . . . 12
Setting Your Meter . . . . . . . . . . . . . . . . . . . . . . . . . . . . . . . . . . . 13
Auto-coding Function . . . . . . . . . . . . . . . . . . . . . . . . . . . . . . . . . 15
Backlight Function . . . . . . . . . . . . . . . . . . . . . . . . . . . . . . . . . . . 16
Testing with the Control Solution . . . . . . . . . . . . . . . . . . . . . . . . . . 17
Performing Your Test . . . . . . . . . . . . . . . . . . . . . . . . . . . . . . . . . 20
Performing a Blood Test with Your Fingertip . . . . . . . . . . . . . . . . . . . 20
Disposing of Your Test Strips and Lancets . . . . . . . . . . . . . . . . . . . . . 24
Reviewing your Results . . . . . . . . . . . . . . . . . . . . . . . . . . . . . . . 25
Reviewing Your Blood Sugar . . . . . . . . . . . . . . . . . . . . . . . . . . . . . 25
Reviewing Your Averages . . . . . . . . . . . . . . . . . . . . . . . . . . . . . . . 25
Deleting Individual Test Result . . . . . . . . . . . . . . . . . . . . . . . . . . . . 26
Deleting All Test Results . . . . . . . . . . . . . . . . . . . . . . . . . . . . . . . . 26
Alternate Site Testing . . . . . . . . . . . . . . . . . . . . . . . . . . . . . . . . 27
Lancing and Sampling from an Alternate Site Area . . . . . . . . . . . . . 28
Caring for Your EasyTouch® HealthPro™ Meter . . . . . . . . . . . . . . . . 32
Cleaning and Disinfecting Procedures . . . . . . . . . . . . . . . . . . . . . 33
Storage of Your System . . . . . . . . . . . . . . . . . . . . . . . . . . . . . . . . . 35
Transferring Your Results . . . . . . . . . . . . . . . . . . . . . . . . . . . . . . . . 36
Battery Installation . . . . . . . . . . . . . . . . . . . . . . . . . . . . . . . . . . . 37
Troubleshooting . . . . . . . . . . . . . . . . . . . . . . . . . . . . . . . . . . . . . 38
Warranty . . . . . . . . . . . . . . . . . . . . . . . . . . . . . . . . . . . . . . . . . . 42
Specications . . . . . . . . . . . . . . . . . . . . . . . . . . . . . . . . . . . . . . . 43
EasyTouch® HealthPro™ Kit Contents
67
1. EasyTouch® HealthPro™ Meter
2. Carrying Case
3. Instruction Manual
4. Logbook
5. Two 3V Coin Batteries, CR2032
6. 10 Twist Lancets
7. 1 Lancing Device
Your EasyTouch® HealthPro™ Glucose Monitoring System has been sealed to
protect the contents. If you nd your seal has been broken, please return it to
the place of purchase.
The following items are included:

Test Strip Port
Insert the EasyTouch® HealthPro™ Test
Strip here.
Serial Number
Battery Cover
Test Strip Ejector
For hands-free disposal of used test strips.
Up/Down Arrow Buttons
Scrolls up or down to adjust settings or
to retrieve memory.
Display Screen
Displays your test results, symbols,
and messages.
Power/Enter Button
Powers the meter on/o, prompts
memory data and acts as an enter
button during setup and after tests.
Low Battery Warning Symbol
Alarm Symbol
Troubleshooting Symbol
Delete Results
Average Test Result System
Before Having a Meal
After Having a Meal
After Sport Activity
Control Solution Symbol
Blood Drop Symbol for Test
Strip Code Symbol
Test Result Unit Symbol
Temperature / Date
Time / Test Result Amount
After Taking Medication
Easy•Touch® HealthPro™ Meter Easy•Touch® HealthPro™ Meter Display
CAUTION:
Do not use the EasyTouch® HealthPro™ Glucose Meter in an environment
with humidity below 10%, especially if synthetic materials are present.
Synthetic clothes, carpets, etc., may cause damaging static discharges in an
arid environment.
Meter Diagram Display Layout Symbol Bank
89

Before You TestEasy•Touch® HealthPro™ Glucose Test Strips
Target to Apply Blood
Sample (.5µL)
Contact Bar
Insert this End into Test Strip Port
1. Store the EasyTouch® HealthPro™ Test Strip vials in a cool, dry place. Keep
out of direct sunlight. Do not freeze.
2. Store test strips in their original vial only. Do not mix the test strips in
new vials or in any other container.
3. Immediately replace the vial cap and close tightly after removing any
test strips from the vial.
4. Make a note of the discard date, which is three months from the date
you rst open a new vial of strips. Throw the EasyTouch® HealthPro™ Test
Strips and vial away after the discard date.
5. Do not use the test strips after the expiration date printed on the
package or vial since it may cause inaccurate results.
6. EasyTouch® HealthPro™ test strips are for single use only. DO NOT RE-USE.
7. Do not test at temperatures below 50˚F, or above 104˚F.
8. Do not test with humidity below 10% or above 90%.
9. Do not bend, cut, or alter the test strip.
10. Avoid getting dirt, food, and/or water on the test strip.
11. Avoid getting dirt, food, and/or water on the vial label.
12. Refer to additional information in the EasyTouch® HealthPro™
Test Strip package.
Make sure to read this section and the test strip package insert found in
the test strip box carefully. You will need to have all of the necessary
items to begin testing:
Necessary Items:
1. EasyTouch® HealthPro™ Meter
2. EasyTouch® HealthPro™ Test Strip
3. Lancing Device
4. Sterile Lancet
Test Strip Diagram
If the meter is moved from one temperature to another, allow 30 minutes for
the meter to adjust to the new temperature before testing. Make sure that the
EasyTouch® HealthPro™ Meter and Test Strips have adjusted to the
temperature of the location from where you are testing. Do not operate the
EasyTouch® HealthPro™ system in direct sunlight.
10 11
CAUTION:
To reduce the chance of infection:
1. The lancing device and sterile lancets should NOT be shared
with others.
2. Always use a new sterile lancet and a new glucose test strip.
3. Practice using the lancing device and become accustomed with its use.
4. Lancets and glucose test strips are for single use only.
5. Wash your hands with soap and warm water before testing.
6. Avoid getting hand lotion, oils, dirt or debris on the lancets or on the
lancing device.
7. Dry your hands completely before testing.

Test results with the EasyTouch® HealthPro™ Glucose Monitoring System are
plasma-equivalent. This method will help you and your healthcare professional
compare your meter results with laboratory test results. The EasyTouch®
HealthPro™ test results and laboratory test results both are expressed in
plasma-equivalent units. However, your glucose monitor results may dier from
your laboratory results due to normal variation. Your glucose monitor results
can be aected by factors and conditions that do not aect laboratory results
in the same way.
Your EasyTouch® HealthPro™ monitor value is considered accurate when it
is within ± 20% of the laboratory measurement. There are some specic
situations that could cause a difference of more than ± 20%.
1. You are severely dehydrated.
2. You have eaten recently. The blood glucose level from blood obtained
from a ngertip can be up to 70mg/dL higher than blood drawn from a
vein (venous sample) used for a lab test.
3. Your hematocrit is above 60% or below 20%. Sacks, D.B.: Carbohydrates:
Carbohydrates: Burits, C.A. and Ashwood, E.R. (ed.), Tietz Textbook of
Clinical Chemistry. Philadelphia: W.B. Saunders Company (1994), 959
If you perform a blood sugar test with the system at a temperature near the
low end of the operating range, it could result in a false high blood sugar.
Repeat the test in a warmer environment with a new test strip as soon as
possible. For additional information on possible limitations for accuracy
on precision, please refer to your test strip insert. In order to make the
most accurate comparison to your laboratory results, please follow a few
basic guidelines:
Before going to the Lab
Do not eat for at least two hours before you test your blood. Perform a control
solution test to make sure the meter is working properly. Take your meter with
you to the lab.
While at the Lab
Follow all instructions in this owner’s booklet for performing a blood sugar
test with your meter. Conduct your meter test within 15 minutes of lab test.
Use only fresh capillary blood obtained from the ngertip.
You may still experience a dierence from the laboratory test results because
blood sugars can change very rapidly over a short period of time. This is due to
a variety of reasons such as exercise, medication, stress or loss of body uids.
The EasyTouch® HealthPro™ Meter has a wide variety of functions from which
to choose. From the setup mode you have the ability to turn activity/meal ags,
set the date/time, designate three averages and set up to ve daily alarms.
Power On
Press for at
least 3 seconds.
User Activity Option
After pressing and
releasing either
or buttons to turn
the User Activity
Option on/o, conrm
with .
Year
After pressing and
releasing either or
buttons to set the year,
conrm with .
Date / Time
After pressing and
releasing either
or buttons to
set the date and
time, conrm
each with .
Test Unit
Your meter is pre-set
to mg/dL as test units.
Just conrm it with .
The correct units of
the measurement in
U.S. are mg/dL.
Temperature Unit
Press and release either
or buttons to set °C
or °F, conrm with .
Setting Your MeterComparing Your Meter & Lab Results
12 13

Days for Avg.
After pressing and
releasing either or
buttons to set the
number of days,
conrm with .
Alarm On/Off
After pressing and
releasing either or
buttons to turn the
alarm on/o, conrm
with .
Alarm Time
After pressing and
releasing either or
buttons to set the alarm
hour and minute,
conrm with .
Alarm
After programming the
number of desired alarms
(5 alarms possible),
conrm with .
IMPORTANT:
1. Your EasyTouch® HealthPro™ Meter is pre-set to mg/dL as test unit.
If you nd out that the meter is not set to mg/dL, please contact
MHC Customer Support at (877) 358-4342 immediately.
2. The correct units of the measurement in U.S. are mg/dL.
3. Without setting the date properly, the average glucose level and the
results in memory will not show proper values. It is recommended to set
the meter before use immediately after new batteries are installed.
4. You can’t test your blood glucose in the setting mode.
5. To turn the meter o during the setup, press for at least 5 seconds.
CAUTION:
1. Do not bend the glucose test strip. Bending could cause automatic
code recognition failure.
2. If the code recognition label is damaged, the code recognition may fail.
Please check the code number on the LCD window with the code
number on the test strip.
1. The EasyTouch® HealthPro™ has an automatic
code recognition function.
2. The code number on the glucose meter is set
automatically and should match the code on
your test strip vial.
Auto-coding FunctionSetting Your Meter, Cont.
14 15

Test results with the EasyTouch® HealthPro™ Glucose Monitoring System are
plasma-equivalent. This method will help you and your healthcare professional
compare your meter results with laboratory test results. The EasyTouch®
HealthPro™ test results and laboratory test results both are expressed in
plasma-equivalent units. However, your glucose monitor results may dier from
your laboratory results due to normal variation. Your glucose monitor results
can be aected by factors and conditions that do not aect laboratory results
in the same way.
Your EasyTouch® HealthPro™ monitor value is considered accurate when it
is within ± 20% of the laboratory measurement. There are some specic
situations that could cause a difference of more than ± 20%.
1. You are severely dehydrated.
2. You have eaten recently. The blood glucose level from blood obtained
from a ngertip can be up to 70mg/dL higher than blood drawn from a
vein (venous sample) used for a lab test.
3. Your hematocrit is above 60% or below 20%. Sacks, D.B.: Carbohydrates:
Carbohydrates: Burits, C.A. and Ashwood, E.R. (ed.), Tietz Textbook of
Clinical Chemistry. Philadelphia: W.B. Saunders Company (1994), 959
If you perform a blood sugar test with the system at a temperature near the
low end of the operating range, it could result in a false high blood sugar.
Repeat the test in a warmer environment with a new test strip as soon as
possible. For additional information on possible limitations for accuracy
on precision, please refer to your test strip insert. In order to make the
most accurate comparison to your laboratory results, please follow a few
basic guidelines:
Before going to the Lab
Do not eat for at least two hours before you test your blood. Perform a control
solution test to make sure the meter is working properly. Take your meter with
you to the lab.
While at the Lab
Follow all instructions in this owner’s booklet for performing a blood sugar
test with your meter. Conduct your meter test within 15 minutes of lab test.
Use only fresh capillary blood obtained from the ngertip.
You may still experience a dierence from the laboratory test results because
blood sugars can change very rapidly over a short period of time. This is due to
a variety of reasons such as exercise, medication, stress or loss of body uids.
When inserting the glucose test
strip (starting measuring
process), the backlight will turn
on for 10 seconds.
After the test results display, the
backlight will last for 10 seconds.
When pressing the power button
(moving into memory mode),
the backlight will turn on for
10 seconds.
When pressing the power button
for 3 seconds (entering the
setting mode), the backlight
will turn on for 10 seconds.
When inserting the PC cable into
the USB port, the backlight will
turn on for 10 seconds.
Performing a Control Solution Test
The control solutions contain a known amount of glucose that reacts with the
EasyTouch® HealthPro™ Glucose Test Strips. By comparing your control solution
test results with the expected range printed on the test strip vial, it is able to
check if the meter and test strips are working properly and that you are
performing the test correctly. It is very important that you perform the control
solutions test routinely to make sure you get accurate results.
Firmly insert the test strip into the meter test port.
Insert down rmly in direction of arrow on test strip.
Do not insert the glucose test strip upside down.
When you insert the glucose test strip into the glucose
meter, the meter will automatically turn on and identify
the strip code.
Check the expiration date before performing a
control solution test. Do not use if expired.
Please note the expiration date on the control
solution bottle.
Gently shake the control solution before use.
Discard the rst drop of control solution, this will
eliminate any residue. Place a drop of control solution
on a clean dry surface (e.g. the lid of the test strip vial).
Dip the test strip into the control solution. Results
will appear in 5 seconds. Compare the result to the
range printed on the test strip vial, the result should
fall within that range.
If activity/meal is OFF,
press and release
either the or
button until the icon
appears; press .
Testing with the Control SolutionBacklight Function
16 17
If activity/meal is
ON, scroll through
the icons with the
or button
until the control
solution bottle is
blinking; press .
The glucose control solution should be used:
• Whenever you suspect the glucose test meter or glucose test strip is not
functioning properly.
• If your glucose test results are not consistent with your symptoms or if you
think they are not accurate.
• If you have dropped the blood glucose test meter.
• For quality control in the point of care usage.
• For teaching or learning the system.

CAUTION:
The Control Solution Range is printed in the lower right of the test strip
vial label. This will allow you to dierentiate between a control solution
test and an actual blood test.
For example:
If you are using the High (Level 3) Control Solution, according to this particular
vial of strips, your meter should show a number between 255 and 345. Likewise,
if you are using the Low (Level 1) Control Solution, your meter should show a number
between 35 and 65.
Note: The control values on the test strip vial shown in the picture are not control
ranges. The control ranges of the control solutions are much greater.
1. Check your meter and strip with the glucose control solution.
2. Perform your test again.
Follow-up ActionsTesting with the Control Solution, Cont.
18 19
ATTENTION:
1. It is recommended that glucose control solution is stored at room
temperature (46-86˚F/8-30˚C) before testing.
2. Check the expiration date before performing a glucose control
solution test.
3. Do not use if expired. Once opened, the control solution expires
after 3 months.
If your control solution test falls out of range, please follow the next
steps before contacting MHC Customer Support:
• Check the expiration dates on all the products you are using. Be sure you
are using EasyTouch® HealthPro™ Glucose Control Solution.
• Try another control solution test.
• If this test falls out of range, try another control solution test with a new
unopened bottle of strips.
• If the control test still falls out of range after following the appropriate
steps do not perform a glucose test. Please call our toll free
MHC Customer Support at (877) 358-4342.
CAUTION:
1. If your glucose control solution falls out of range, do not perform a
glucose test and please contact MHC Customer Support
at (877) 358-4342.
2. The glucose control solution range is not the recommended range
for your blood glucose level.
3. Please discard control solutions according to your local regulations.

If during the setup process you chose to use the activity/
meal ags ( , , , ), press and release or button
to select the activity that will correlate with your results,
then press and release .
Performing a Blood Test with Your Fingertip
Step 1
Firmly insert the test strip into the meter test port. Insert
down rmly in direction of arrow on test strip.
Please do not insert the glucose test strip upside down.
When you insert the glucose test strip into the glucose test
meter, the meter will automatically turn on with the code
and temperature.
Make sure the code number matches the code on the strip
bottle (e.g. C21). The meter automatically recognizes the
test strip code number and adjusts the meter accordingly.
A blinking test strip will appear at the top of the screen
indicating the meter is ready for testing.
Step 2
Before obtaining a blood sample, wash your hands with soap and warm water.
Dry hands completely before testing.
CAUTION:
1. If the blood smears or runs, do not use that sample. Dry the area and
gently squeeze another drop or puncture a new site.
2 Do not share reusable lancing device with anyone, including other
family members.
Unscrew the lancing
device cap.
Insert a sterile lancet
into the lancing
device.
Pull the end of the
lancet device back.
To prick your nger,
push the center
button.
Depth setting: Use
1-2 for soft skin, 3 for
avg. skin, 4-5 for thick
or calloused skin.
Twist the protective
cover o.
Do not discard.
Replace the lancing
device cap by
twisting it on tightly.
Performing Your Test, Cont.Performing Your Test
20 21
WARNING:
1. The EasyTouch® HealthPro™ Meter and Lancing Device are for single patient
use only. Do not share them with anyone, including other family members.
Do not use on multiple patients.
2. All parts of the kit are considered bio-hazardous and can potentially transmit
infectious disease, even after you have performed cleaning and disinfection.
3. Avoiding getting hand lotion, oil, dirt or debris in or on the lancets (single
use only) and the lancing device.
4. Please refer to page 33 for cleaning and disinfection your EasyTouch®
HealthPro™ Glucose Monitoring System.
5. Wash your hands thoroughly with soap and warm water after handling the
meter, lancing device and/or test strip.

Performing Your Test, Cont.Performing Your Test, Cont.
22 23
Step 3
The EasyTouch® HealthPro™ Meter only requires 0.5 µL sample volume.
• Place the edge of the test strip to the drop of blood.
• The blood will automatically be drawn into the test strip channel.
• When the test strip has collected a large enough blood sample the meter will
automatically count down.
• After the beeping sound, the test will begin automatically and your results
will appear in 5 seconds. It should begin counting down from 5 to 1 second
on the LCD display window. The LCD window will display the result of your
blood glucose level, temperature and time.
• Record the result value in your logbook. When the glucose test strip is
removed, the glucose test meter turns o automatically.
CAUTION:
1. If the countdown does not start, do not add more blood to the glucose
test strip. Discard the glucose test strip and start over with a new strip.
2. If you do not conduct the test within 5 minutes, the glucose test meter
will automatically power o to save battery life. In this case the test
procedure should start again from the beginning.
3. You may get an inaccurate result if the blood sample does not
completely ll the test strip channel.
CAUTION:
1. If the test result is out of the test range, the Hi/Lo message will be shown
on the LCD. Please contact your healthcare provider immediately if there
is a Hi/Lo result.
2. Please contact your healthcare provider for instructions on disposing
glucose test strips and lancets.
Step 4
Correct
Incorrect

Reviewing Your ResultsPerforming Your Test, Cont.
24 25
Removing and Disposing of Used Test Strip
Disposing of Your Lancet
Once the test is complete, push the
strip forward to remove the test
strip from the meter.
Used test strips may be considered
bio-hazardous waste in your area.
Be sure to contact your healthcare
provider for instructions on disposing
the test strips.
Push the needle into the
protective cover.
Slide the button forward to eject
the lancet. Be sure to contact your
healthcare provider for instructions
on disposing the lancets.
The EasyTouch® HealthPro™ Meter stores up to 365 test results in its built-in
memory, along with the average sugar level for the number of days, which you
had preset the glucose test meter to calculate.
Press and release the button and your average result will appear on
the display.
Press and release button. The most recent result appears rst. Note the time
and day of your blood sugar result. Press and release the button and your
previous result will appear on the display.
Third Latest Second Latest Latest
7-Day Average
from the Test Date
14-Day Average
from the Test Date
21-Day Average
from the Test Date

Average Test Result
Test Unit
Test Result Amount
Average Test Result Days
Test Result Amount
Results Diagram AST Diagram
Deleting Individual Test Result
To delete any individual test result in the memory,
press or button for 3 seconds. While the test
result is being deleted, the message will blink.
After the second beep sound, the deletion will
be completed.
CAUTION:
The deleted test results cannot be recovered. Please be careful in deleting
the test results.
The EasyTouch® HealthPro™ Glucose Monitoring System gives you the ability
to obtain a blood sample for testing your sugar from dierent areas of
your body. The gure shown above displays the areas where you can test
using your EasyTouch® HealthPro™ Meter. You may test you blood sugar from
your forearm, upper arm, palm (ventral palm or dorsal hand), ngertips, thigh,
or calf. It is recommended that alternate site testing be used when sugars
are stable: before meals and before bedtime. However, when sugars are
changing, blood from the ngertip may show these changes sooner than
blood from other sites.
Alternate Site TestingReviewing Your Results, Cont.
26 27
Deleting All Test Results
To delete all test results in the memory press
and button for 3 seconds. While the test
result is being deleted, message will blink.
After the third beep sound, the deletion will
be completed.
Upper Arm
Forearm
Thigh
Calf
Dorsal Hand
Ventral PalmFingertips
LIMITATION:
1. Alternative site testing results should never be used to calibrate
continuous glucose monitoring systems.
2. Alternative sampling results should never be used in insulin
dosing calculations.

IMPORTANT:
We recommend that you test on your ngertips if you are testing for
hypoglycemia (low blood glucose) or if you are suering from
hypoglycemia unawareness.
WARNING:
To reduce the chances of getting infection never share a lancet or a
lancing device with anyone.
28 29
Lancing and Sampling from an
Alternate Site Area
Lancing and Sampling from an
Alternate Site Area, Cont.
Sampling from your upper arm, forearm, dorsal hand, ventral palm, thigh,
or calf allows you to use your ngertips less often. You may nd that
obtaining a blood sample from an alternate site is less painful than using
a ngertip. Getting a blood sample from your forearm or palm is dierent
than getting a sample from your ngertip.
Ventral Palm/Dorsal Hand
Choose a eshy area on the palm, below your thumb or pinky nger. Select a
spot without any visible veins and away from any deep lines. This may cause
your blood sample to smear.
Forearm/Upper Arm/Calf/Thigh
Choose a eshy area of the forearm, upper arm, thigh, or calf away from bone,
visible veins and/or hair. Sometimes there is less blood ow to these areas than
to the ngertip. To help you get a large enough drop of blood, you may gently
message or apply a heating pad to the site to increase blood ow.
Accuracy
To ensure accurate results when lancing your arm (forearm or upper arm), leg
(calf or thigh), or palm (ventral palm or dorsal hand), clean the test site with
soap and warm water. Make sure there is no cream or lotion on the test site.
Thoroughly dry your hands and test site.

6. Lift the lancing device
straight up; be careful
not to smear the blood
on your testing site.
1. Remove the lancing
cap by twisting o.
5. While holding the
lancing device on your
test site, look through
the clear cap until
a round drop of
blood appears.
7. Place the edge of the
test strip to the drop
of blood. The blood
will automatically be
drawn up.
2. Insert lancet and
replace with the
clear cap.
3. Rub the test site for a
few seconds until you
feel it getting warm.
Applying heat may
be helpful.
4. Continue to hold the
lancing device and
gradually increase
pressure for several
seconds.
CAUTION:
Do not test on your upper arm, forearm, dorsal hand, ventral palm, thigh,
or calf when:
1. You think you blood glucose is rapidly falling. For example within two
hours of exercise, rapid-action insulin injection, or an insulin pump bolus.
2. Testing with a ngertip sample may identify hypoglycemia or an insulin
reaction sooner than testing with a forearm or palm sample.
30 31
Lancing Using the Clear Cap for an
Alternate Site Area
Lancing Using the Clear Cap for an
Alternate Site Area, Cont.
REMEMBER:
1. Consult with your healthcare professional before using alternate
site testing.
2. Choose a dierent puncture site each time you test. Repeated punctures
in the same spot may cause soreness and calluses.
3. If bruising occurs at an alternate site or you have diculty getting
a sample, consider sampling from a ngertip instead. You may want
to review the choice of sites with your healthcare professional.
4. Do not share lancing device with anyone, including other
family members.

Why should cleaning and disinfecting the meter and the lancing device
be performed?
Blood glucose meters and lancing devices are at the high risk of becoming
contaminated with blood born pathogens such as Hepatitis B Virus(HBV).
Transmission of this virus has been documented due to contaminated blood
glucose devices. According to the Centers for Disease Control and
Prevention, cleaning and disinfection of meters and lancing devices can
prevent the transmission of this virus through indirect contact.
The cleaning is to remove soil and dirt on all surfaces of the devices
while the disinfecting is to kill the blood born pathogens stated above.
In addition, whenever the meter gets dirty and has blood or liquid on it, the
cleaning and disinfecting procedure should be performed. It also should be
cleaned and disinfected periodically. We recommend that you perform the
cleaning and disinfecting procedures on it once per week.
Materials Needed:
Cleaning and disinfecting can be completed by using any commercially
available EPA-registered disinfectant with the EPA registration number
46781-8, such as CaviWipesXL™ towelettes. Please refer to the disinfectant
labeling for additional instructions on the safe use of the disinfectant.
1. Wash your hands before performing cleaning
and disinfecting procedures.
2. Remove a wipe from the container and follow
the product label instruction to clean and disinfect.
3. Check if the meter is turned o.
4. Wipe the outside of the meter carefully. (3 horizontal and vertical passes.)
5. Dispose of used wipes.
6. Wash your hands thoroughly with soap and warm water after handling the
meter, lancing device or test strips.
7. Whenever the reusable lancing device gets dirty and has blood or liquid on
it, cleaning and disinfection procedure should be performed. It also should
be cleaned and disinfected periodically. We recommend that you performed
the cleaning and disinfection procedures on it once per week.
• To clean the meter, wipe it with an approved disinfecting towelette.
• To disinfect the meter, wipe it with another towelette and leave it wet for
two minutes.
NOTE:
1. The meter should be cleaned prior to each disinfection.
(Two disinfecting towelettes in total.)
2. To achieve disinfection of the stated ecacy kill claim, the meter
and lancing device should remain visibly wet for two minutes
after disinfecting.
3. Take extreme care not to get liquid in the test strip, test strip port,
control buttons and data port. Do not use spray of any sort.
CAUTION:
If the meter is being operated by a second person who is providing testing
assistance to the user, the meter and lancing device should be
decontaminated prior to use by the second person.
32 33
Caring for Your EasyTouch® HealthPro™ System Cleaning and Disinfecting Procedures
NOTE:
1. Please note any disinfectant product with the EPA registration number
of 46781-8 may be used on this device. Other cleaning agents have not
been validated with the meter and lancing device.
2. Please call MHC Customer Support at (877) 358-4342 if you have any
questions regarding proper cleaning and disinfection procedure and
purchasing the materials needed.

34 35
Lancing Device Lancing Device, Cont.
CAUTION:
• To achieve disinfection of the stated efficacy kill claim, the lancing
device should remain visibly wet for two minutes after the completion
of disinfecting.
WARNING:
Do not share lancing device with anyone, including other family members.
NOTE:
If any of the following physical and/or functional signs of deterioration
appear after cleaning and disinfecting the devices, stop using and contact
MHC Customer Support at (877) 358-4342.
• Cloudy meter display
• Meter displays broken character or icons
• Meter will not power on
• Meter buttons or strip ejector does not function
• Control solution test falls out of range
• Lancing device does not function
1. Wash your hands before performing cleaning and disinfecting procedures.
2. Remove a wipe from the container and follow the product label instruction
to clean and disinfect.
3. Check to make sure used lancet has been removed.
4. Wipe the outside of the reusable lancing device carefully.
* To clean the lancing device, wipe it with an approved disinfecting towelette.
* To disinfect the lancing device, wipe it with another towelette and
leave it wet for two minutes.
5. Dispose of used wipes.
6. Wash your hands thoroughly with soap and warm water after handling the
lancing device.
7. Whenever the reusable lancing device gets dirty and has blood or liquid on it,
cleaning and disinfection procedure should be performed. It also should be
cleaned and disinfected periodically. We recommend that you performed the
cleaning and disinfection procedures on it once per week.
Your EasyTouch® HealthPro™ Meter has an expected life of at least 3 years and
should withstand the cleaning and the disinfecting recommended in this User
Manual. We tested the meter and the lancing device with CaviWipes™
representing daily cleaning and disinfecting (two separate steps) for three (3)
years (Once per day (365 days) x 3 years x 2 cleaning/disinfecting steps for a total
of 1,095 times) and did not observe any change in performance, accuracy, or
appearance.
Storage of your EasyTouch® HealthPro™ System
To avoid the meter and test strips from accumulating dirt, dust or other
contaminants, please wash and dry your hands thoroughly before use.
Meter Storage:
• Storage conditions: 36-86˚F or 2-30˚C (Temperature)
• Always store or transport the meter in its original carrying case.
• Avoid dropping and strong impact.
• Avoid direct sunlight.
Strip Storage:
• Storage conditions: 36-86˚F or 2-30˚C (Temperature)
• Store your test strips in their original vial only. Do not transfer to
other container.
• Store test strip packages in a cool and dry place. Keep away from direct
sunlight and heat.
• After removing a test strip from the vial, immediately replace the vial cap
and close it tightly.
• Record the expiration date (3 months after opening the test strips) on
the strip label.
• Do not use if expiration date has passed.
• Use the test strip with clean and dry hands.
Control Solution Storage:
• Storage conditions: Store in a cool, dry place between 46-86 ˚F or
8-30 ˚C (Temperature).
• After use, close cap tightly.
• Record the expiration date (date opened plus 3 months) on the control
solution on the bottle.
• Do not use if expiration date has passed.

You can transfer test results from the EasyTouch® HealthPro™ Meter to a
computer. You will need to download the software from the following web site
(mhcmed.com > Products > HealthPro) and purchase the computer cable
from your local pharmacy or call MHC Customer Support for a retailer near
you. *The cable is sold separately.
The low battery icon will appear in the upper left corner of the LCD display
to alert you when the battery power is running low, indicating a new battery
is needed immediately.
Your EasyTouch® HealthPro™ Meter uses only two 3V lithium batteries
(CR2032), which are included. When replacing the batteries, only CR2032 or
equivalent lithium battery should be used.
Follow-up Action:
1. Check your meter with the glucose control solution.
2. Perform your test again.
3. If you are experiencing symptoms that are not consistent with your blood
glucose test results, call you healthcare professional.
NOTE:
Make sure your date and time are correct after changing your battery.
36 37
Transferring Your Results Battery Installation
User Meter
Connect Cable to PC
PC

38 39
Troubleshooting Troubleshooting, Cont.
Message What it means
Hardware is
defective.
Reboot the meter by removing
and then replacing the batteries
while no test strip is inserted.
Contact MHC Customer Support
at (877) 358-4342 if the problem
persists.
Test strip may be
contaminated
or used.
Please insert a new glucose test
strip and perform your test again.
Insucient amount
of sample blood
is placed on the
test strip.
Please insert a new glucose test
strip and apply the blood sample
until conrming the window is
completely lled.
Inadequate sample
of blood or control
solution on test strip.
Please insert a new glucose test
strip and perform your test again.
Blood sample is
placed on the
test strip before
the symbol for
blood blinks.
Wait for the meter to display the
blinking icon before applying
your blood sample.
Action required
Message What it means Action required
Color bar of the
strip is dirty,
not good or there
is too much light.
Action required.
Please insert a new glucose test
strip and perform your test again.
Contact MHC Customer Support
at (877) 358-4342 if the problem
persists.
The ambient
temperature is
less than 50˚F (10˚C).
Place the meter at a temperature
between 50-104˚F (10-40˚C)
for 10 minutes or more
and test again.
The ambient
temperature is
over 104˚F (40˚C).
Place the meter at a temperature
between 50-104˚F (10-40˚C)
for 10 minutes or more
and test again.
The test result is
lower than 20mg/dl.
If “Lo” appears on the LCD screen
for the Glucose result, the
measured concentration is below
20mg/dl. The test should be
repeated to ensure that the test
procedure was done correctly.
If you are certain the meter is
functioning correctly and that
no errors were made during the
test procedure and the blood
glucose is still consistently
measured as “Lo”, the result may
indicate severe hypoglycemia
(low blood glucose). You should
inform your health care
professional immediately.
The following chart may help you identify certain problems, but may not
solve all problems that can occur. Contact your authorized representative
or MHC Medical Products customer support if the problem persists.

Message What it means Action required
The test result is
higher than
600mg/dl.
If “HI”is displayed for the glucose
result, the measured concentra-
tion is above 600mg/dl. The test
should be repeated to ensure
accuracy. If you are certain the
meter is functioning correctly and
that no errors were made during
the test procedure and the blood
glucose is still consistently
measured as “HI”, the result may
indicate severe hyperglycemia
(high blood glucose). You should
inform your health care
professional immediately.
There are no
readings stored in
the meter.
Not enough
readings in the
memory to
display designated
averages.
Battery is dead or
there is a problem
with the meter.
Change the battery and if the
problem persists, contact your
local representative.
Insucient amount
of blood.
Please insert a new test strip
and perform your test again.
Please insert a new test strip
and perform your test again.
There may be a
problem with the
glucose test strip.
The glucose test
meter does not
power its ON.
The glucose test
meter does not
start after applied
blood sample.
The results are
inconsistent.
-
-
If you continue to get unexpected results, check your system with the control
solution. If you experience symptoms that are not consistent with your glucose
results, review and follow all instruction in this manual. Never ignore symptoms
or make signicant changes to your diabetes control program. Inform health
care professional of symptoms and/or concerns.
CAUTION:
1. Low Glucose Results: If your result is lower than 70mg/dL, it may mean
hypoglycemia (low blood sugar). This may require immediate treatment
according to your healthcare professional’s recommendations. Although
this result could be due to a test error, it is safer to treat rst.
2. High Glucose Results: If your test result is higher than 180 mg/dL, it may
mean hyperglycemia (high blood sugar). If you are uncertain about your
test results, consider re-testing. Your health care professional will help
you to decide how to take action. If the meter displays HI all the time,
please re-test your blood sugar. If it’s still higher, please contact your
healthcare professional immediately.
Range of Expected Values:
Self-testing of blood glucose levels provide a way to control your diabetes.
Consults with your physician to determine the best range of your expected
blood glucose values.
Expected blood glucose values for nondiabetic adults are as follows:
Before eating < 100 mg/dL(5.6 mmol/L)
One to Two hours after meals < 140 mg/dL(7.8 mmol/L)
Reference: American Diabetes Association: Clinical Practice
Recommendations(2013) Diabetes Care, Vol 36, Supplement 1, p. S1-S100.
40 41
Troubleshooting, Cont. Inconsistent or Unexpected Test Results
This manual suits for next models
1
Table of contents
Other MHC Medical Products Blood Glucose Meter manuals
MHC Medical Products
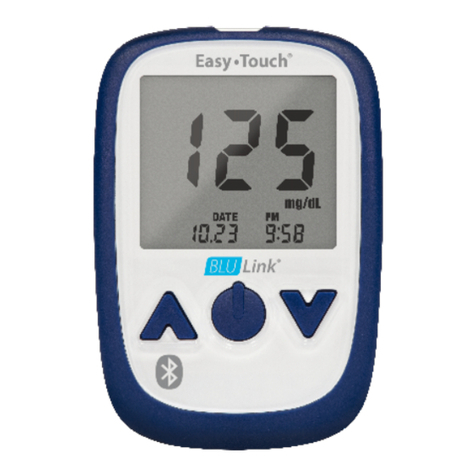
MHC Medical Products EasyTouch BluLink User manual
MHC Medical Products
MHC Medical Products Easy Touch User manual
MHC Medical Products
MHC Medical Products Easy Touch User manual

MHC Medical Products
MHC Medical Products Easy Touch User manual

MHC Medical Products
MHC Medical Products Easy Touch User manual

MHC Medical Products
MHC Medical Products Easy Touch User manual

